
Reanimal All Collectible Locations

How many collectibles are there?
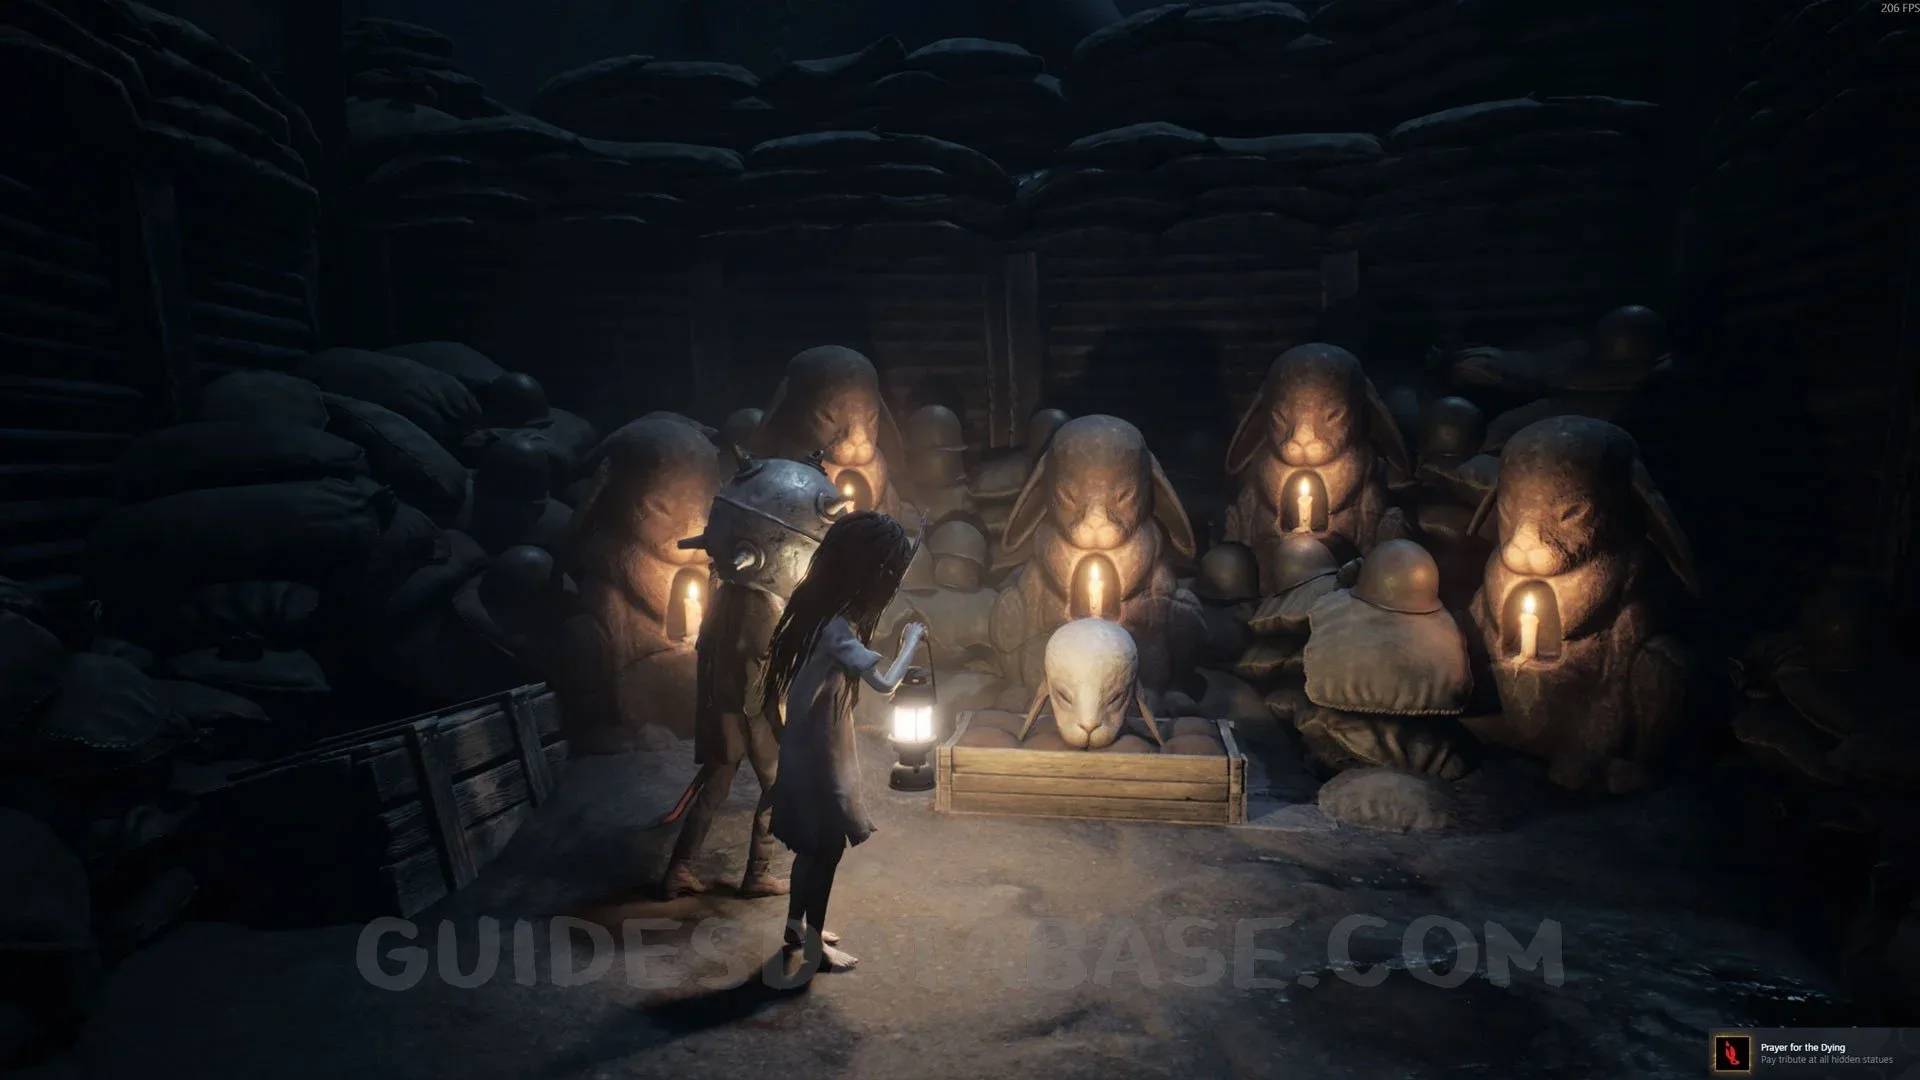
There are 110 collectibles in total, split across 7 different types: 47 Secrets, 18 Masks, 20 Posters, 5 Hidden Statues, 5 Critters, 5 Coffins, and 10 Rest Your Legs spots. Collecting all of them will earn you the Hidden Among the Pines, Hidden Among Rats, Hidden in Rubble, Beneath the Mask, A Proper Gander, Prayer for the Dying, Critter Kill Hit, Friends Reunited, and Take a Load Off trophies.

Chapter 1: Dead in the Water
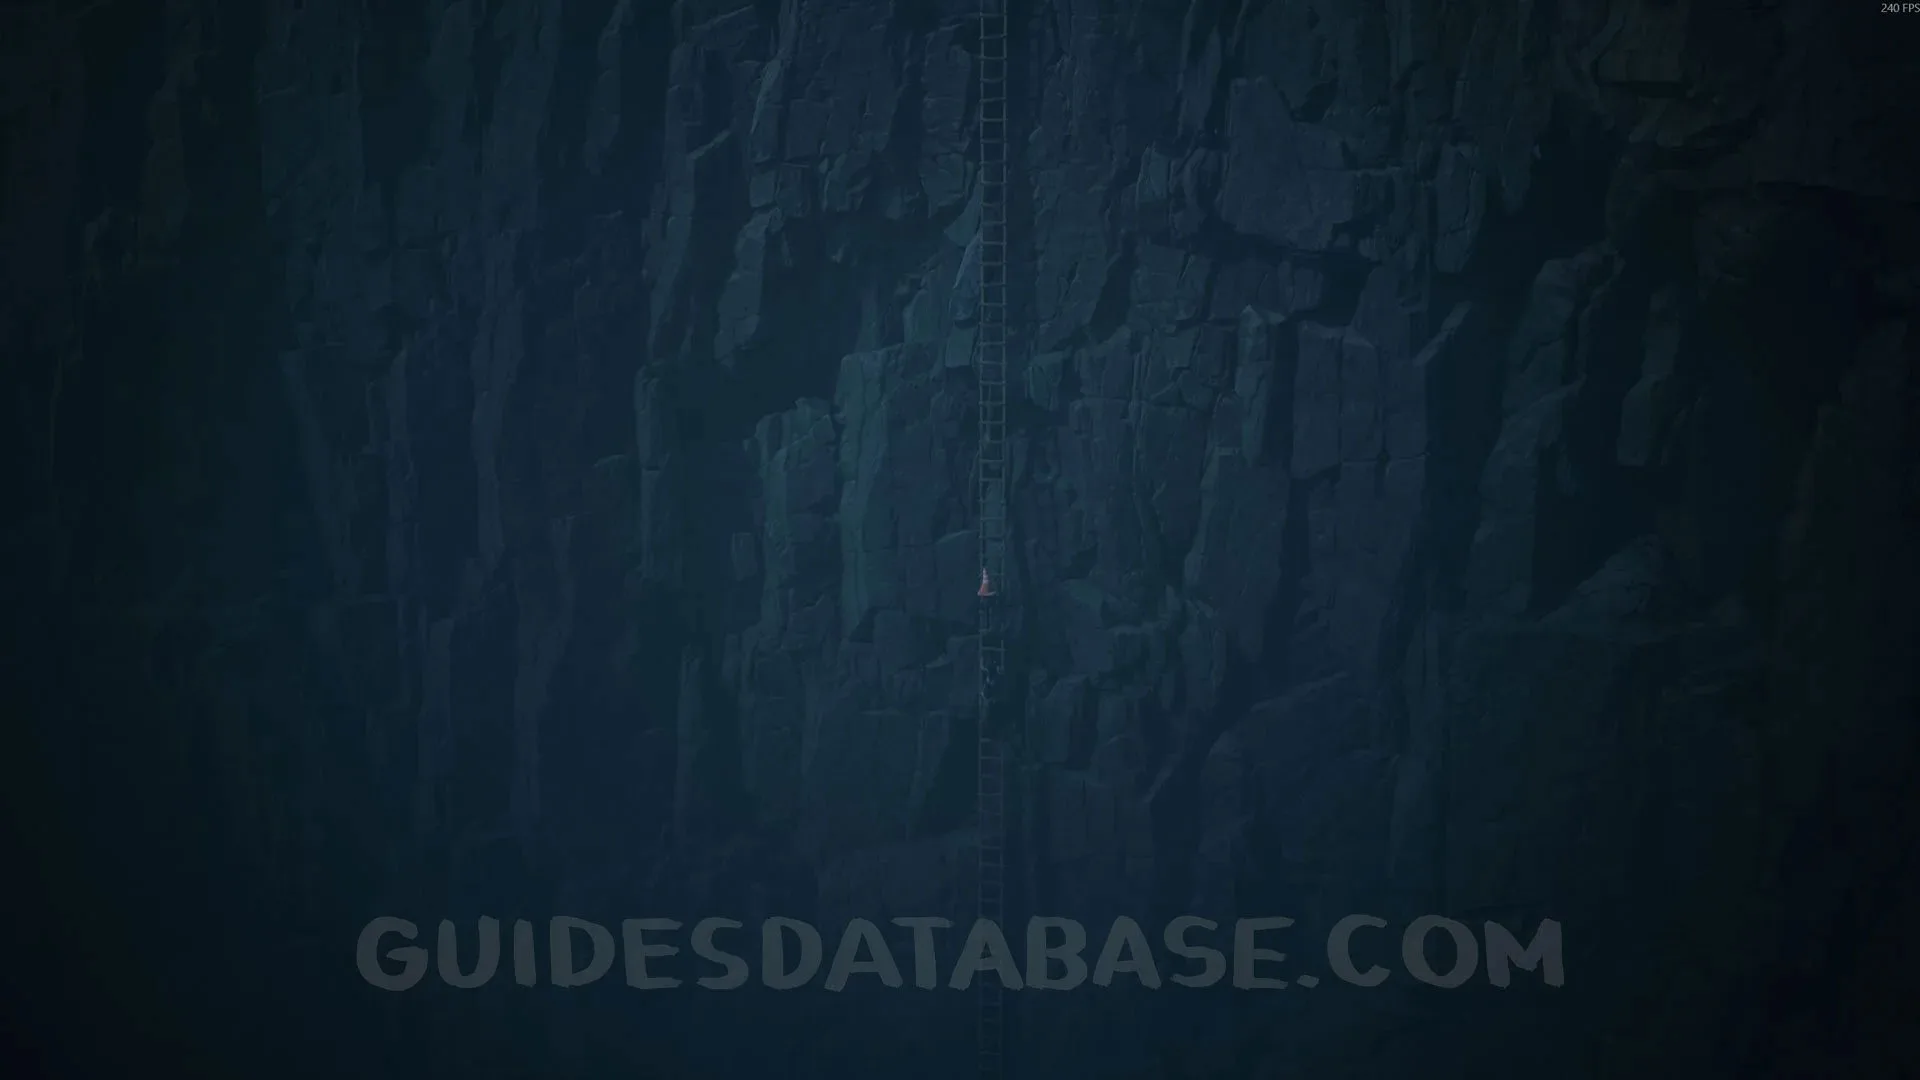
Mask #1 + Secret #1
At the start of the chapter, after climbing the first ladder, go left instead of continuing forward. Go through the door and then through the hole to find this mask.
 GUIDESDATABASE.COM
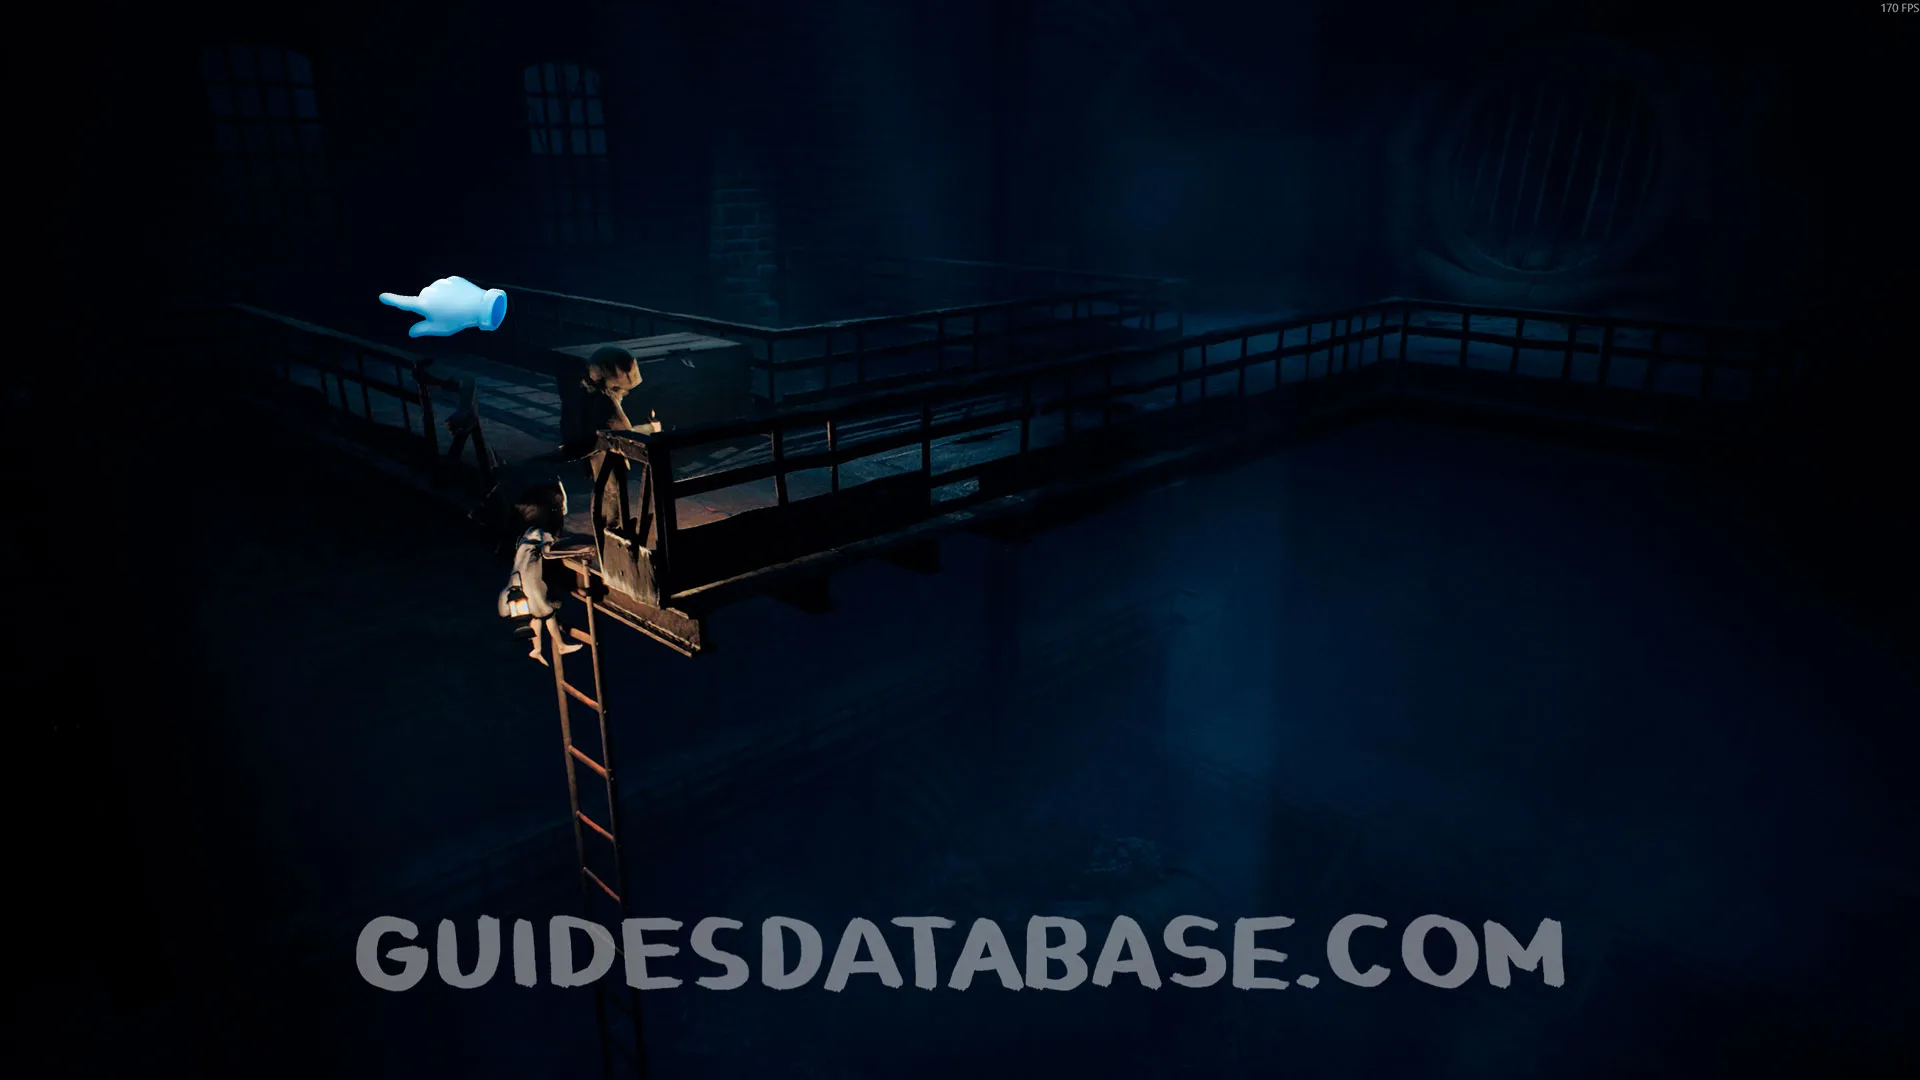 GUIDESDATABASE.COM
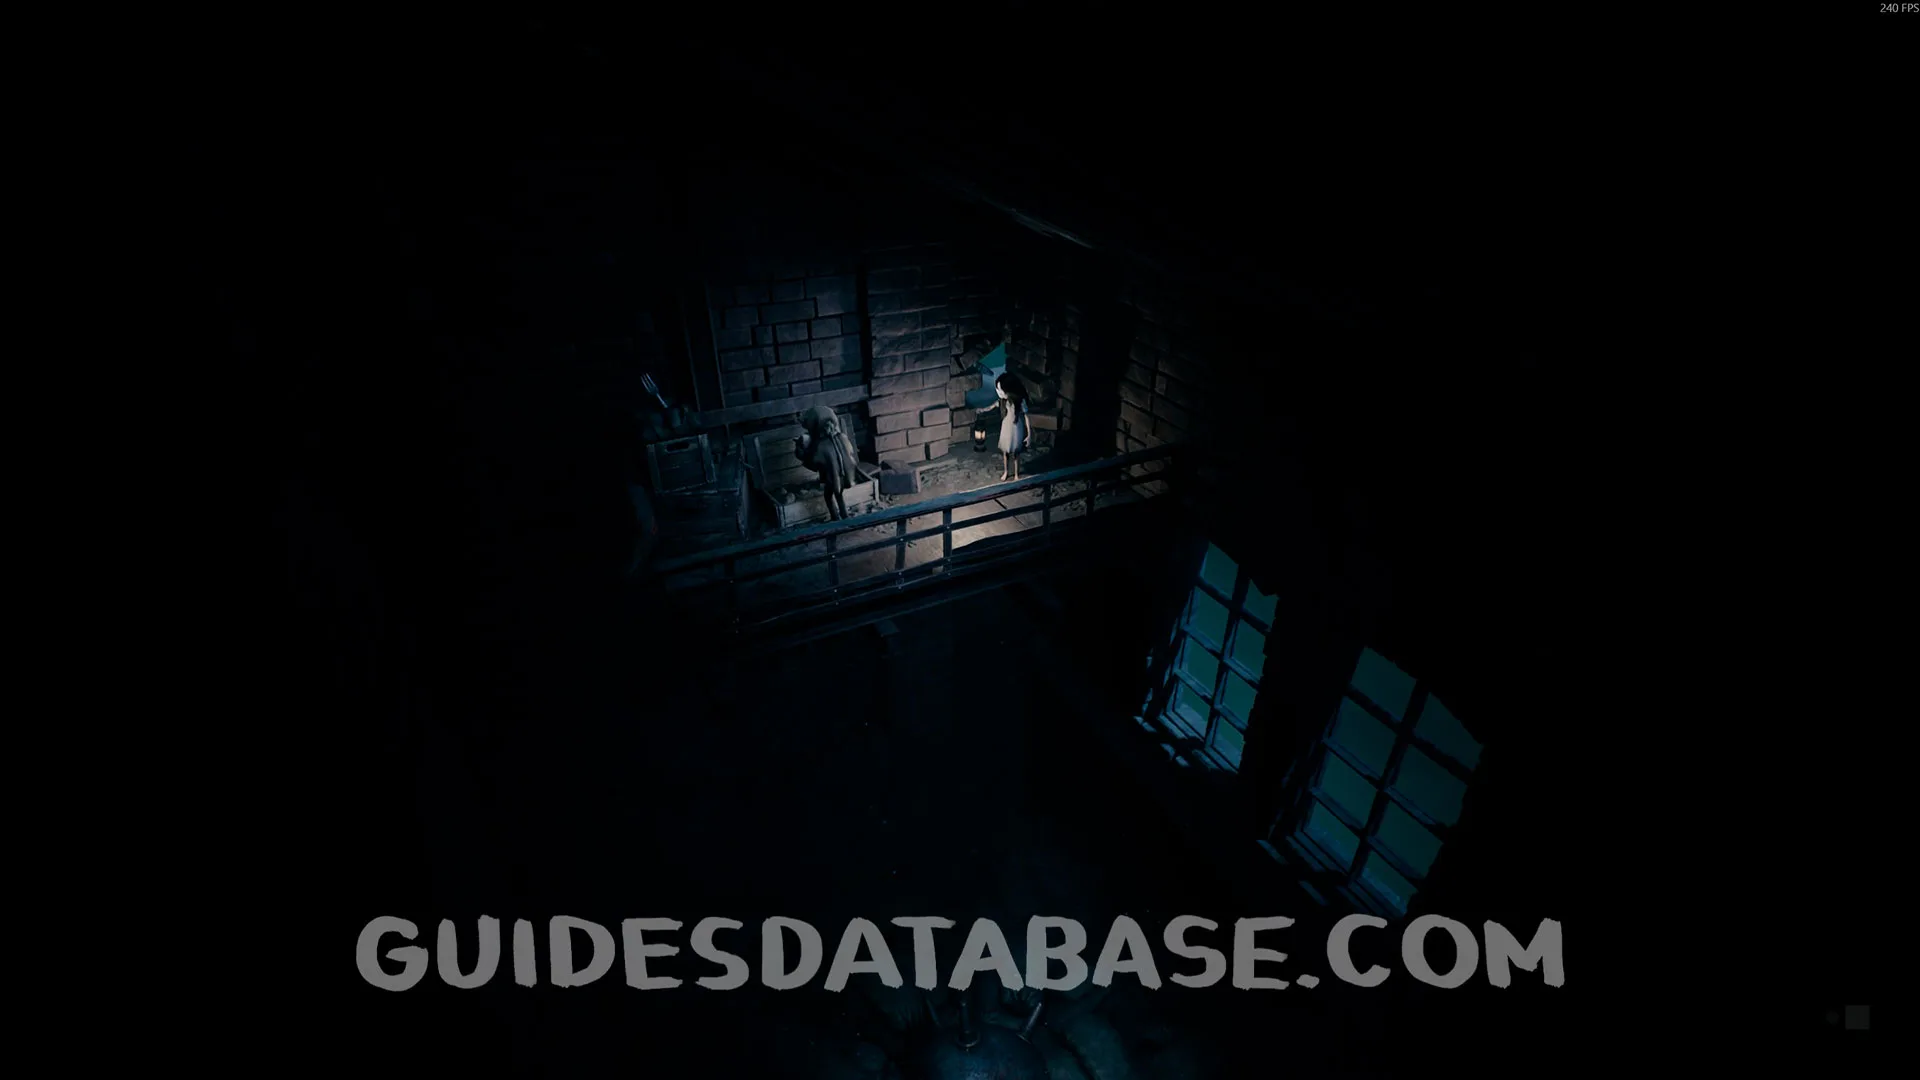 GUIDESDATABASE.COM
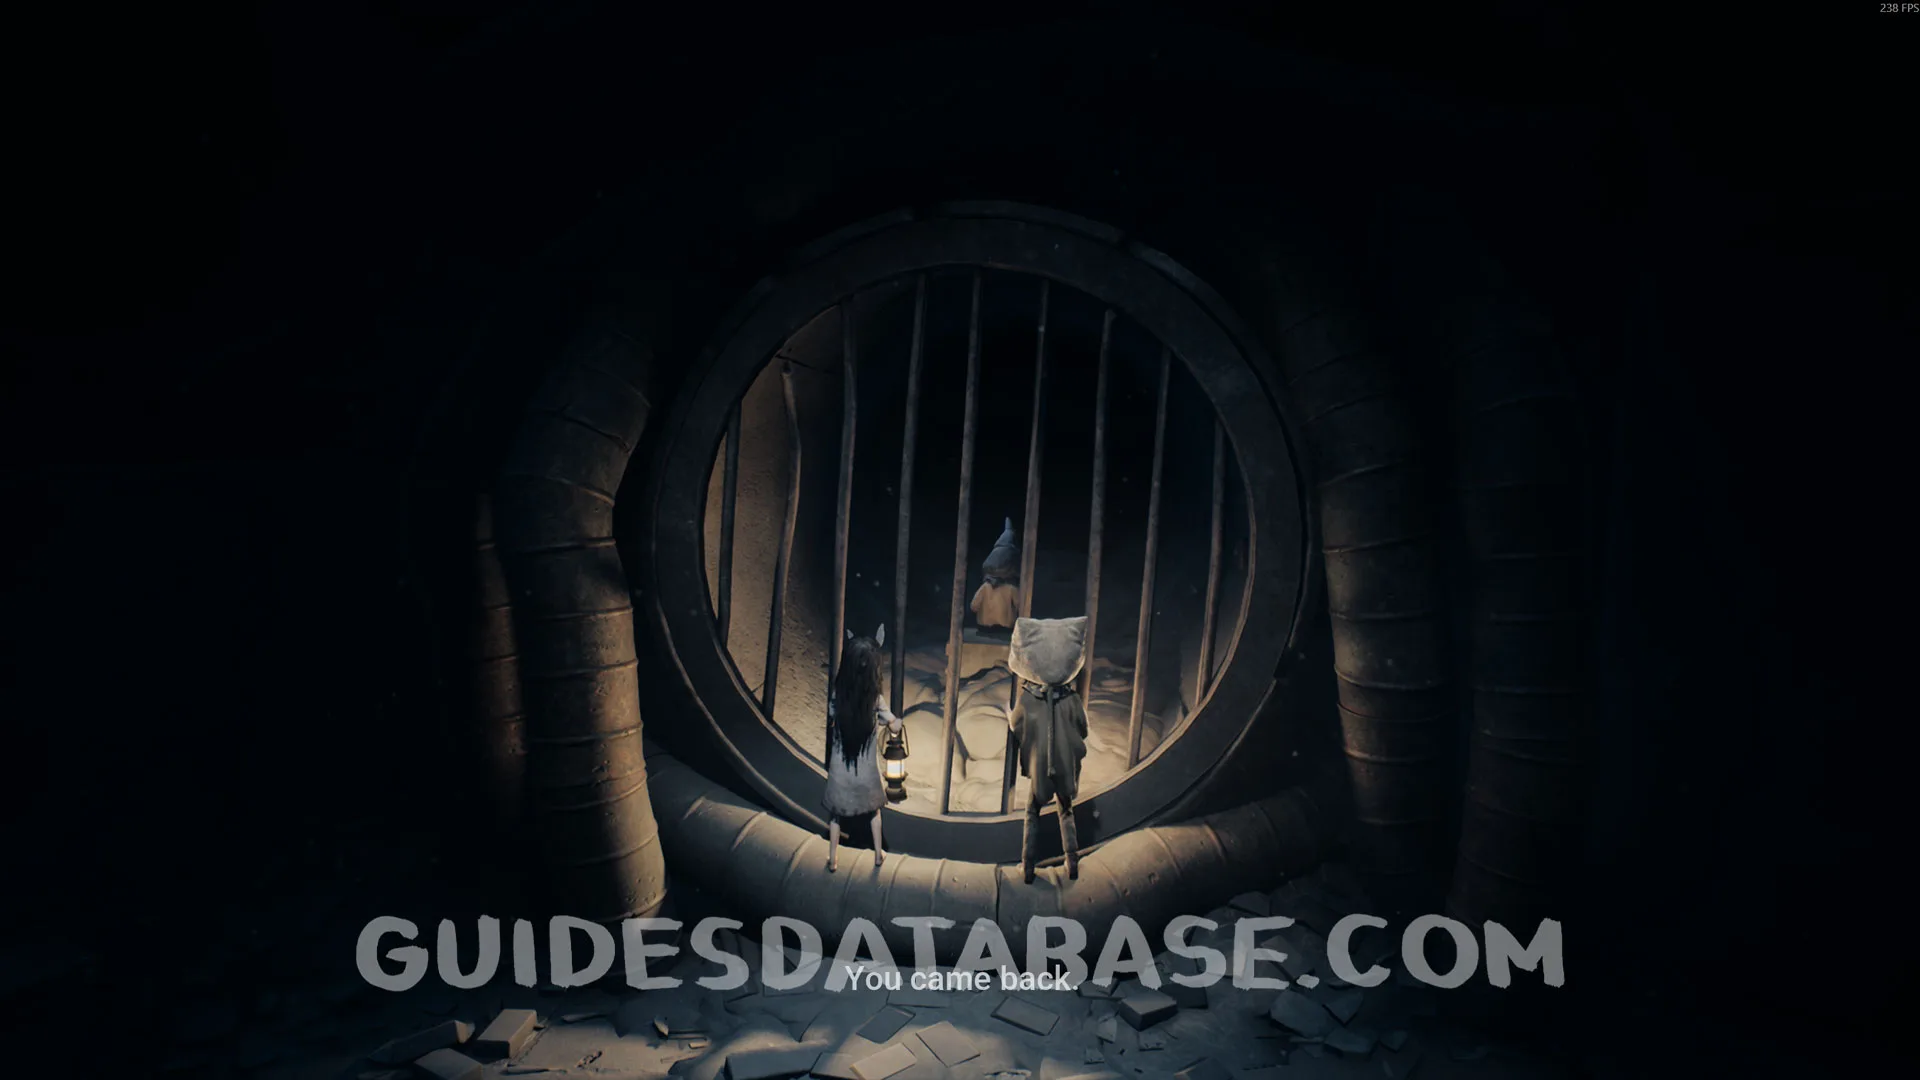
Rest Your Legs #1
After talking to your friend in the sewer pipe, you’ll need to restore the power. Once the power is on, go to the back of the room and sit in the chair to rest your legs.
 GUIDESDATABASE.COM
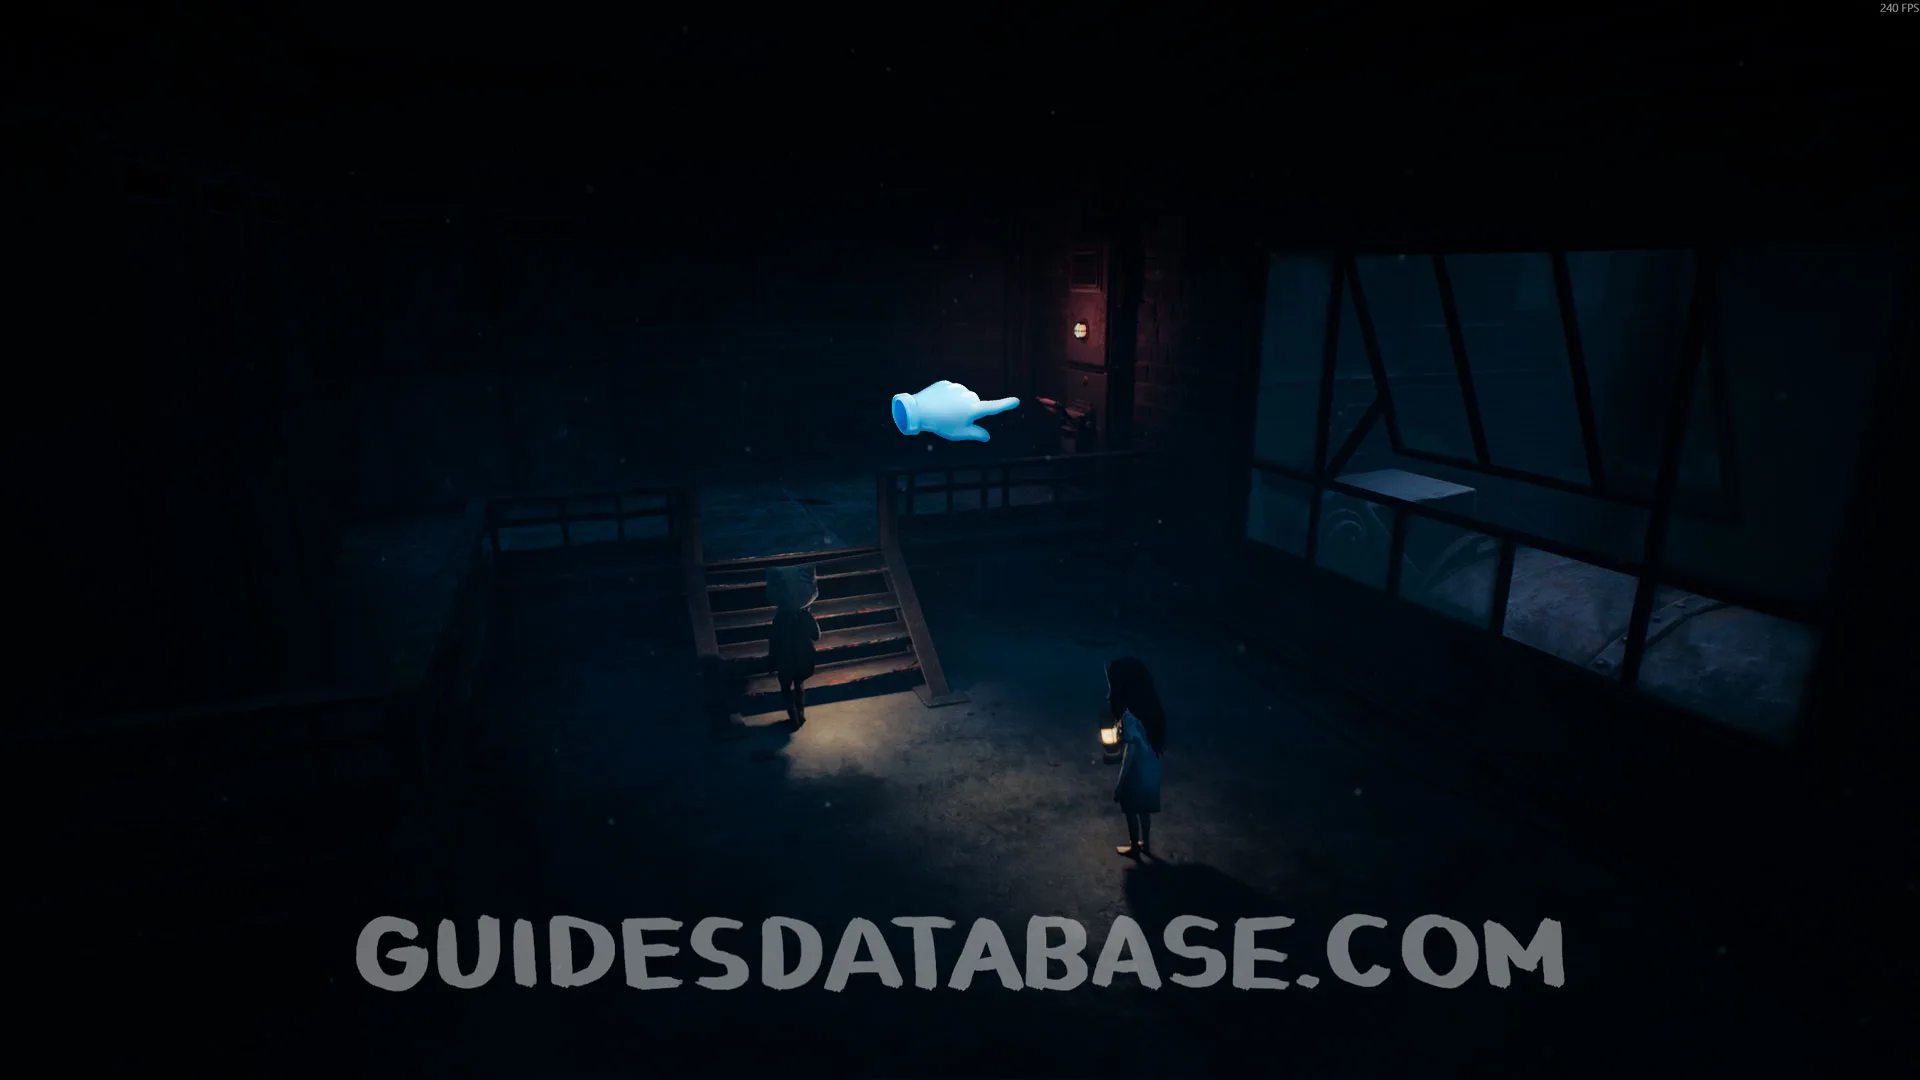 GUIDESDATABASE.COM
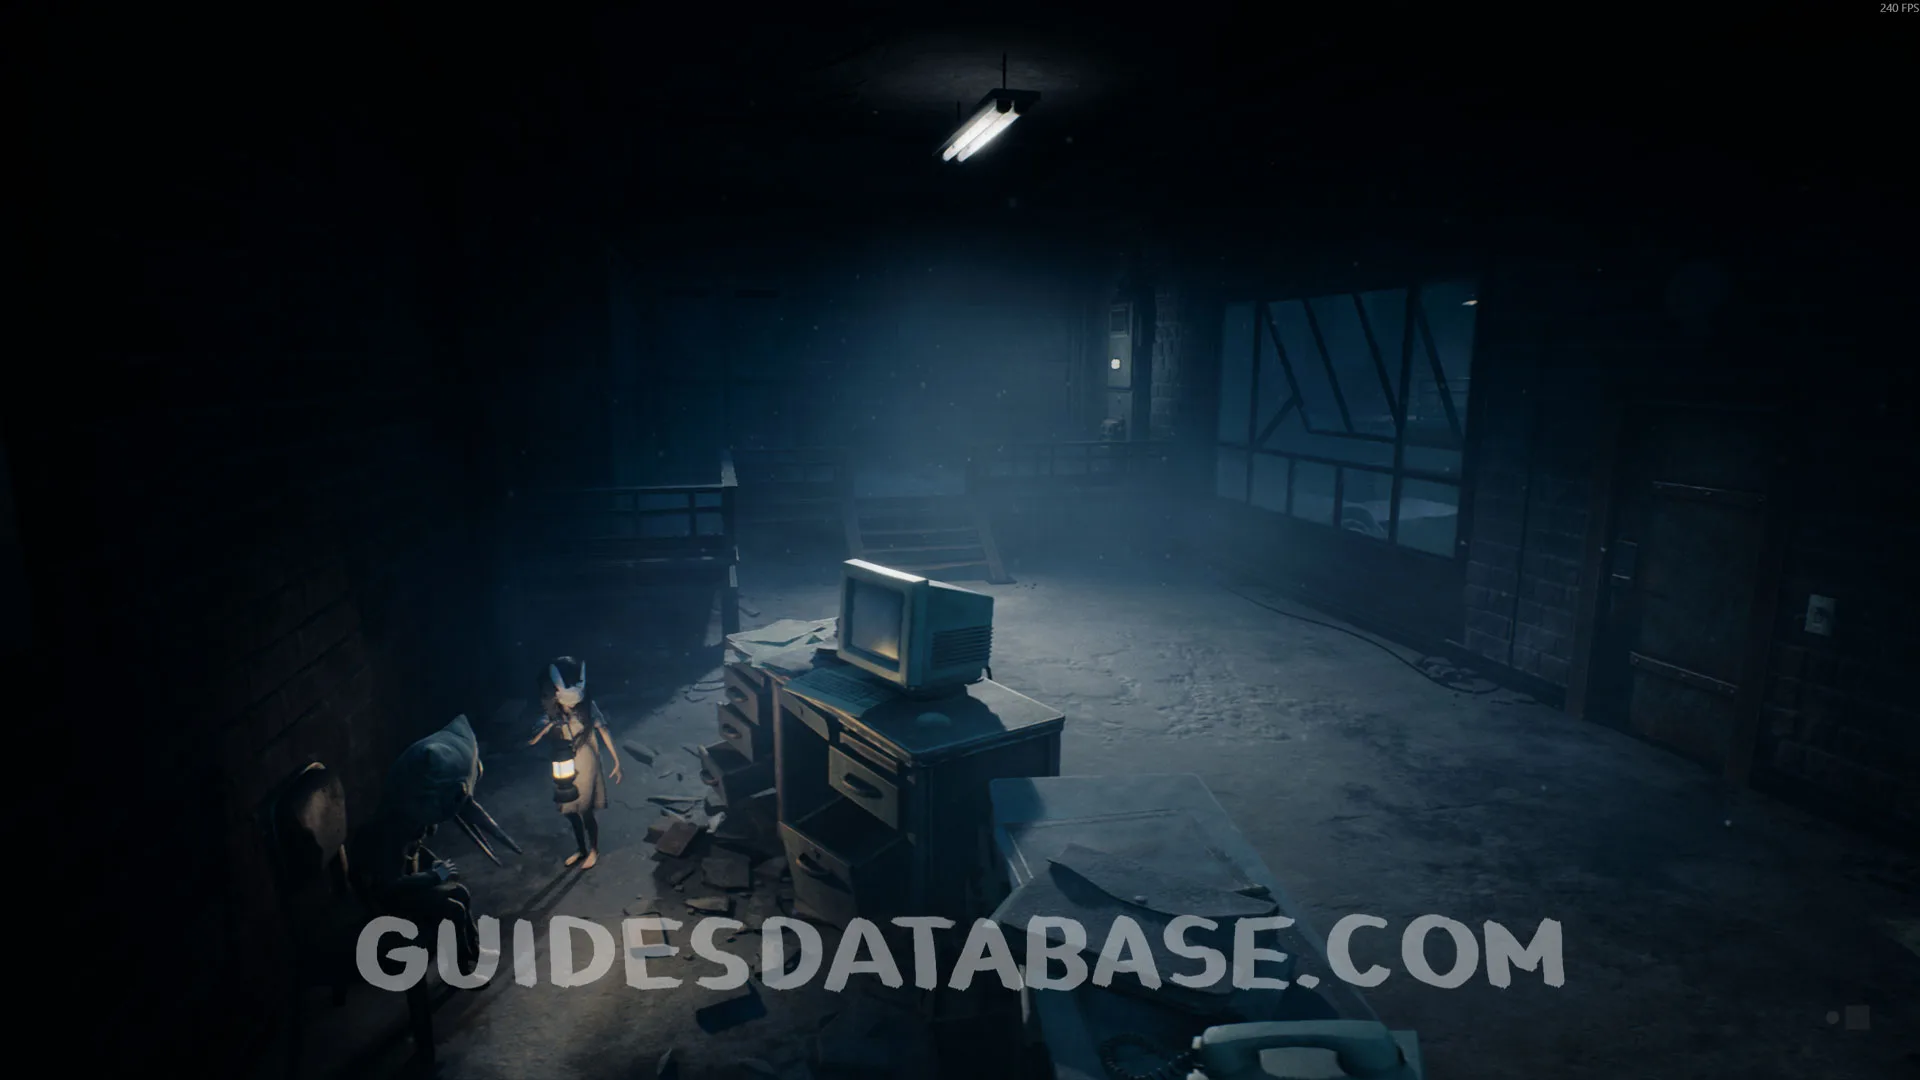 GUIDESDATABASE.COM
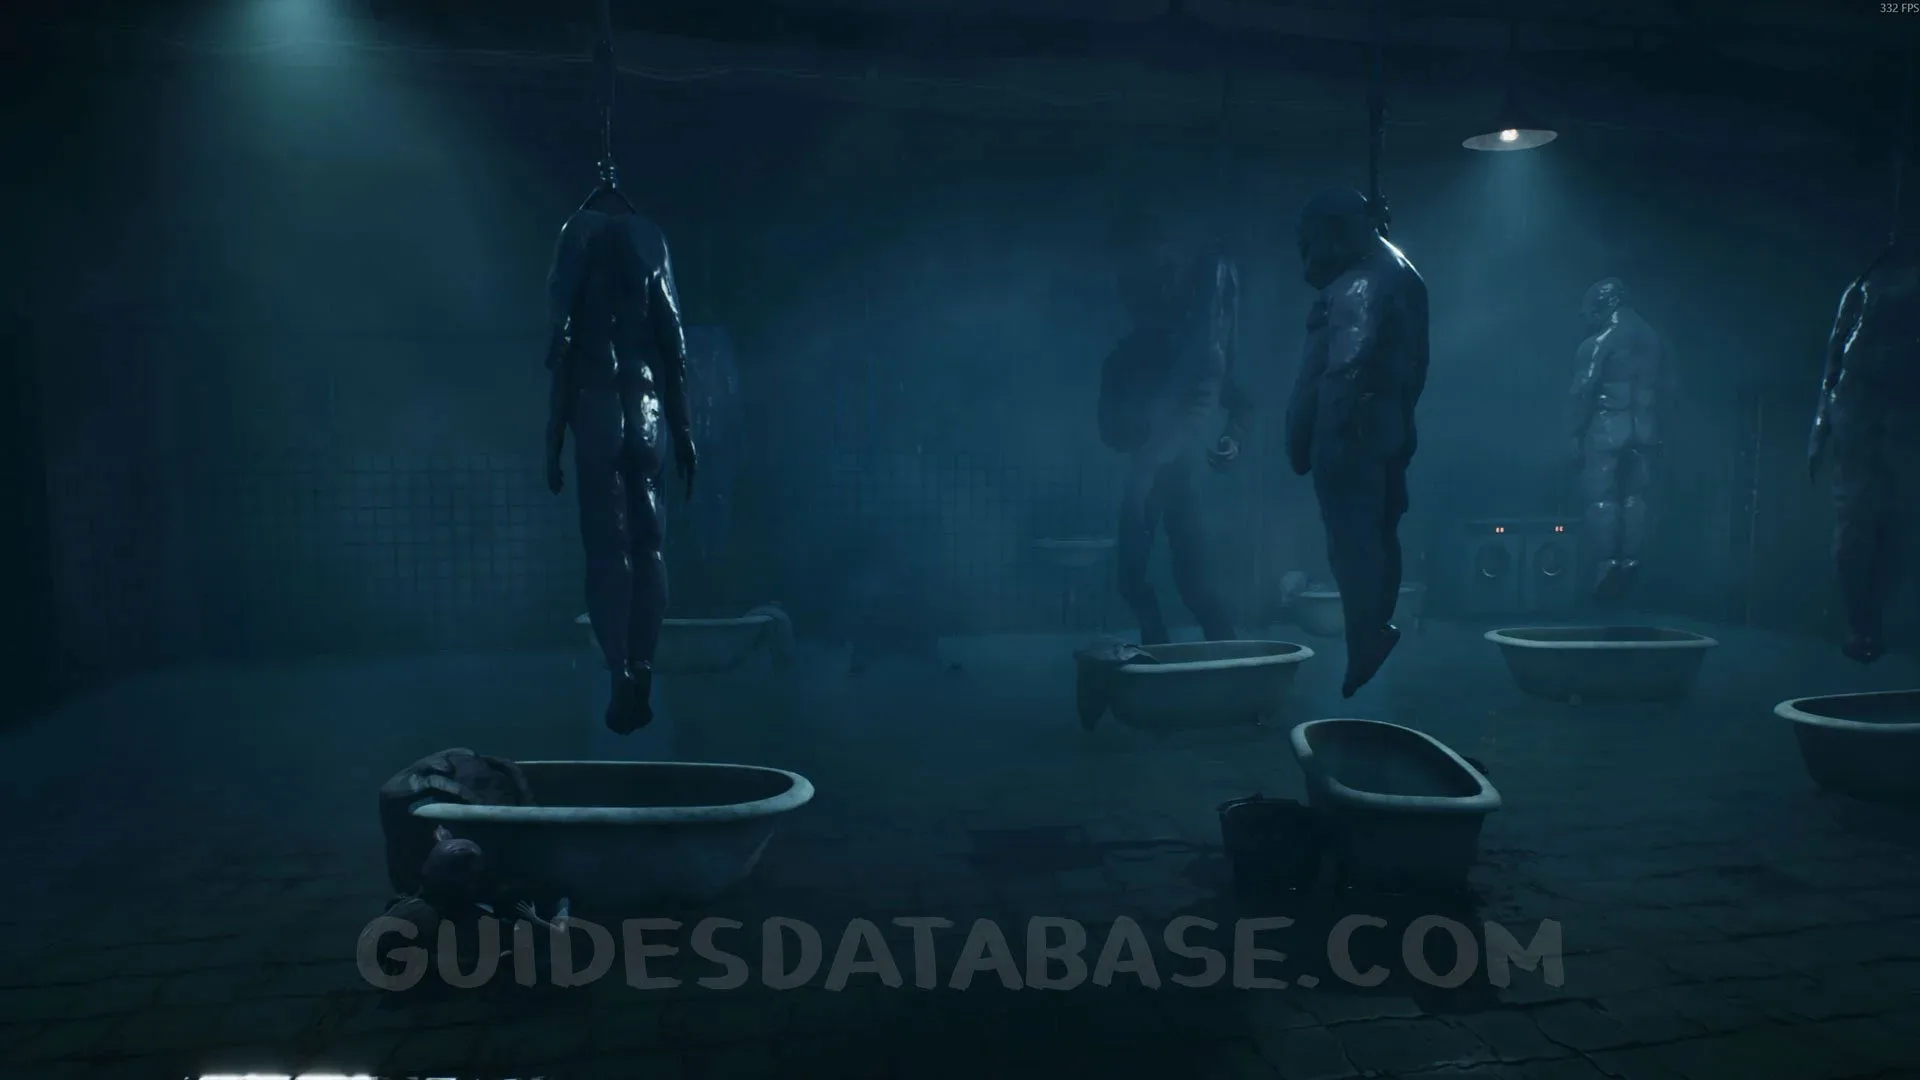
Mask #2 + Secret #2
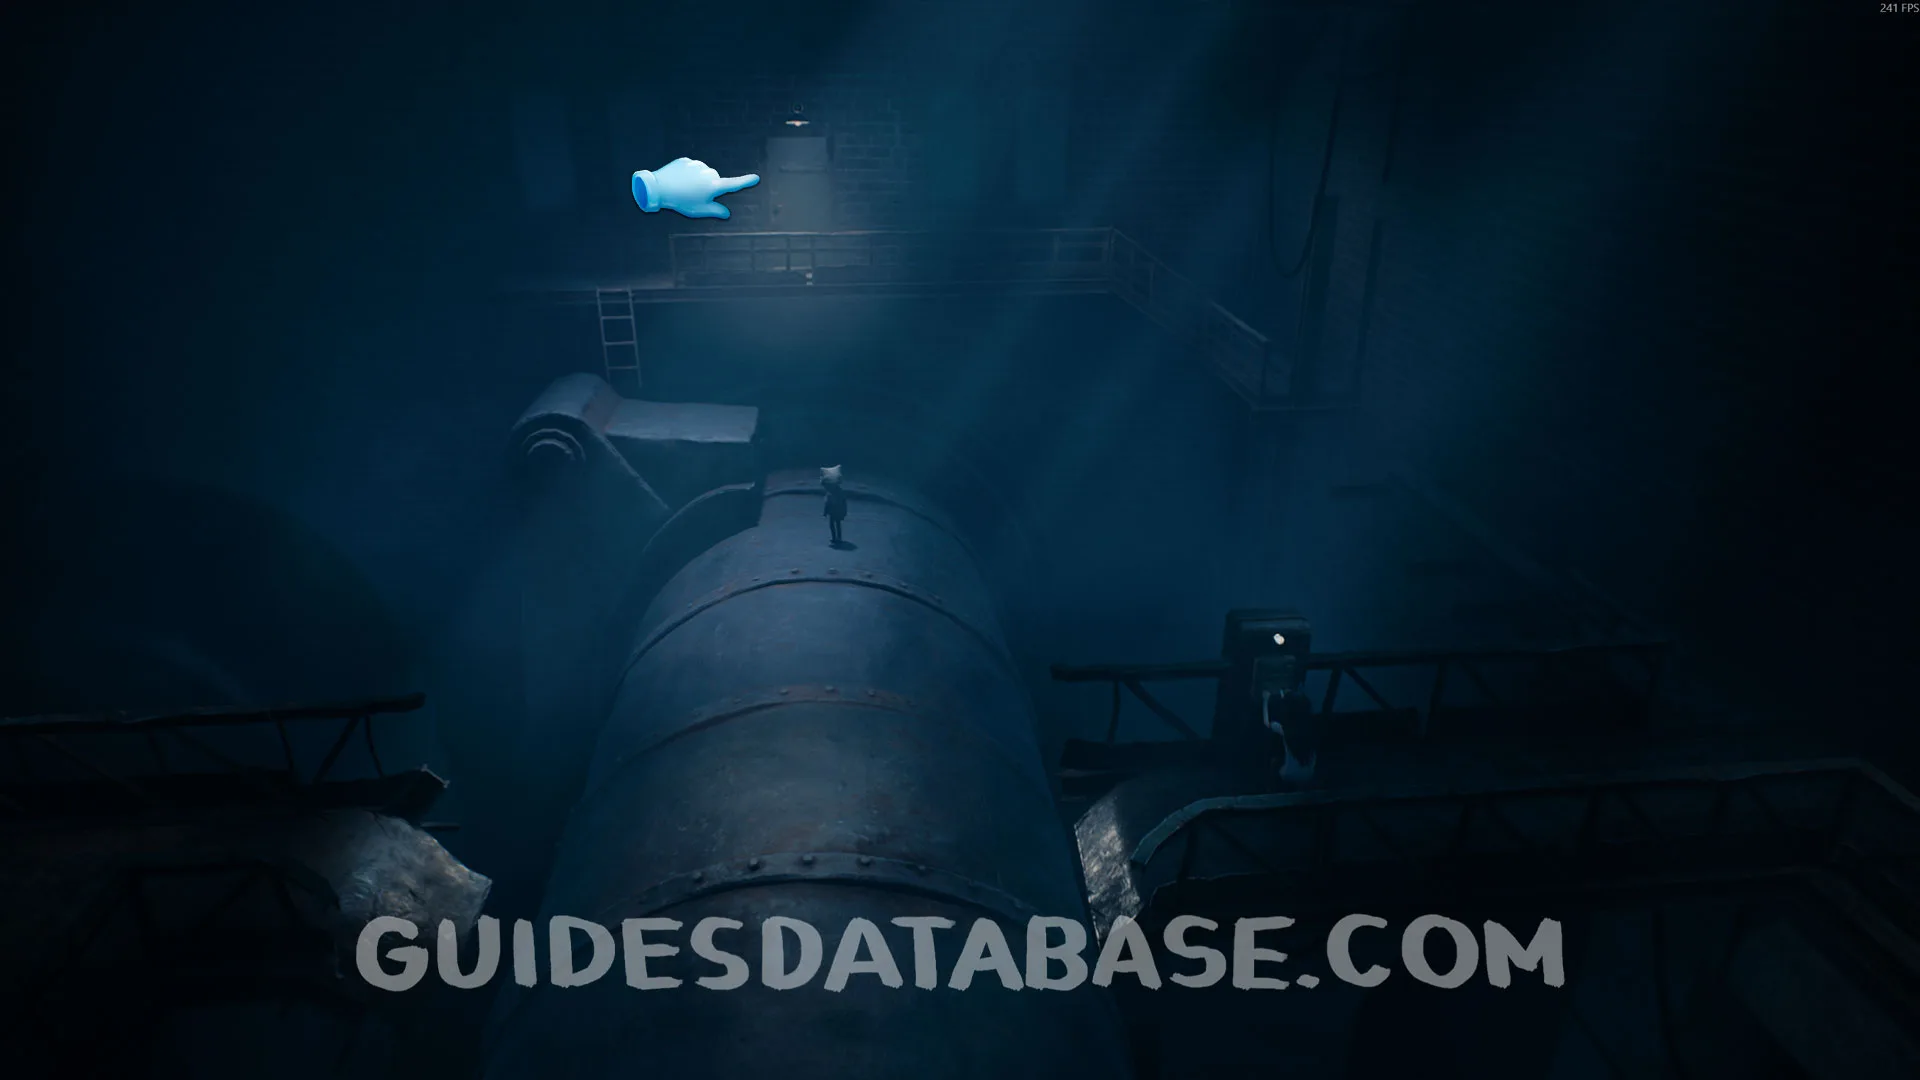
After restoring the power and going through the pipe and the door at the end of the area, open the locker and crawl through it to reach the bathroom and find this mask.
 GUIDESDATABASE.COM
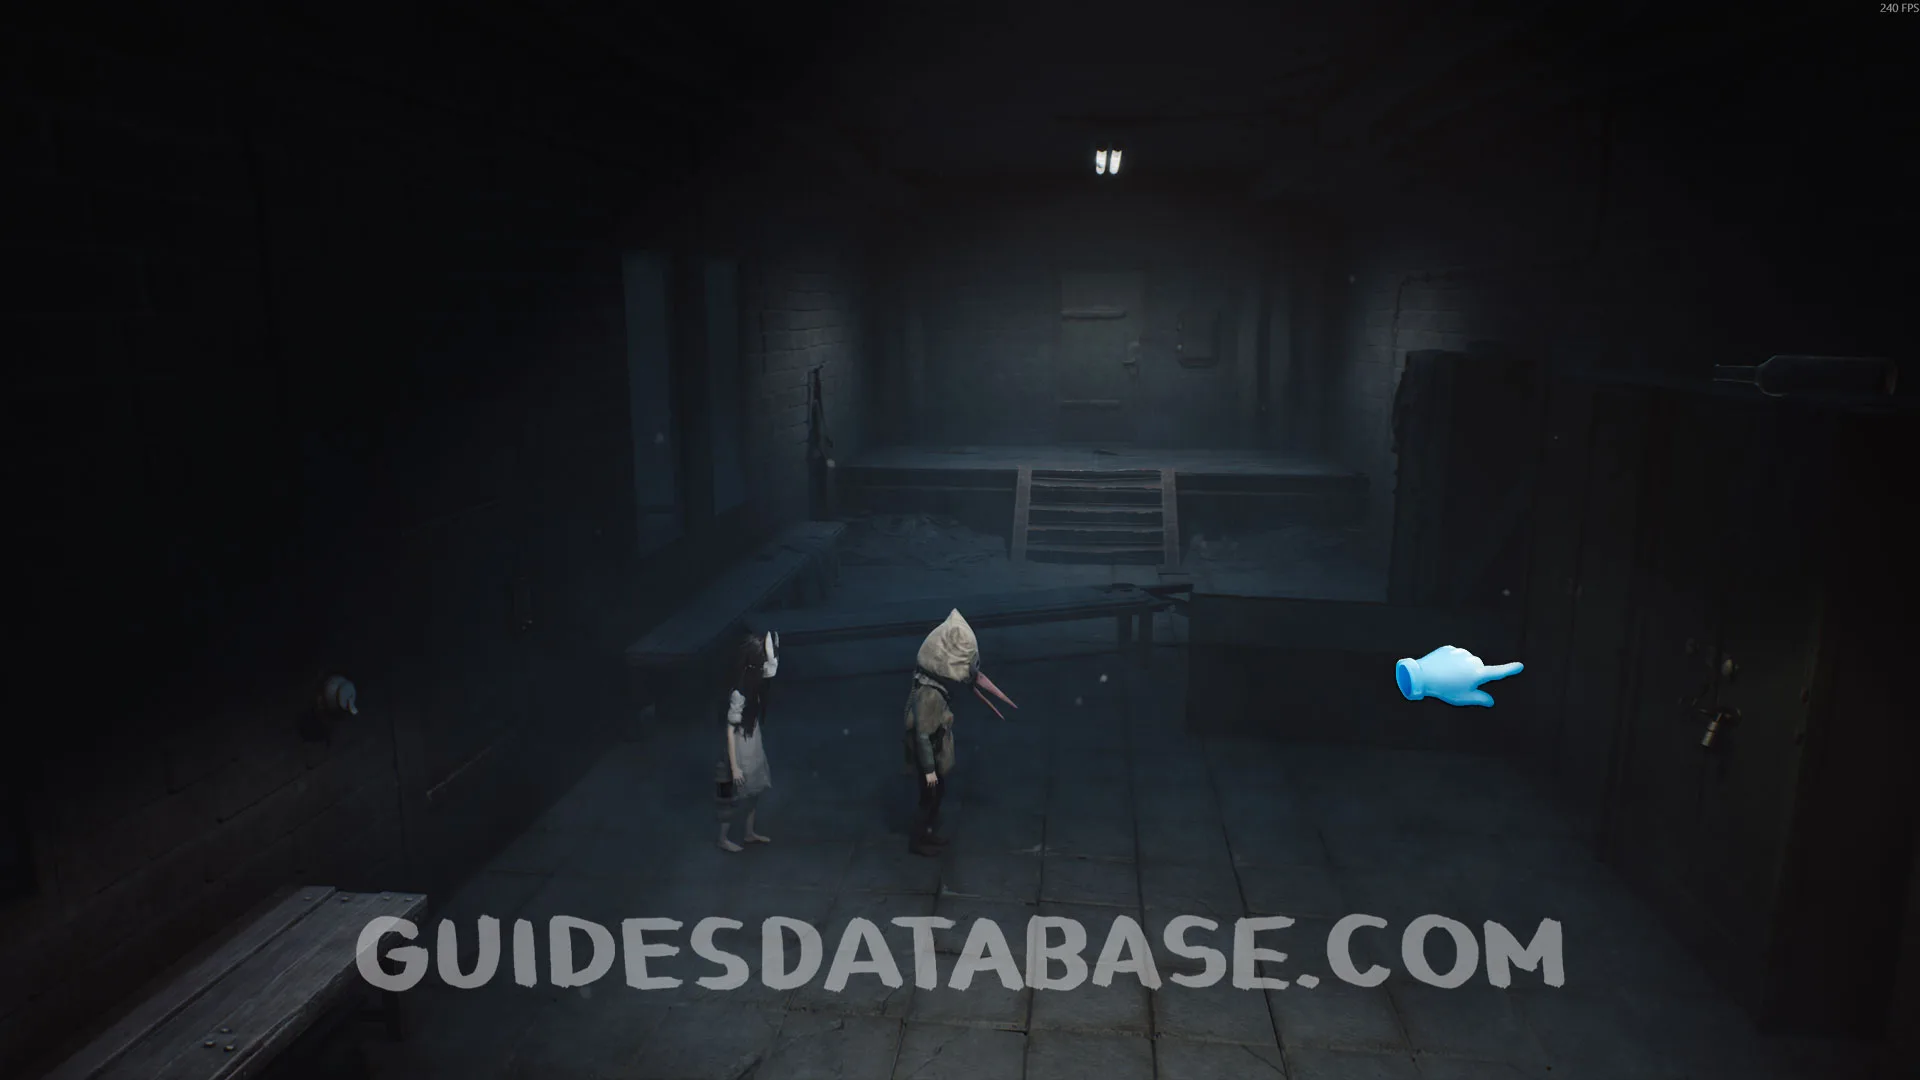 GUIDESDATABASE.COM
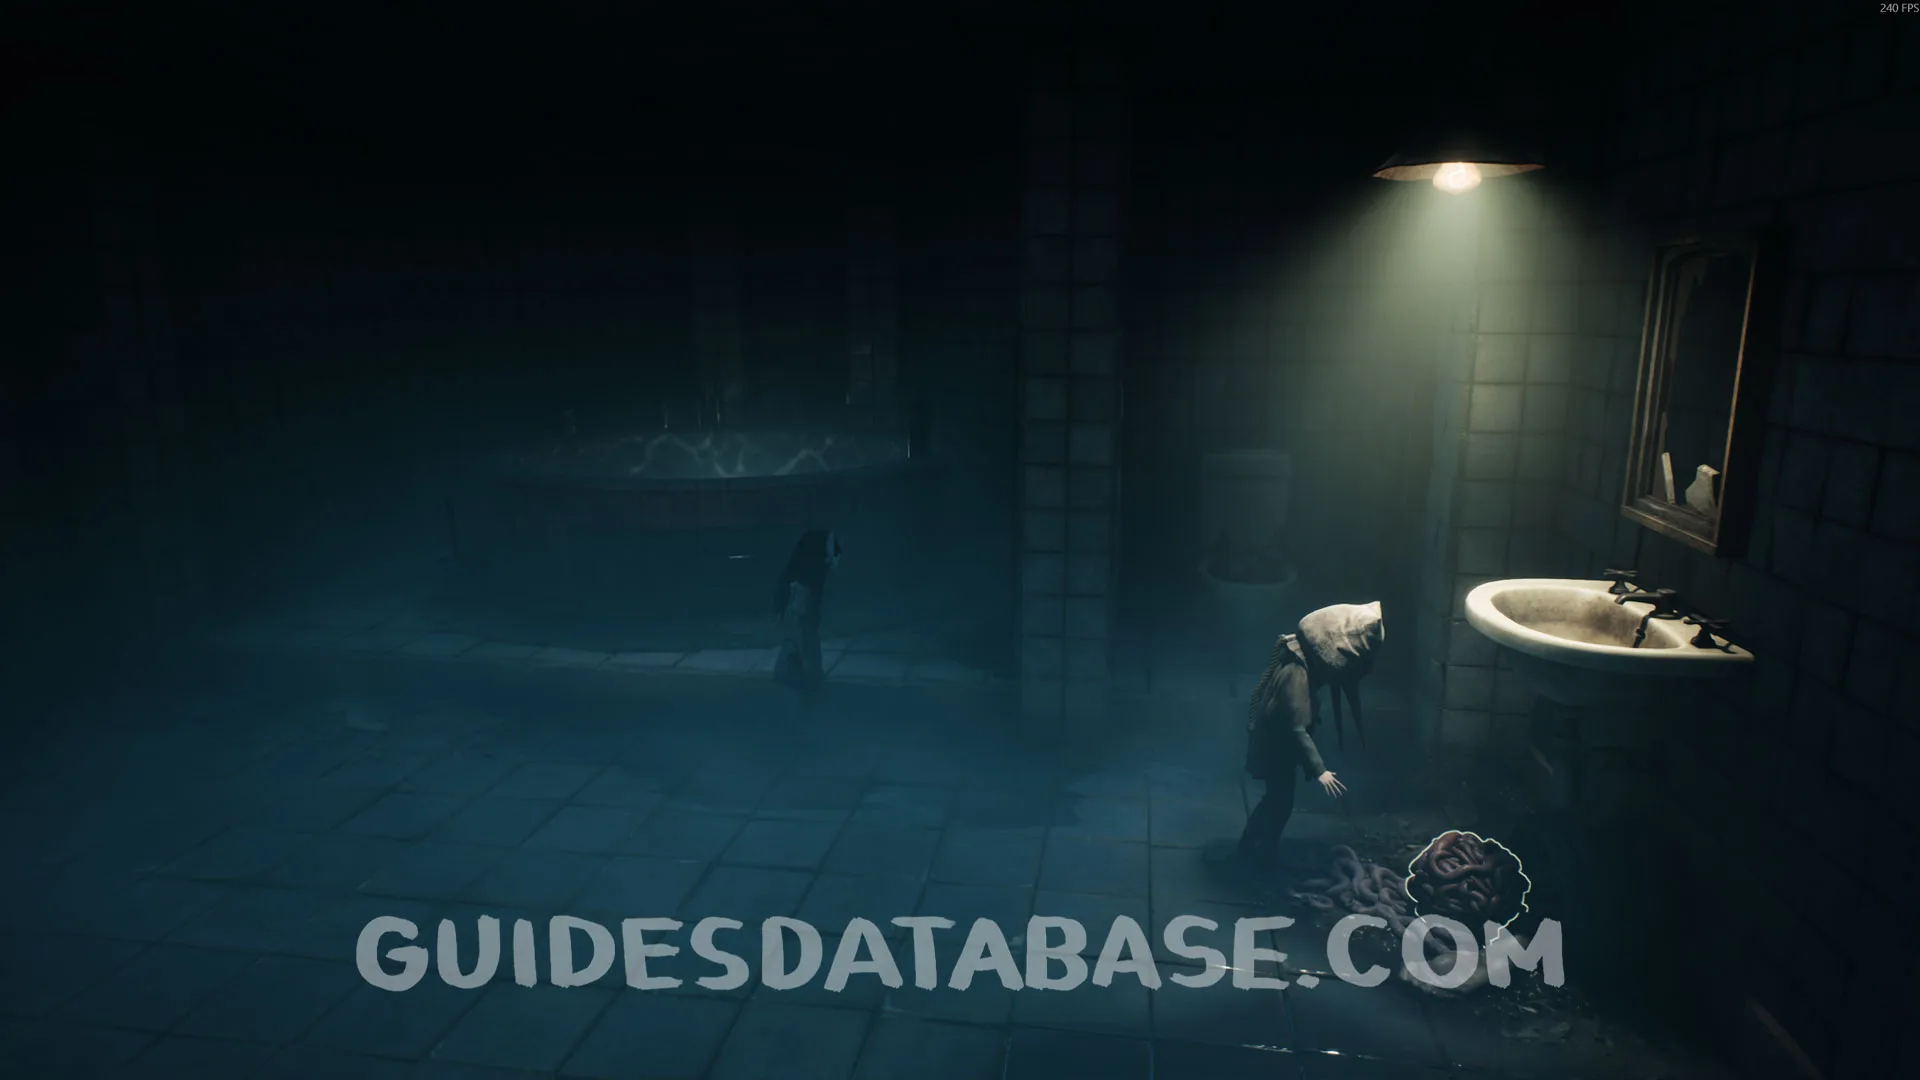 GUIDESDATABASE.COM
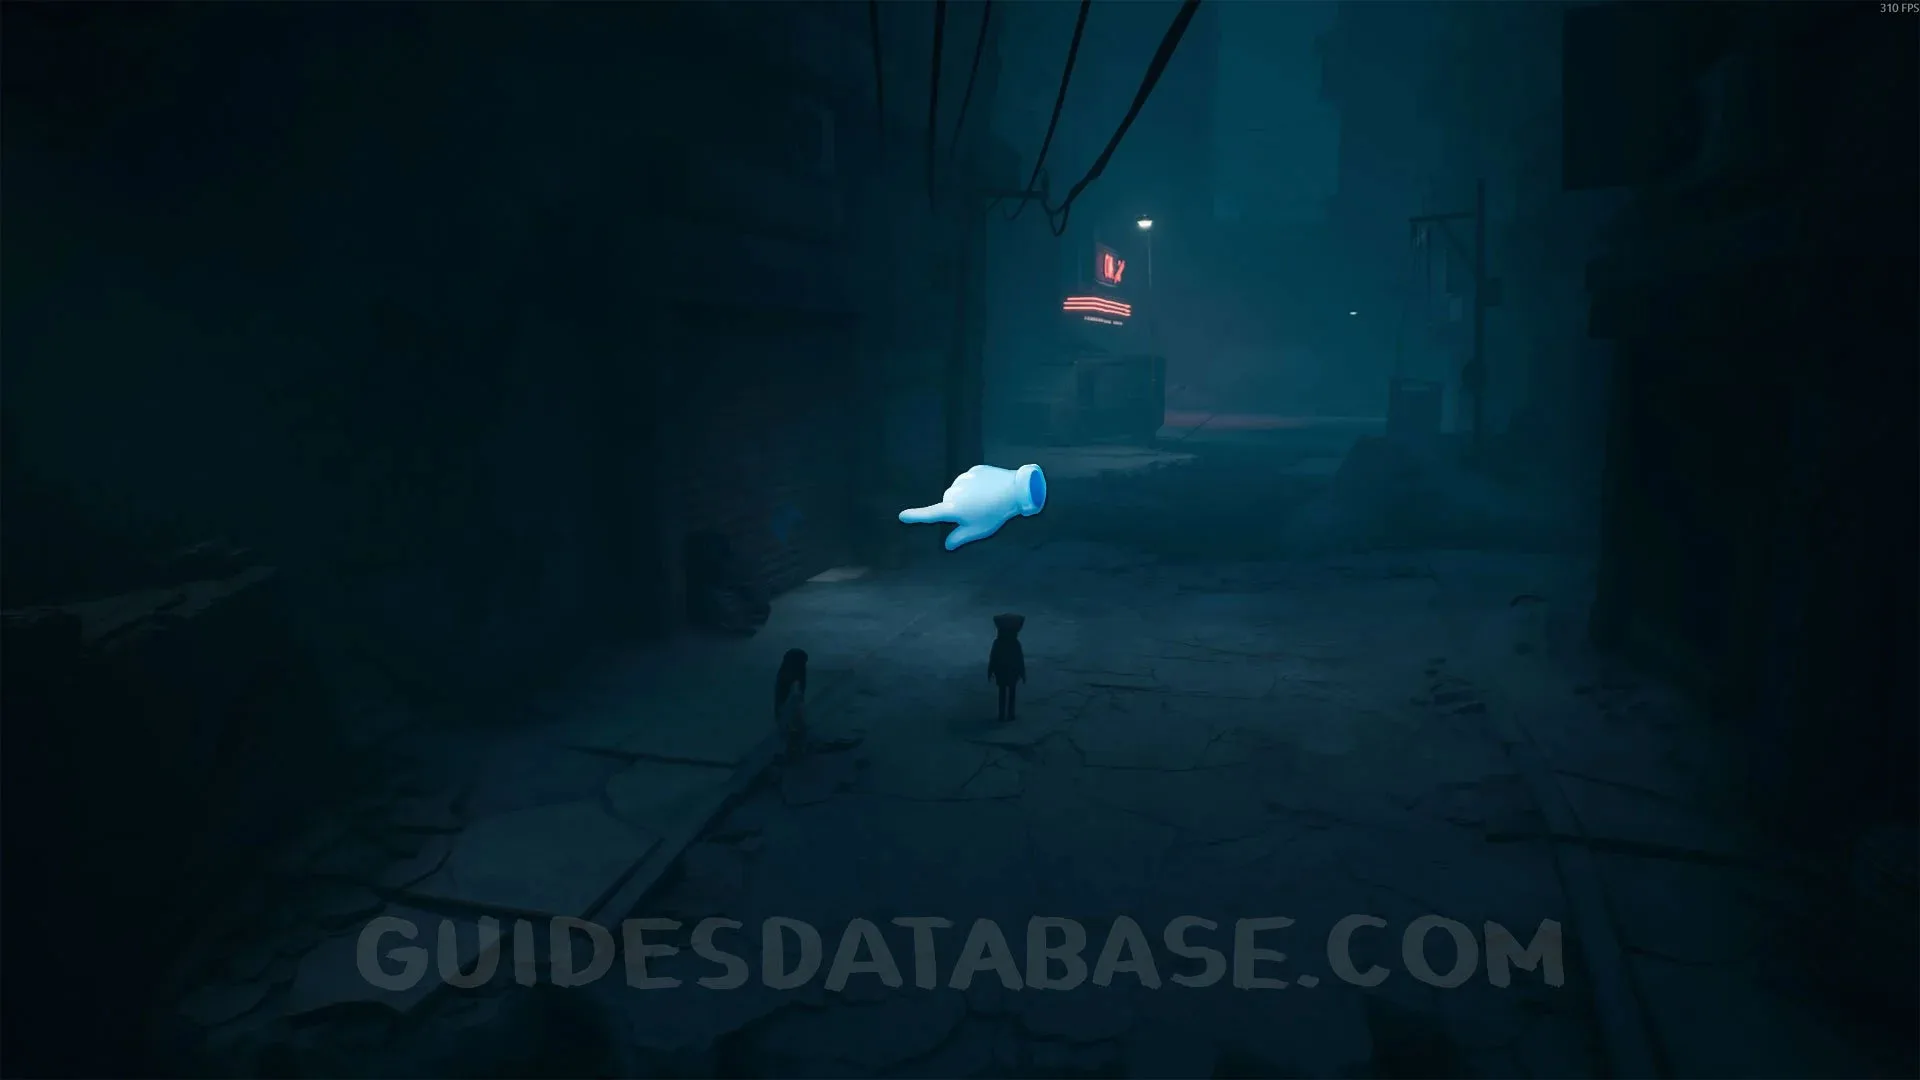
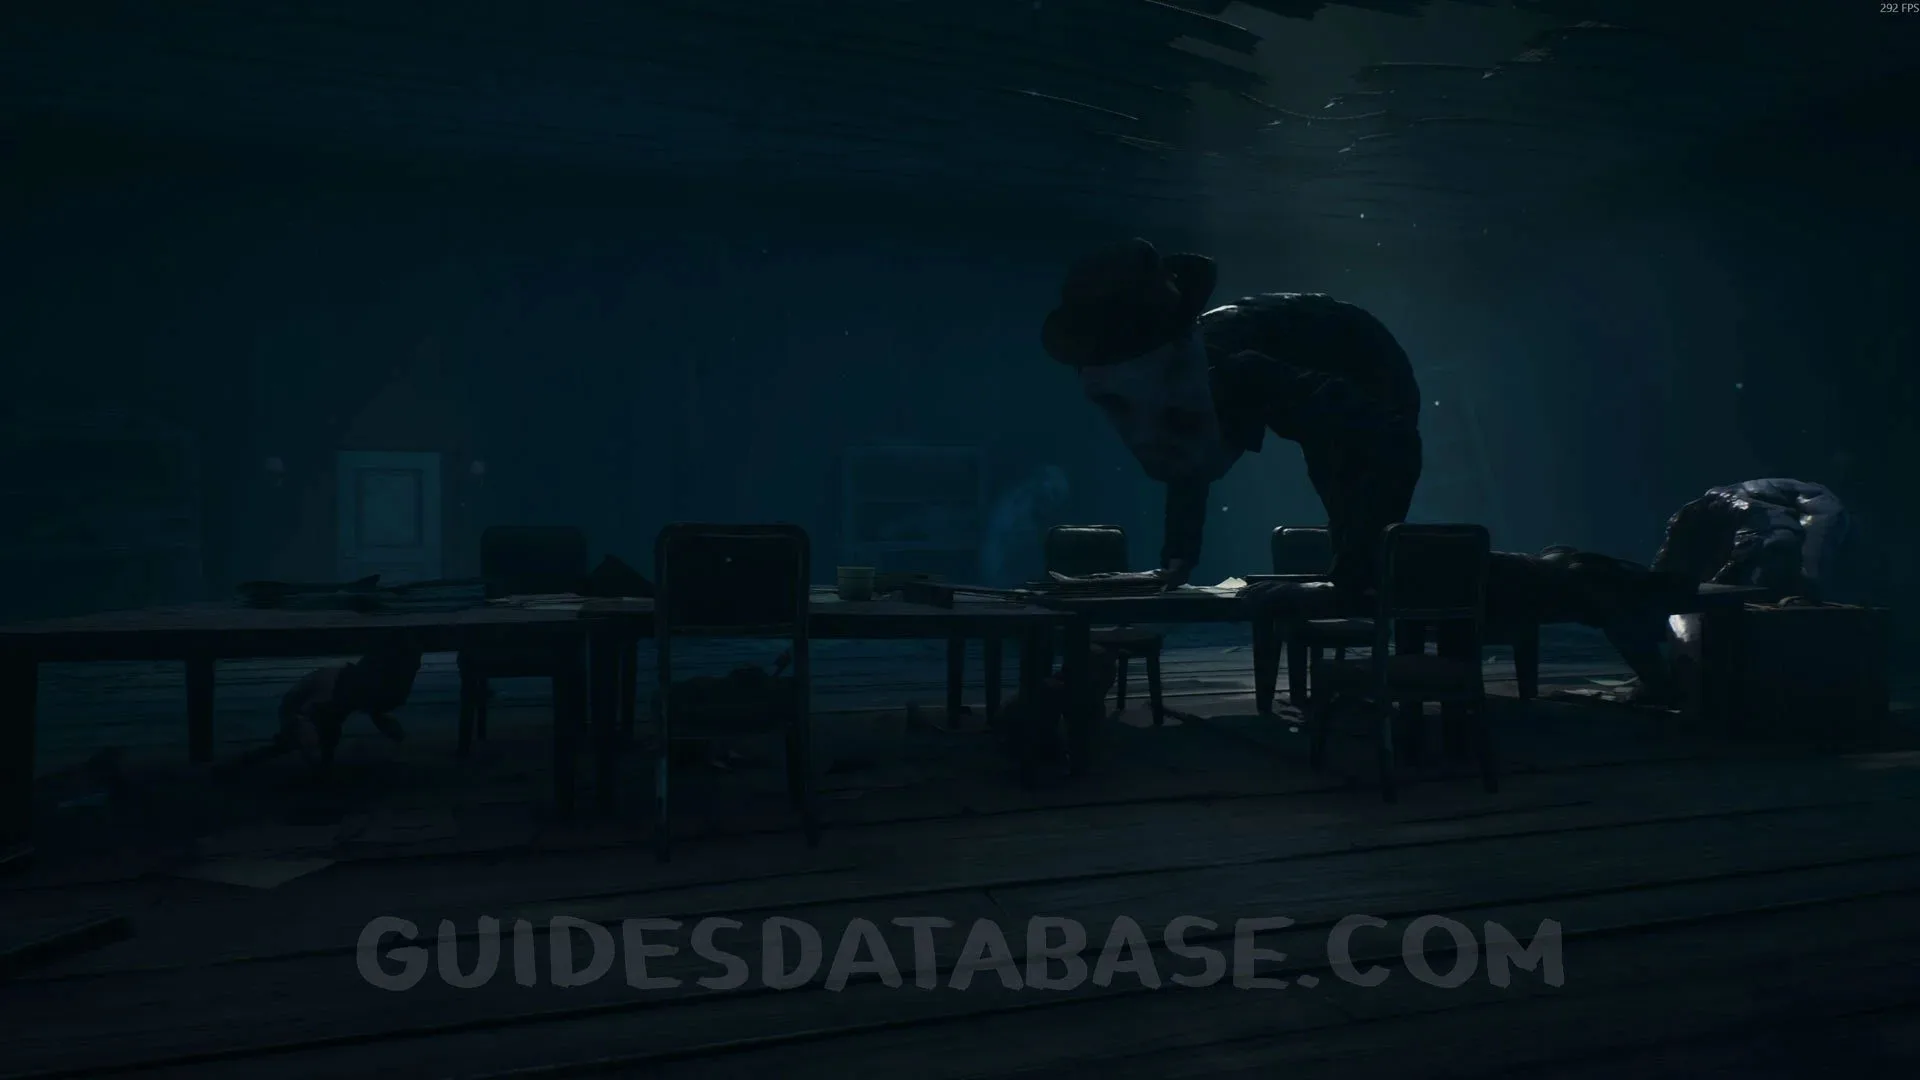
Trophy ‘‘Dark Tourism’’ + Poster #1 + Secret #3 + Rest Your Legs #2
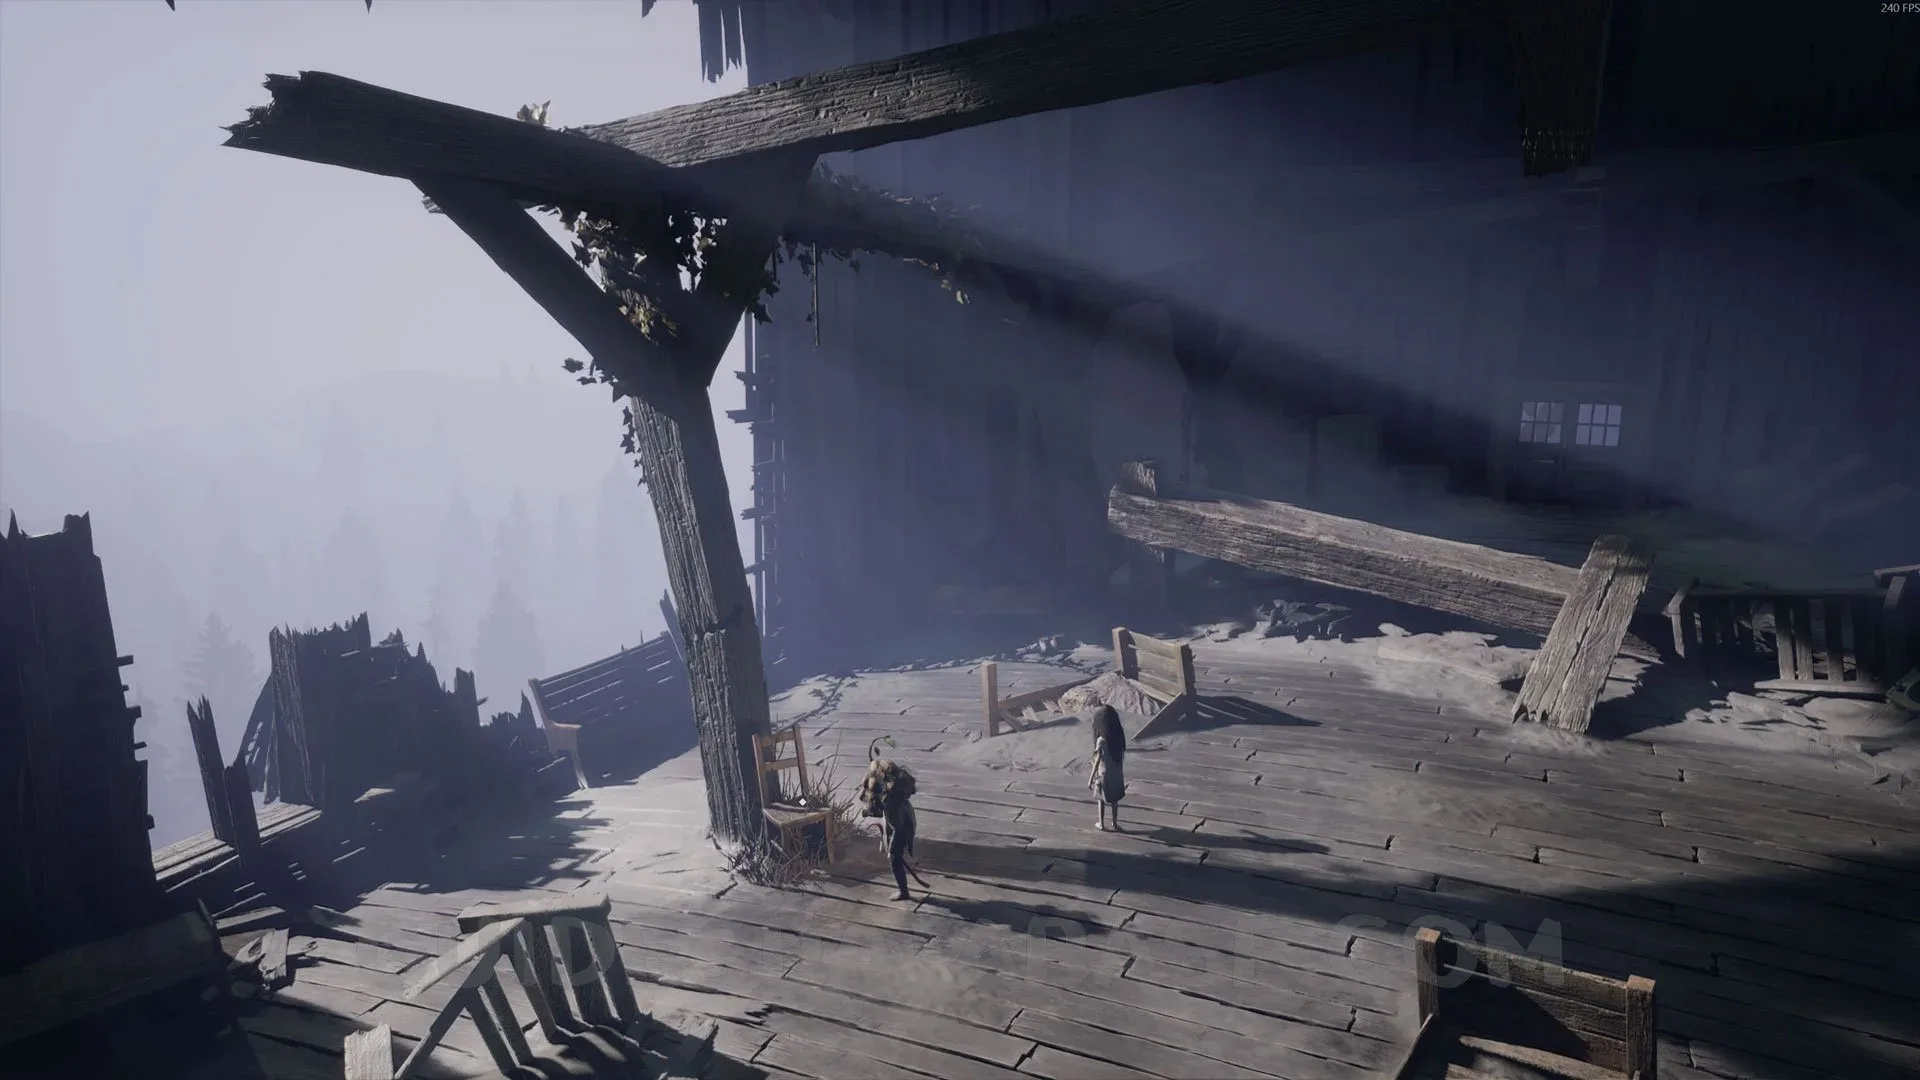
After going through the last sewer pipe, you’ll come out into an open area. Go to the back of the area and sit in the chair. Then kick the man sitting there to get the trophy, and finally pick up the poster on the wall.
 GUIDESDATABASE.COM
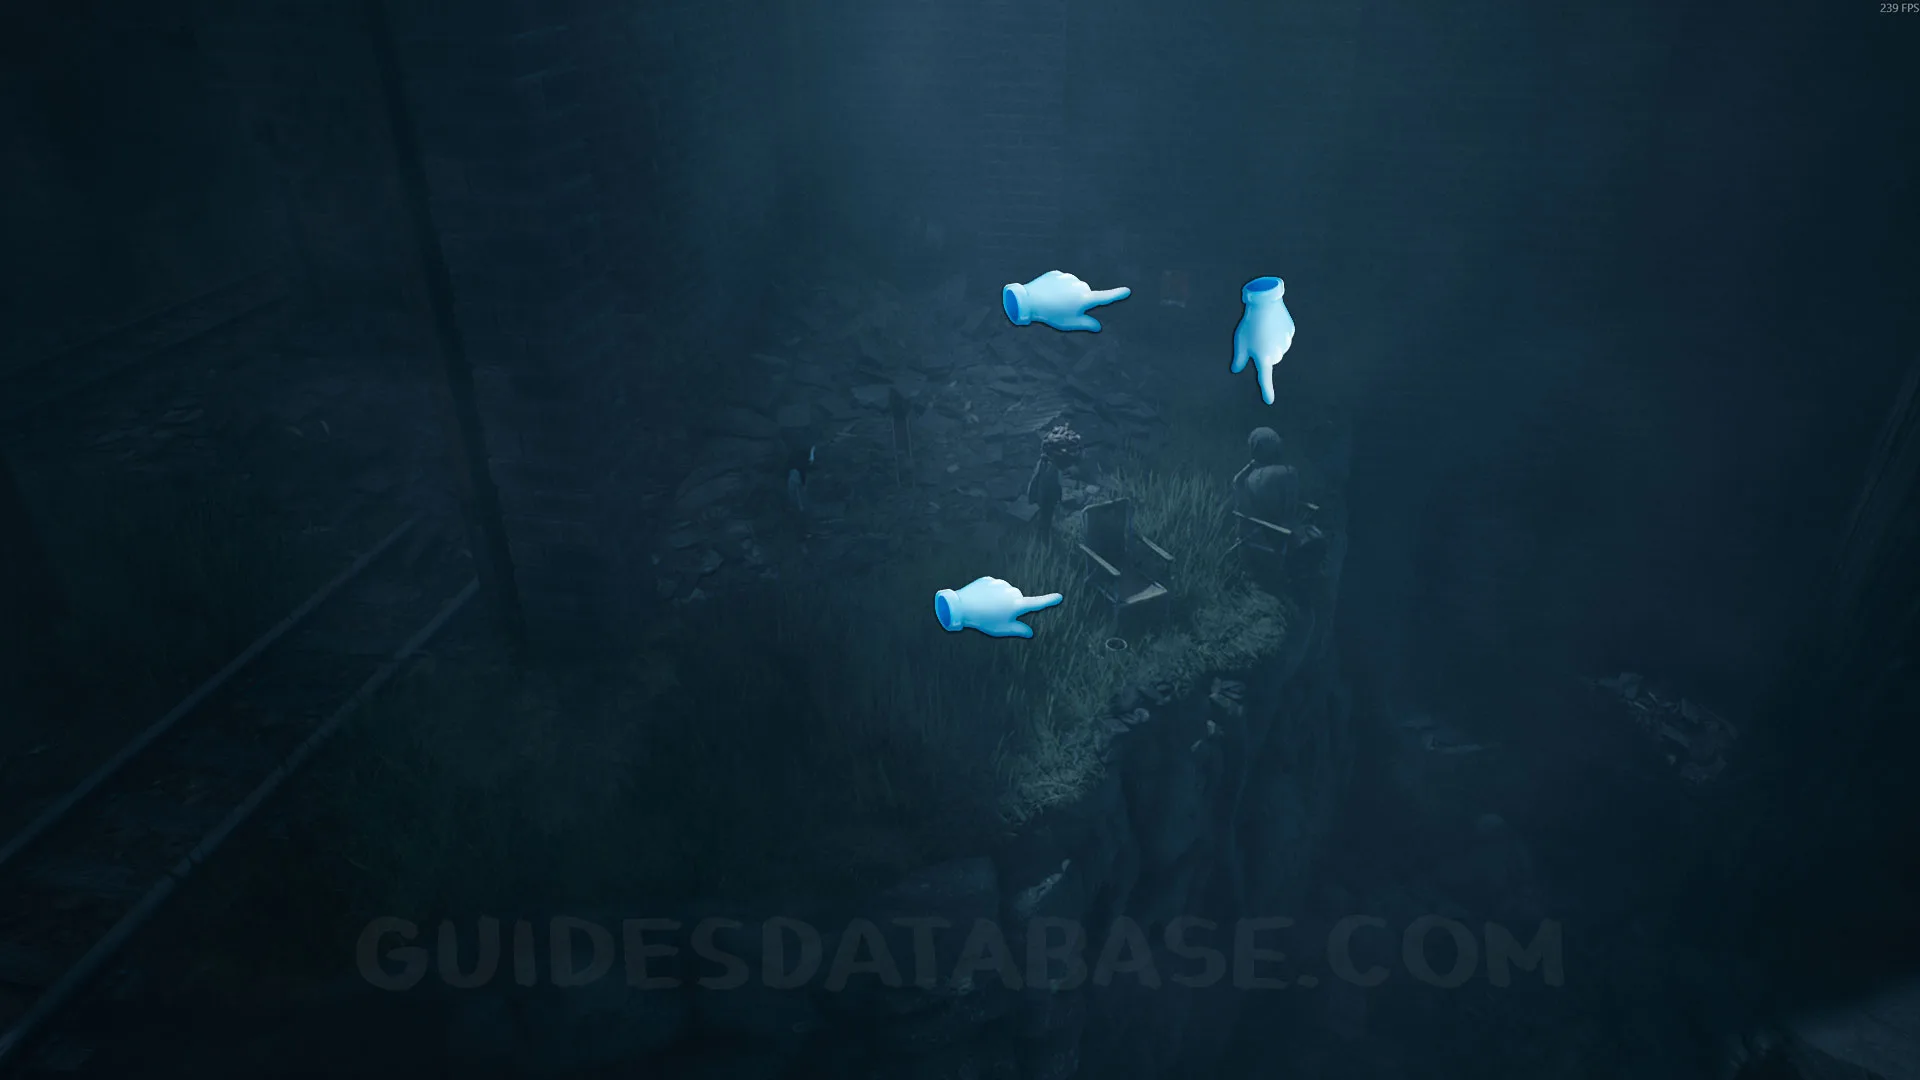 GUIDESDATABASE.COM
Poster #2 + Secret #4
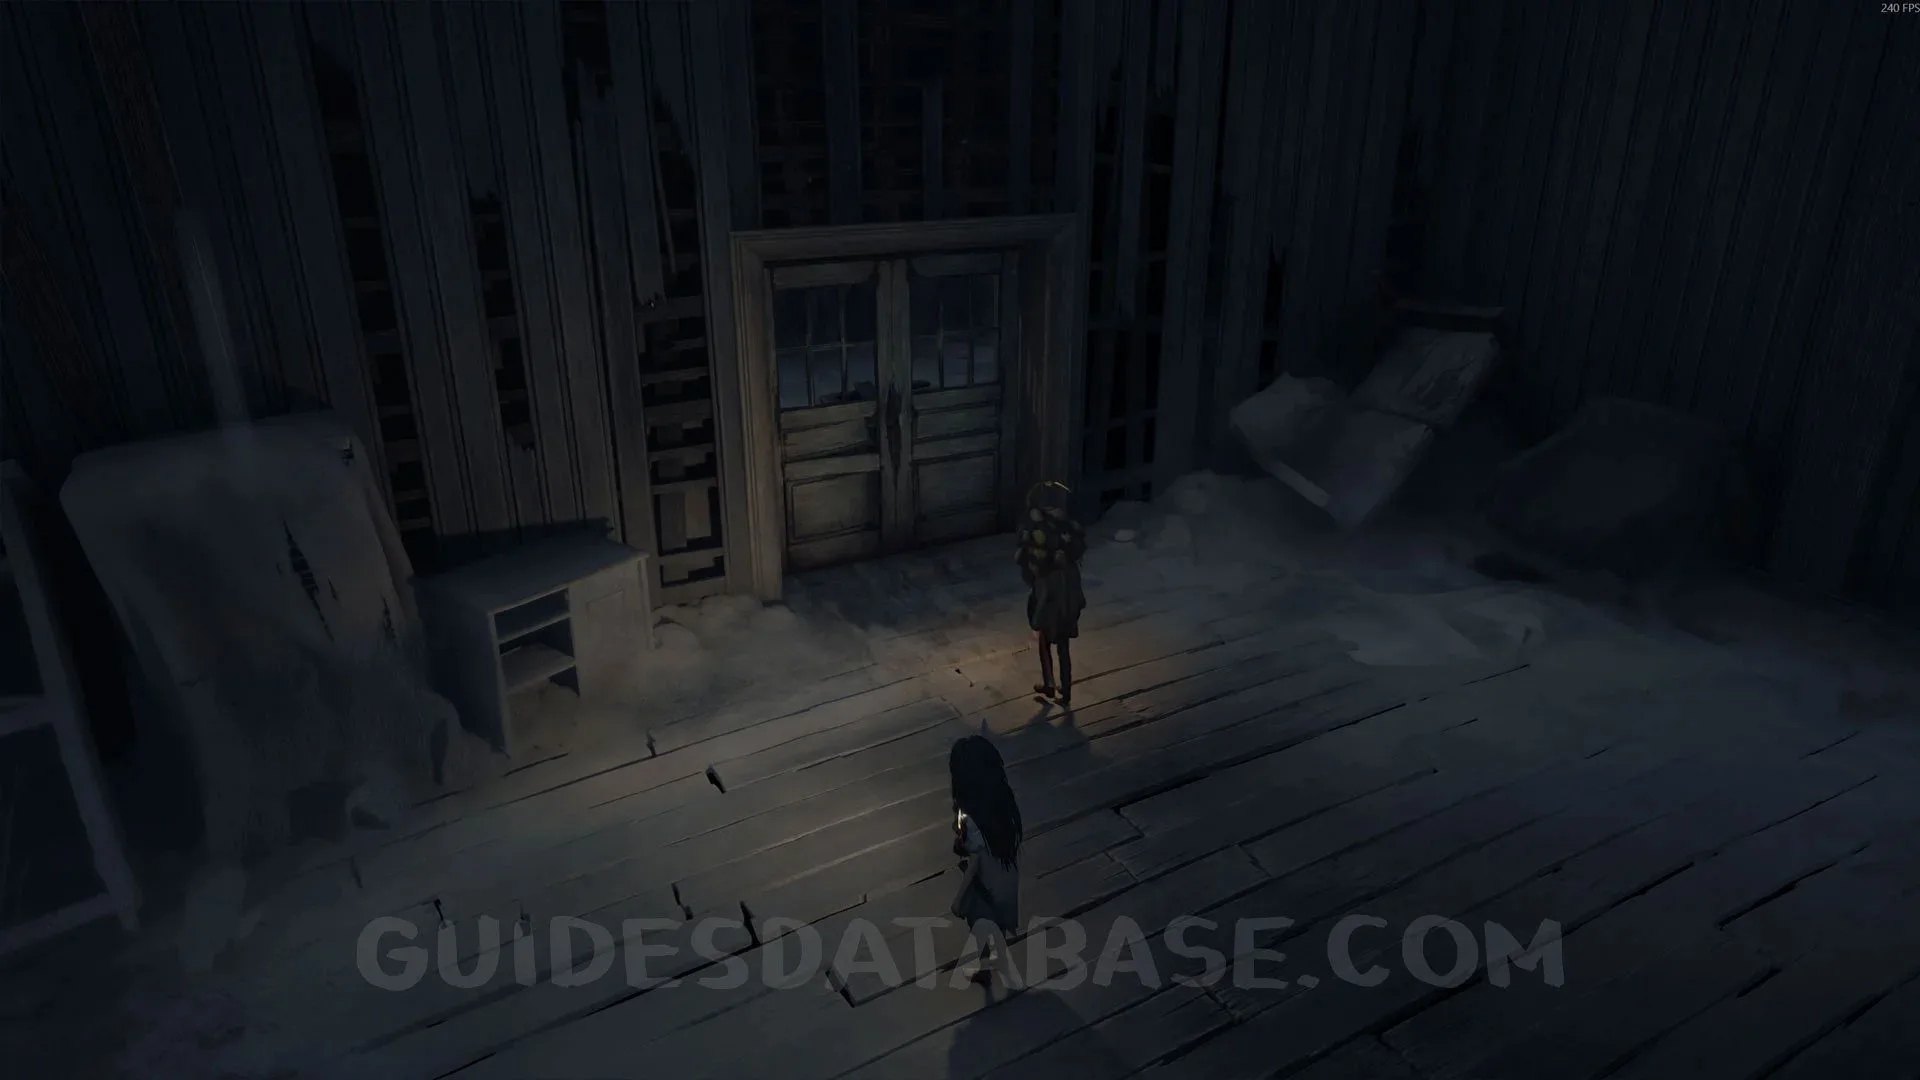
Right after the previous collectible, enter the door on the right with the light above it to reach the bathroom. This poster will be on the wall as soon as you go through the door.
 GUIDESDATABASE.COM
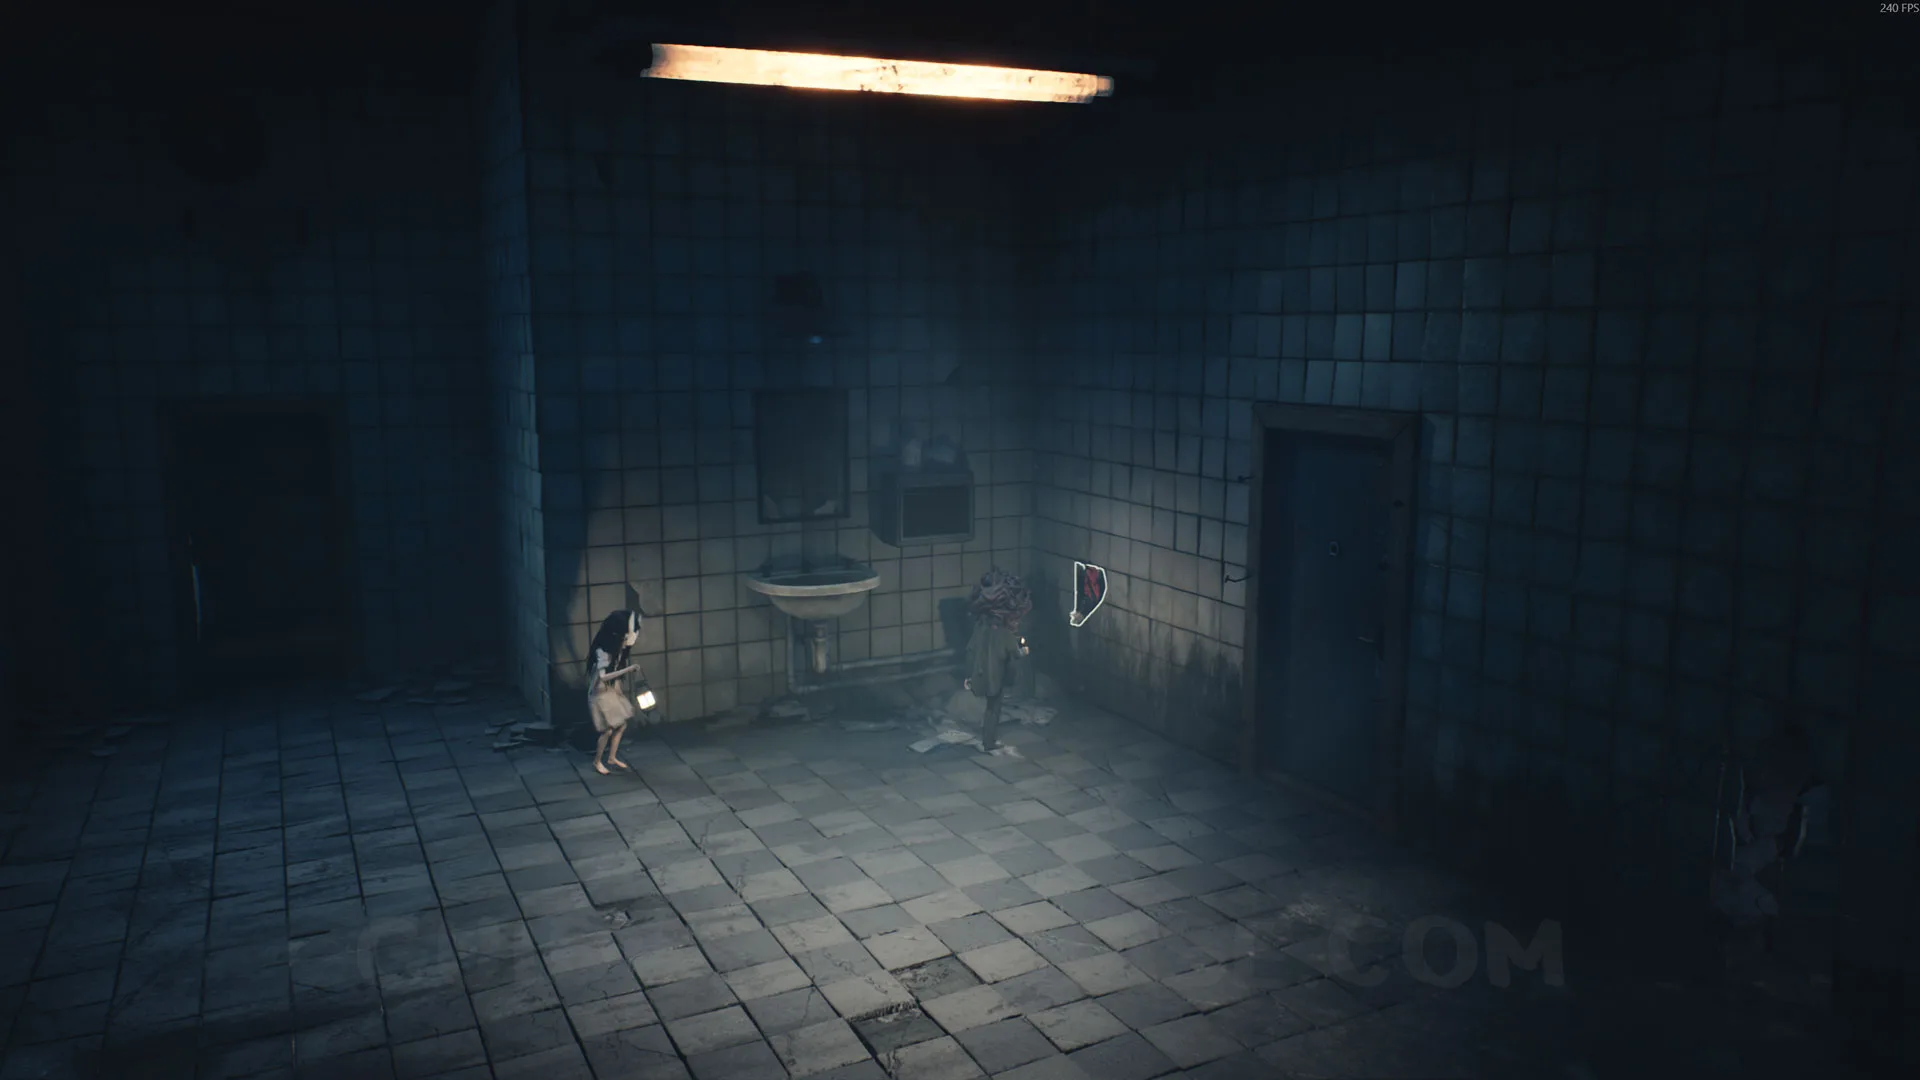 GUIDESDATABASE.COM
Mask #3 + Secret #5
After using a plunger on the toilet to get a key, leave the bathroom and enter the door on the right with the light turned off. Once inside, go to the end of the area to find this mask.
 GUIDESDATABASE.COM
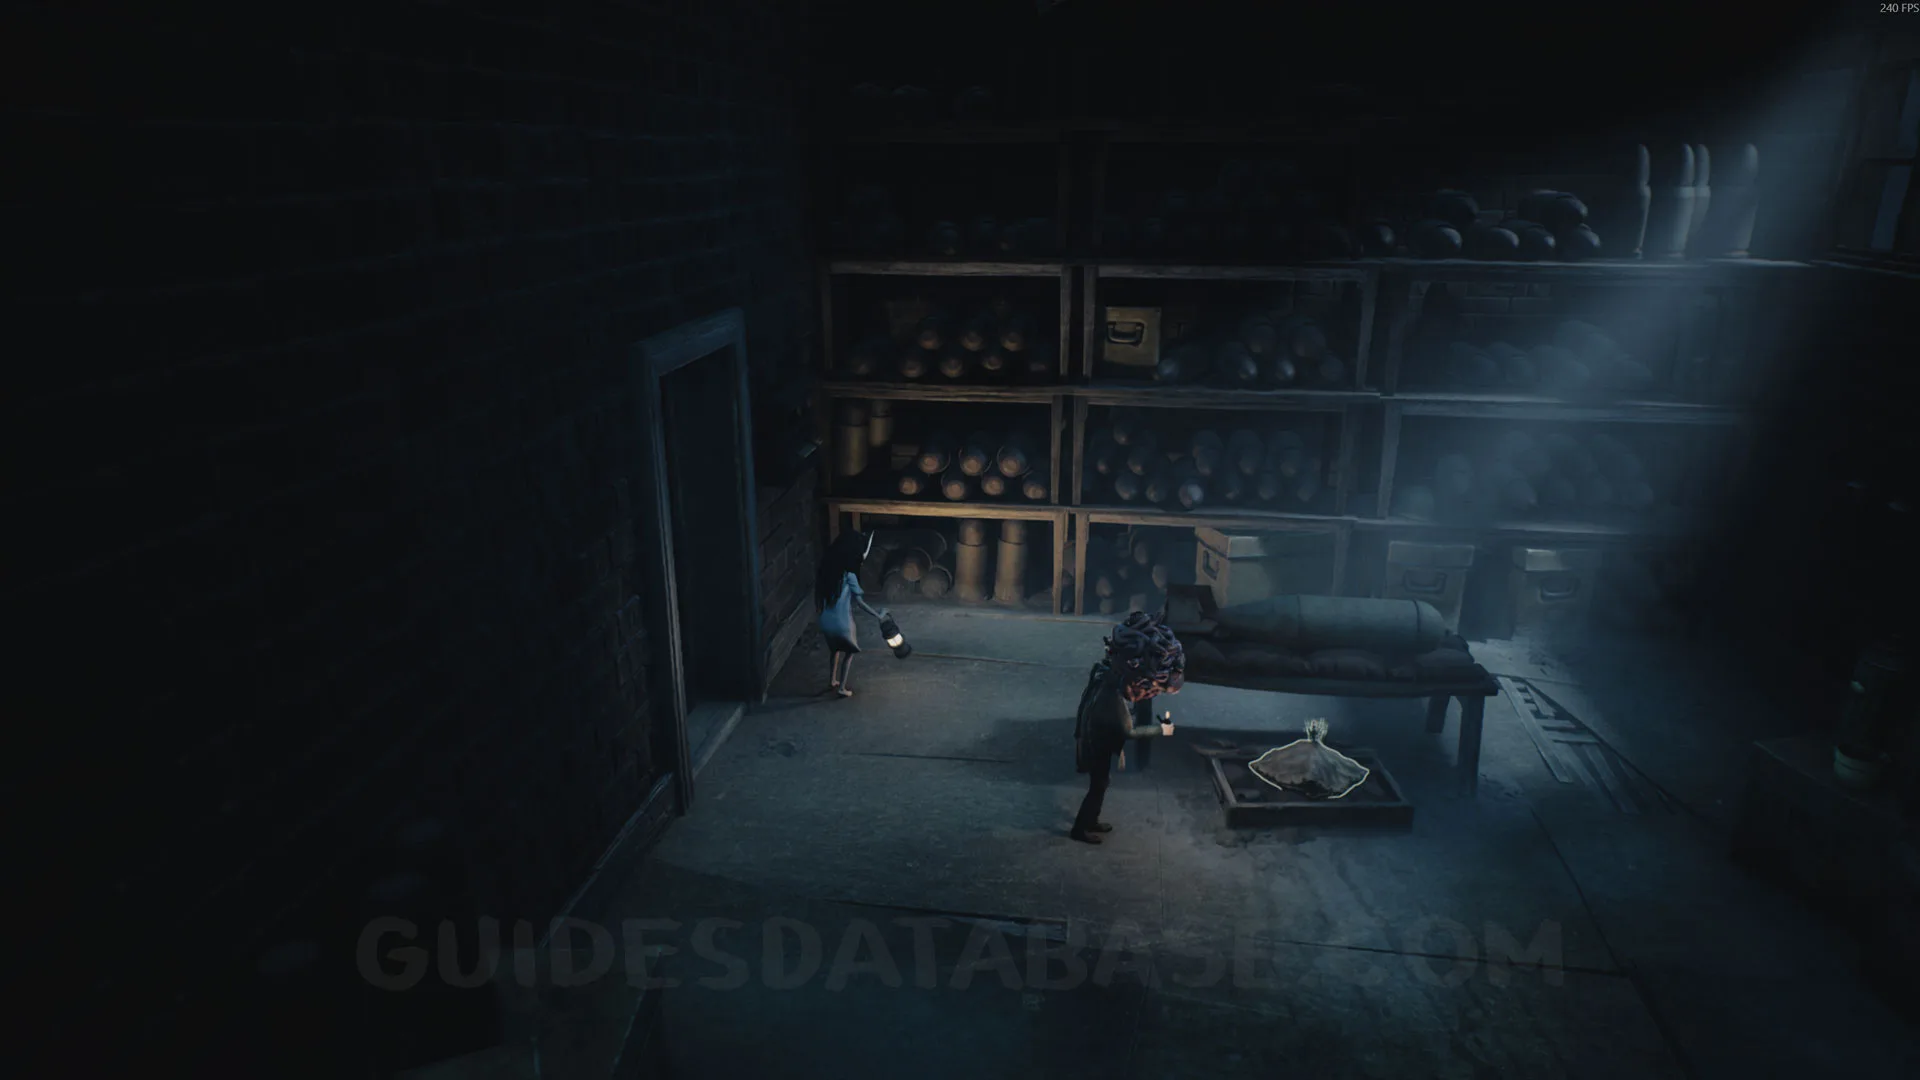 GUIDESDATABASE.COM
Rest Your Legs #3
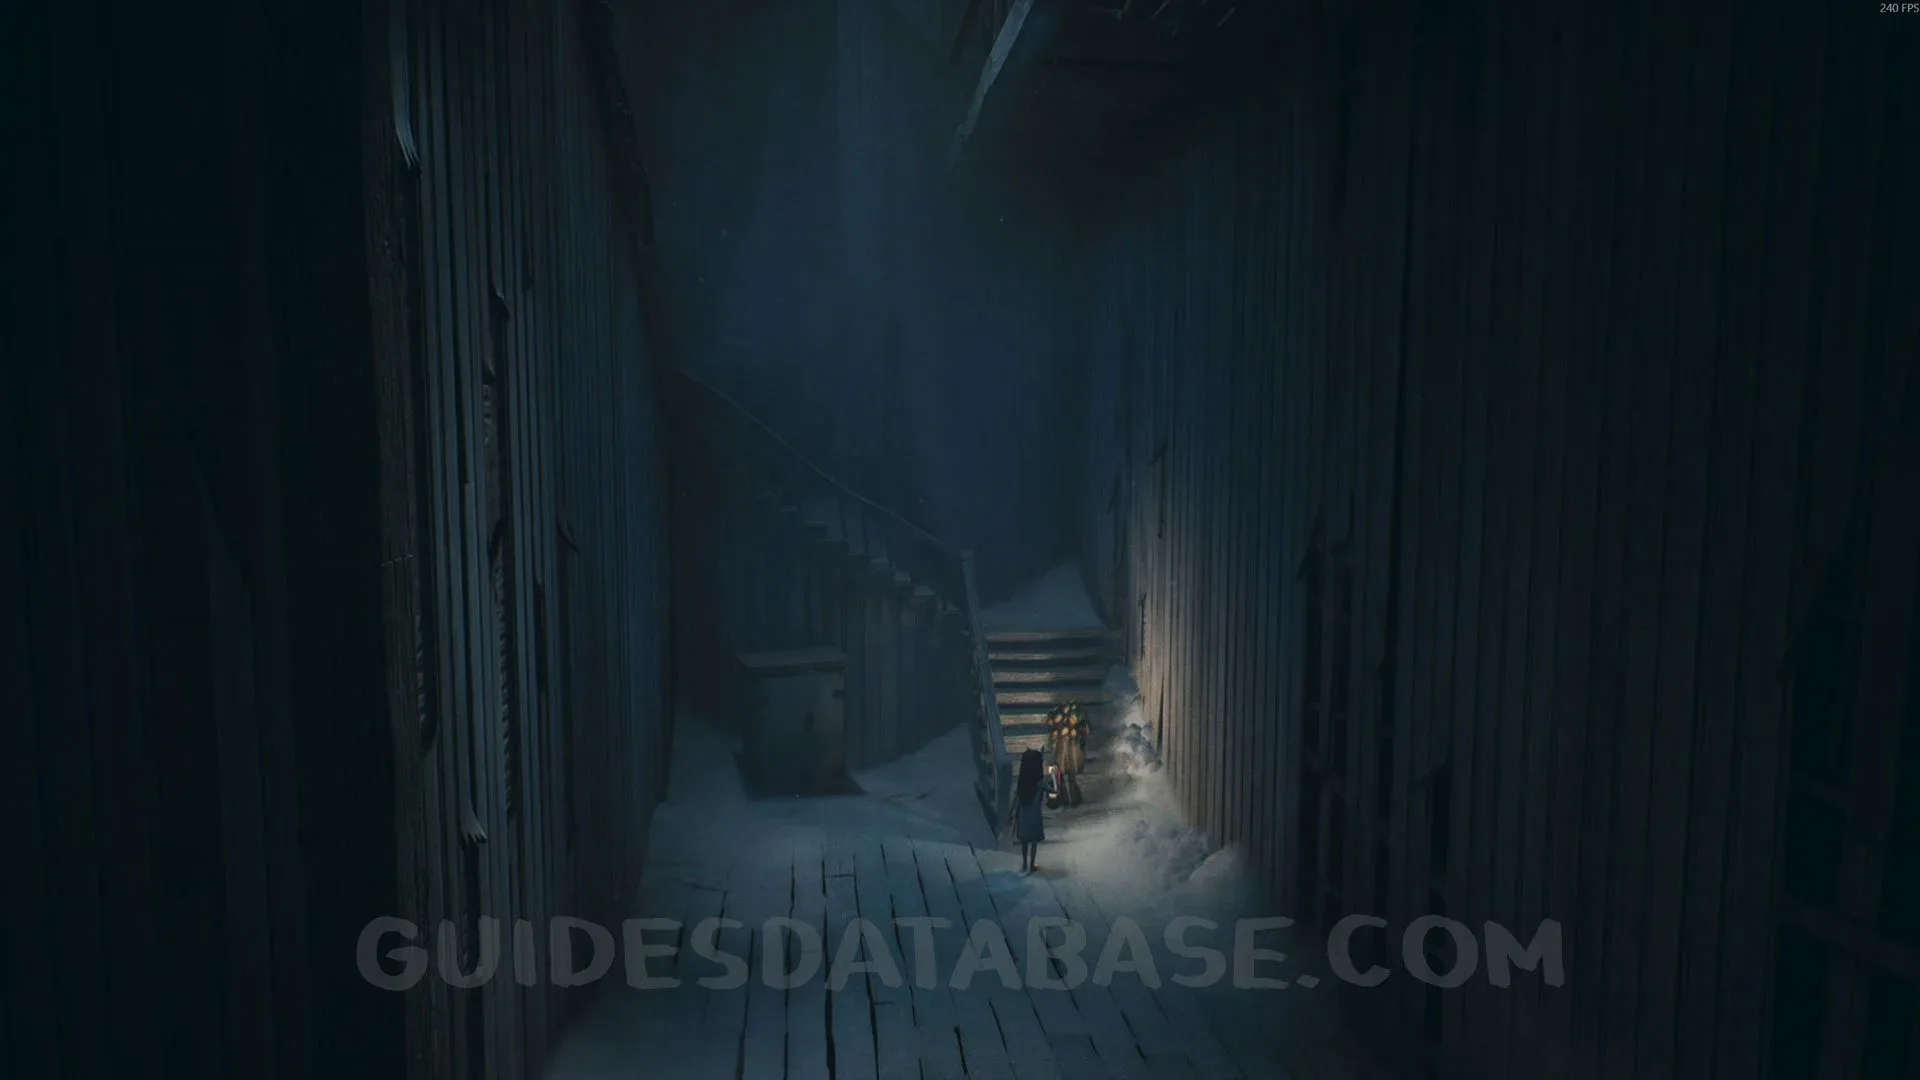
Right after the previous collectible, go outside the area you were in and enter the door on the left. Continue forward and you’ll see a chair where you can rest your legs.
 GUIDESDATABASE.COM
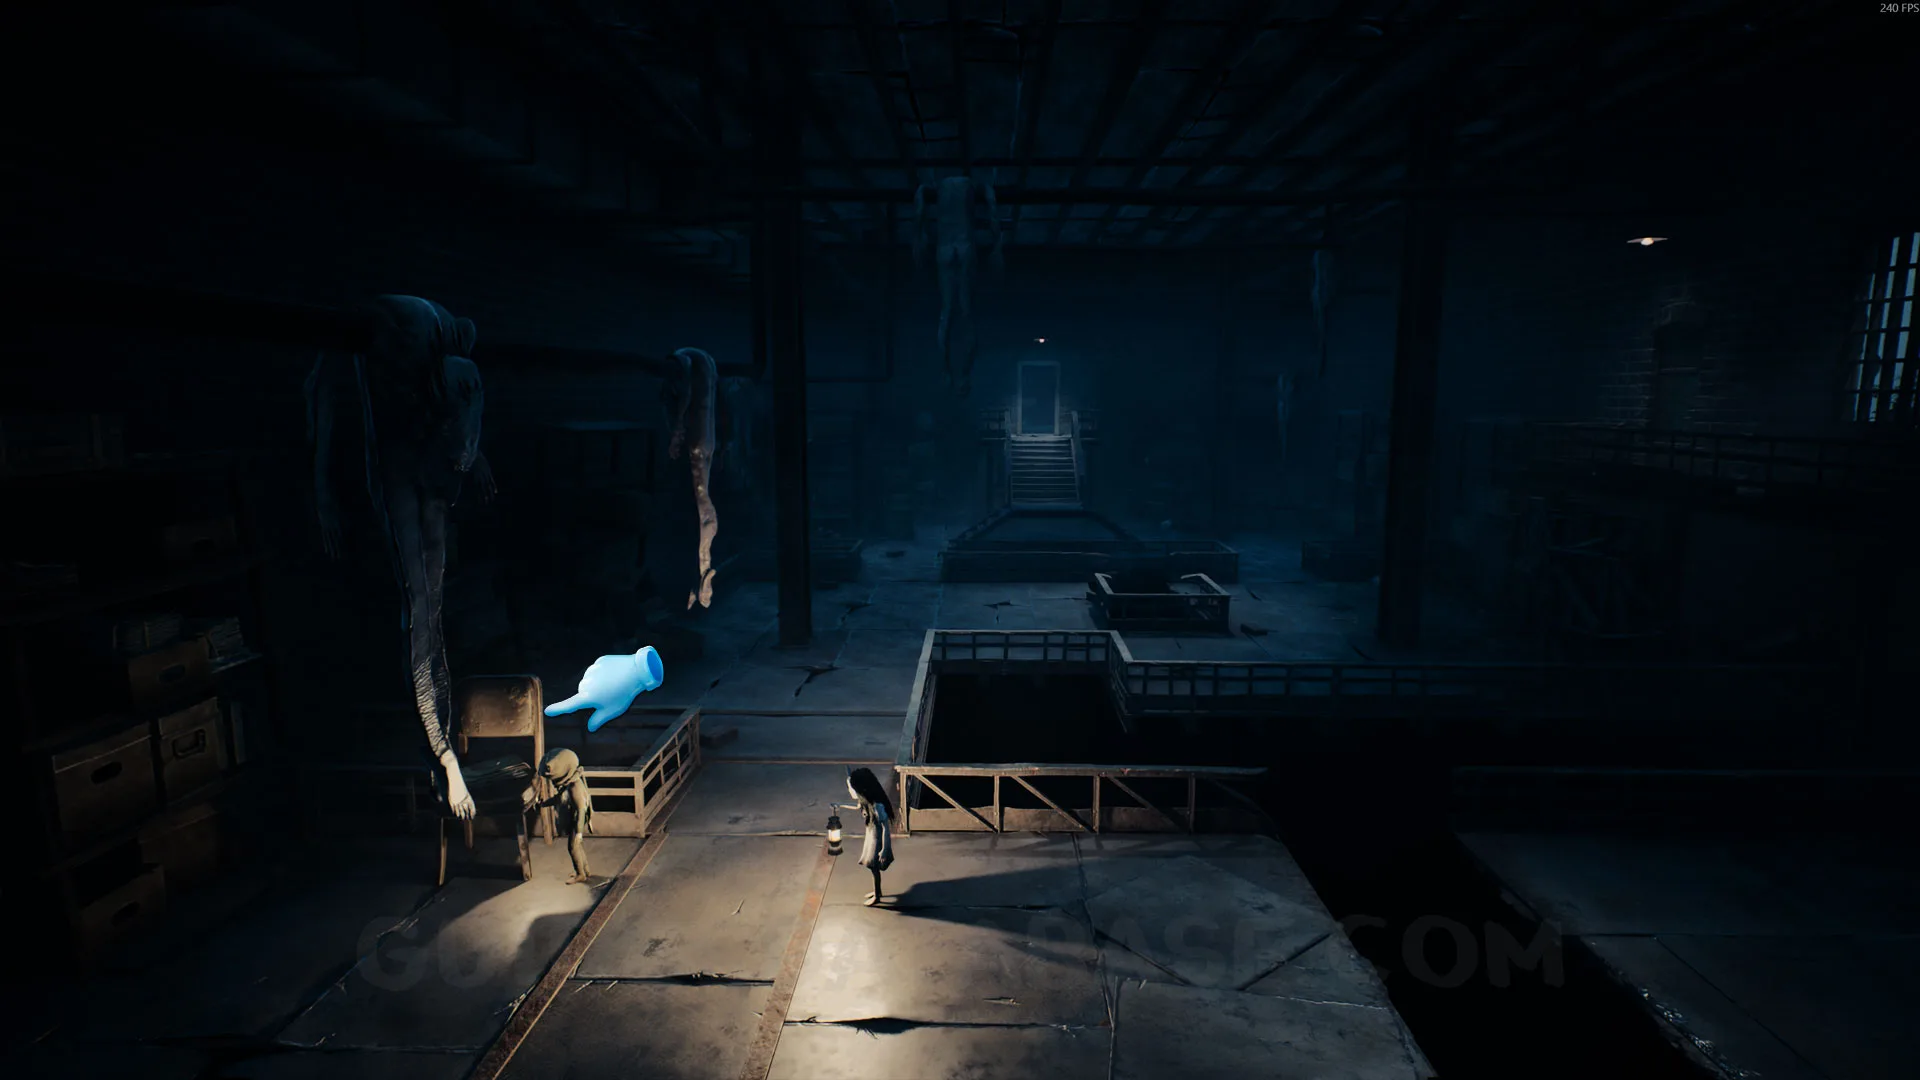 GUIDESDATABASE.COM
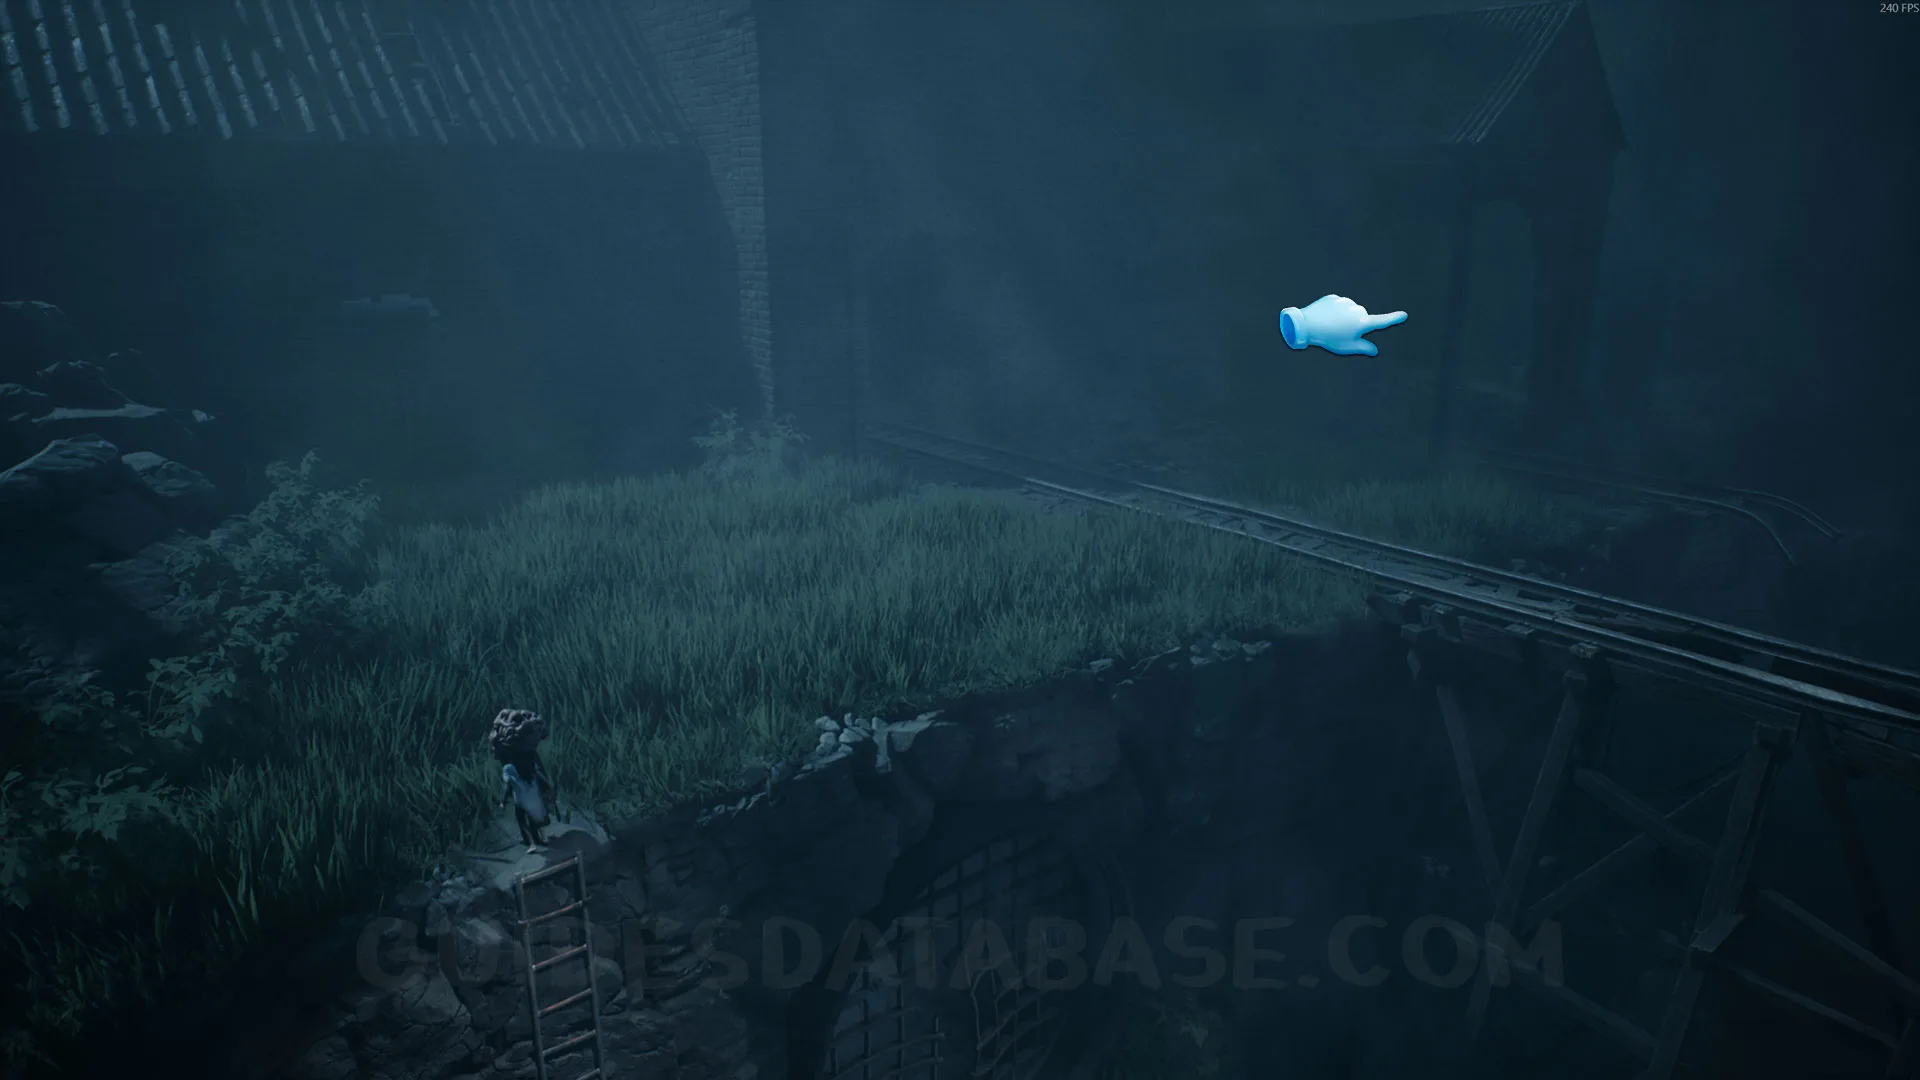
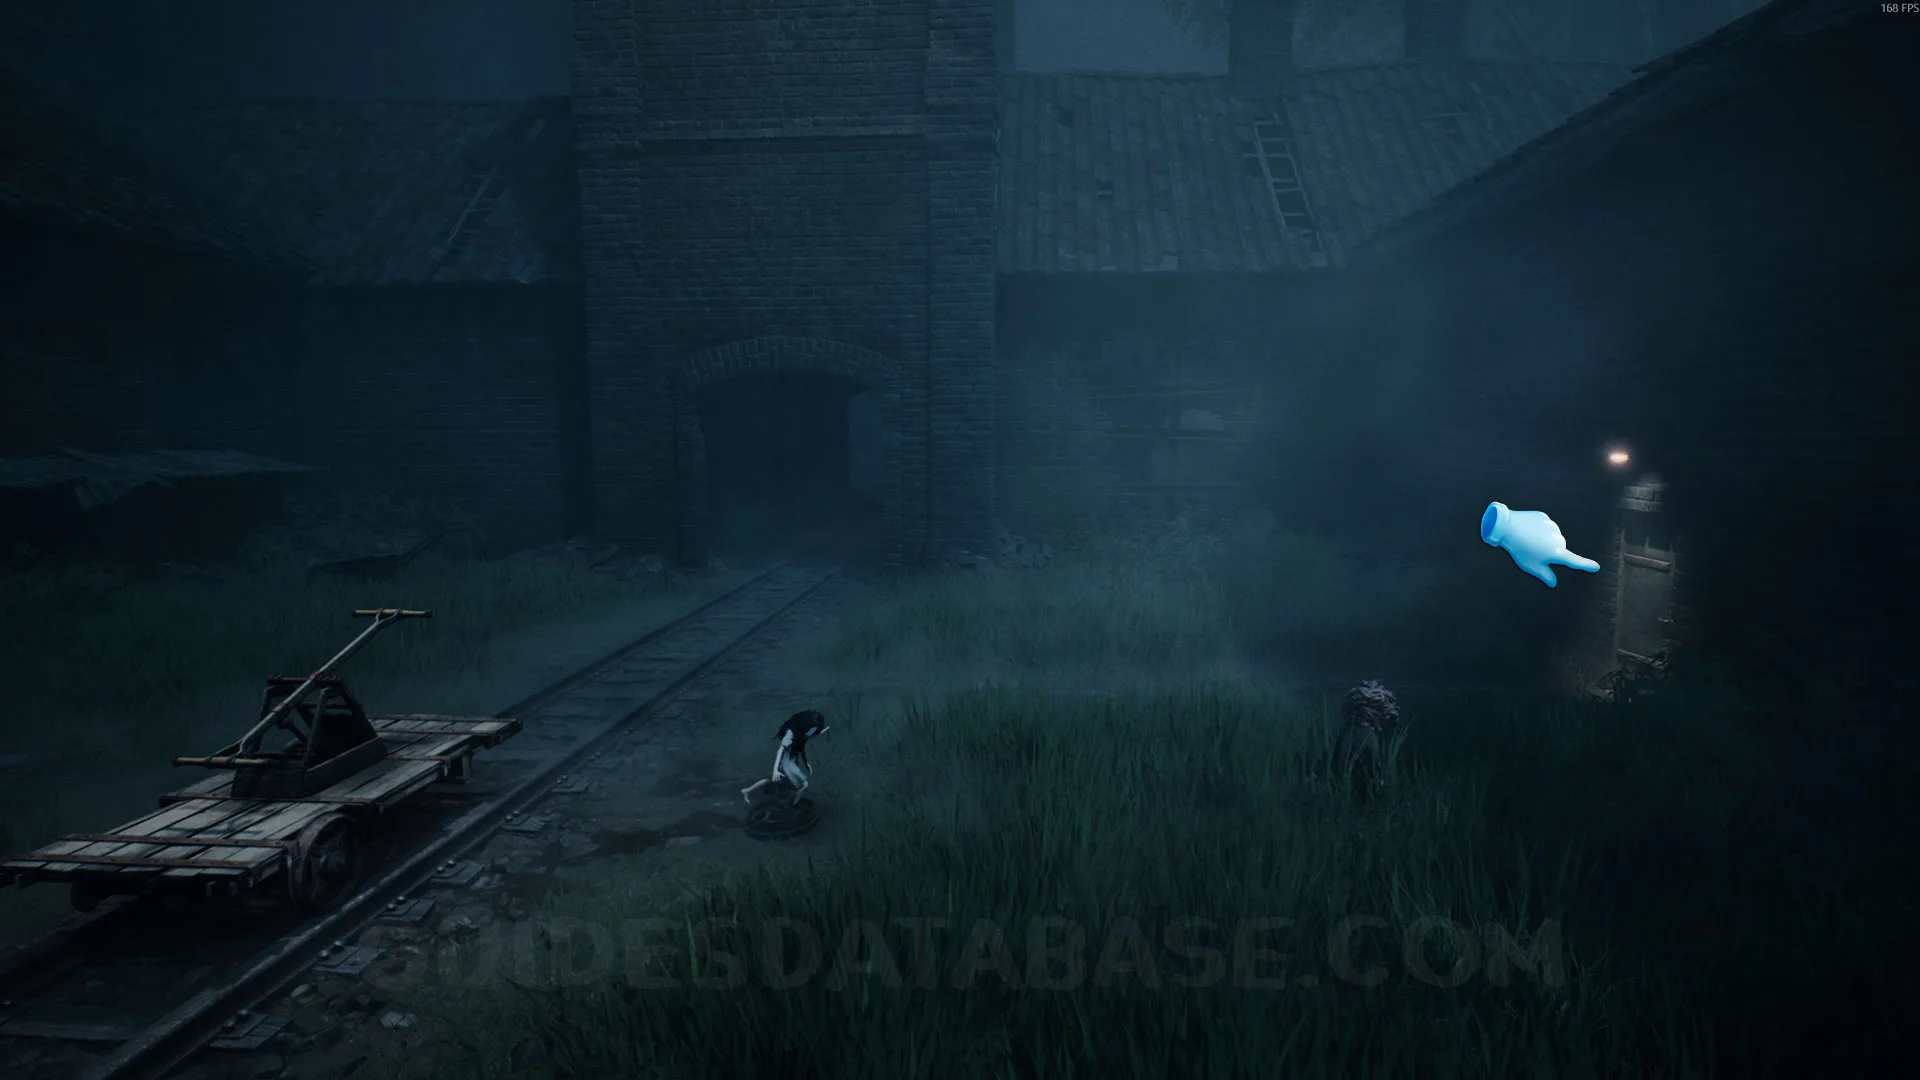
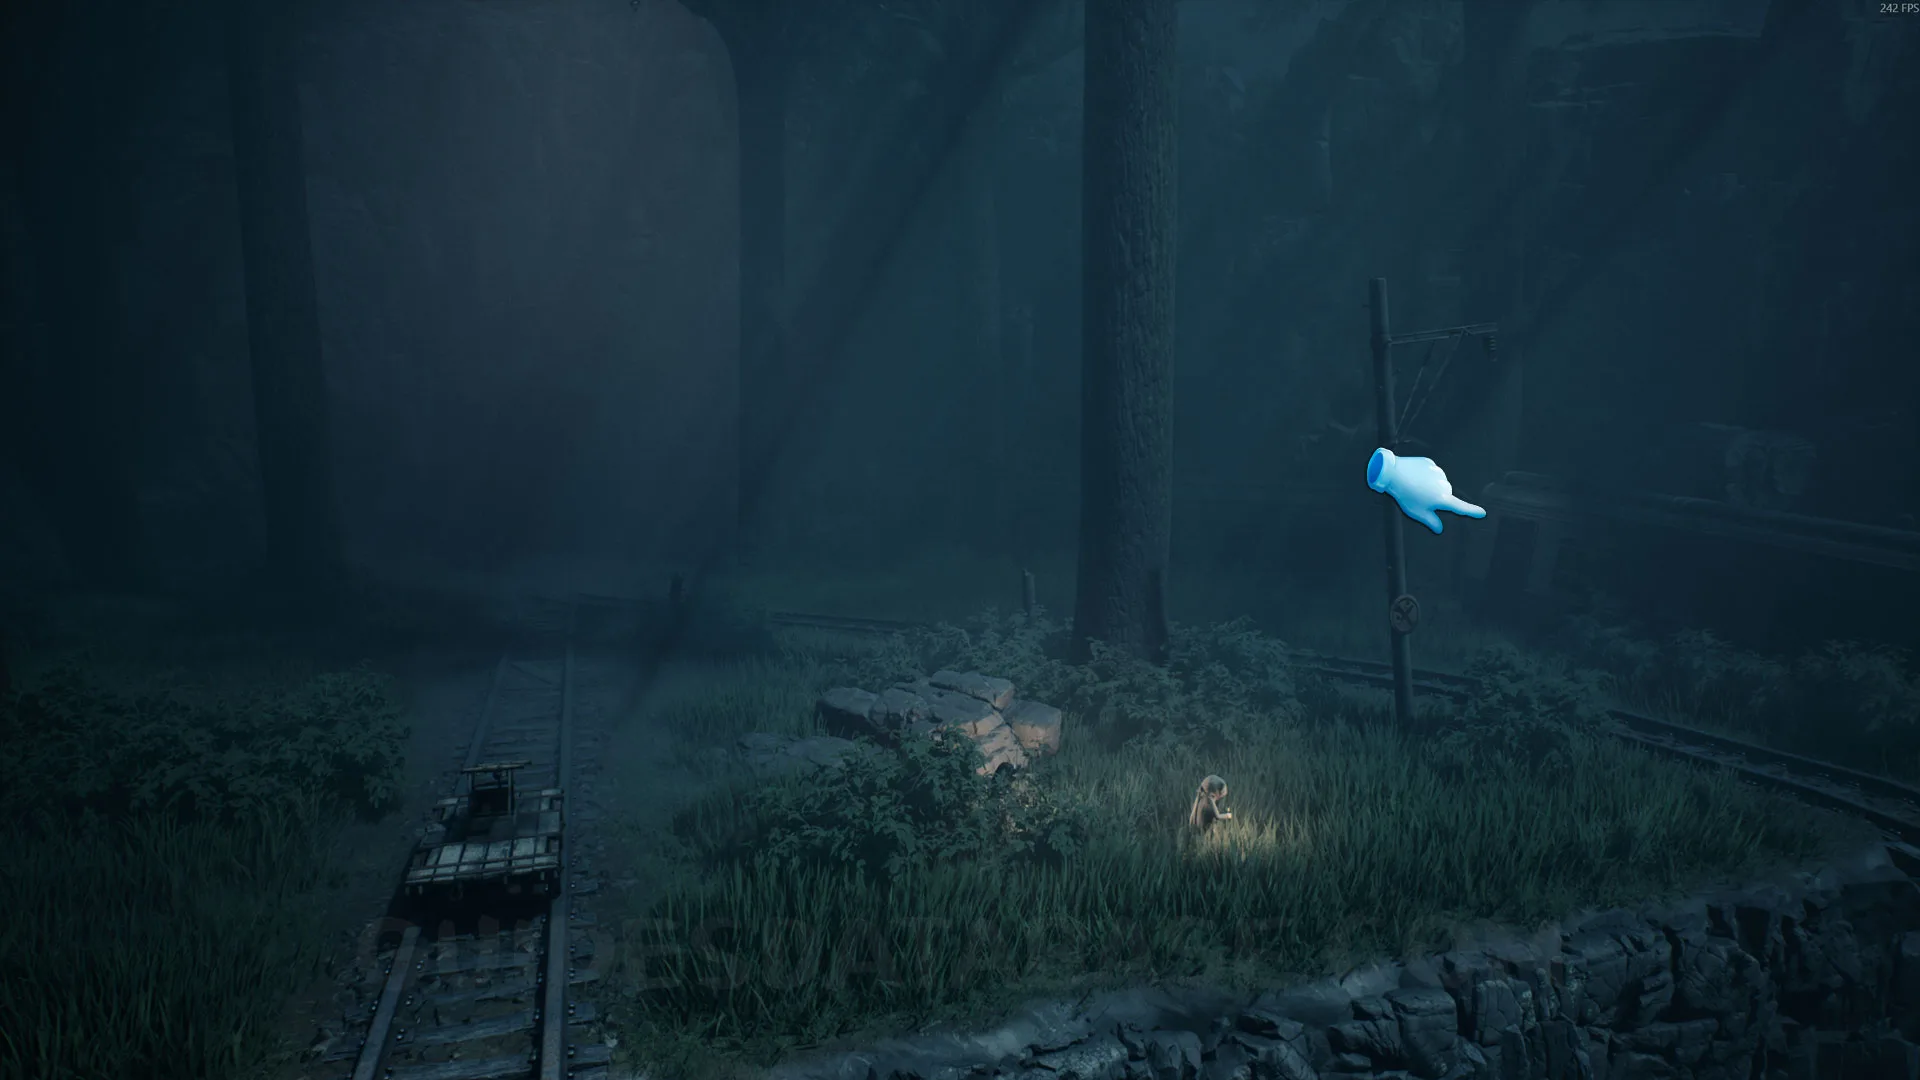
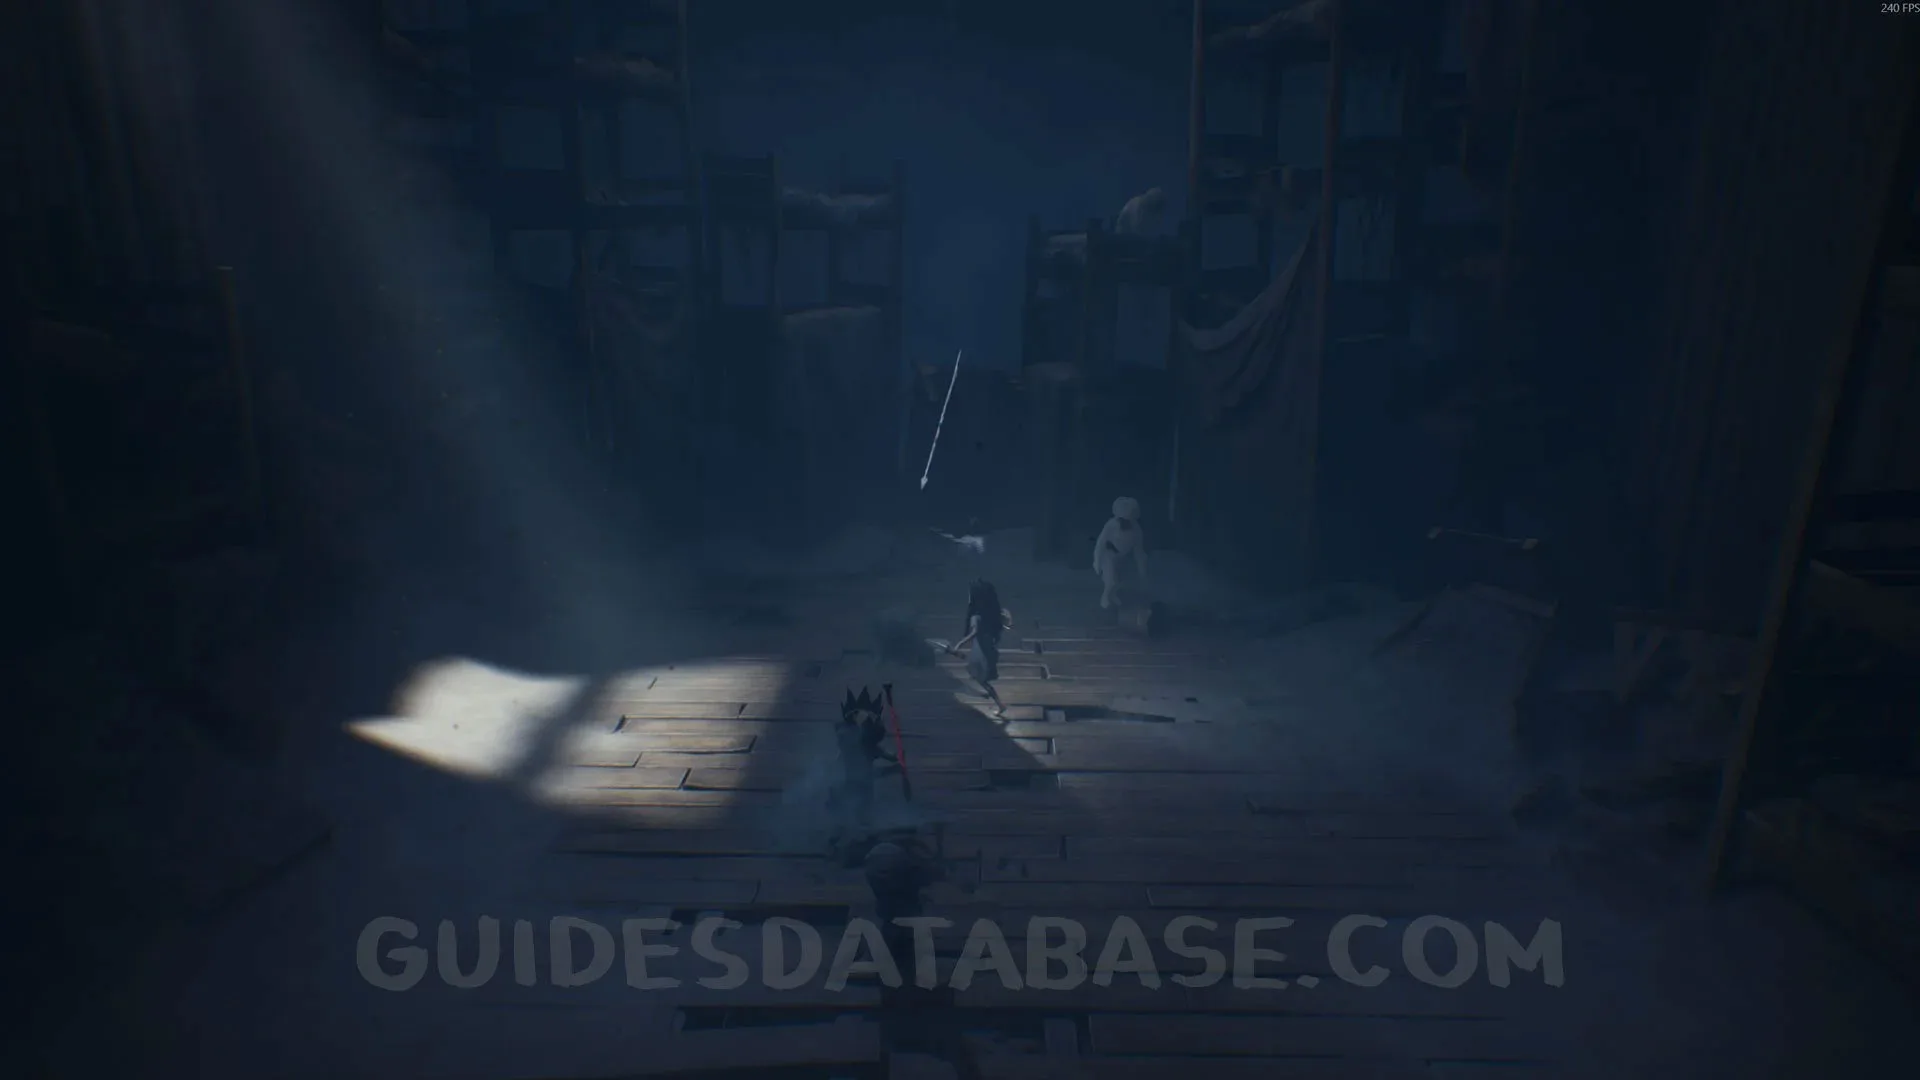
Coffin #1 + Secret #6
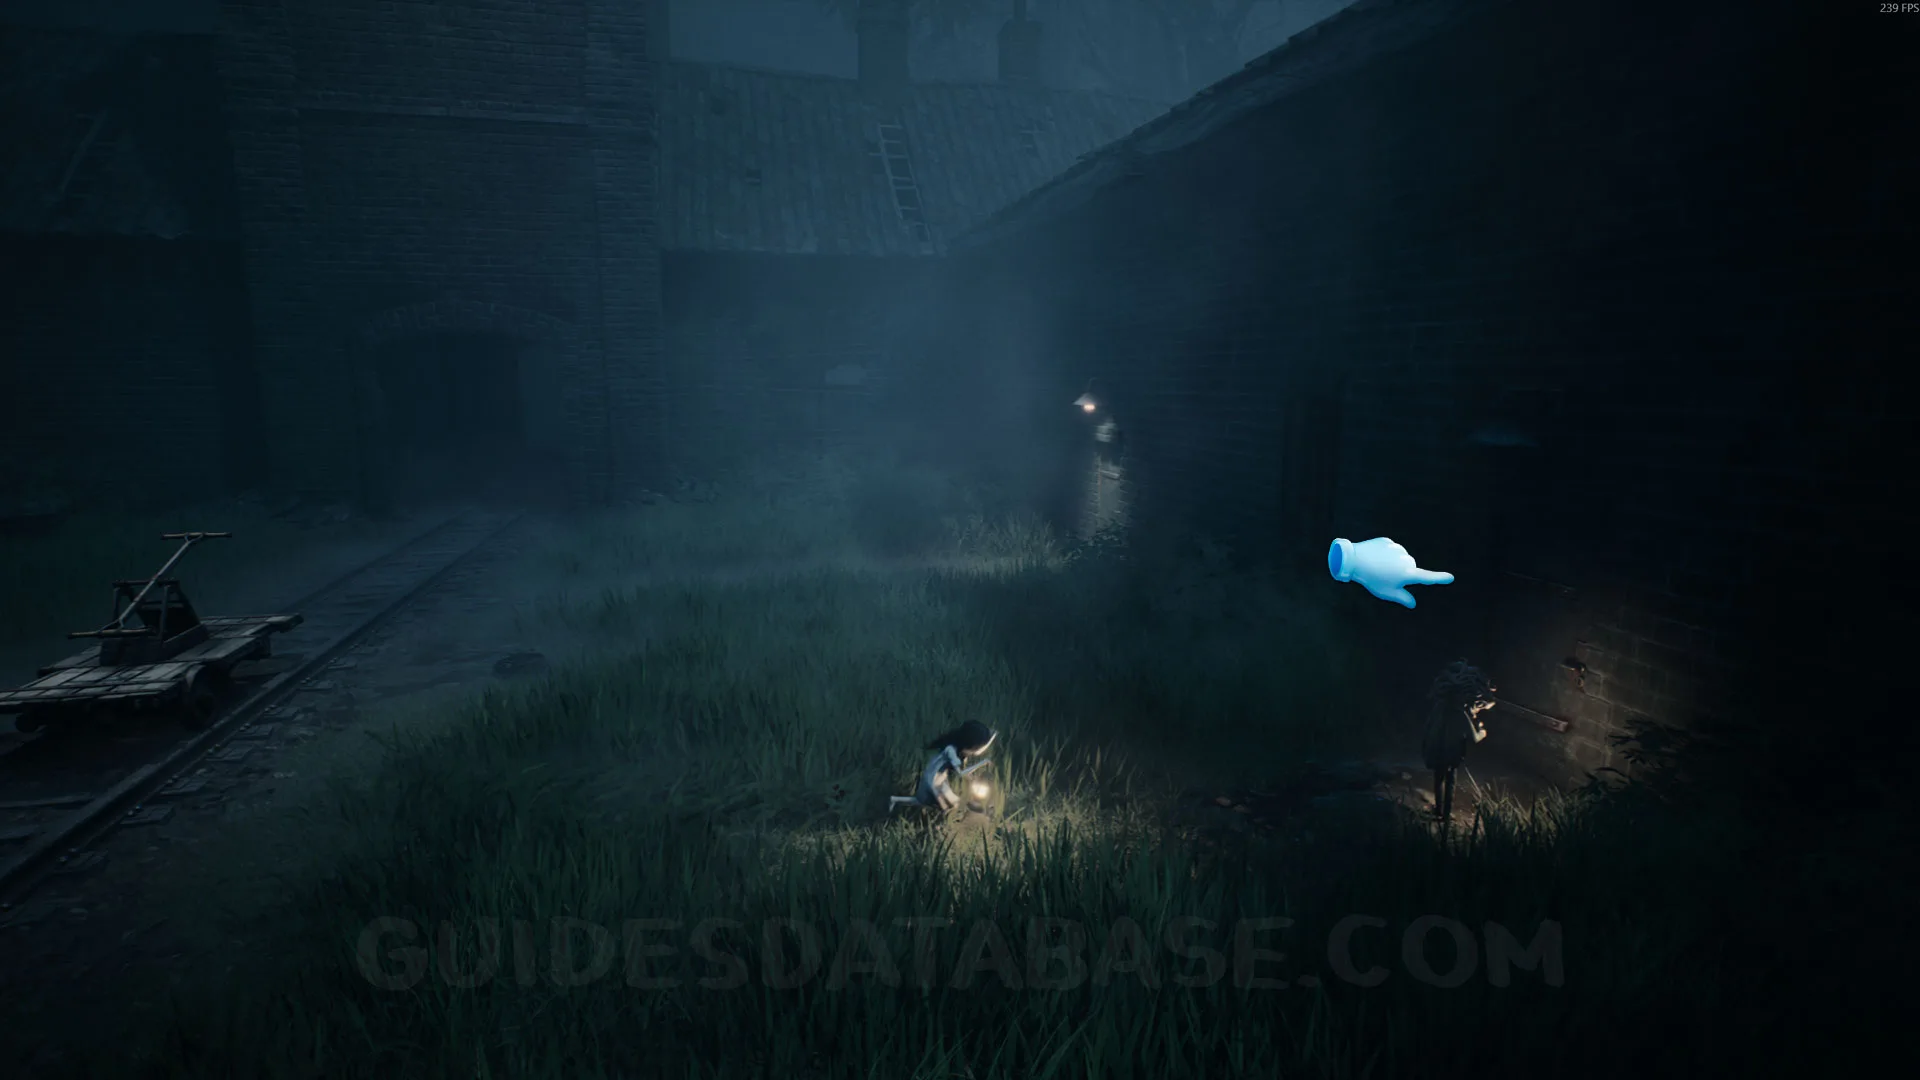
After placing the two wheels on the cart, you’ll travel along the suspended tracks and see an abandoned train on the right. Stop the cart and head over to the train. Enter it and go to the other side of the area to find this coffin. Open it.
 GUIDESDATABASE.COM
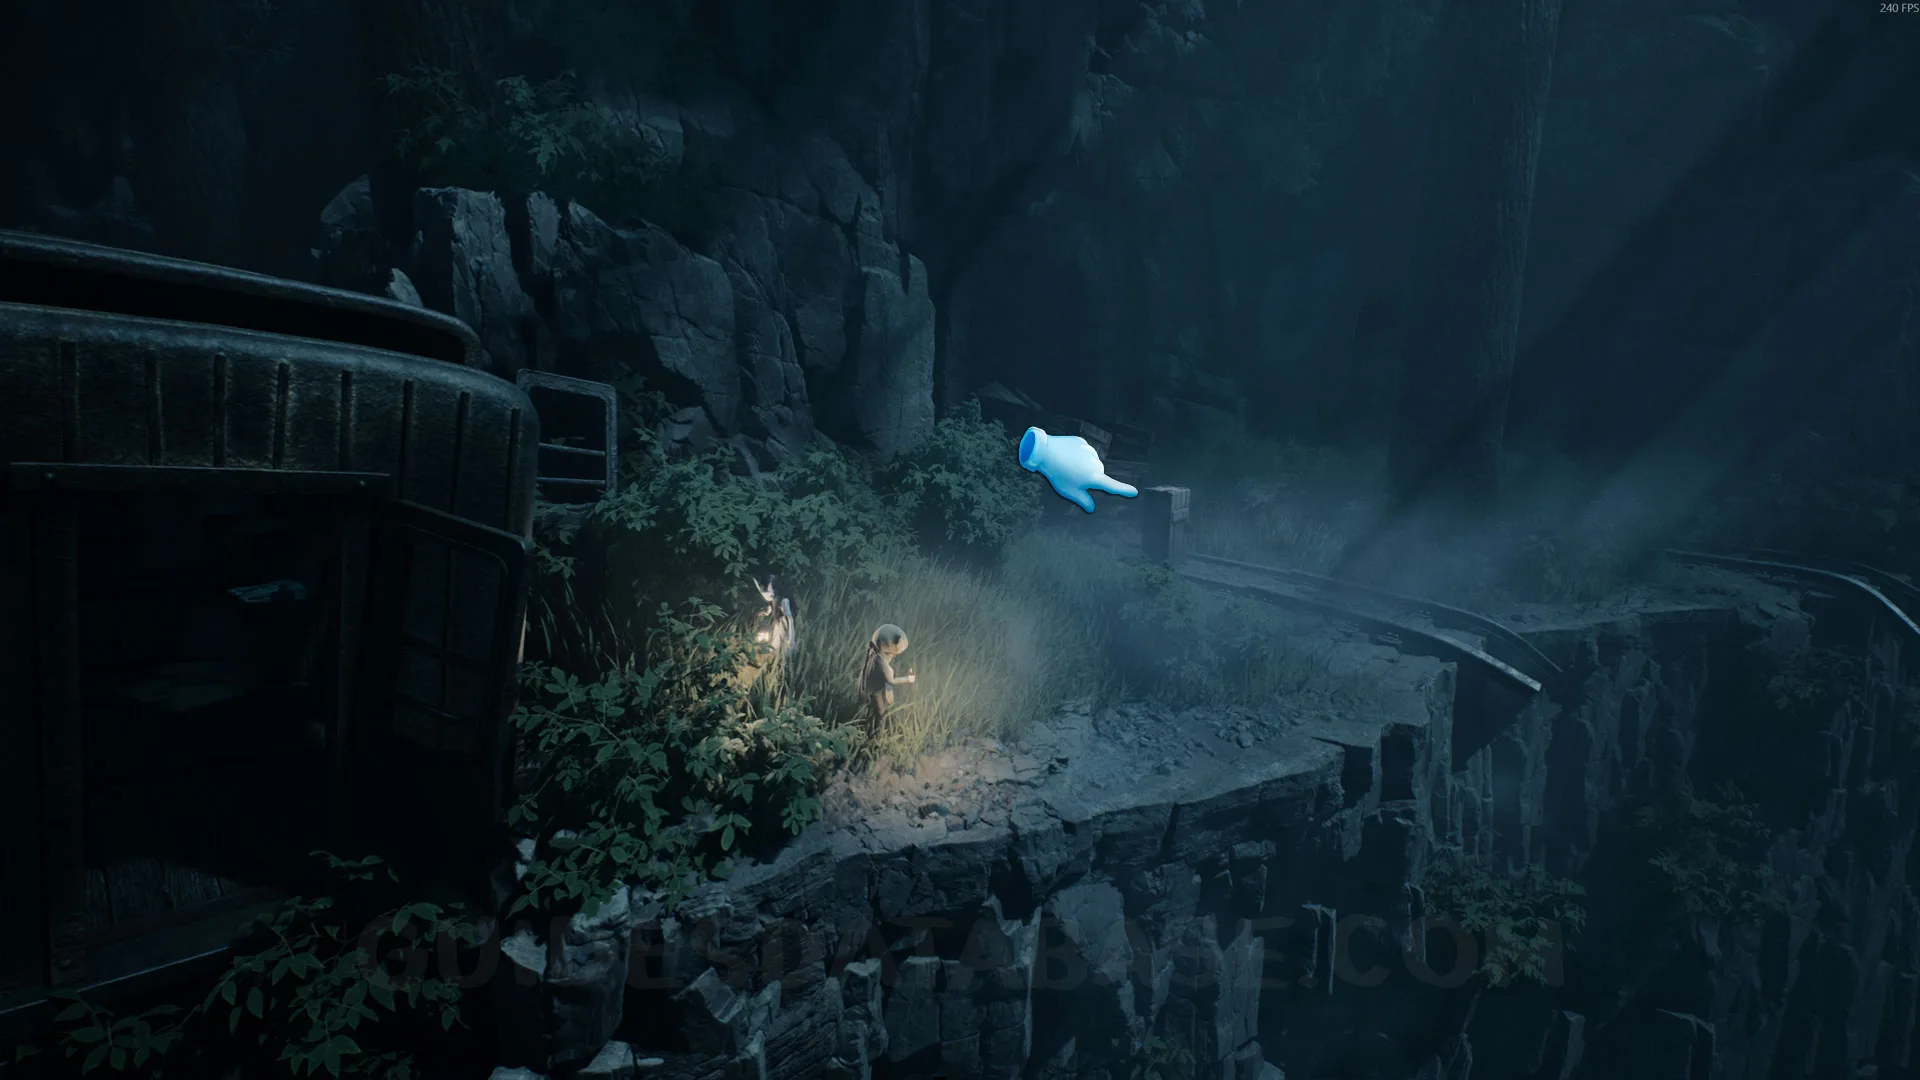 GUIDESDATABASE.COM
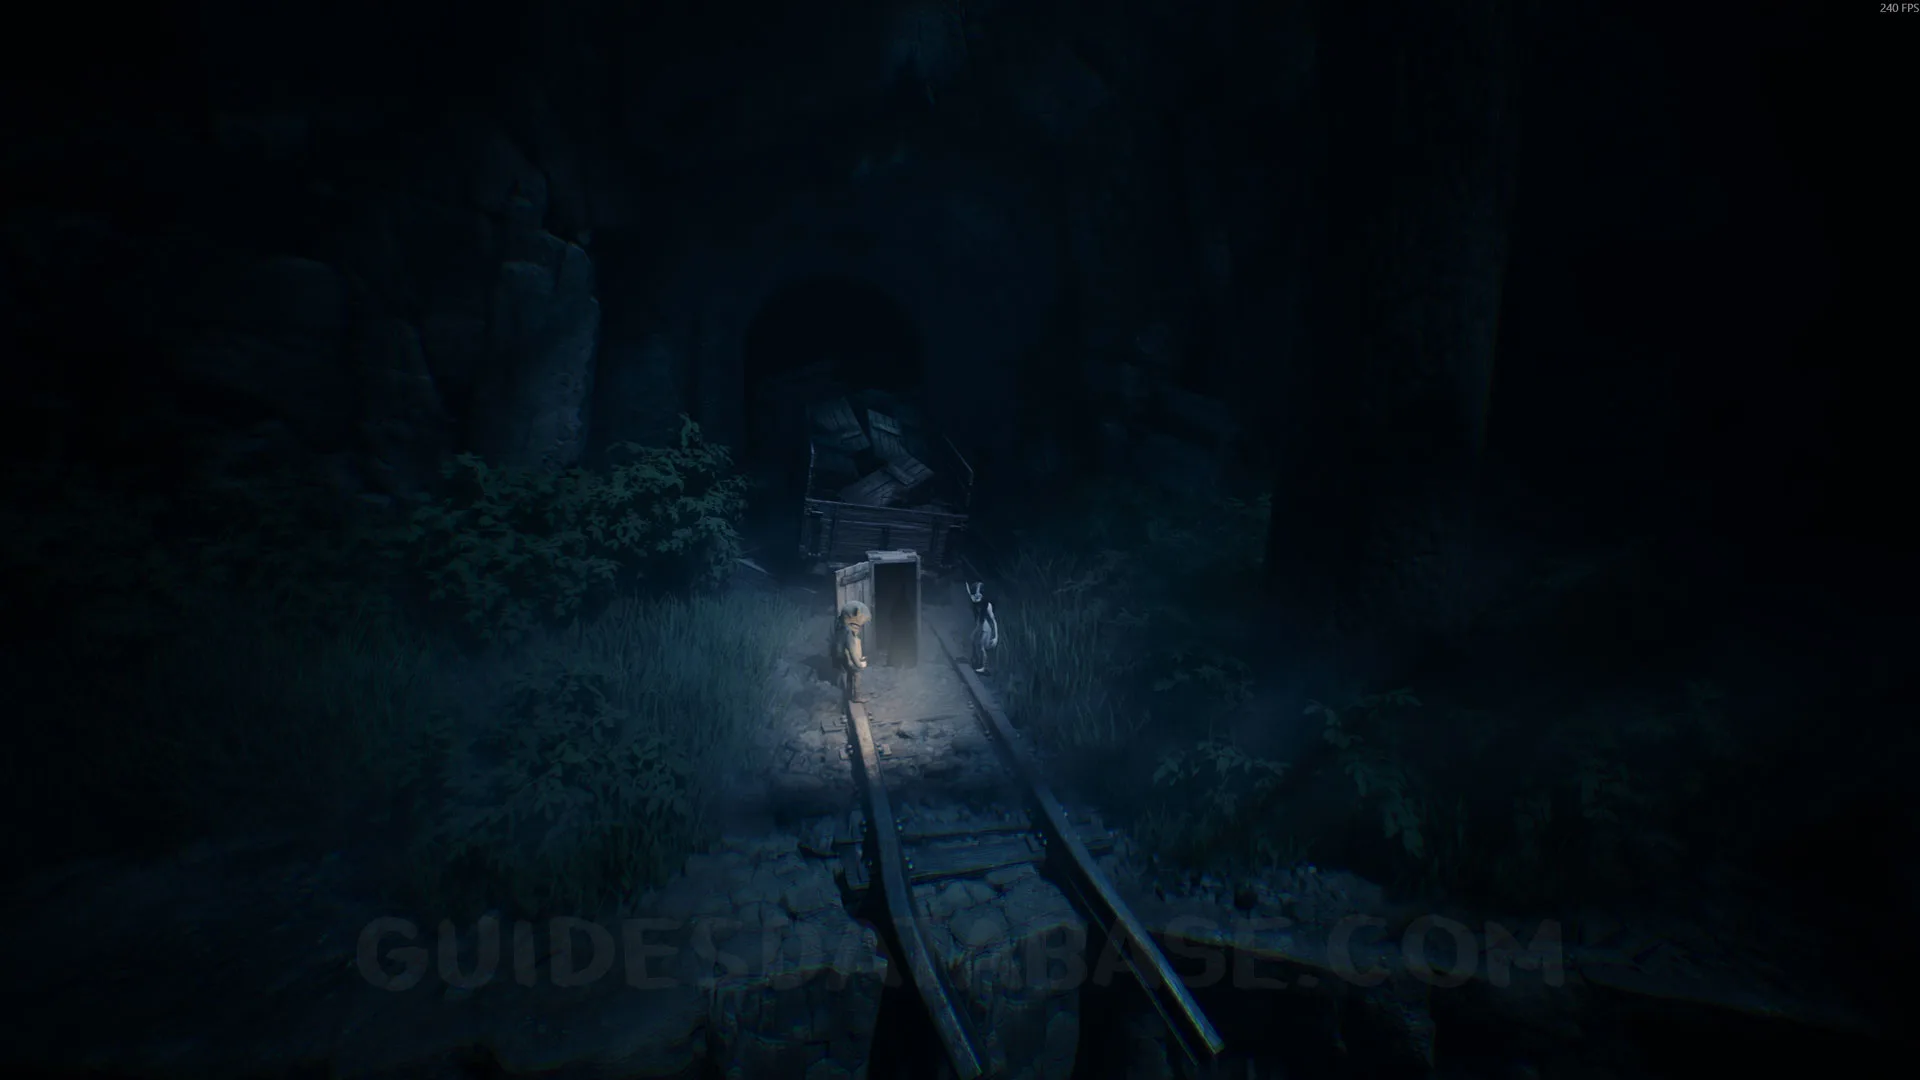 GUIDESDATABASE.COM
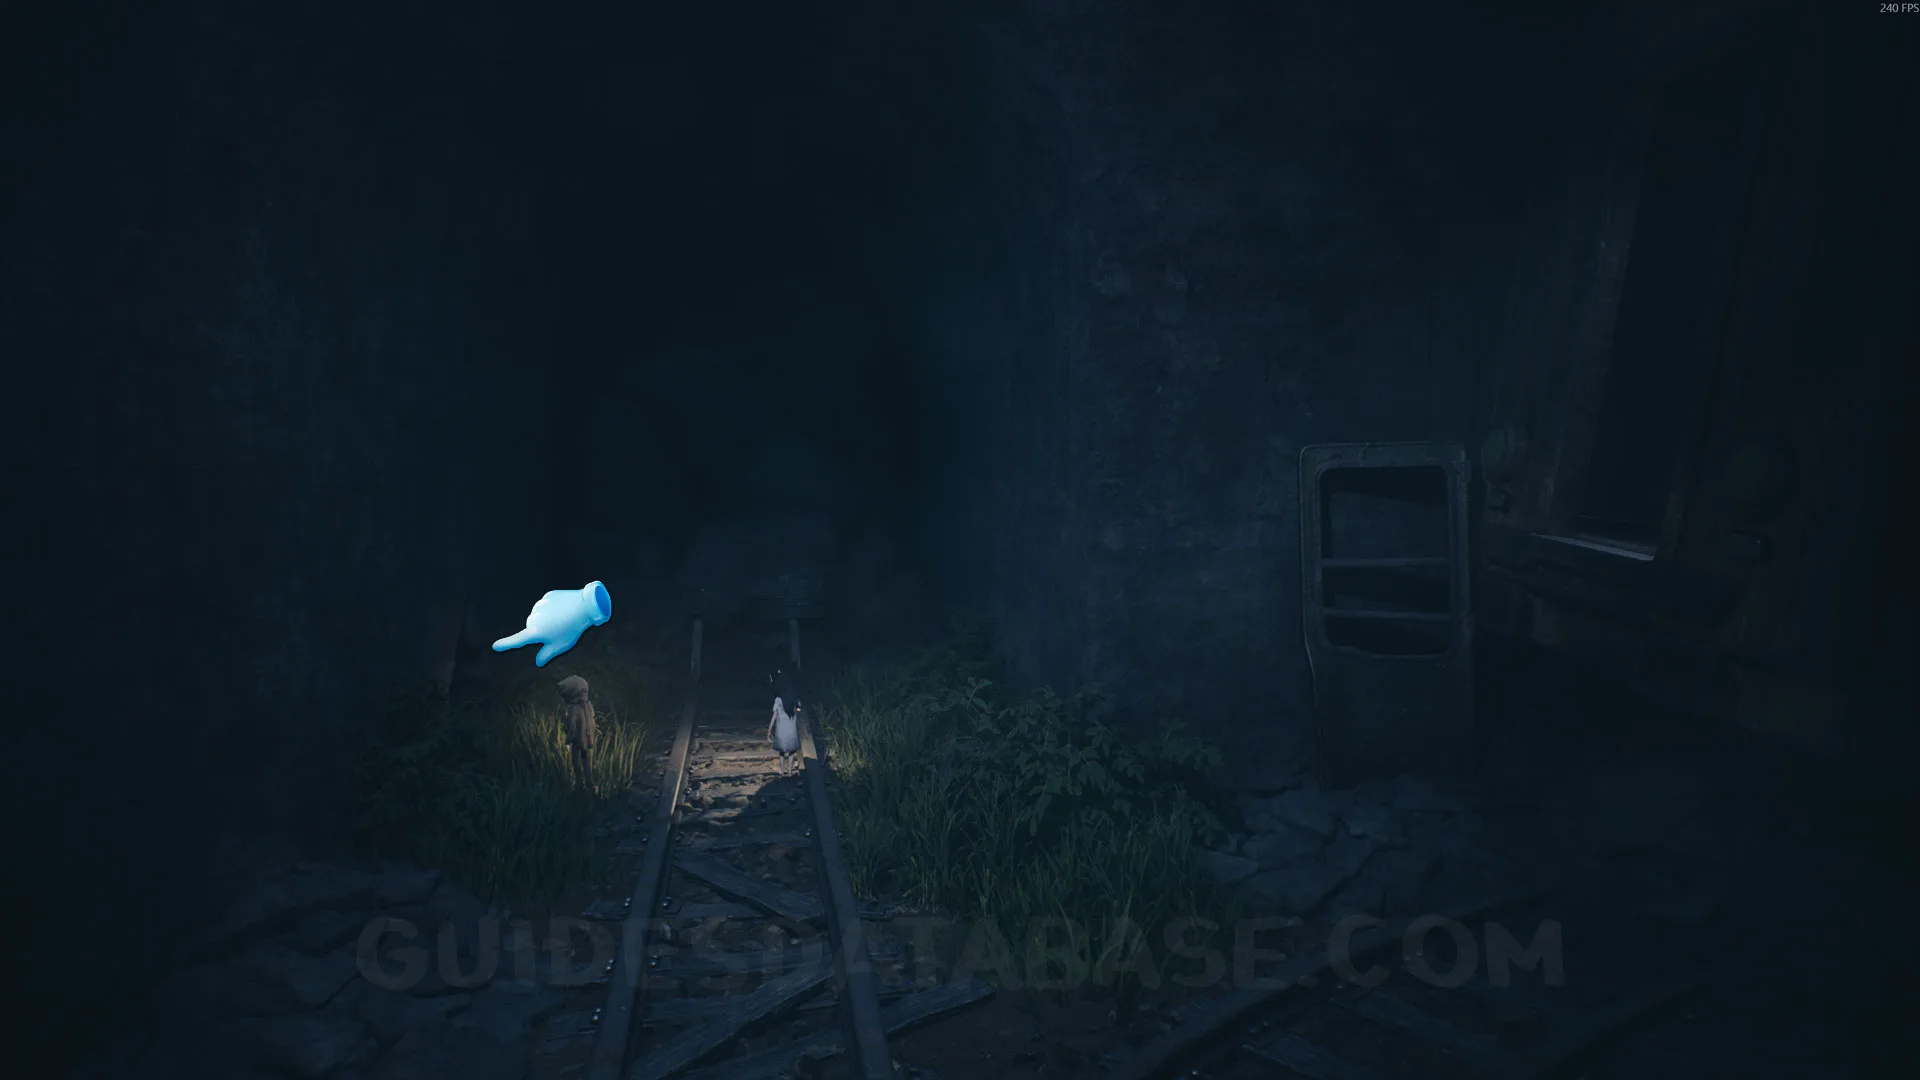
Poster #3 + Secret #8
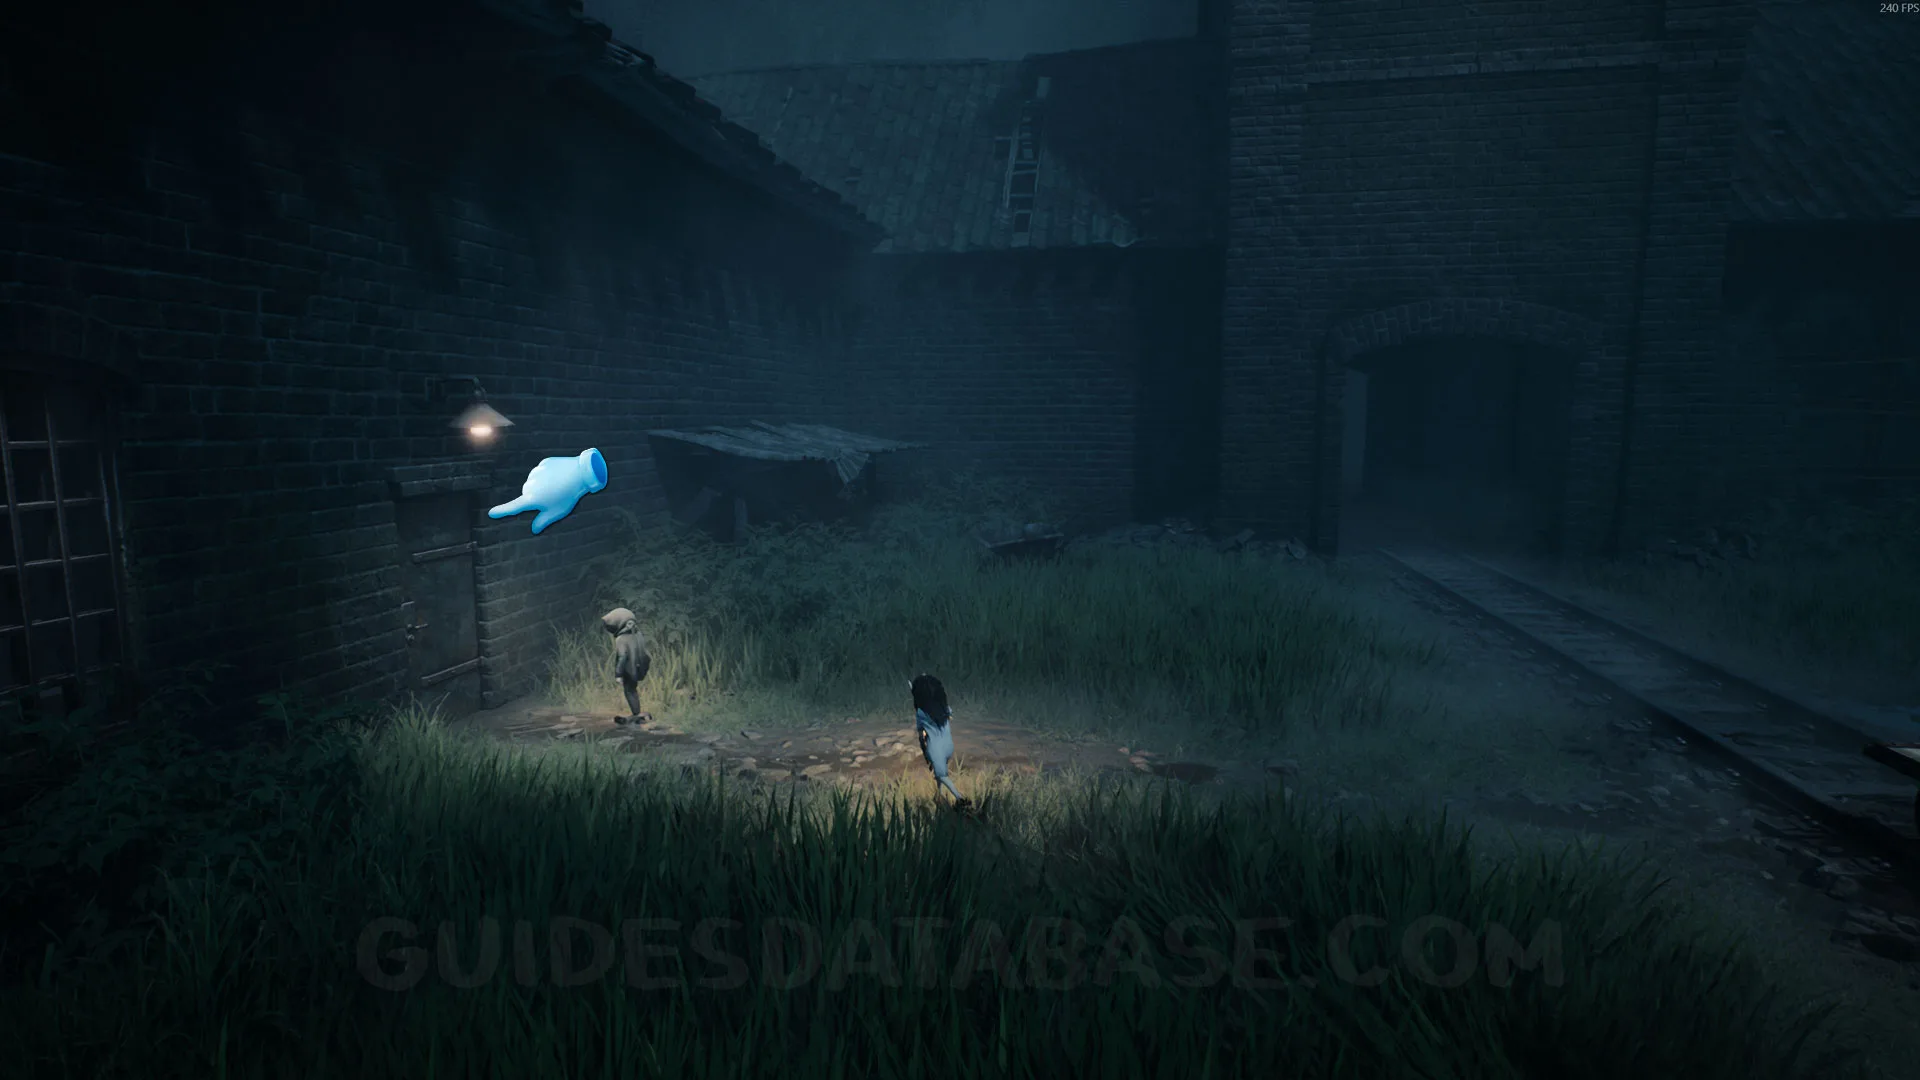
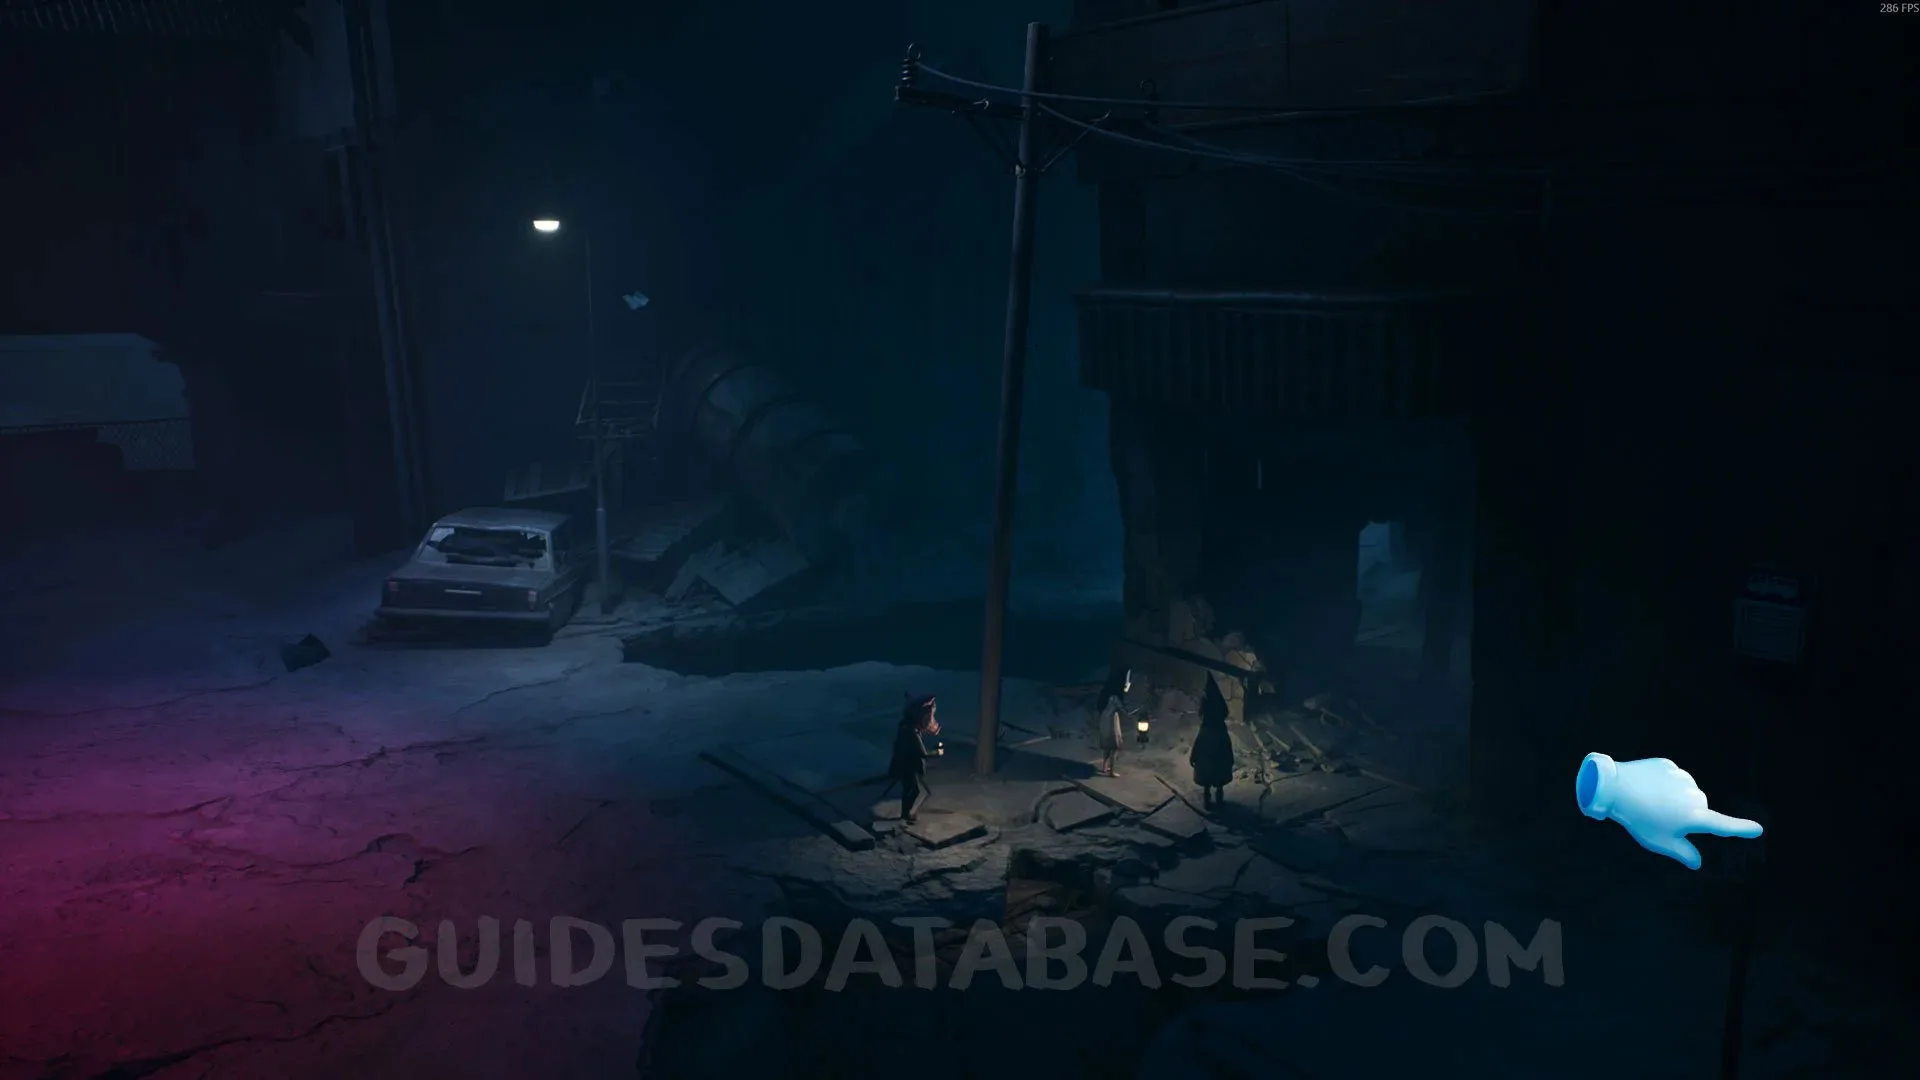
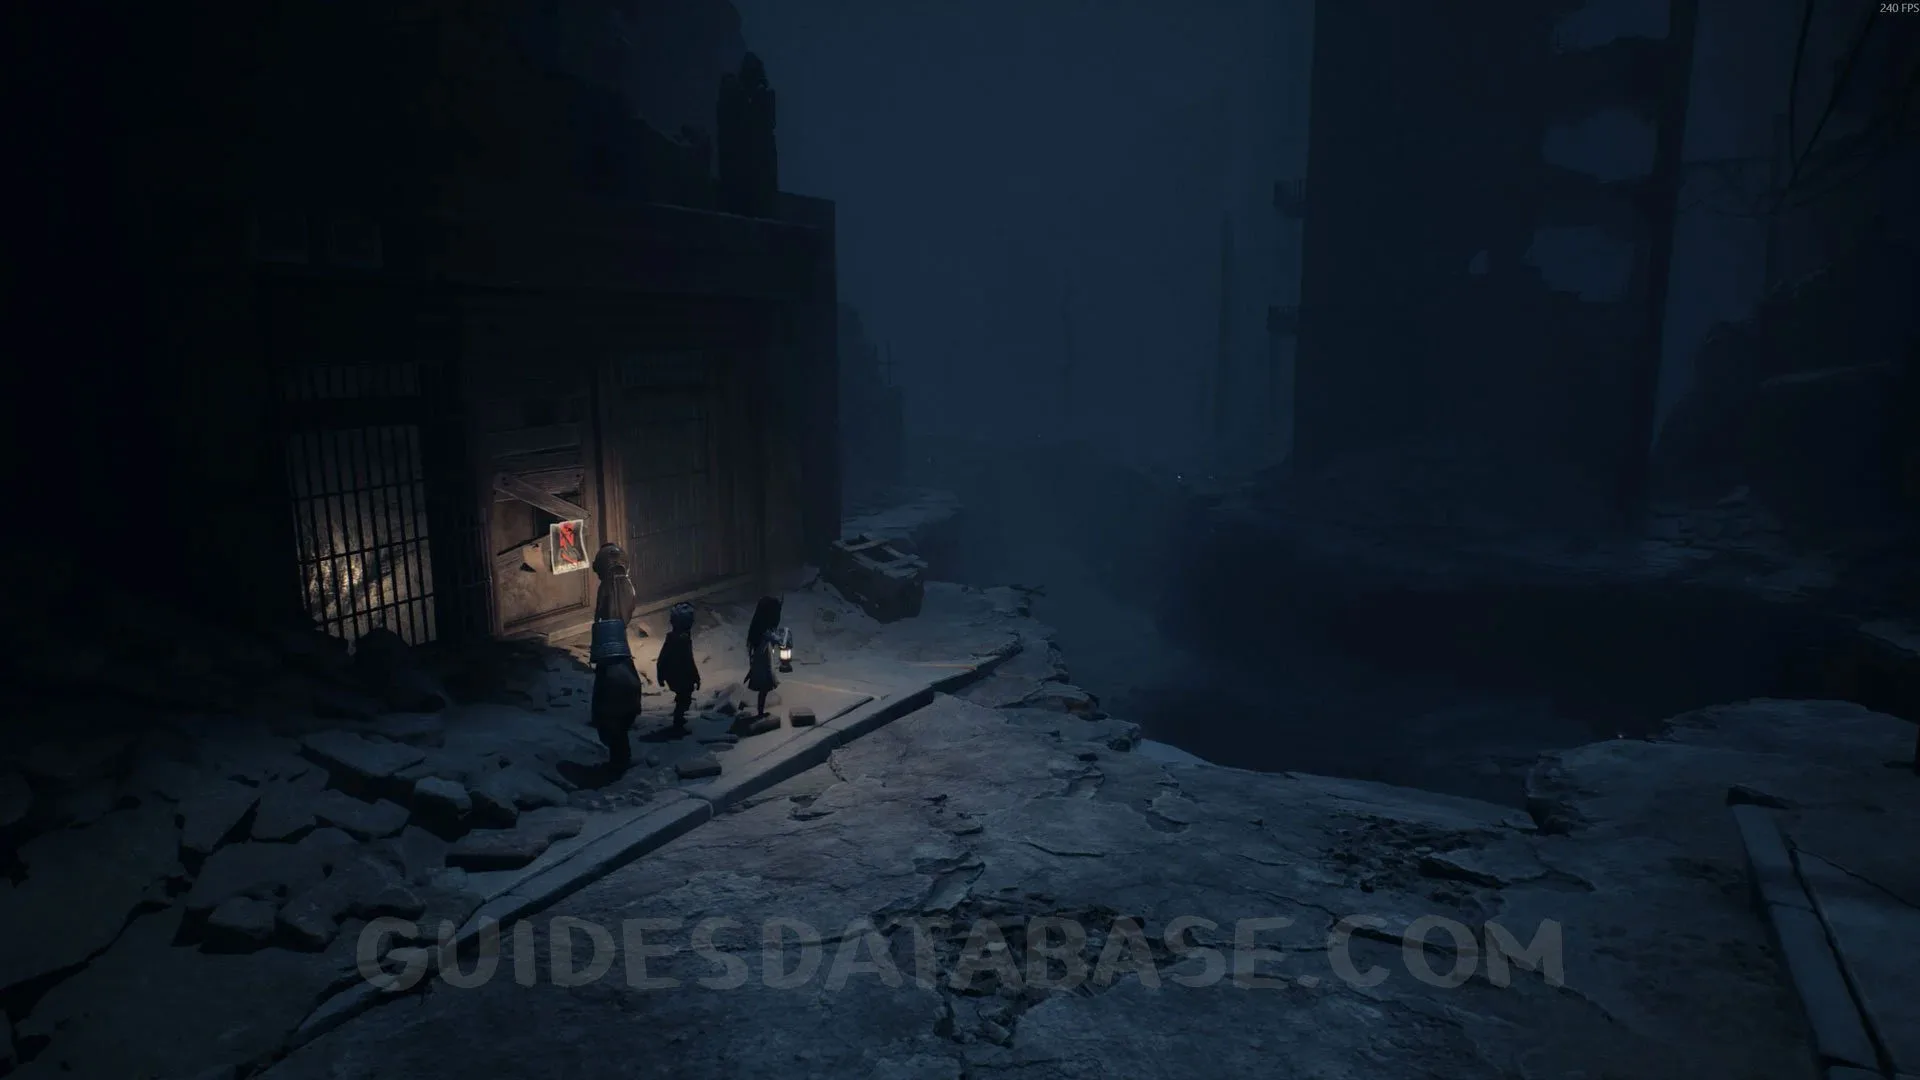
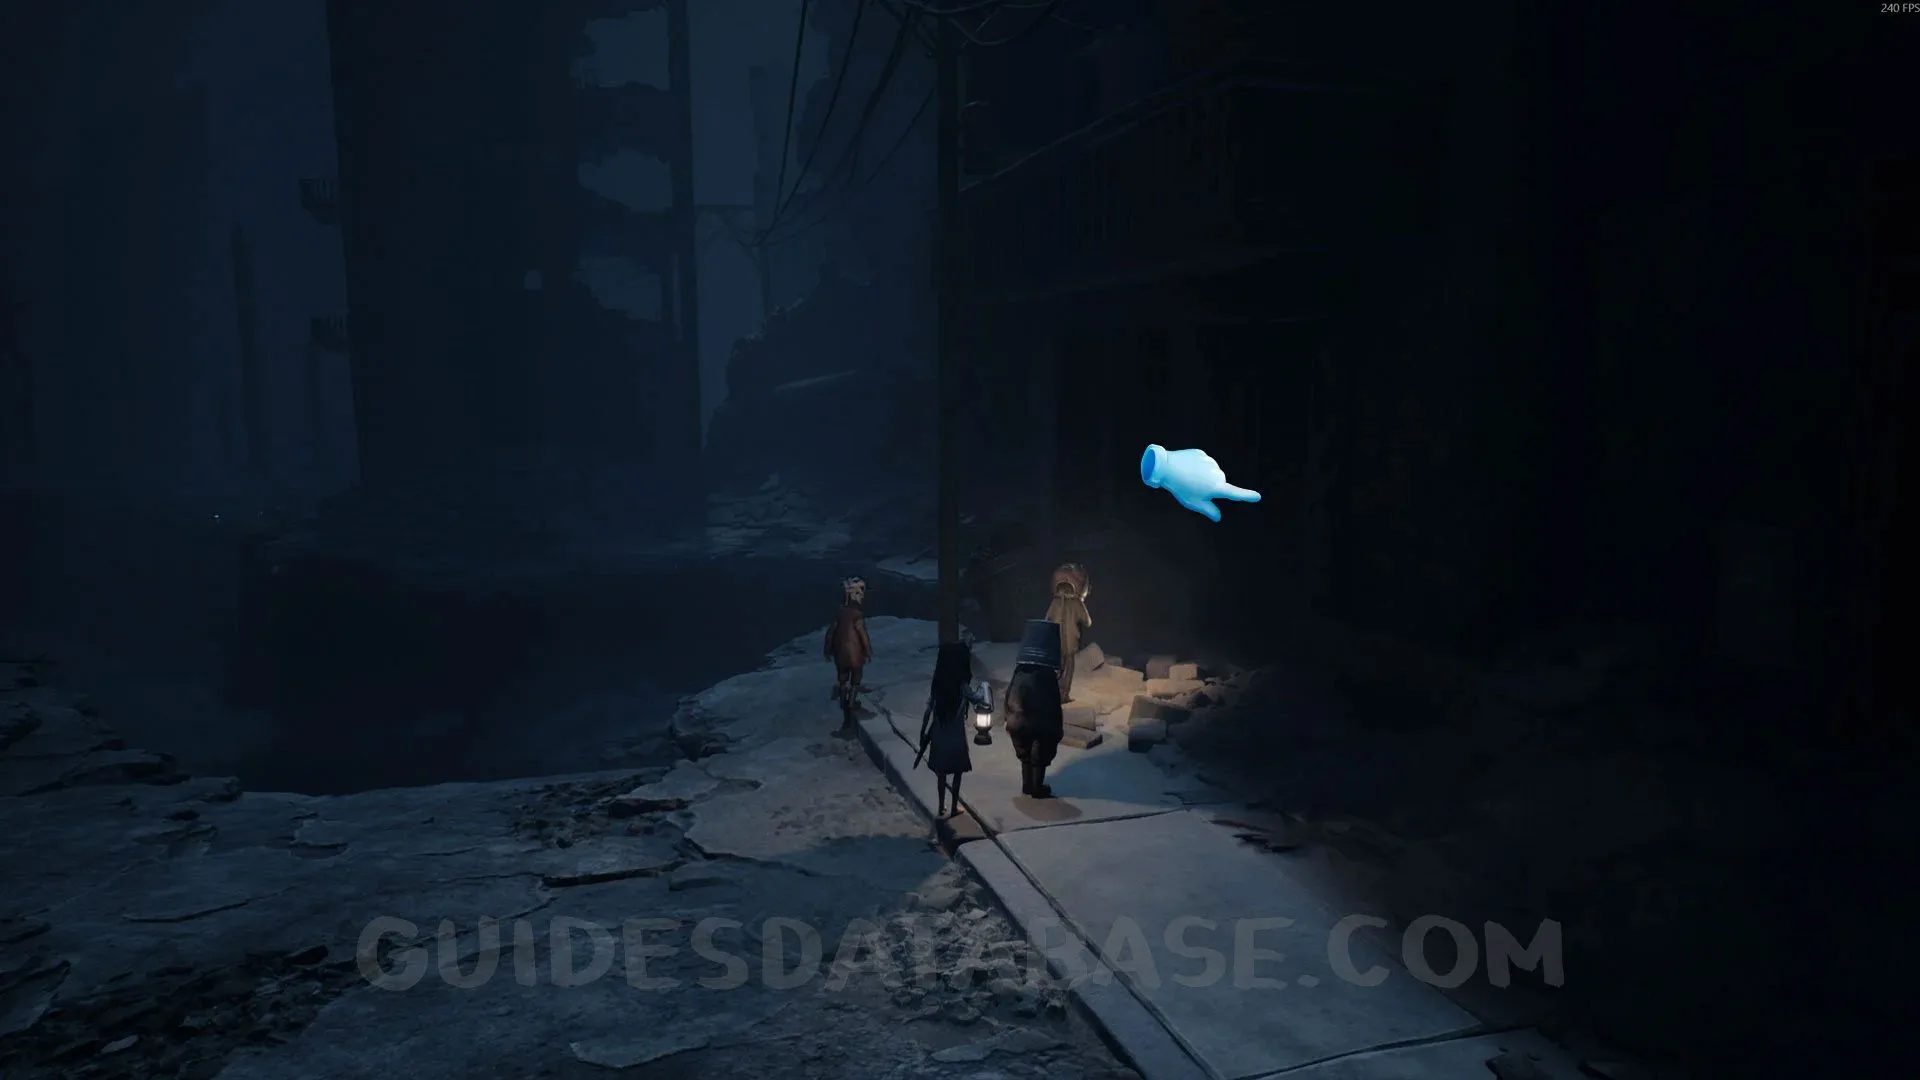
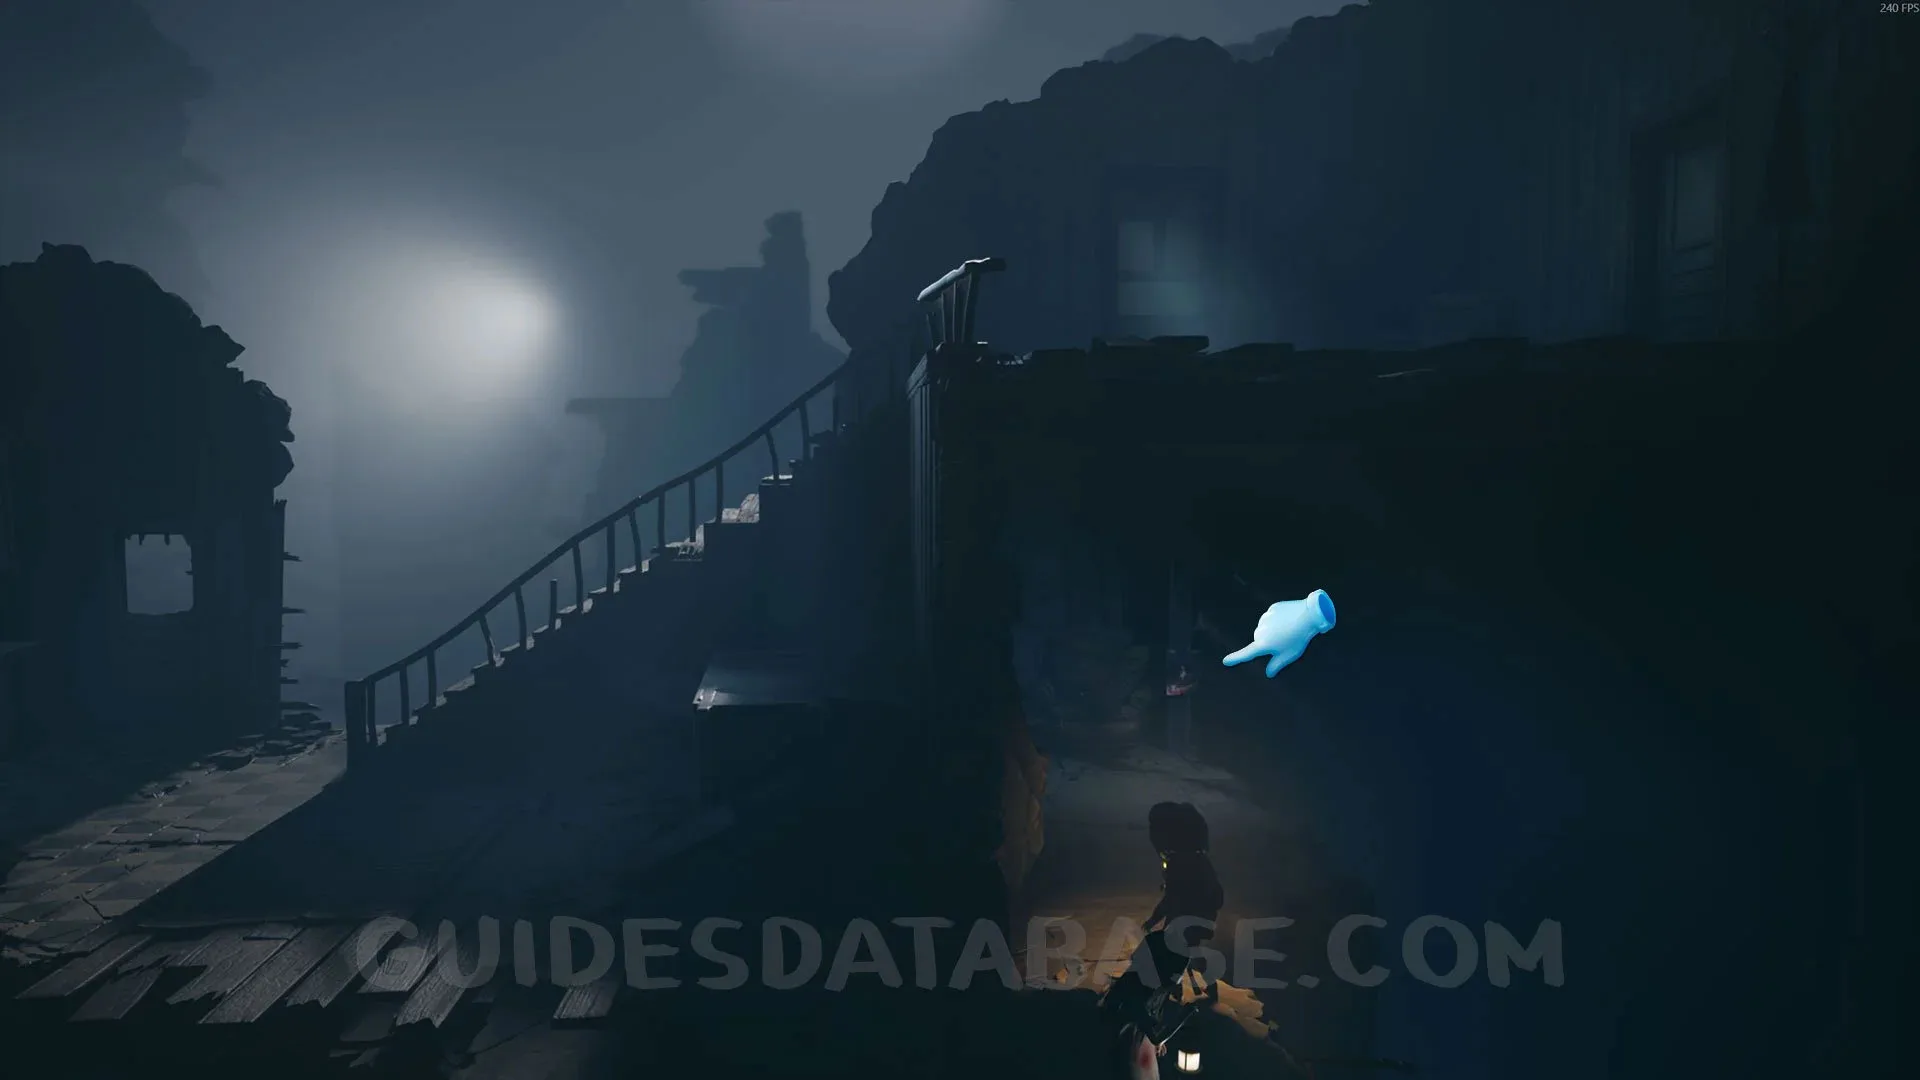
A little later in the chapter (near the end), you’ll be chased by an ice cream truck and your friend will be captured. After the scene where he gets captured, instead of following the road, go left and you’ll see a trailer with this poster attached to it. Pick it up.
 GUIDESDATABASE.COM
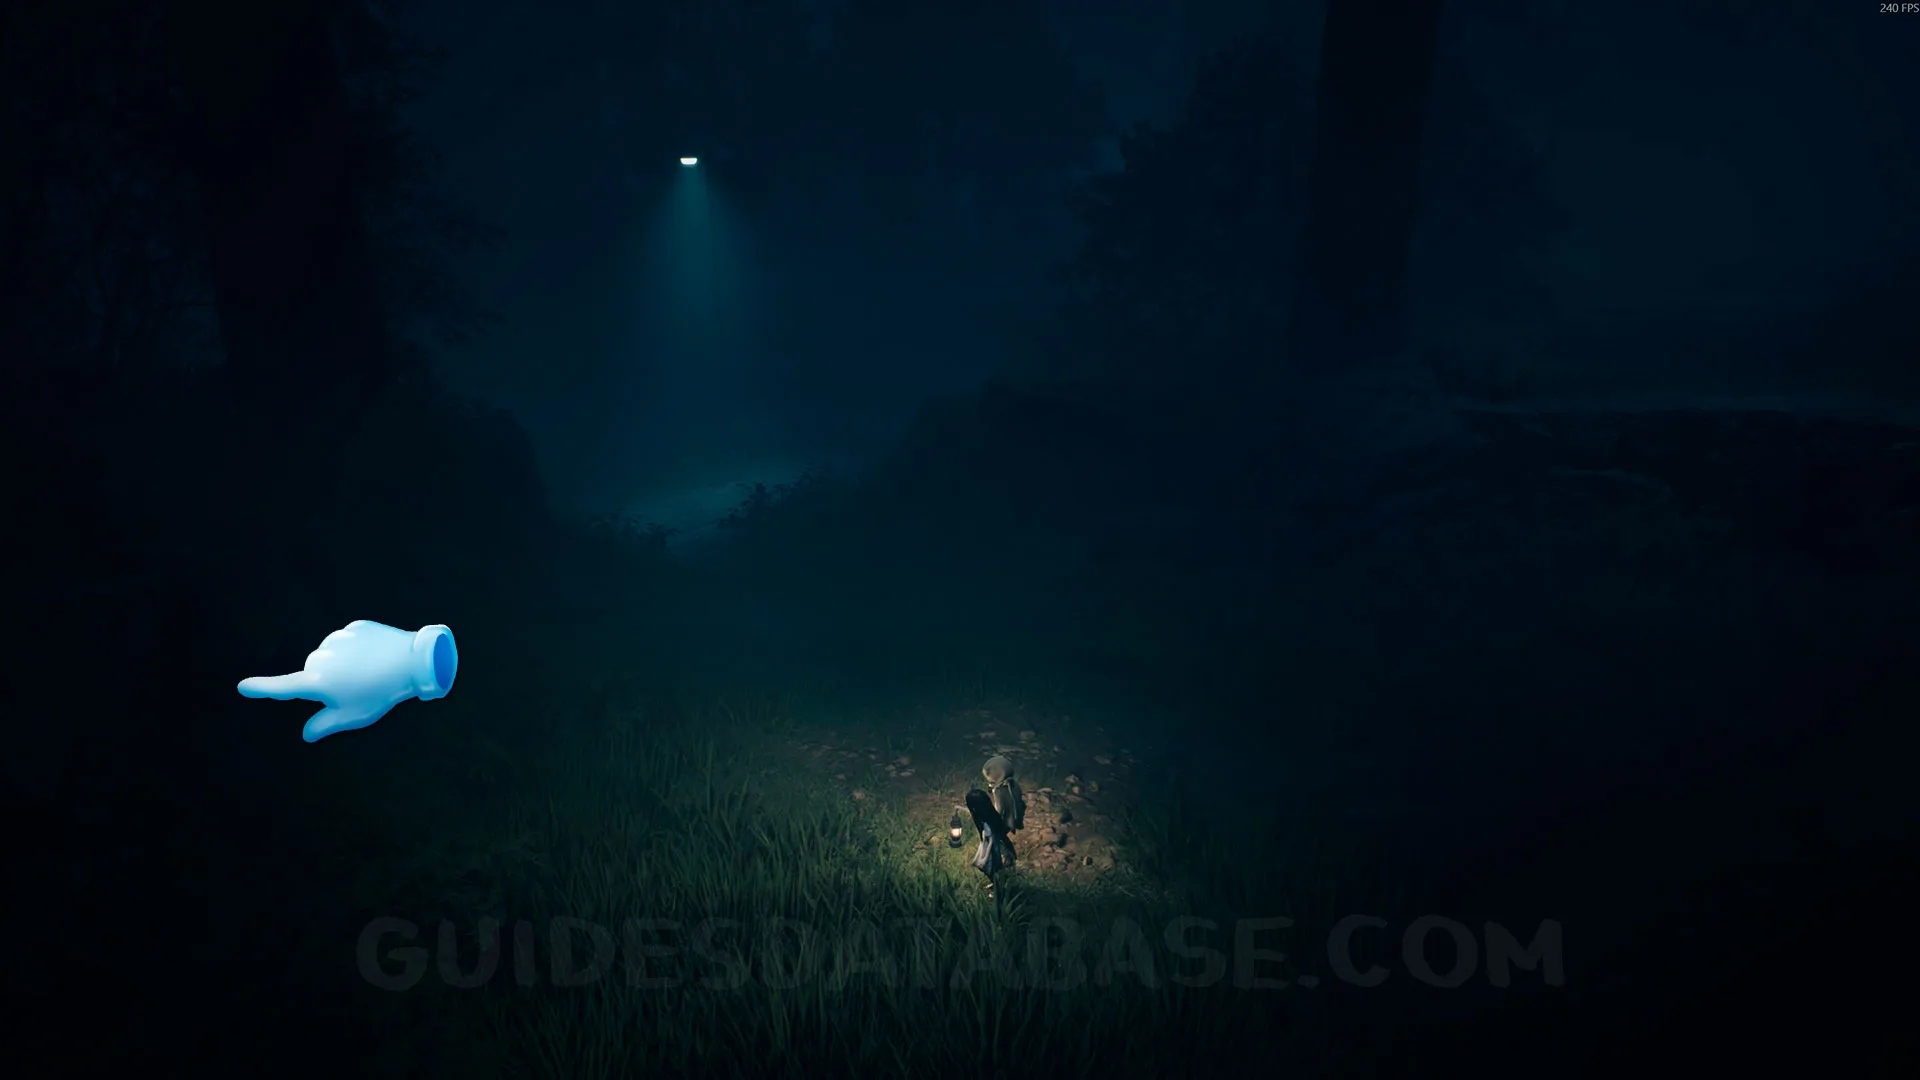 GUIDESDATABASE.COM
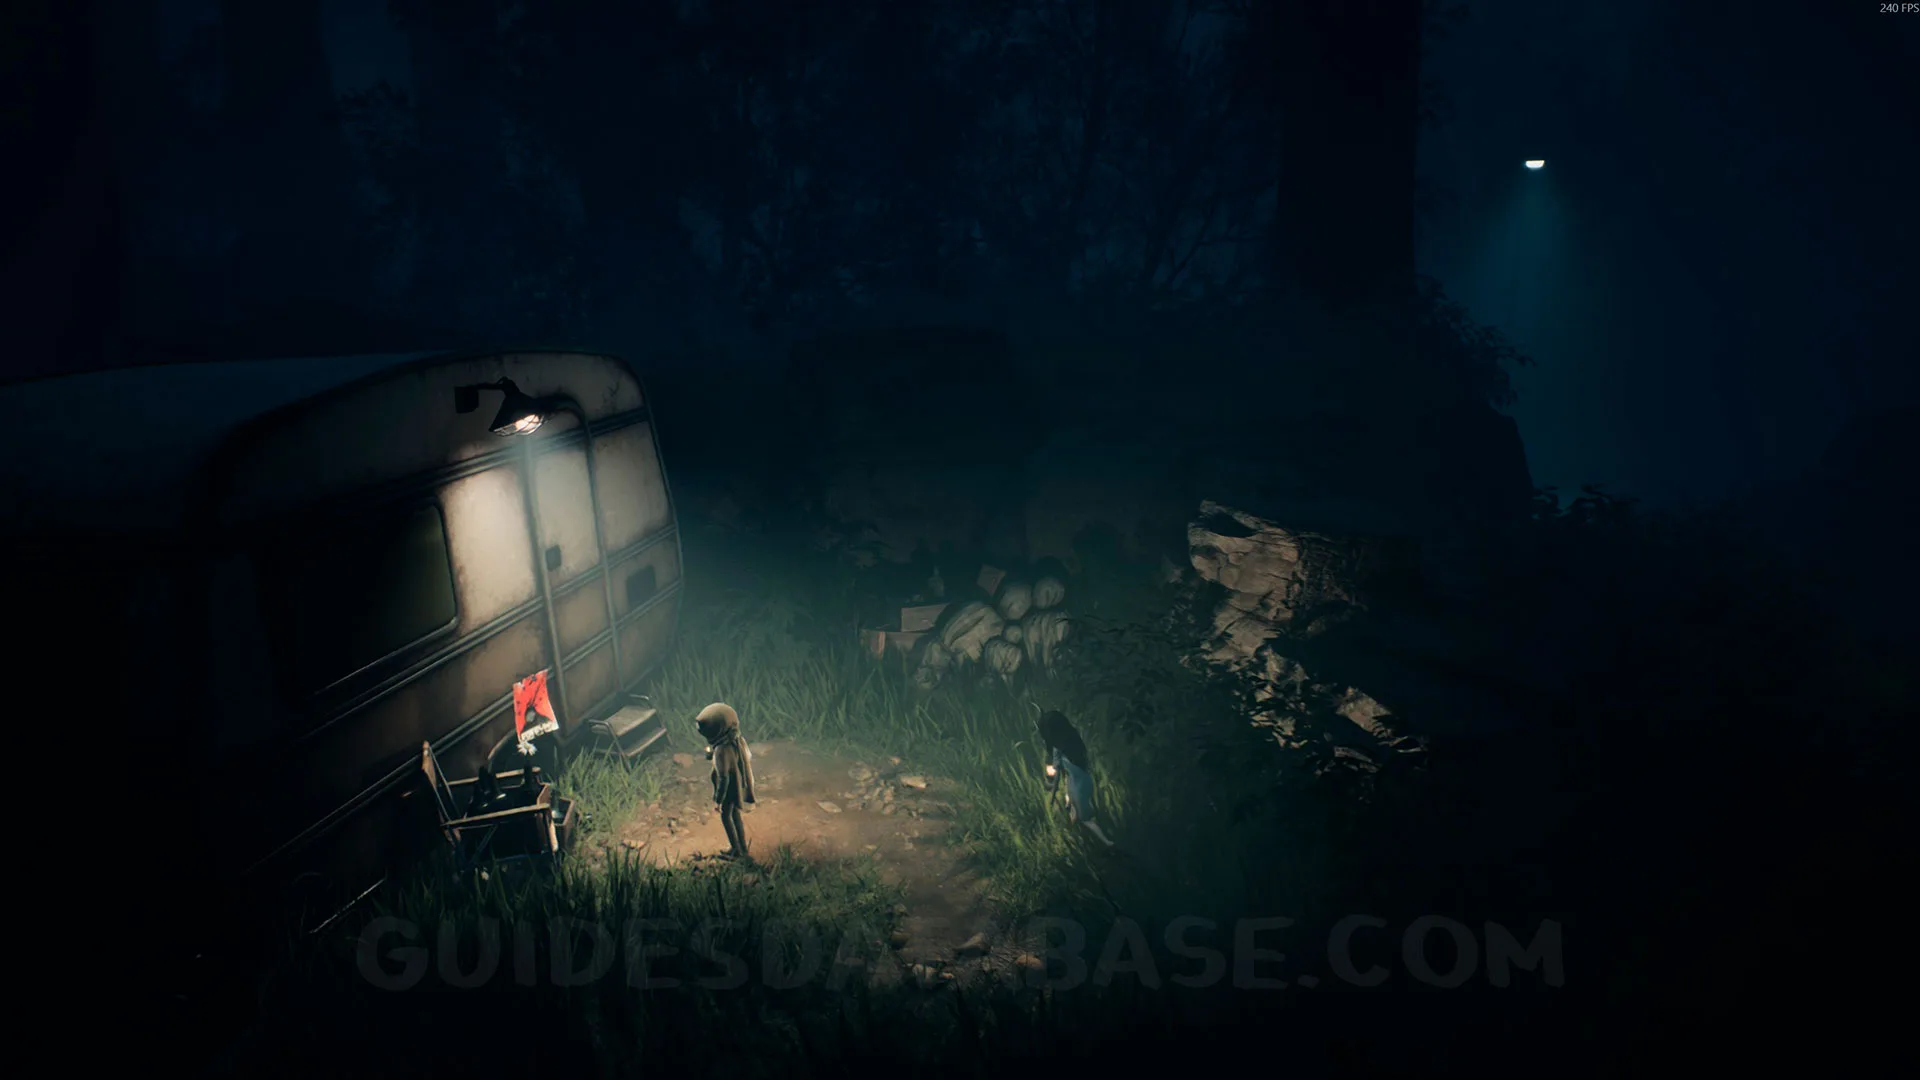 GUIDESDATABASE.COM
Chapter 2: The Cleaning House
Mask #4 + Secret #9
At the start of Chapter 2, open the door on the left and go in. Then crawl through the hole in the wall to find this mask.
 GUIDESDATABASE.COM
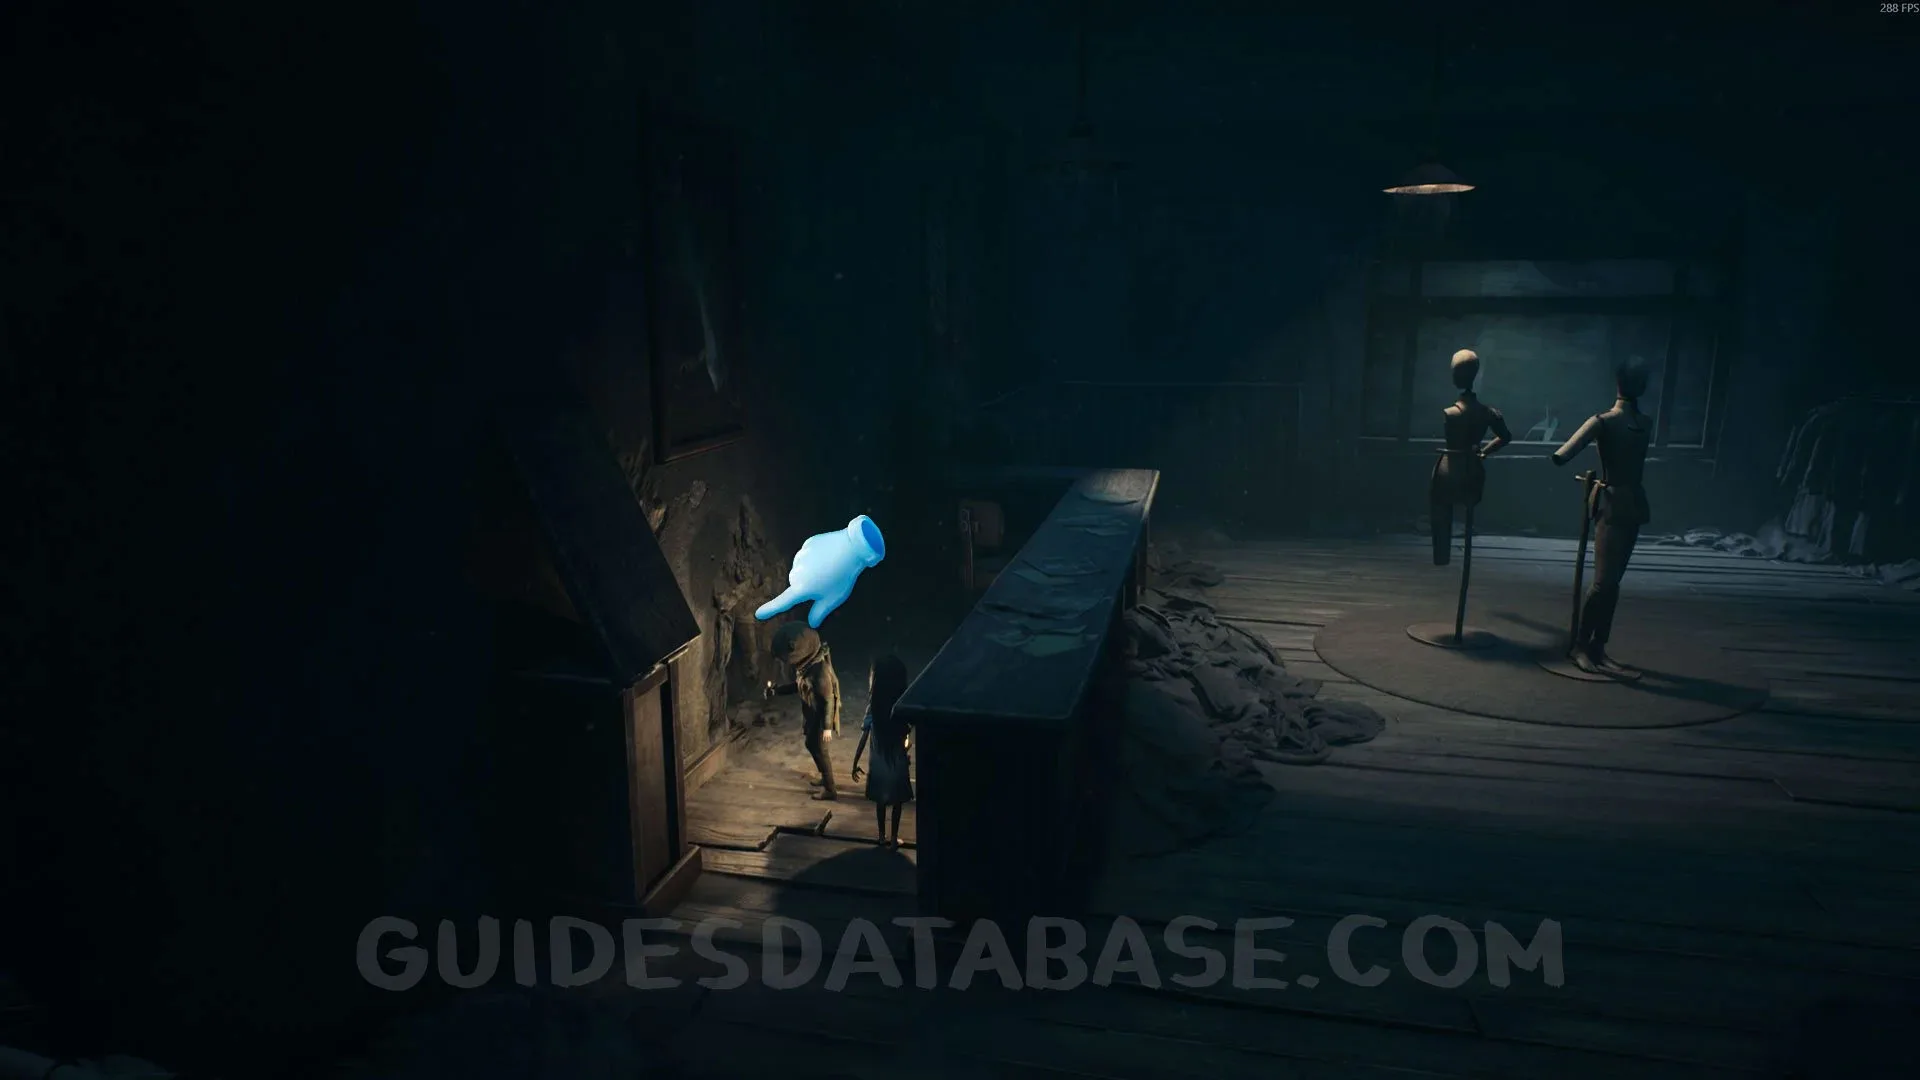 GUIDESDATABASE.COM
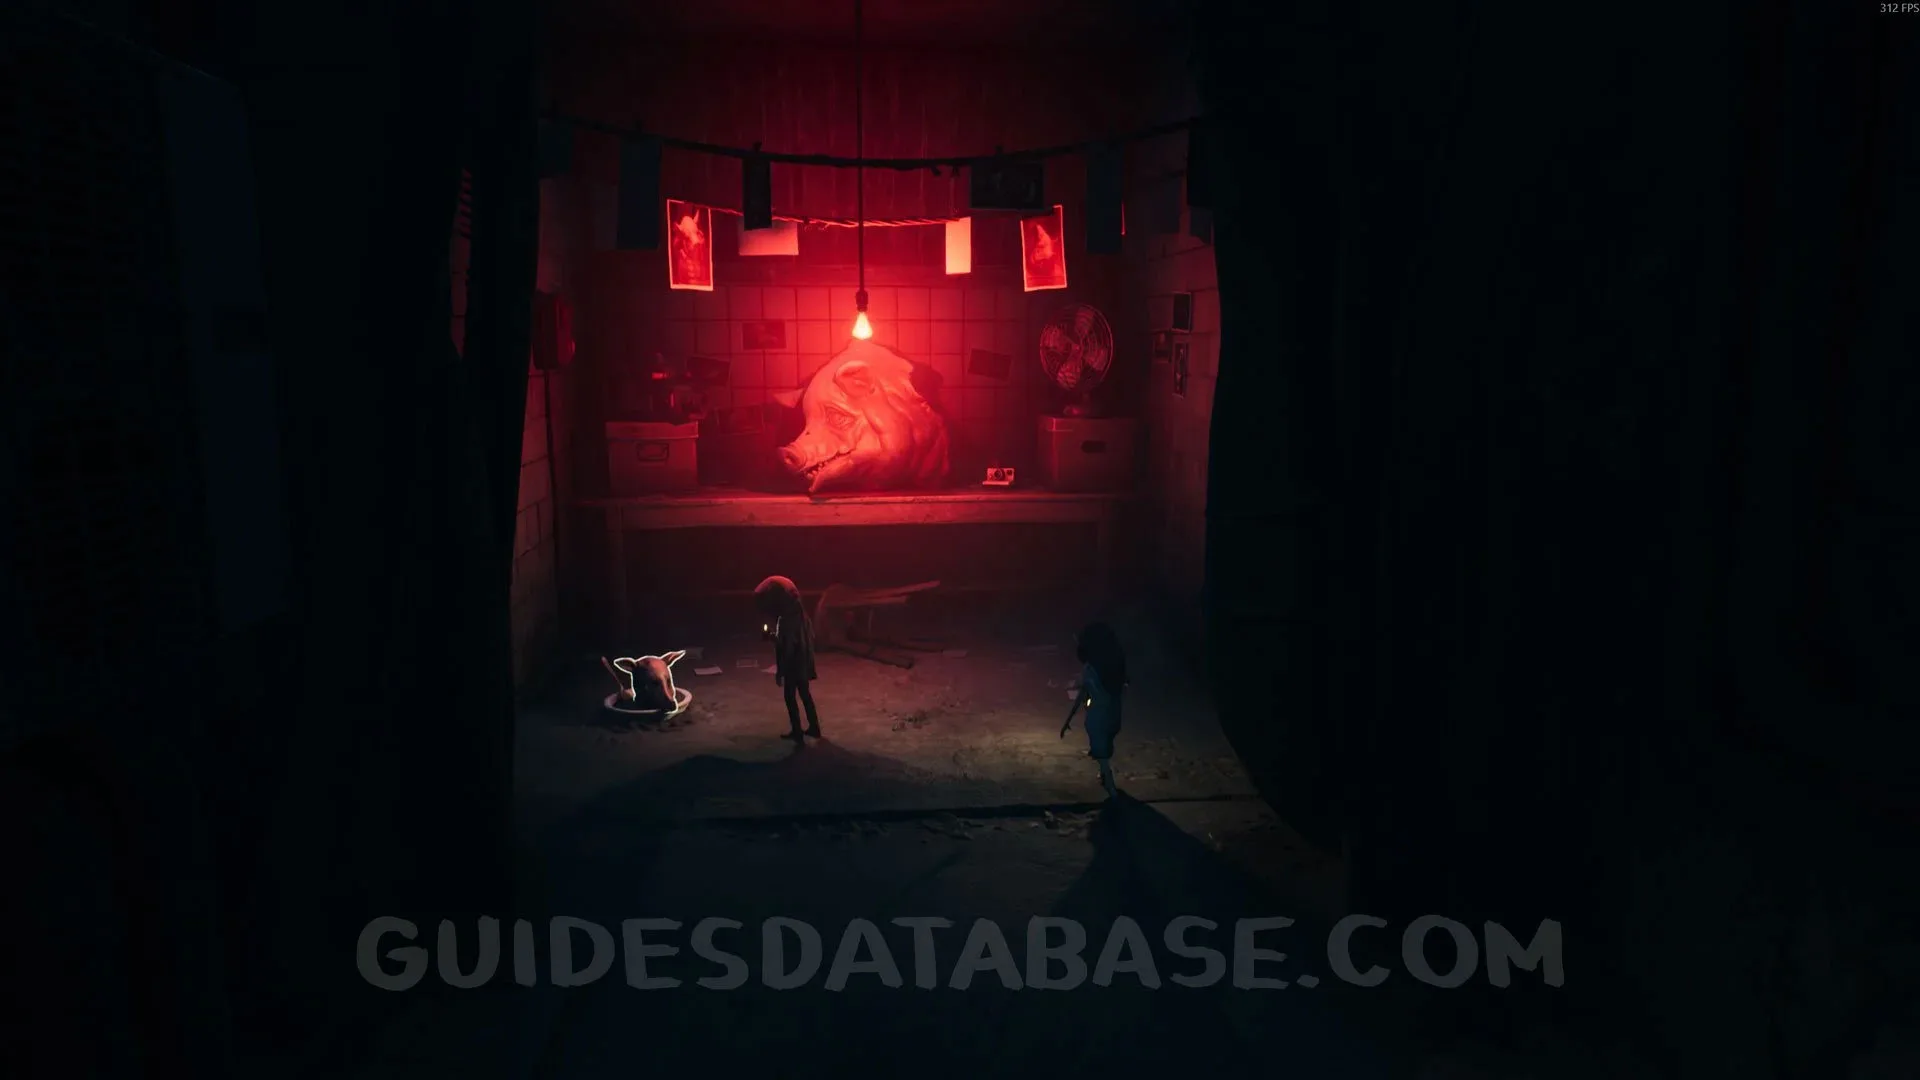 GUIDESDATABASE.COM
Poster #4 + Secret #10
Go into the cinema, and you will see this poster attached to the wall next to the entrance door.
 GUIDESDATABASE.COM
 GUIDESDATABASE.COM
Trophy ‘‘Rock ‘n Pop’’
Pick up the brick next to the entrance door and throw it at the popcorn machine to get the trophy.
 GUIDESDATABASE.COM
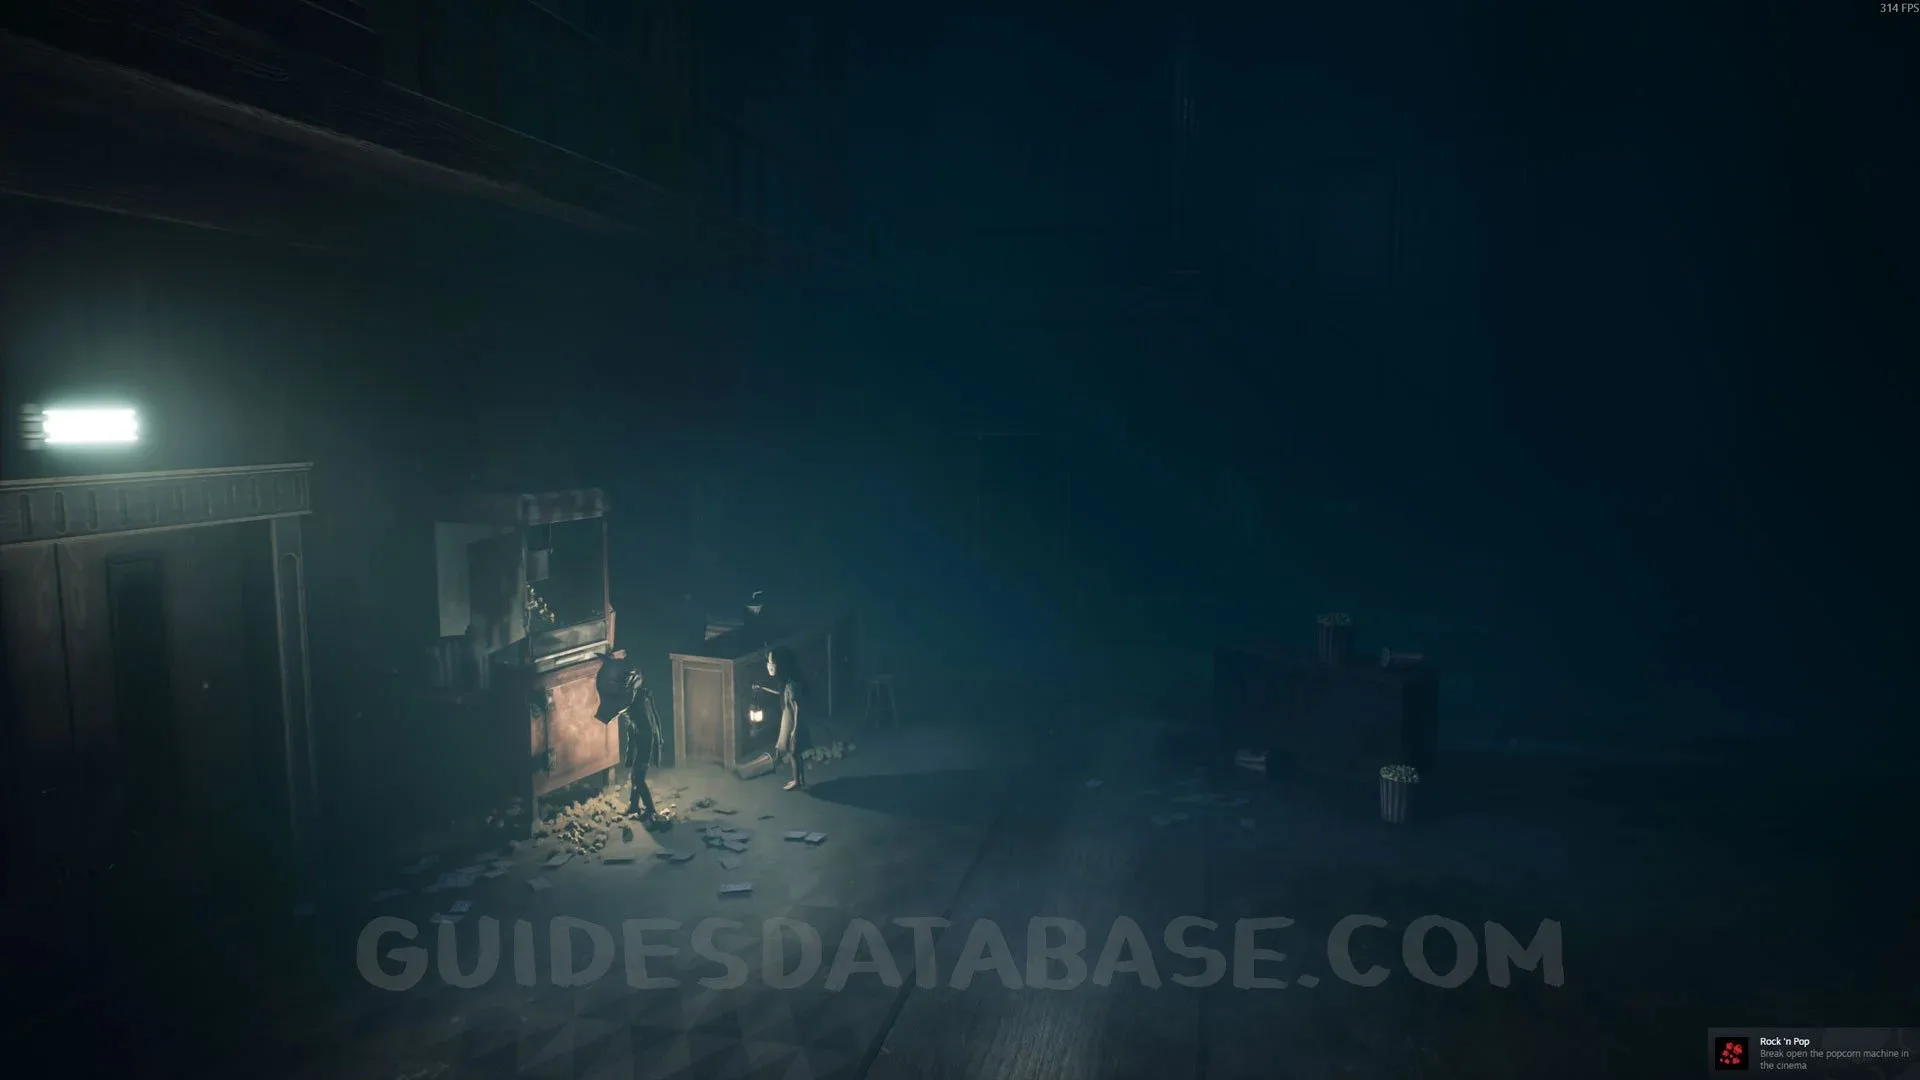 GUIDESDATABASE.COM
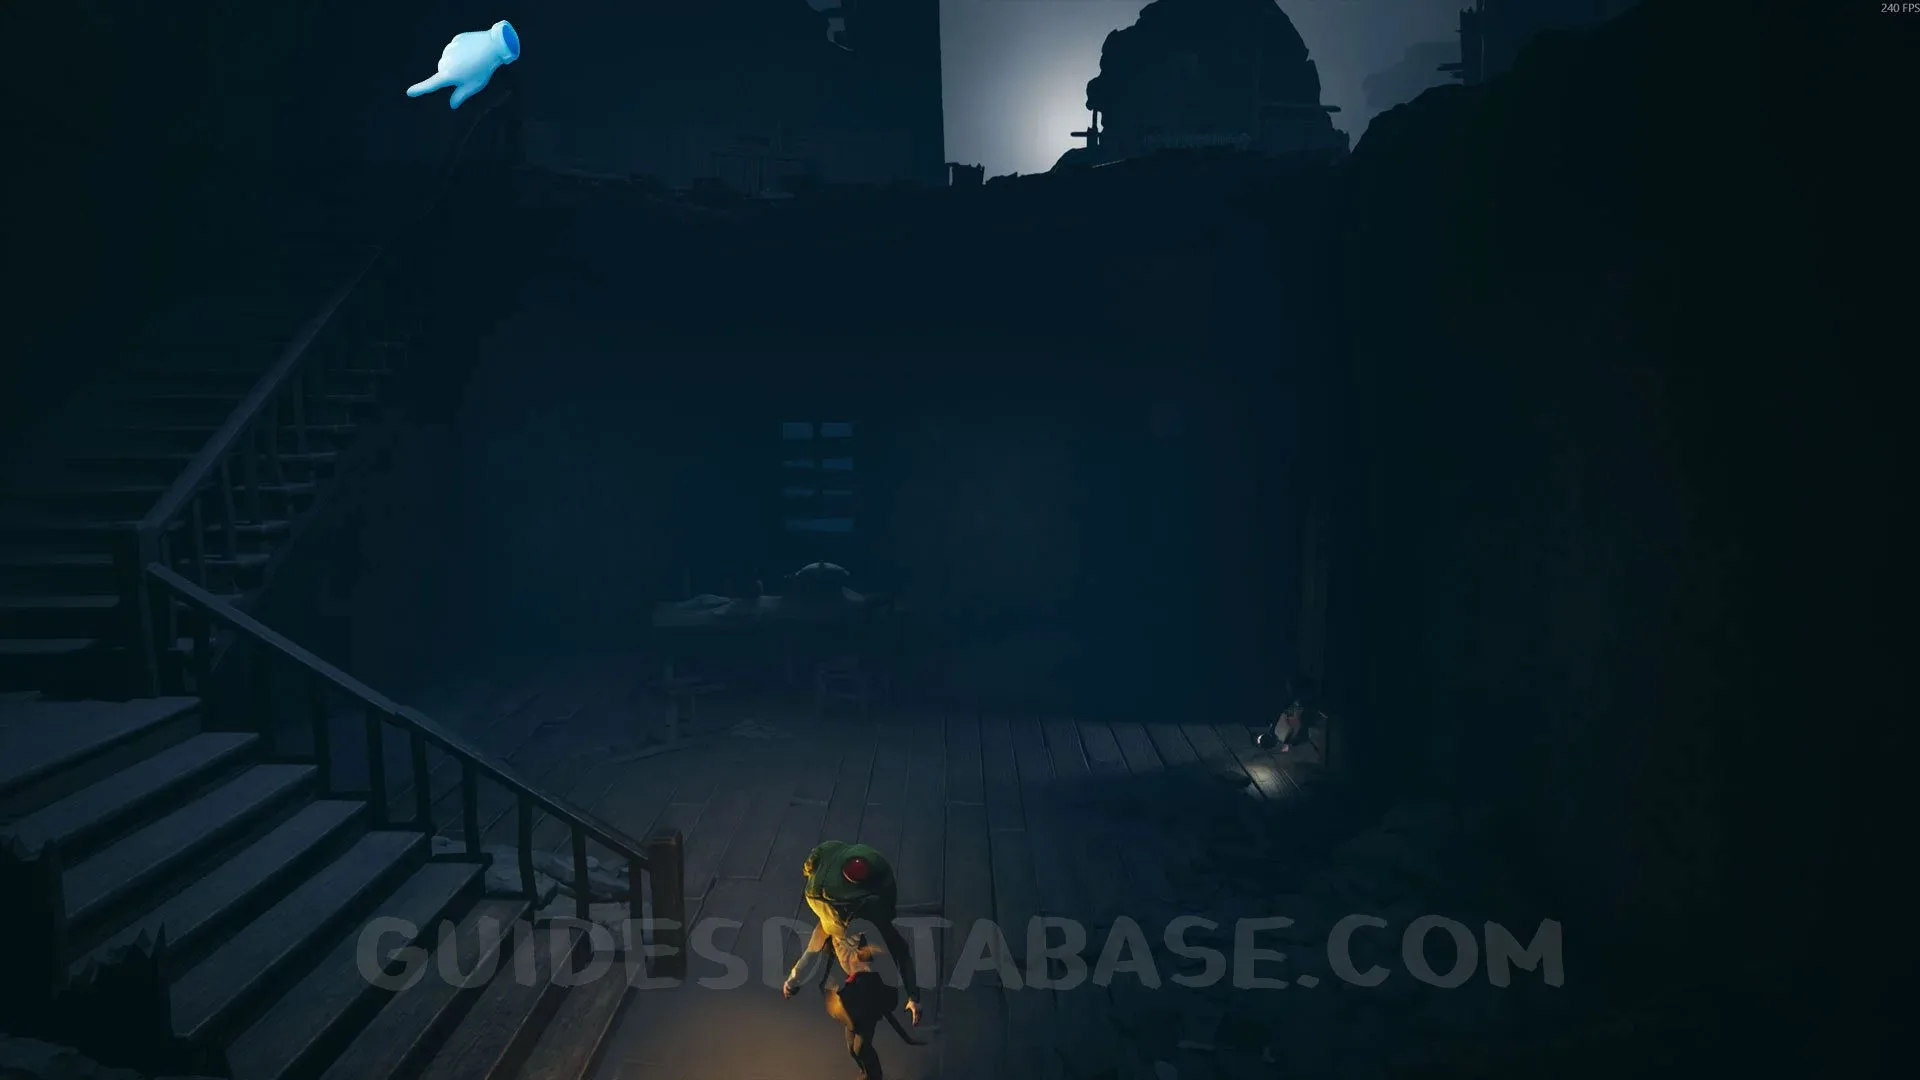
Rest Your Legs #4
When you reach the courtyard, you will see a sofa. Sit on it.
 GUIDESDATABASE.COM
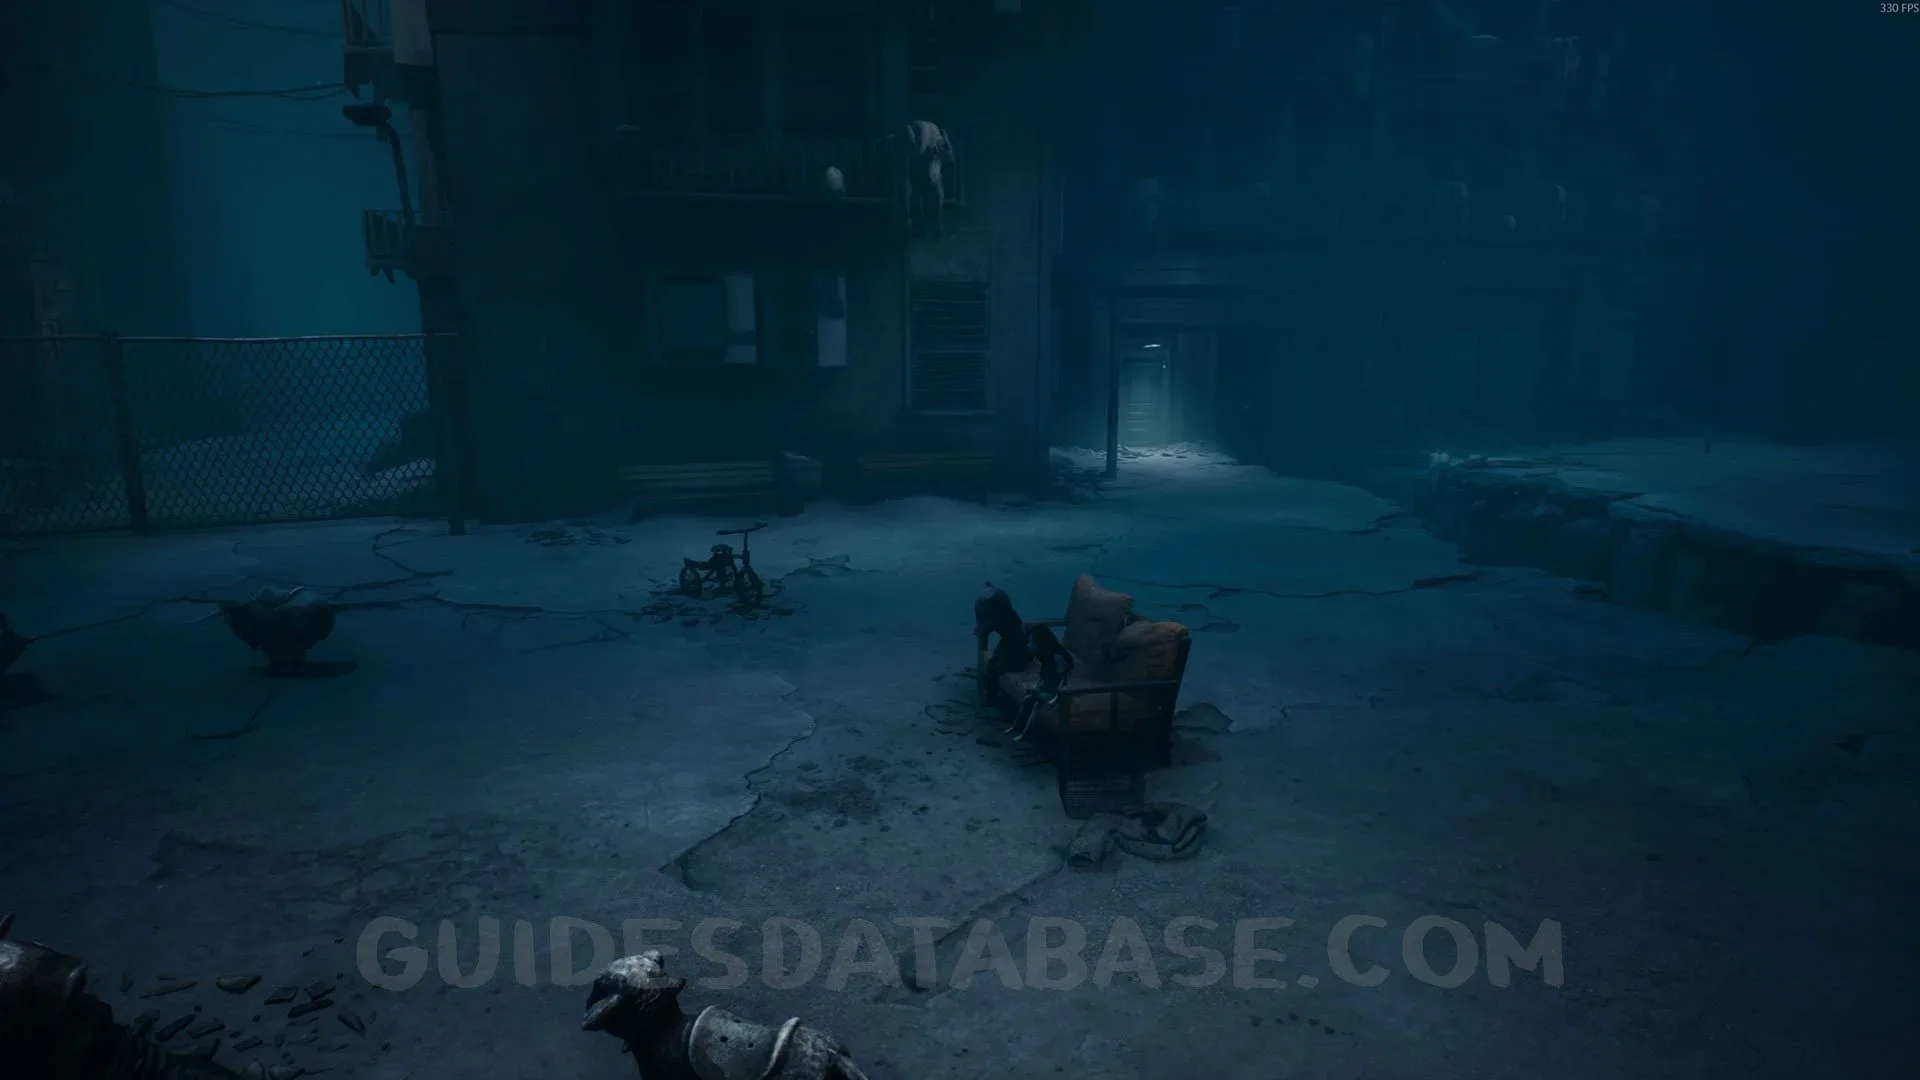 GUIDESDATABASE.COM
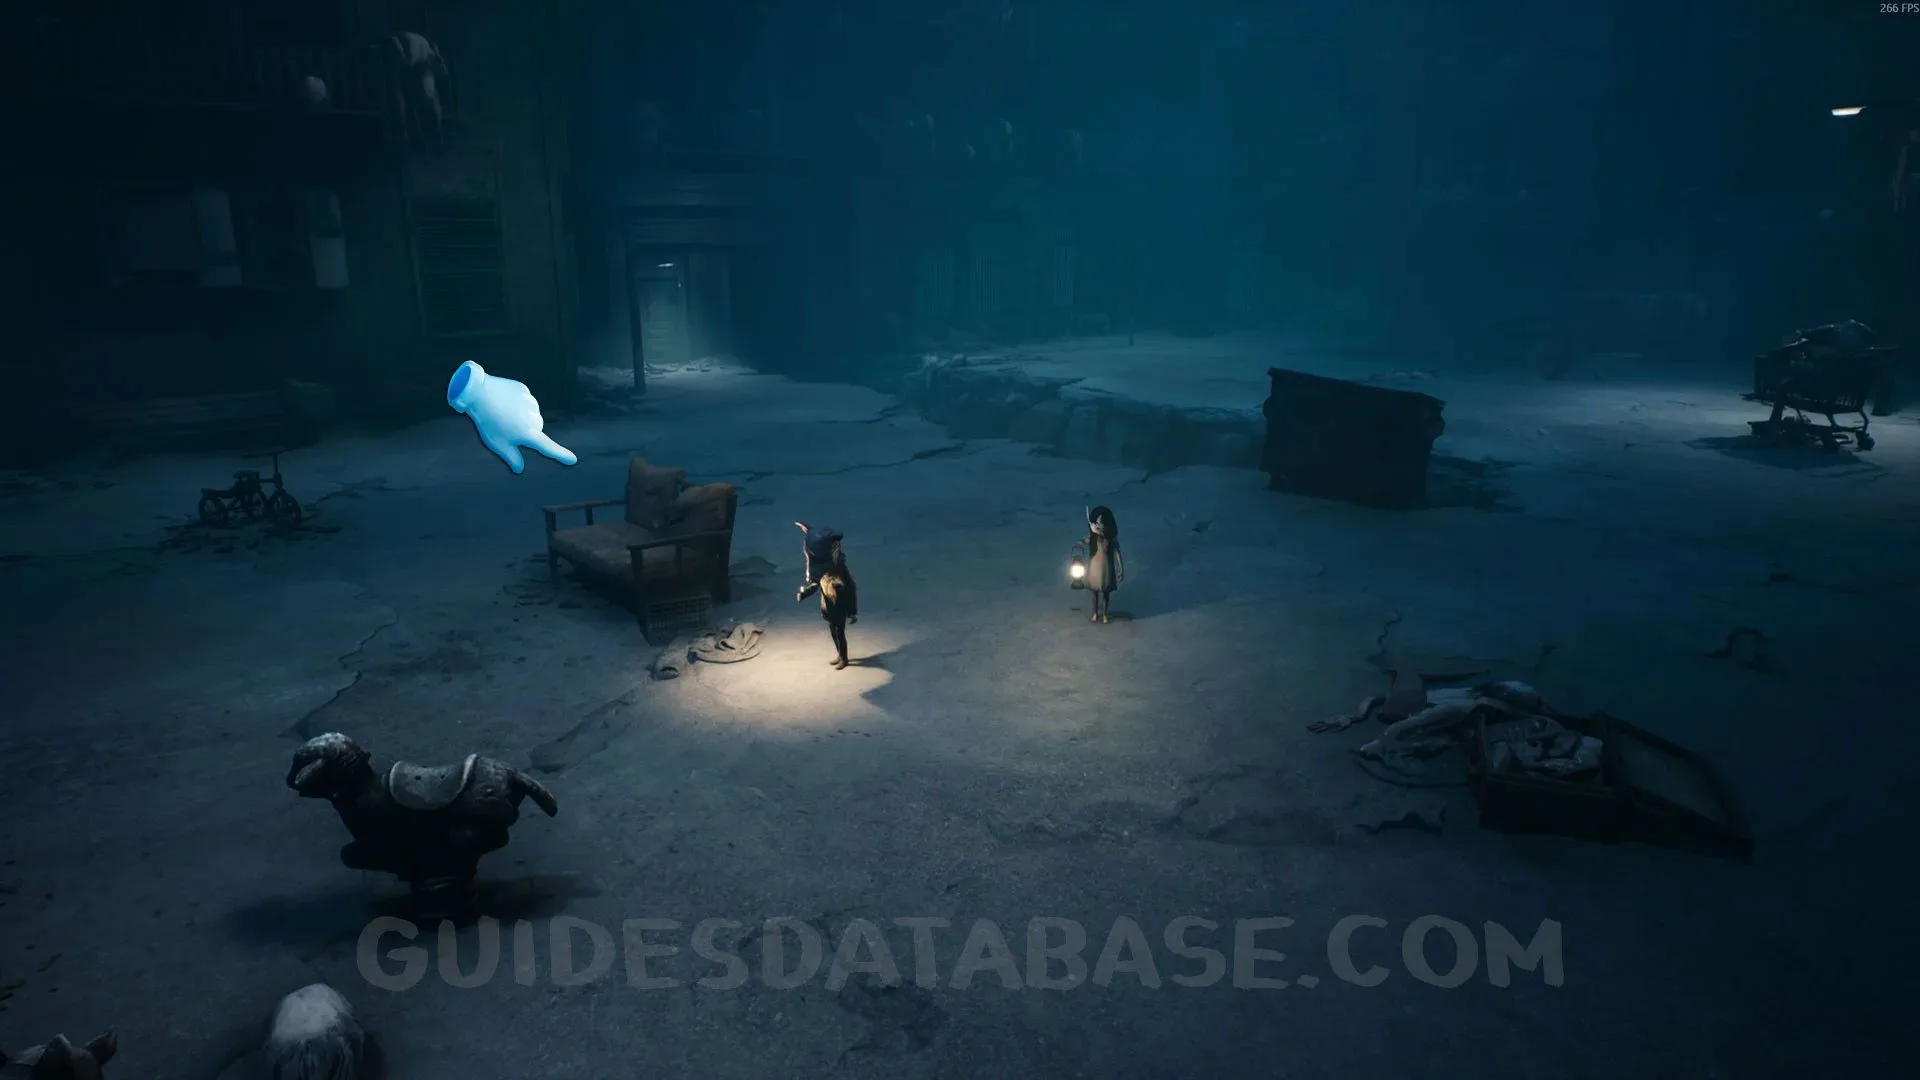
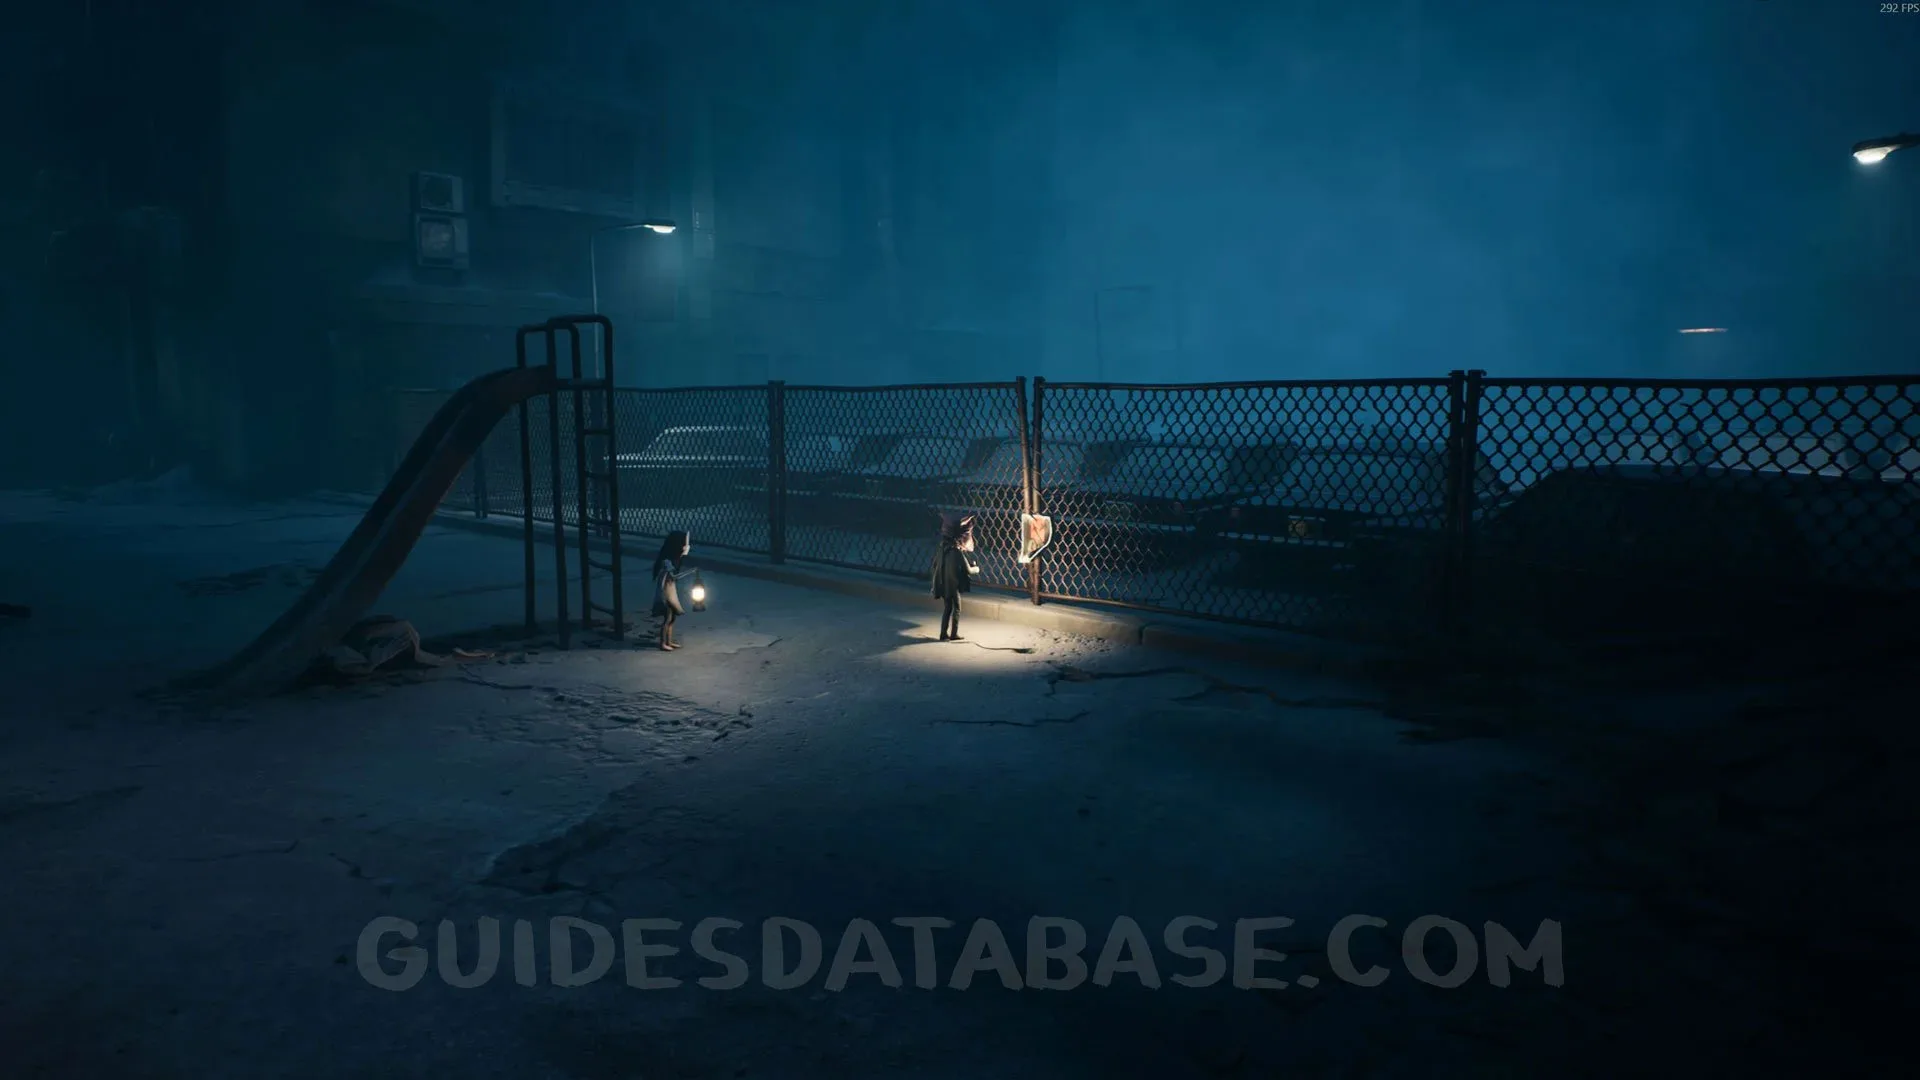
Poster #5 + Secret #11
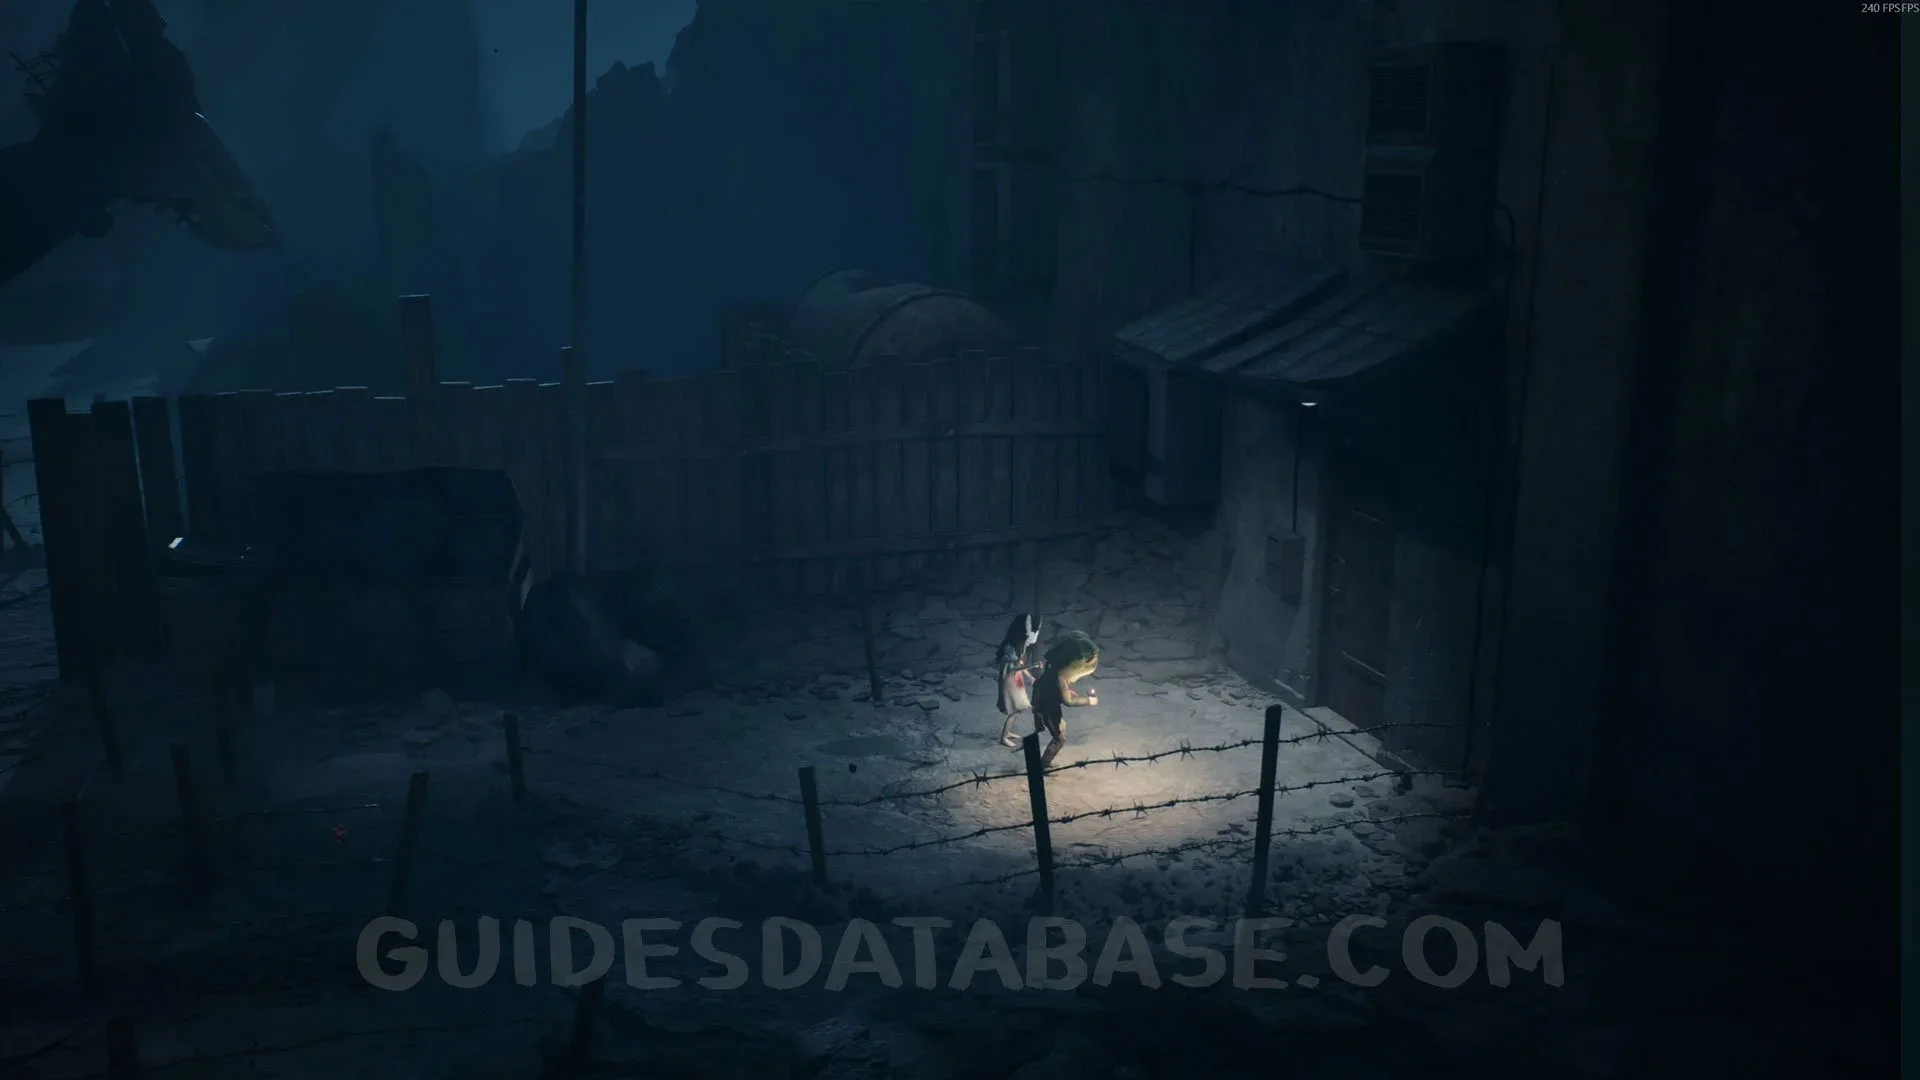
In the same area as the previous collectible, go to the fence in the right corner to find this poster attached to it. Pick it up.
 GUIDESDATABASE.COM
Rest Your Legs #5
After hiding from the monster in the laundry room, you will need to pick up a crowbar. Before reaching the crowbar area, you will find another chair. Sit on it.
 GUIDESDATABASE.COM
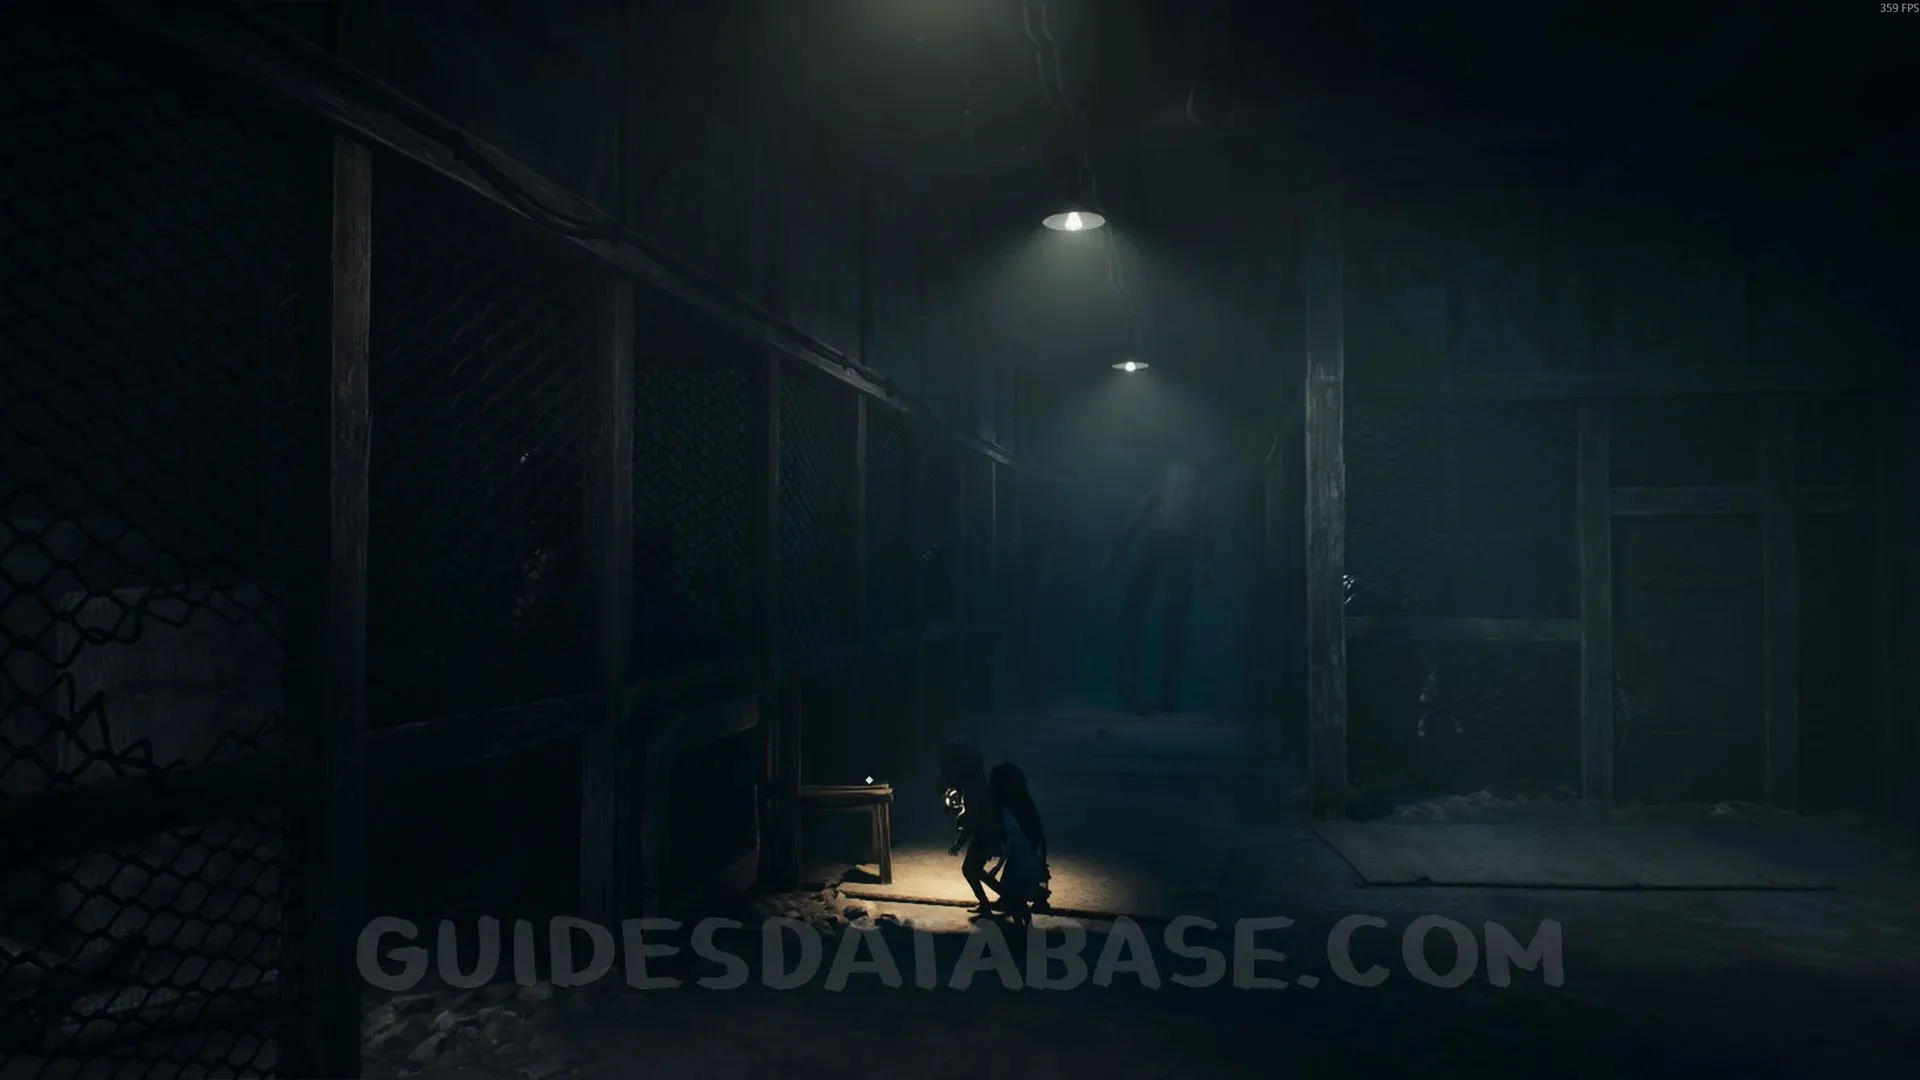 GUIDESDATABASE.COM
Rest Your Legs #6
After the previous collectible, you will hide from the monster under a table and then enter another movie theater. Remove the wooden boards from the door and go through it. You will see a toilet right in front of you, and you can sit on it.
 GUIDESDATABASE.COM
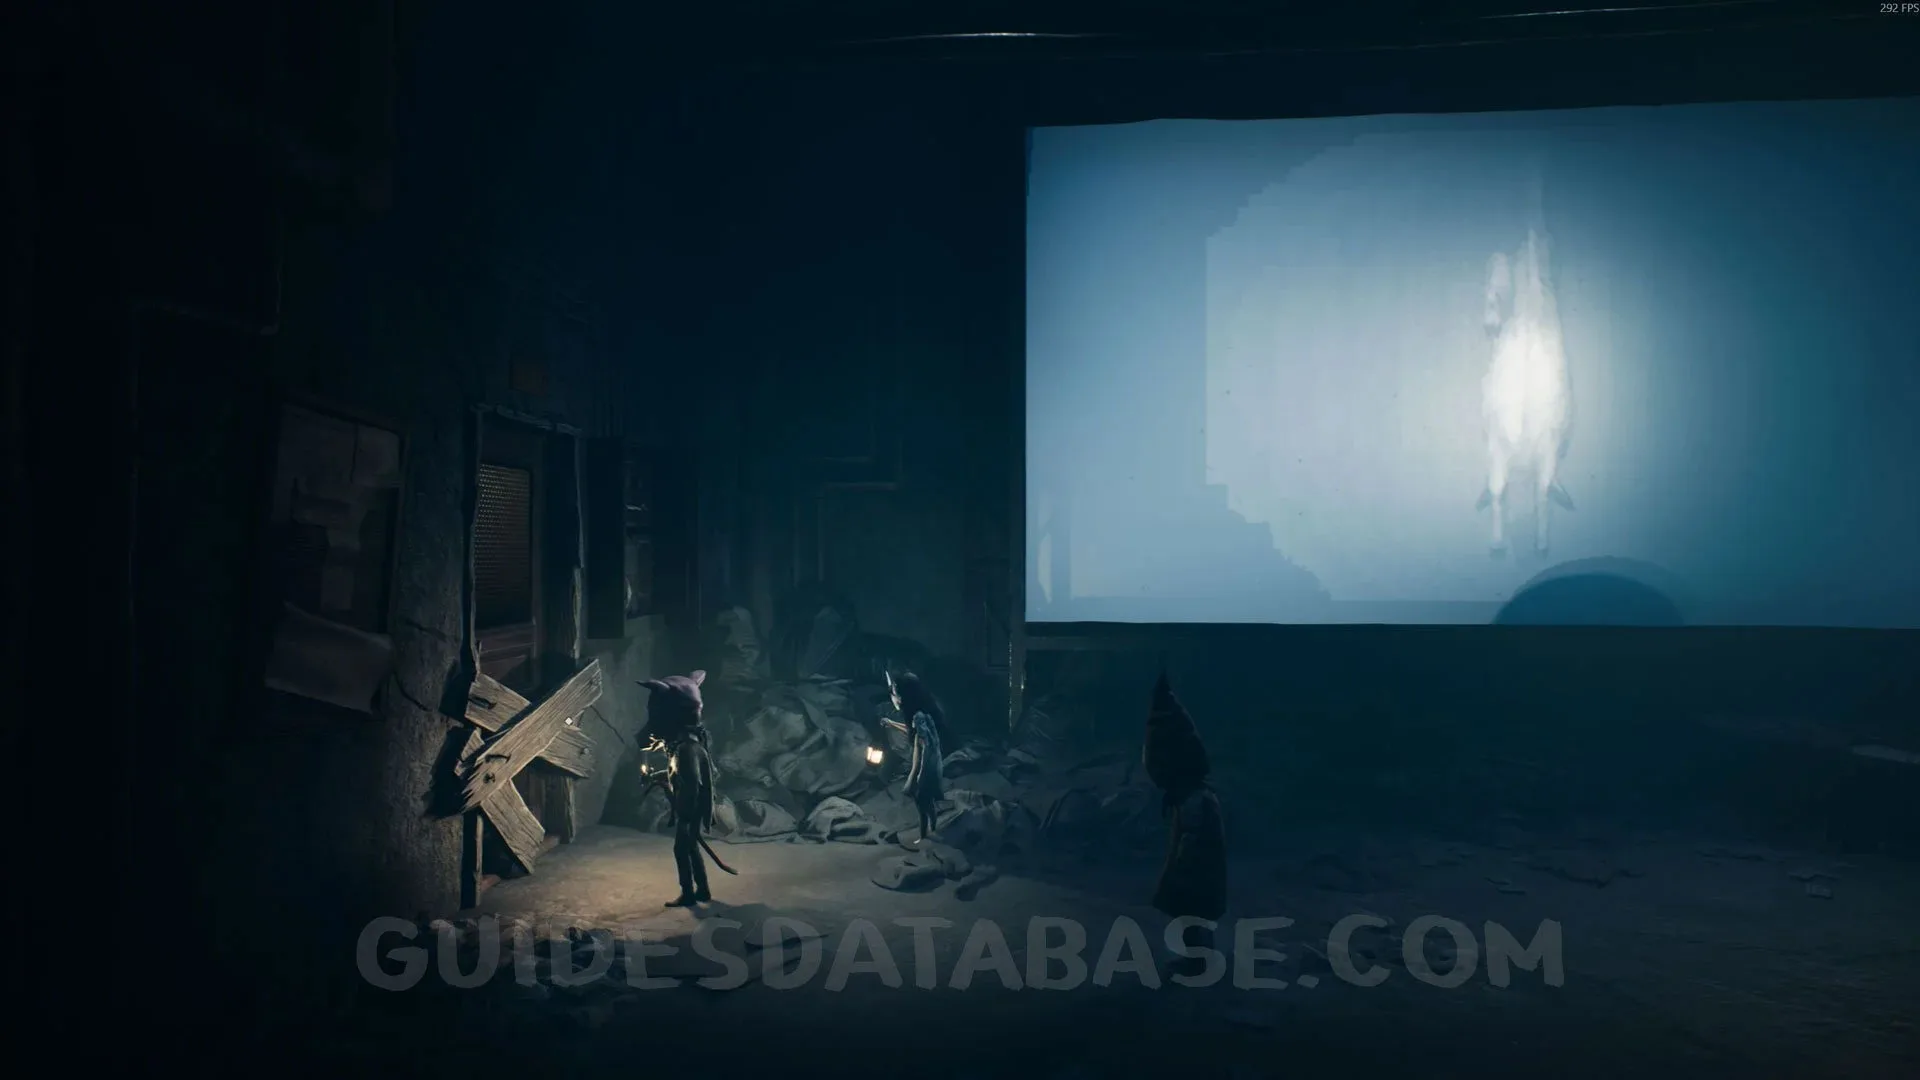 GUIDESDATABASE.COM
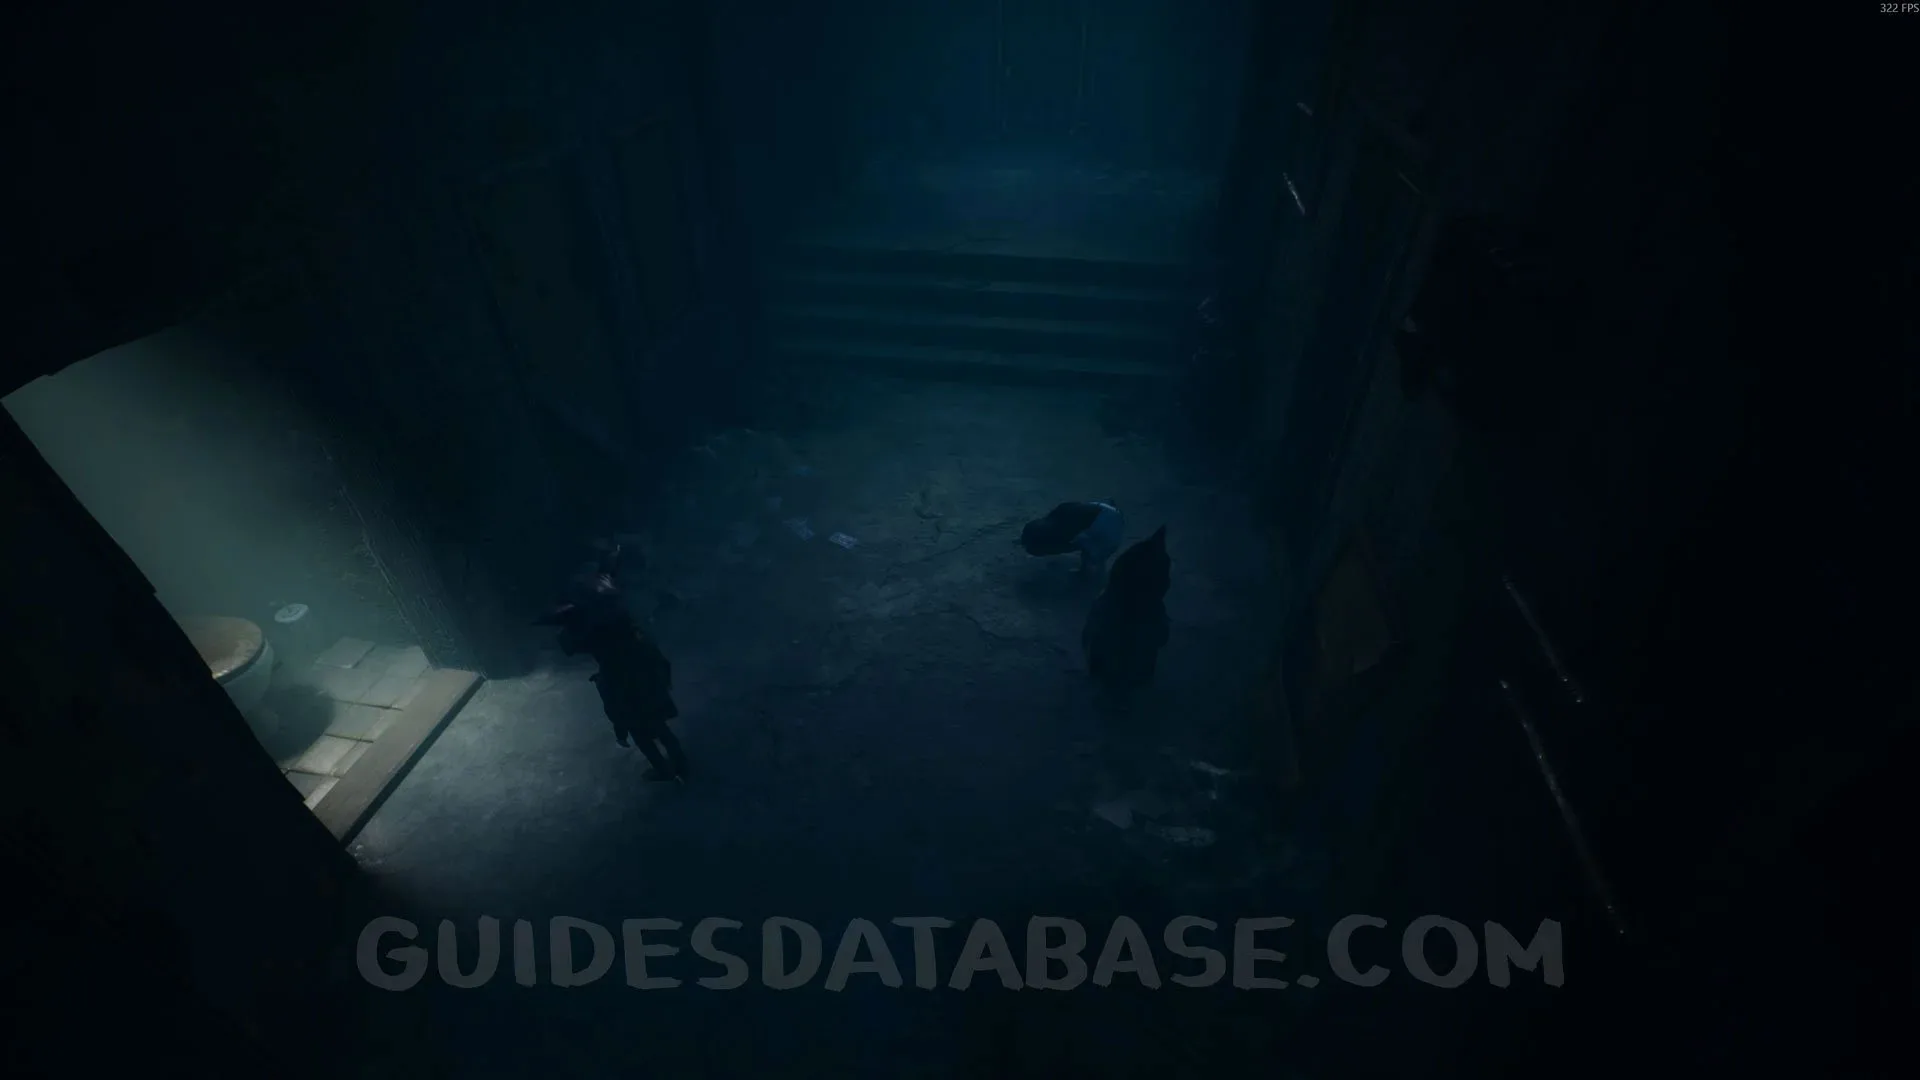 GUIDESDATABASE.COM
Critter #1 + Mask #5 + Secret #12
After leaving the movie theater and now having the crowbar, instead of going straight where the monster would attack you, go right and you will see another door with some wooden boards on it. Use your crowbar to remove the boards and go through the door. Inside, you will find the first creature. Defeat it to get the mask.
 GUIDESDATABASE.COM
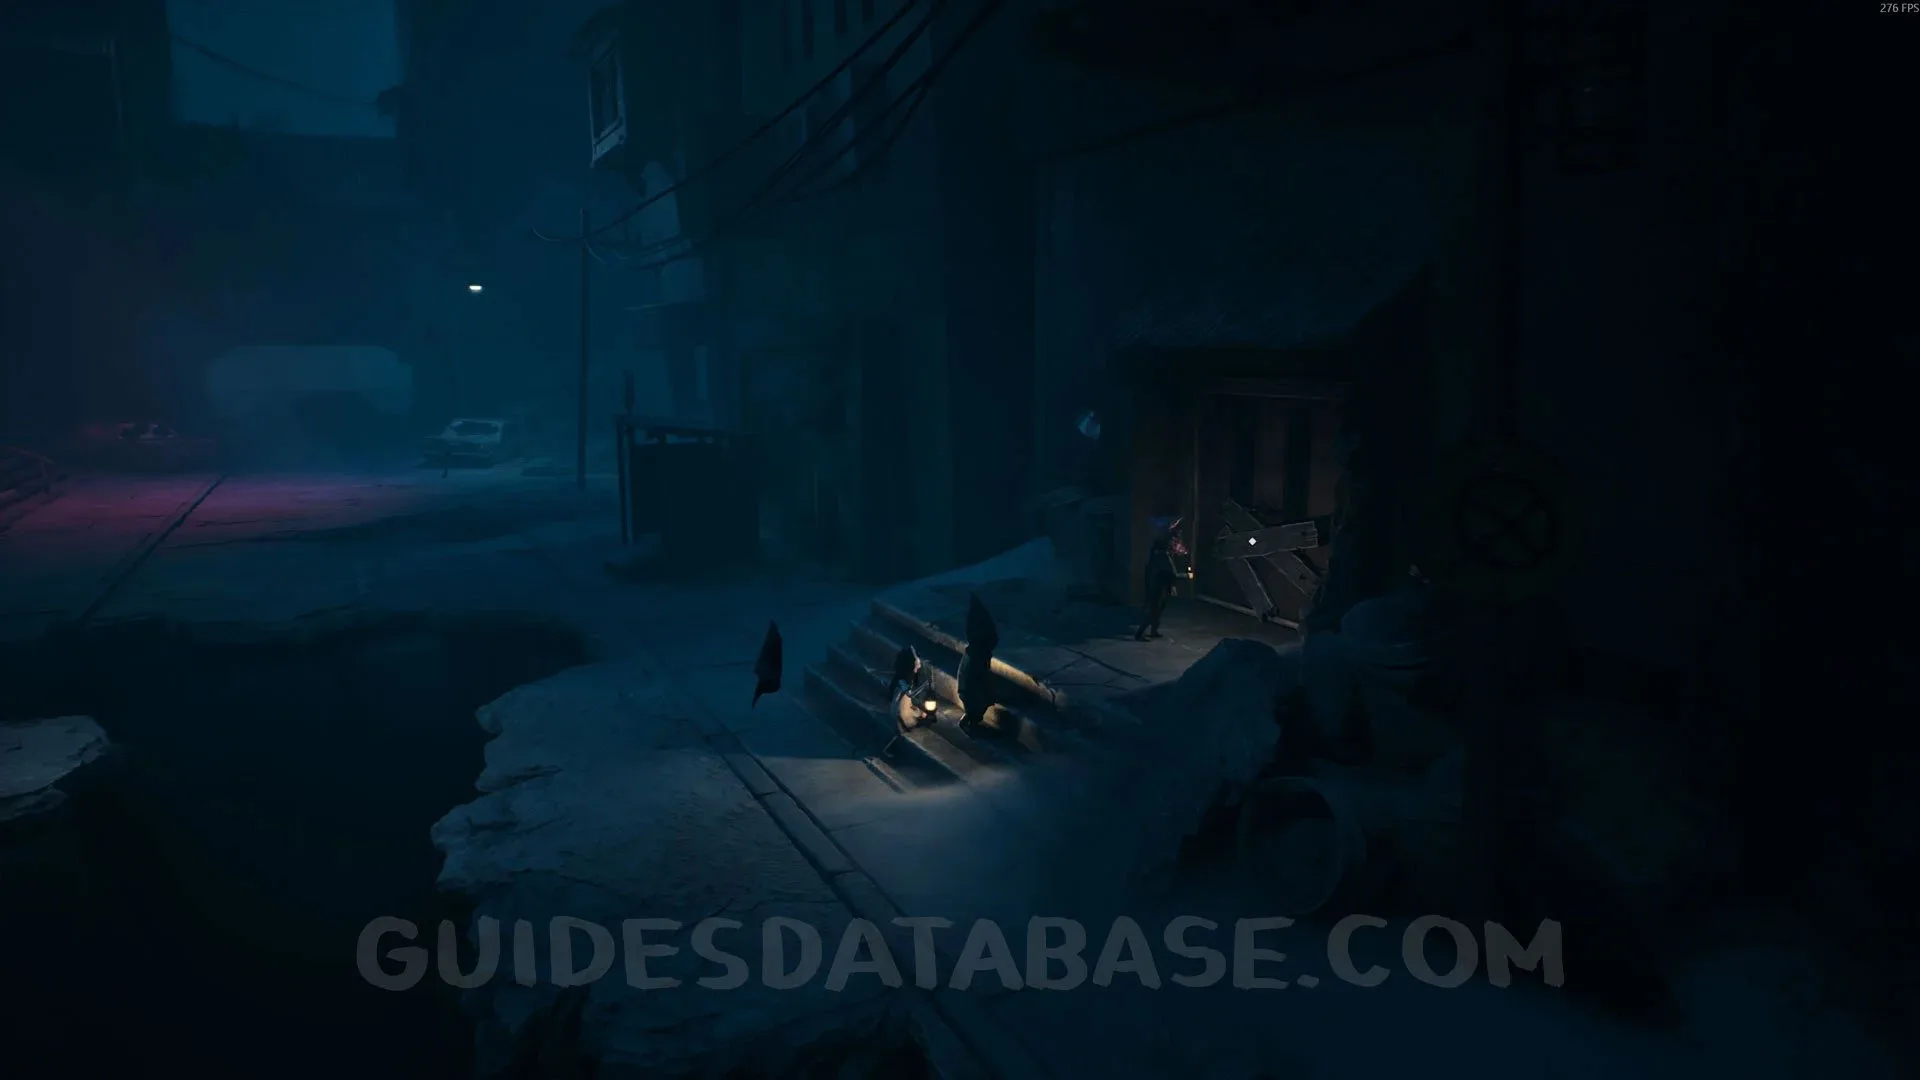 GUIDESDATABASE.COM
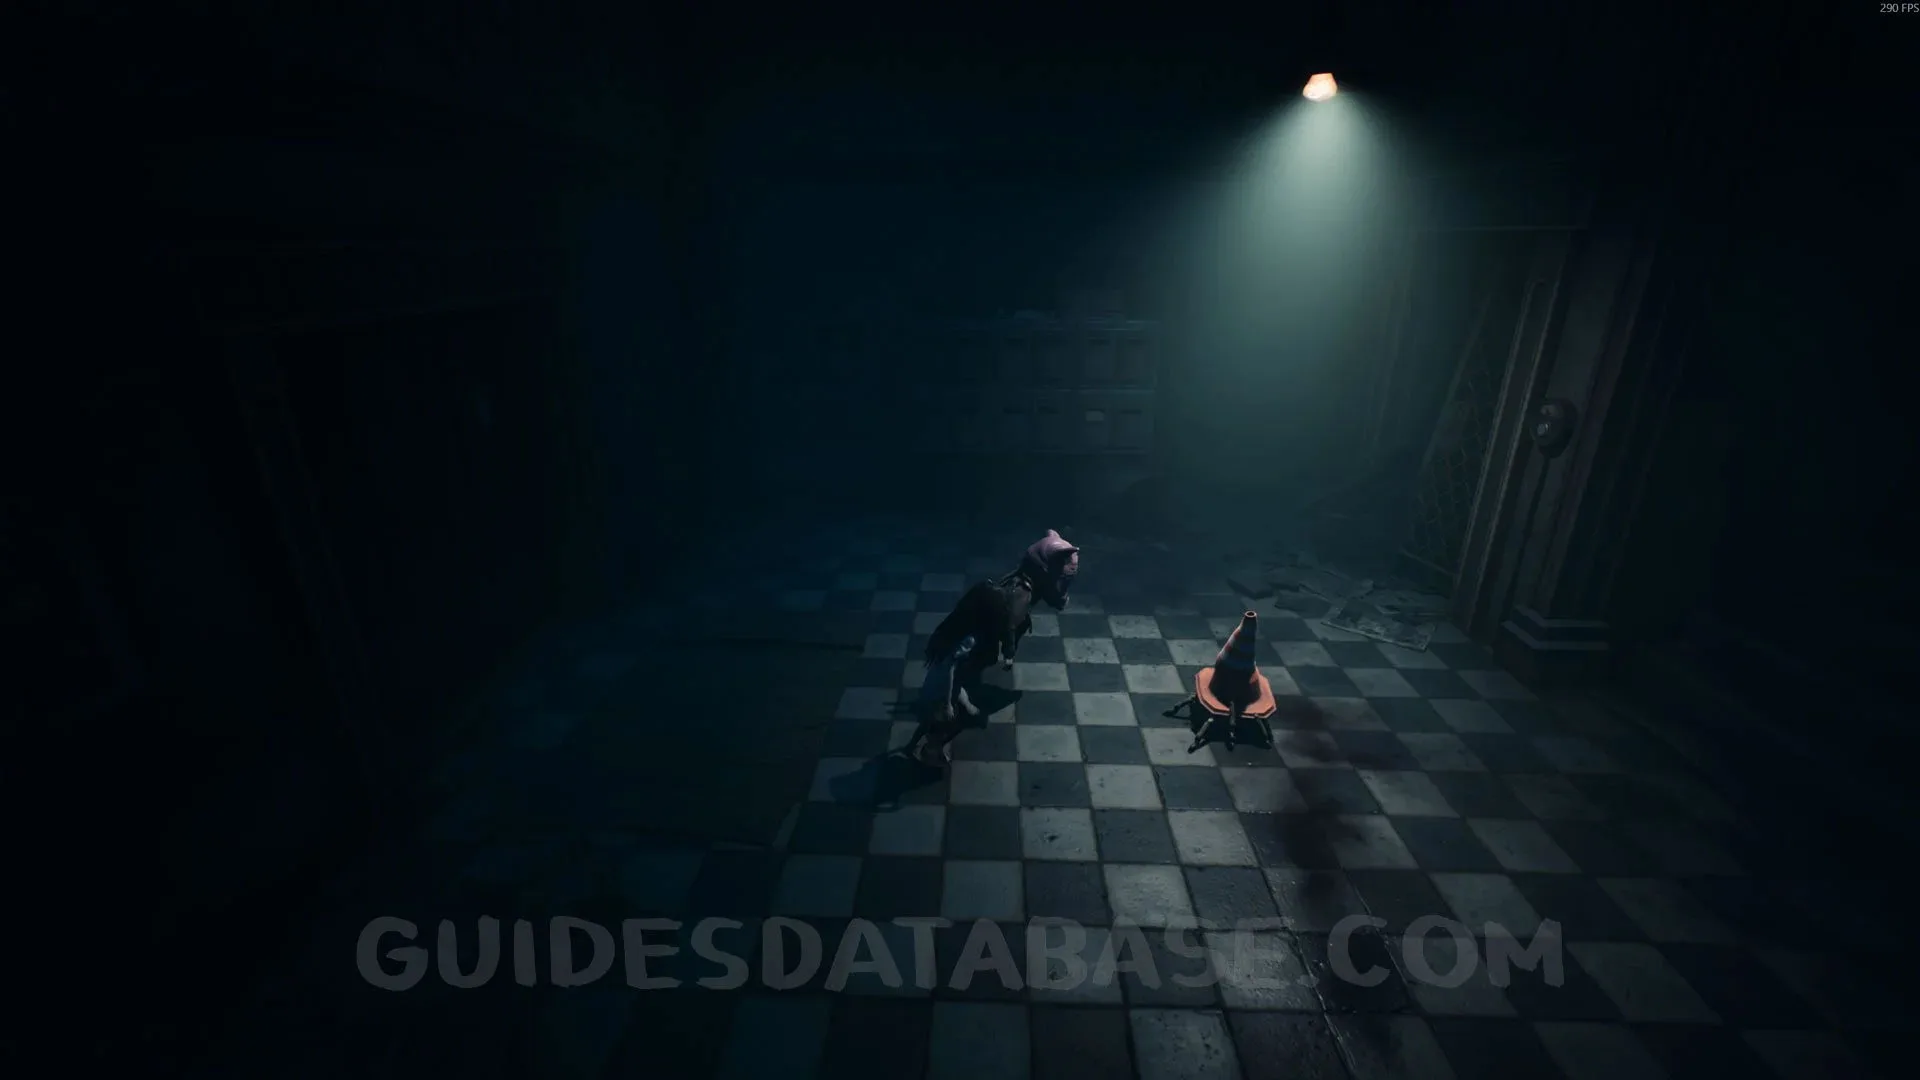 GUIDESDATABASE.COM
Chapter 3: After the Flood
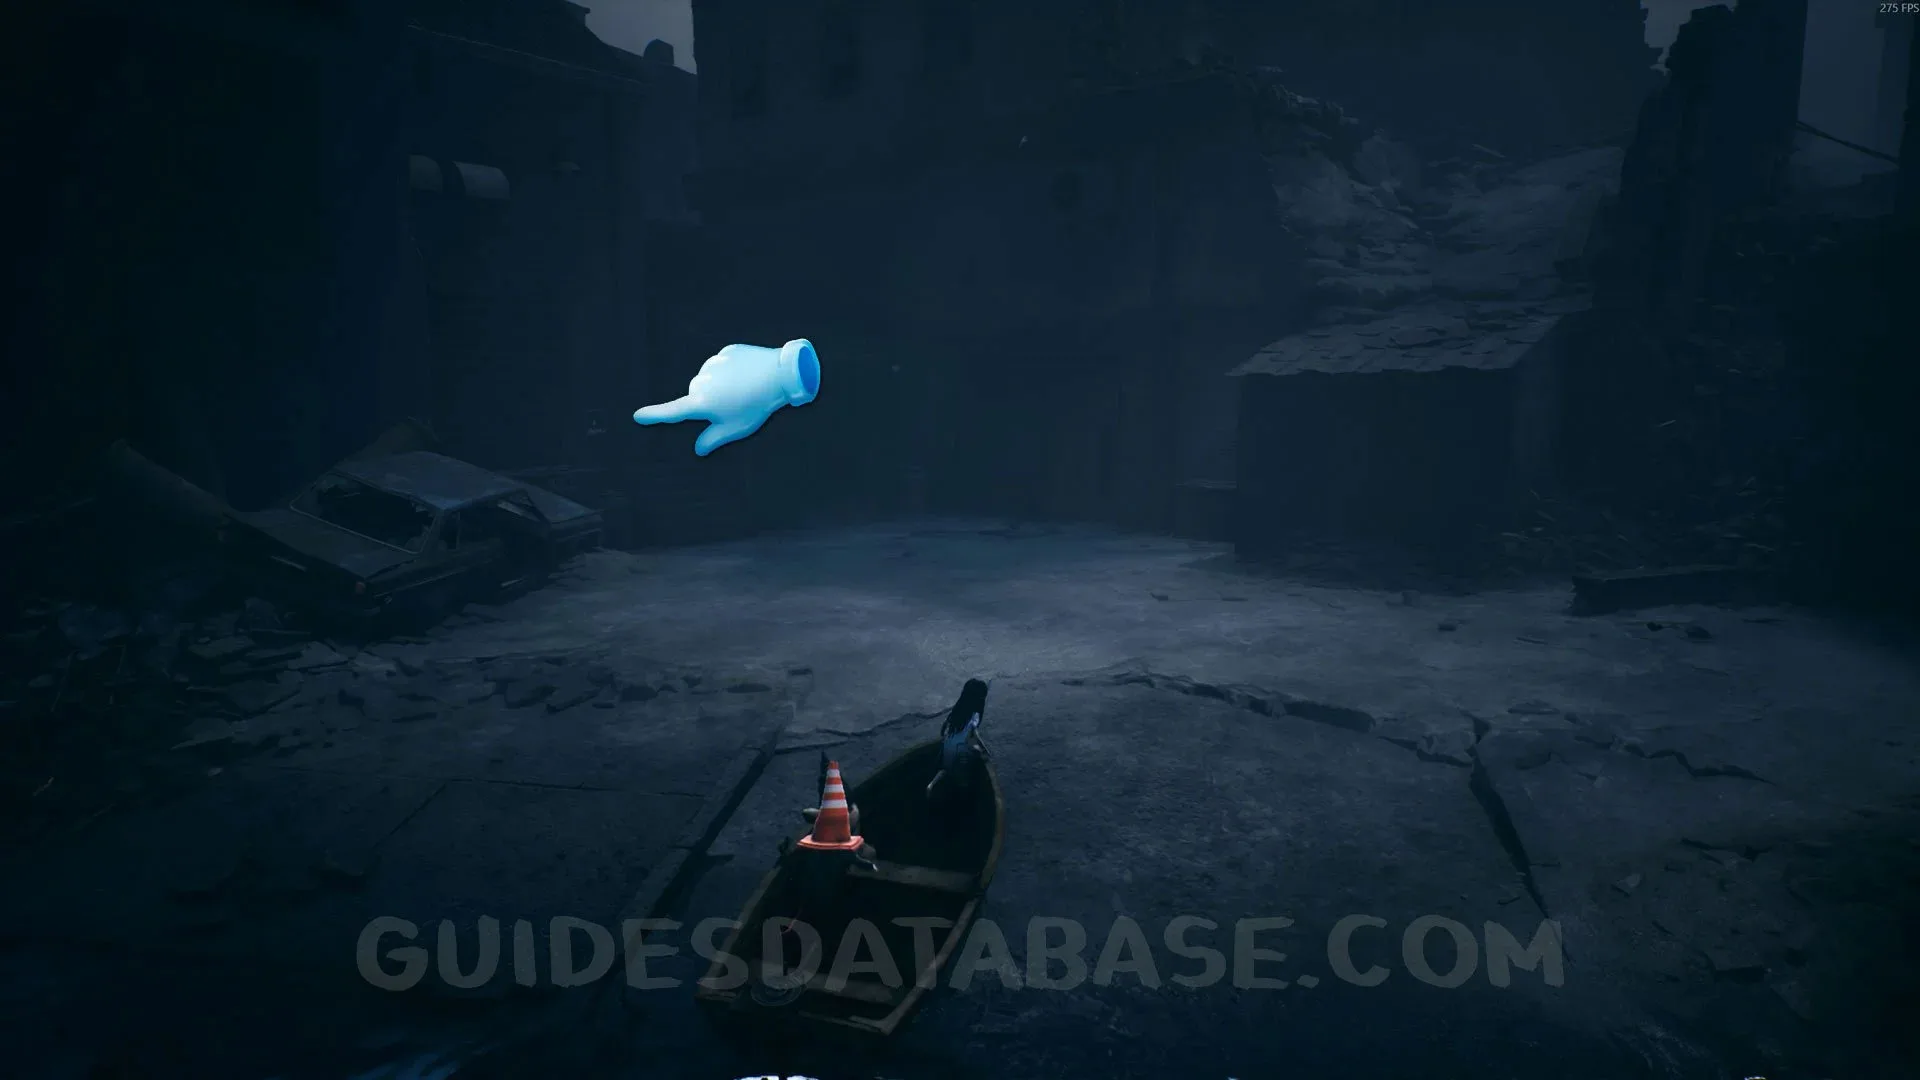
Poster #6 + Secret #13
For story purposes, at the start of Chapter 3, you will need to open a dam gate to pass through with your boat. After that, keep going with your boat until you reach a beach where you get the harpoon. You will find this poster on that beach. The path to the harpoon is story-related, so there is no way to get lost.
 GUIDESDATABASE.COM
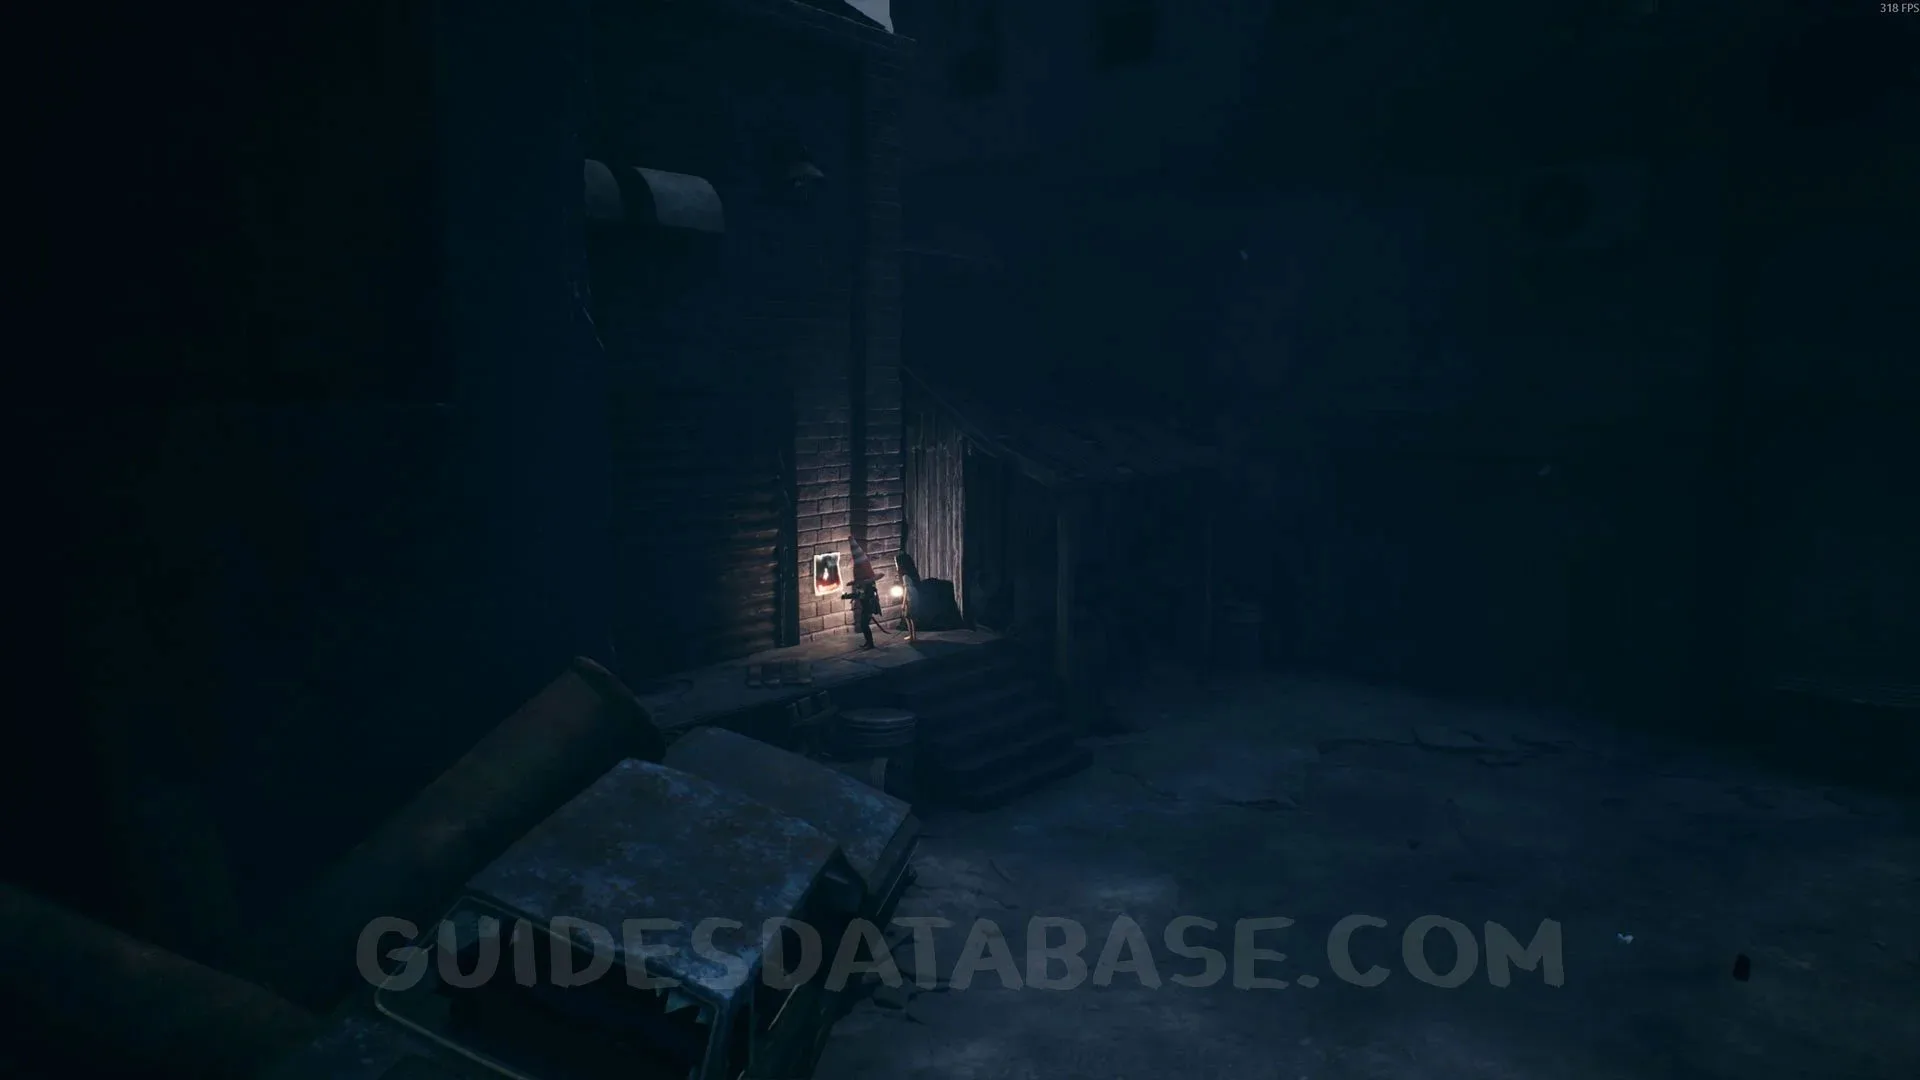 GUIDESDATABASE.COM
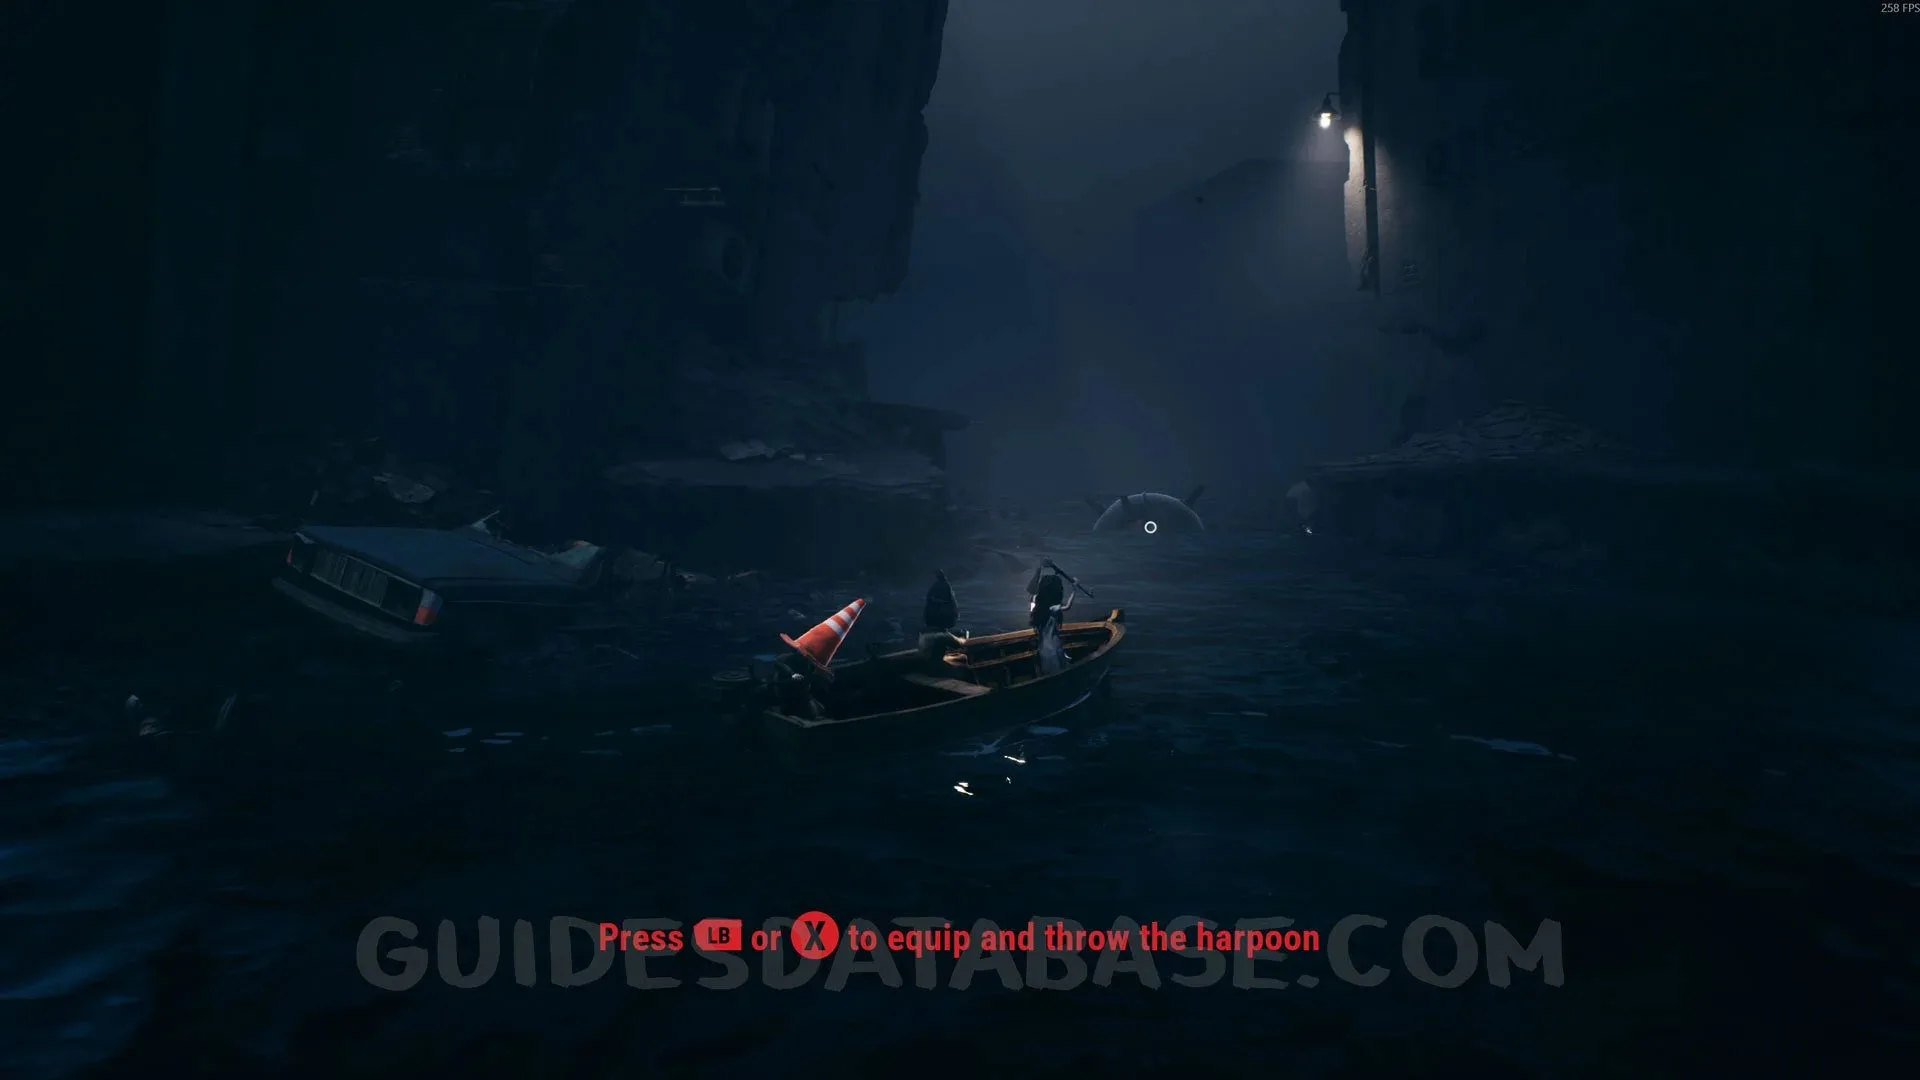
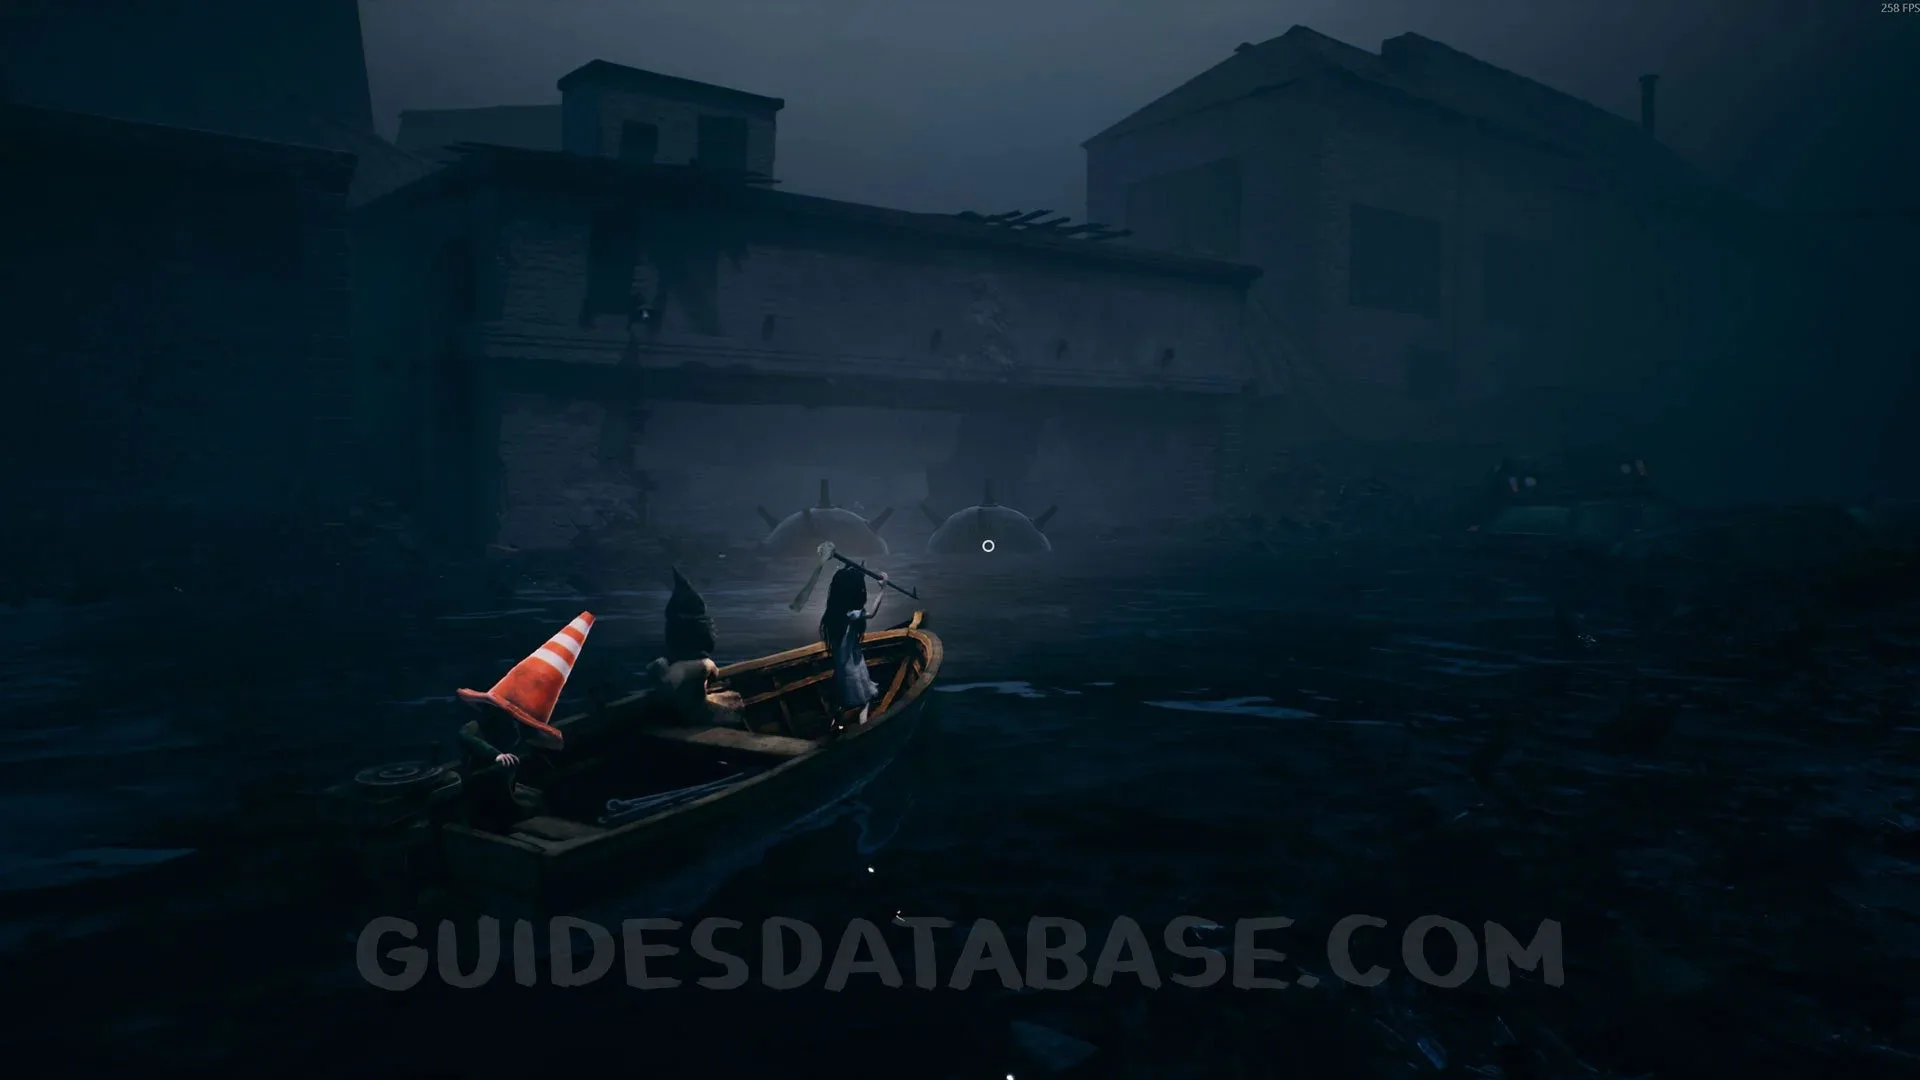
Trophy ‘‘Naval Blazing’’ (Clear 20 naval mines in one playthrough)
Make sure to destroy every naval mine you see along the way. There are 24 naval mines in total, which is 4 more than you need for the trophy. After getting the harpoon, you will be able to blow up 4 of them. The next ones can only be destroyed in Chapter 6. This guide will point out when to watch for them again.
 GUIDESDATABASE.COM
Coffin #2 + Secret #14
After blowing up the first naval mine with the harpoon, turn right and, instead of continuing toward the hotel, which is the story path, turn right again.
 GUIDESDATABASE.COM
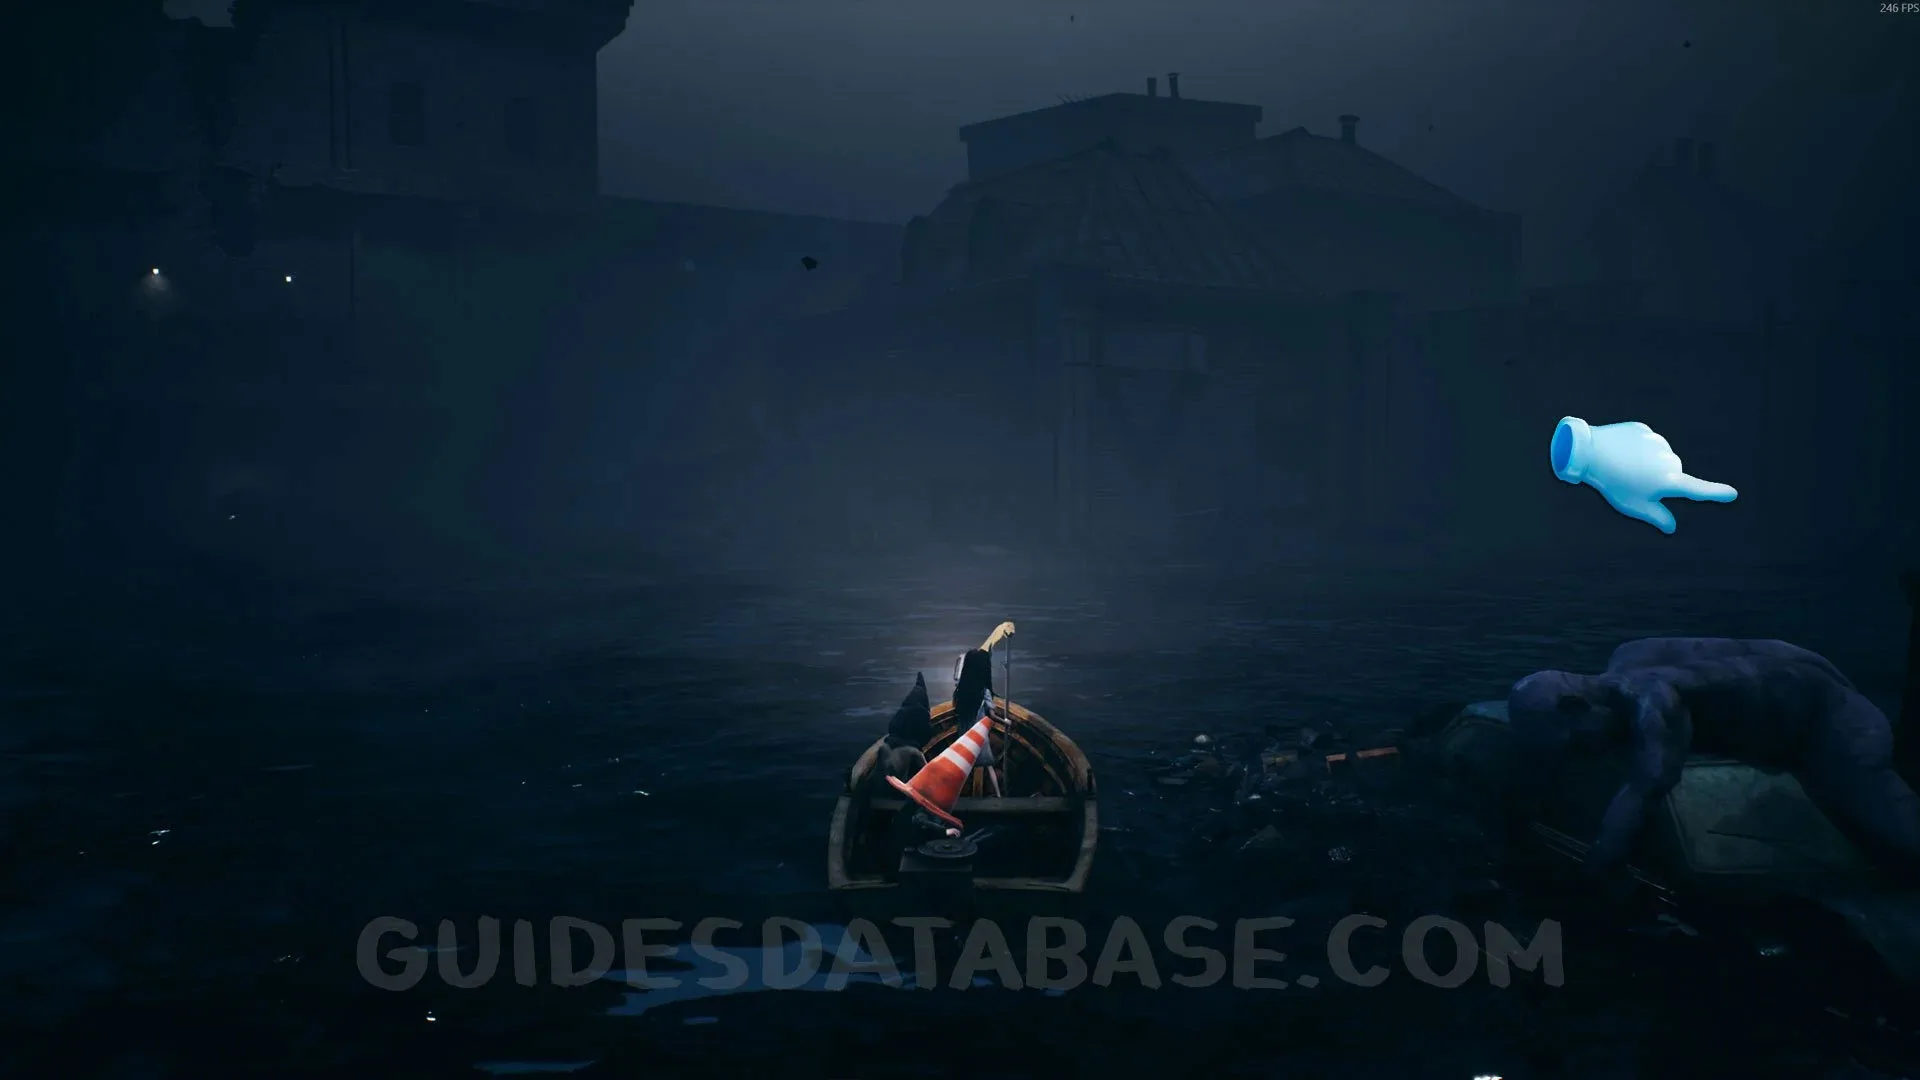 GUIDESDATABASE.COM
You will see 2 more naval mines there. Blow them up, go all the way to the end, and pass through the light. Once inside, go downstairs and open the coffin.
 GUIDESDATABASE.COM
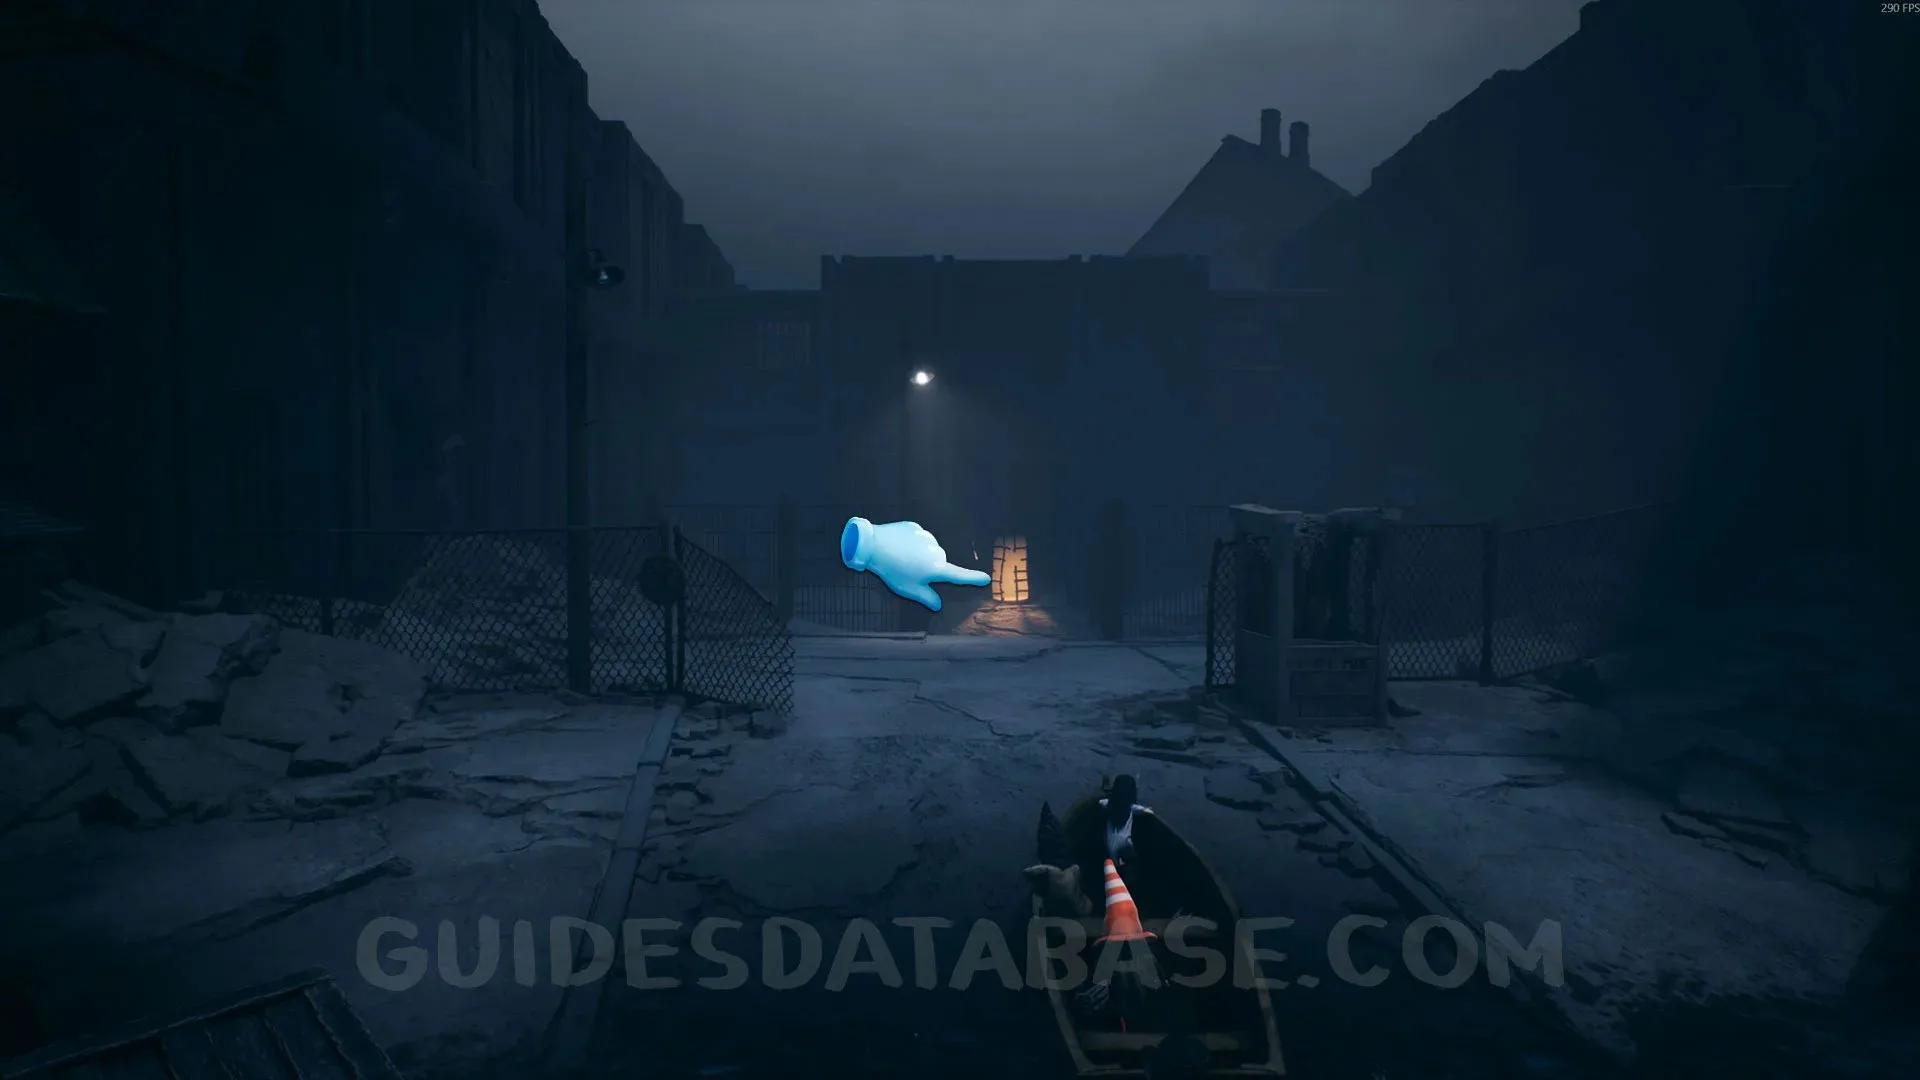 GUIDESDATABASE.COM
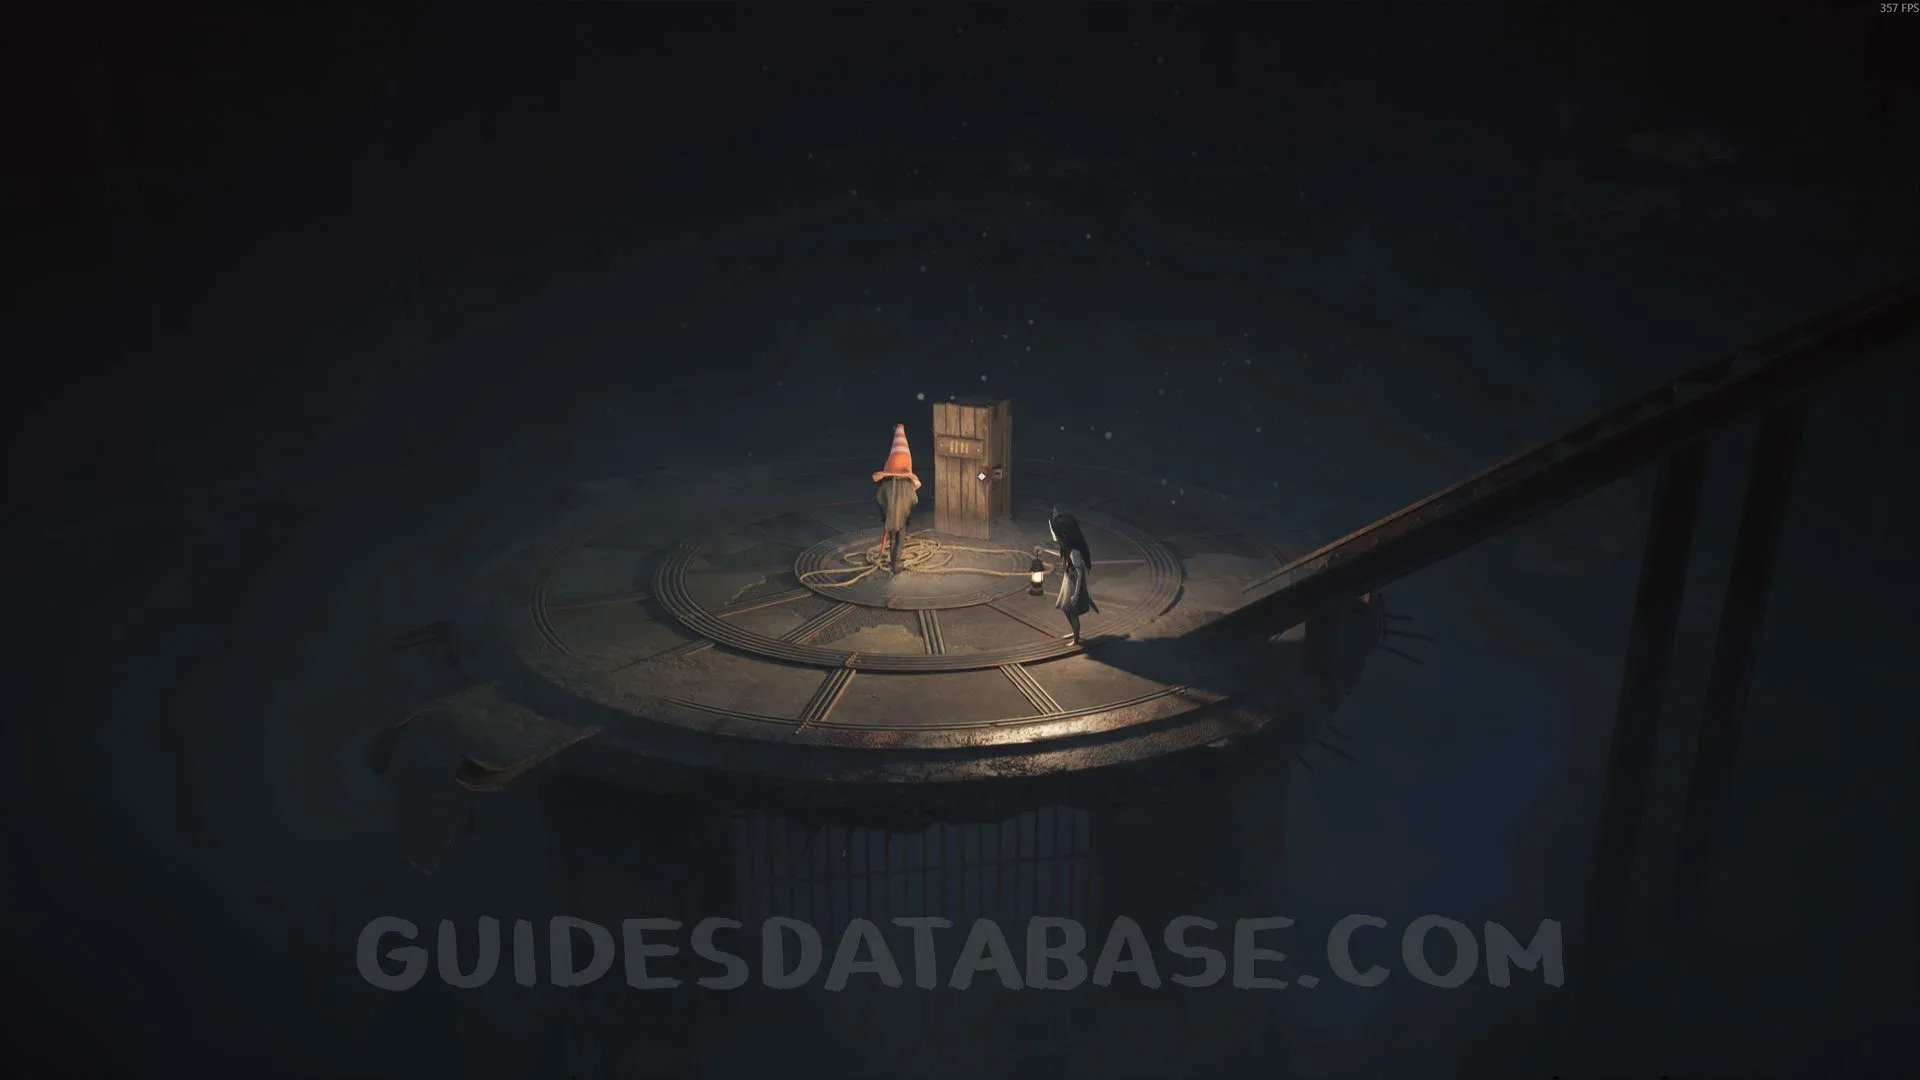 GUIDESDATABASE.COM
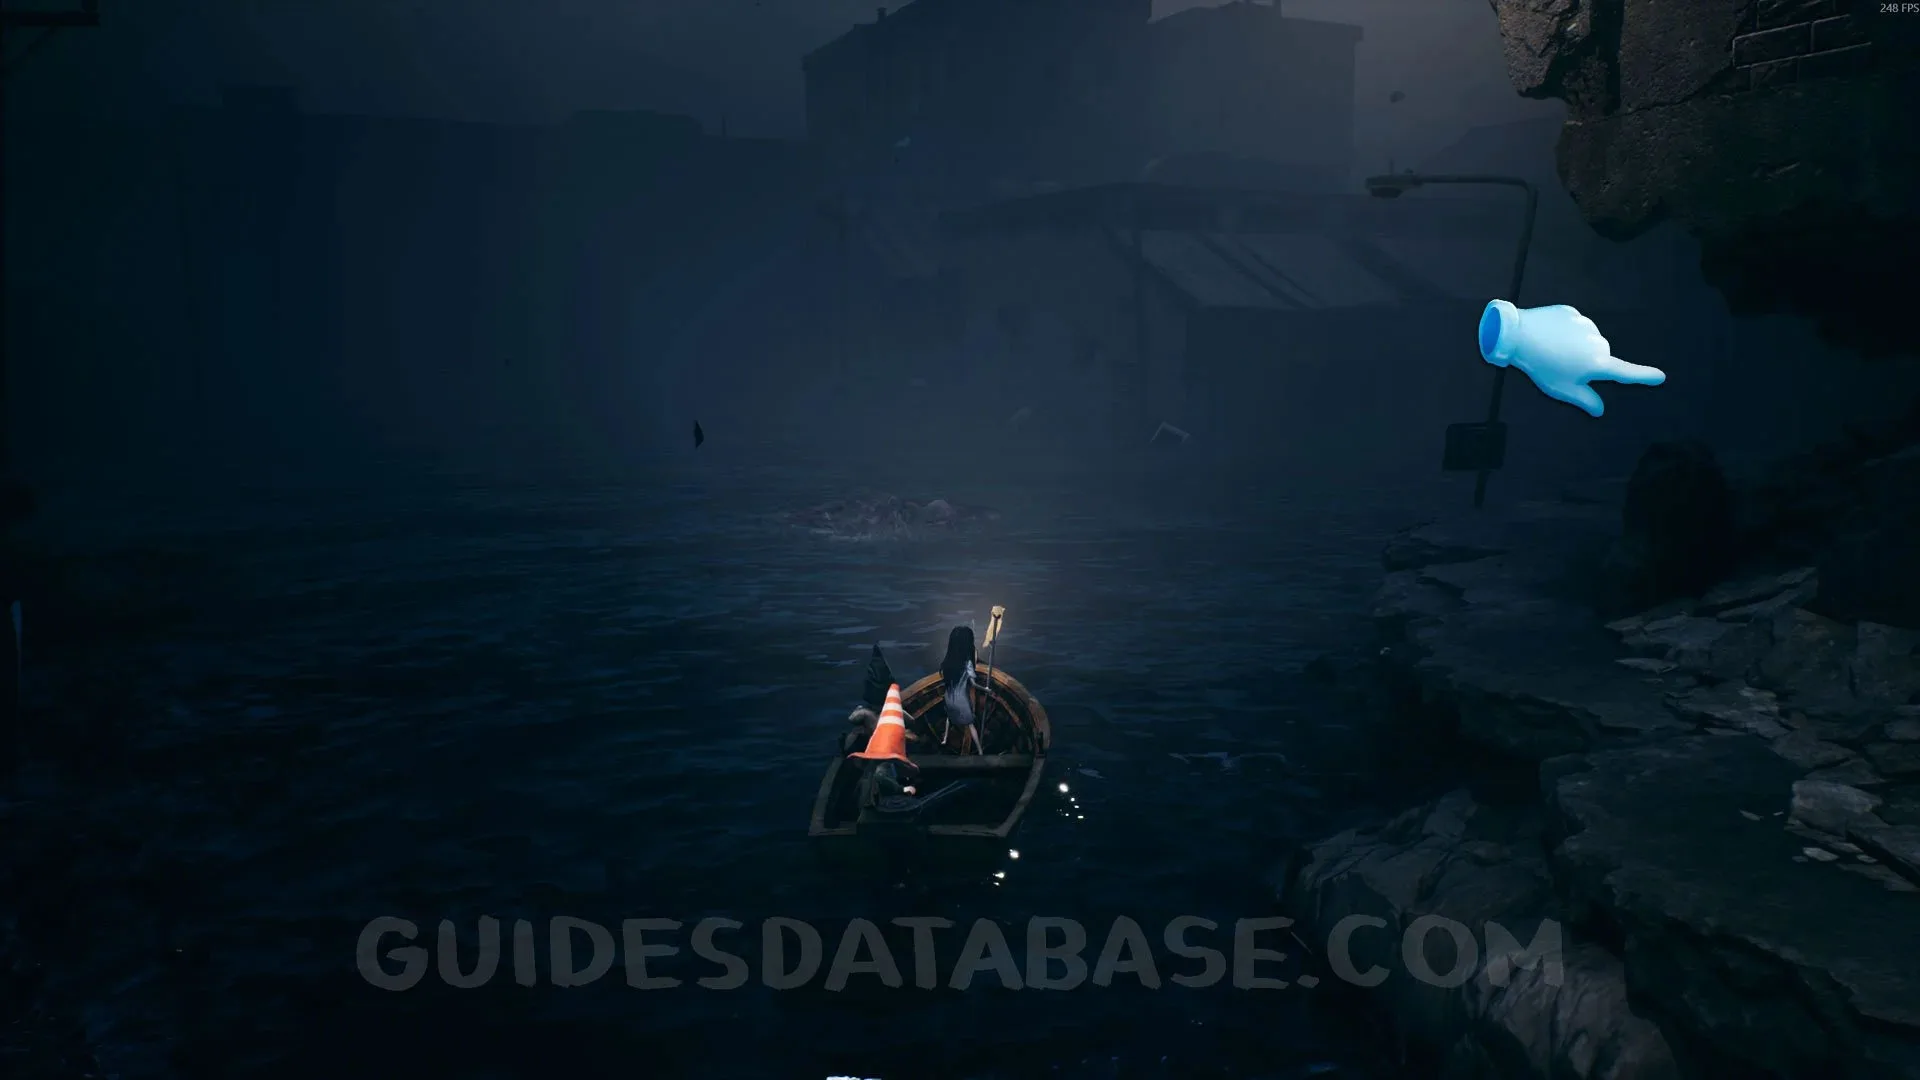
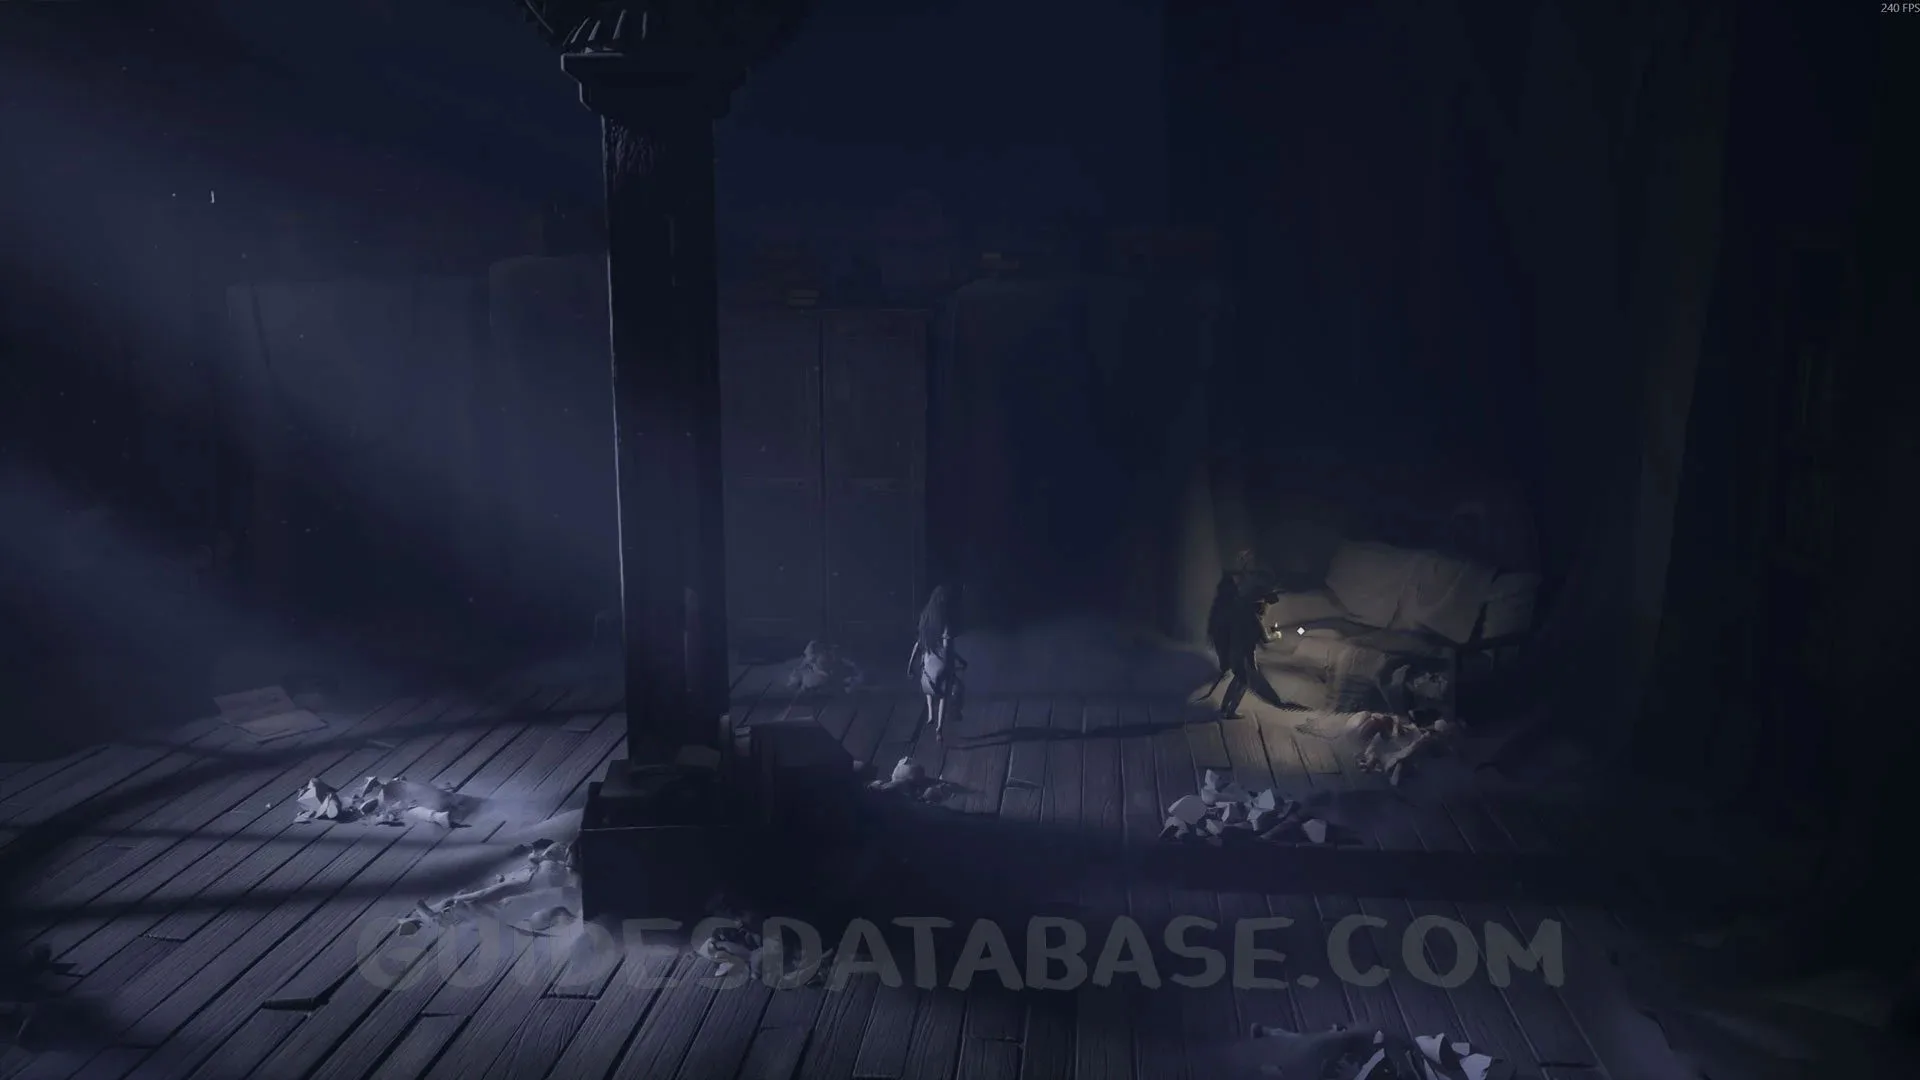
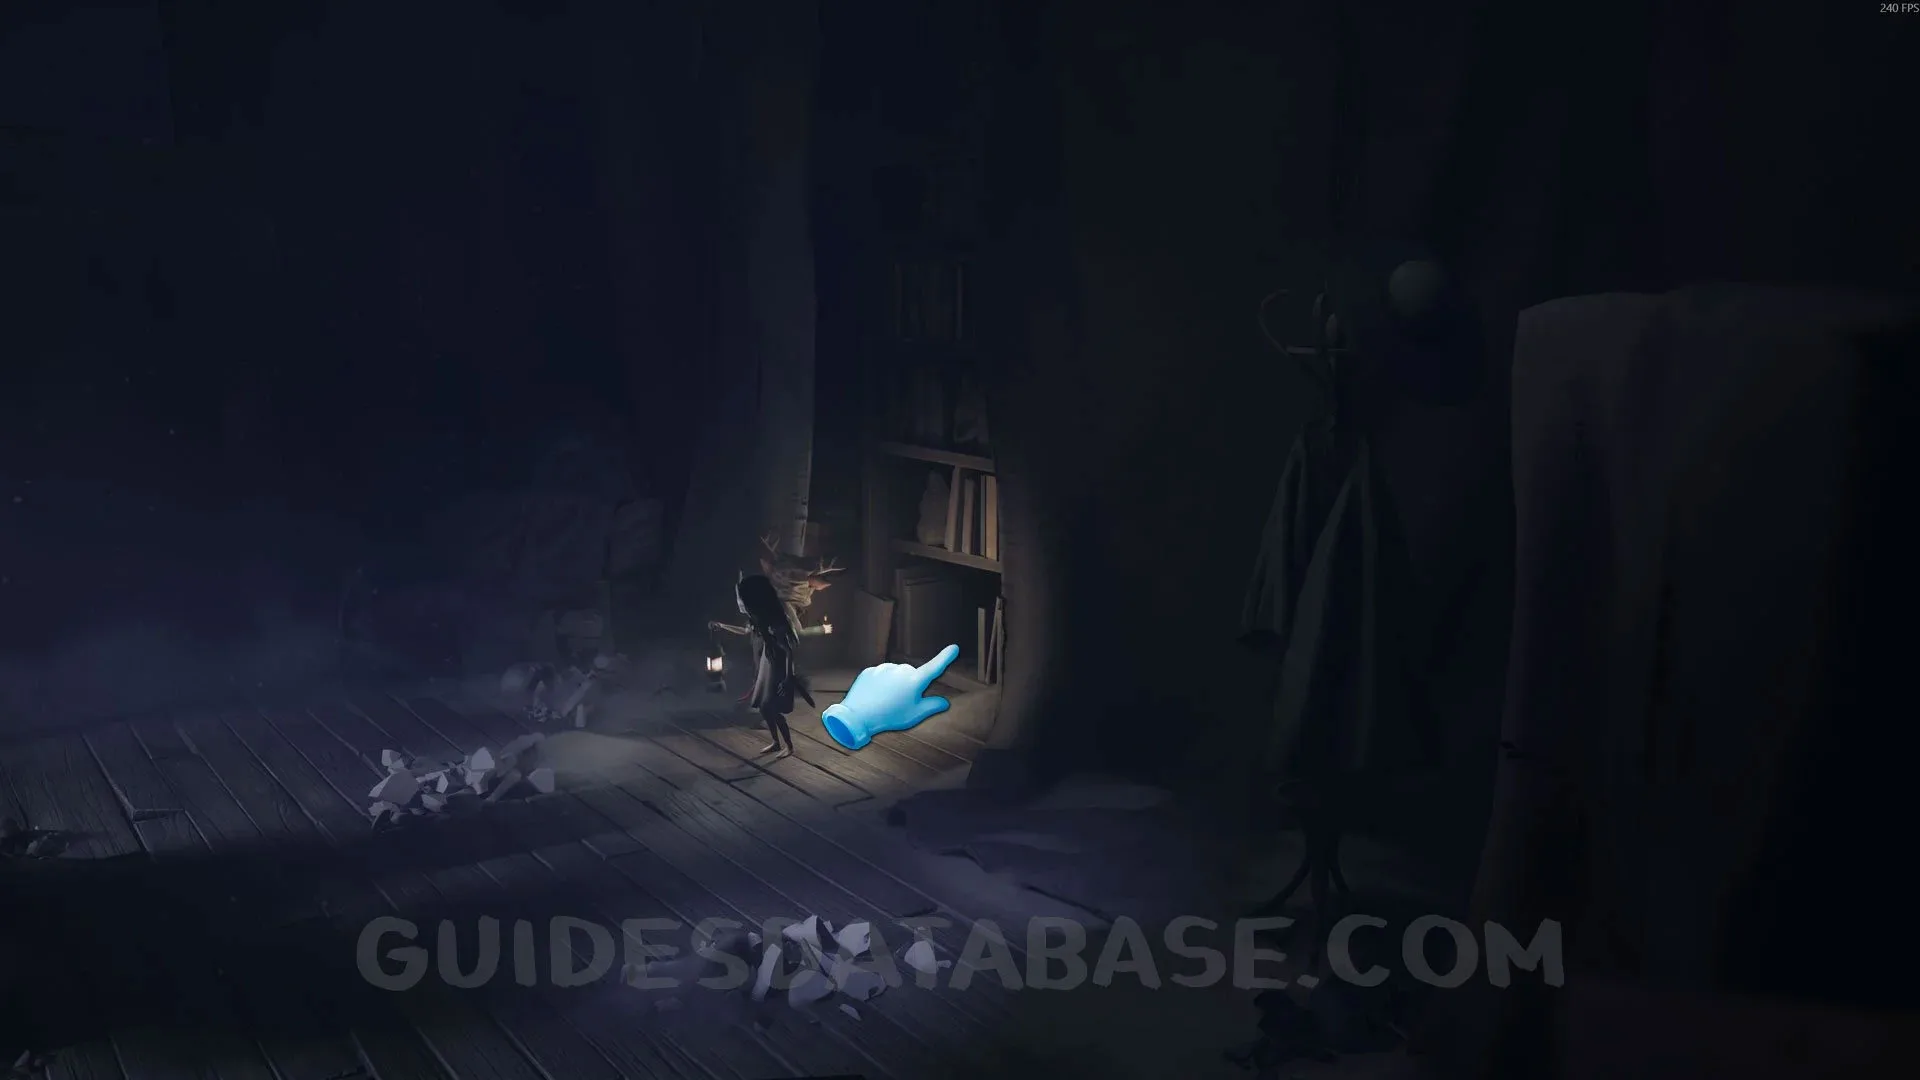
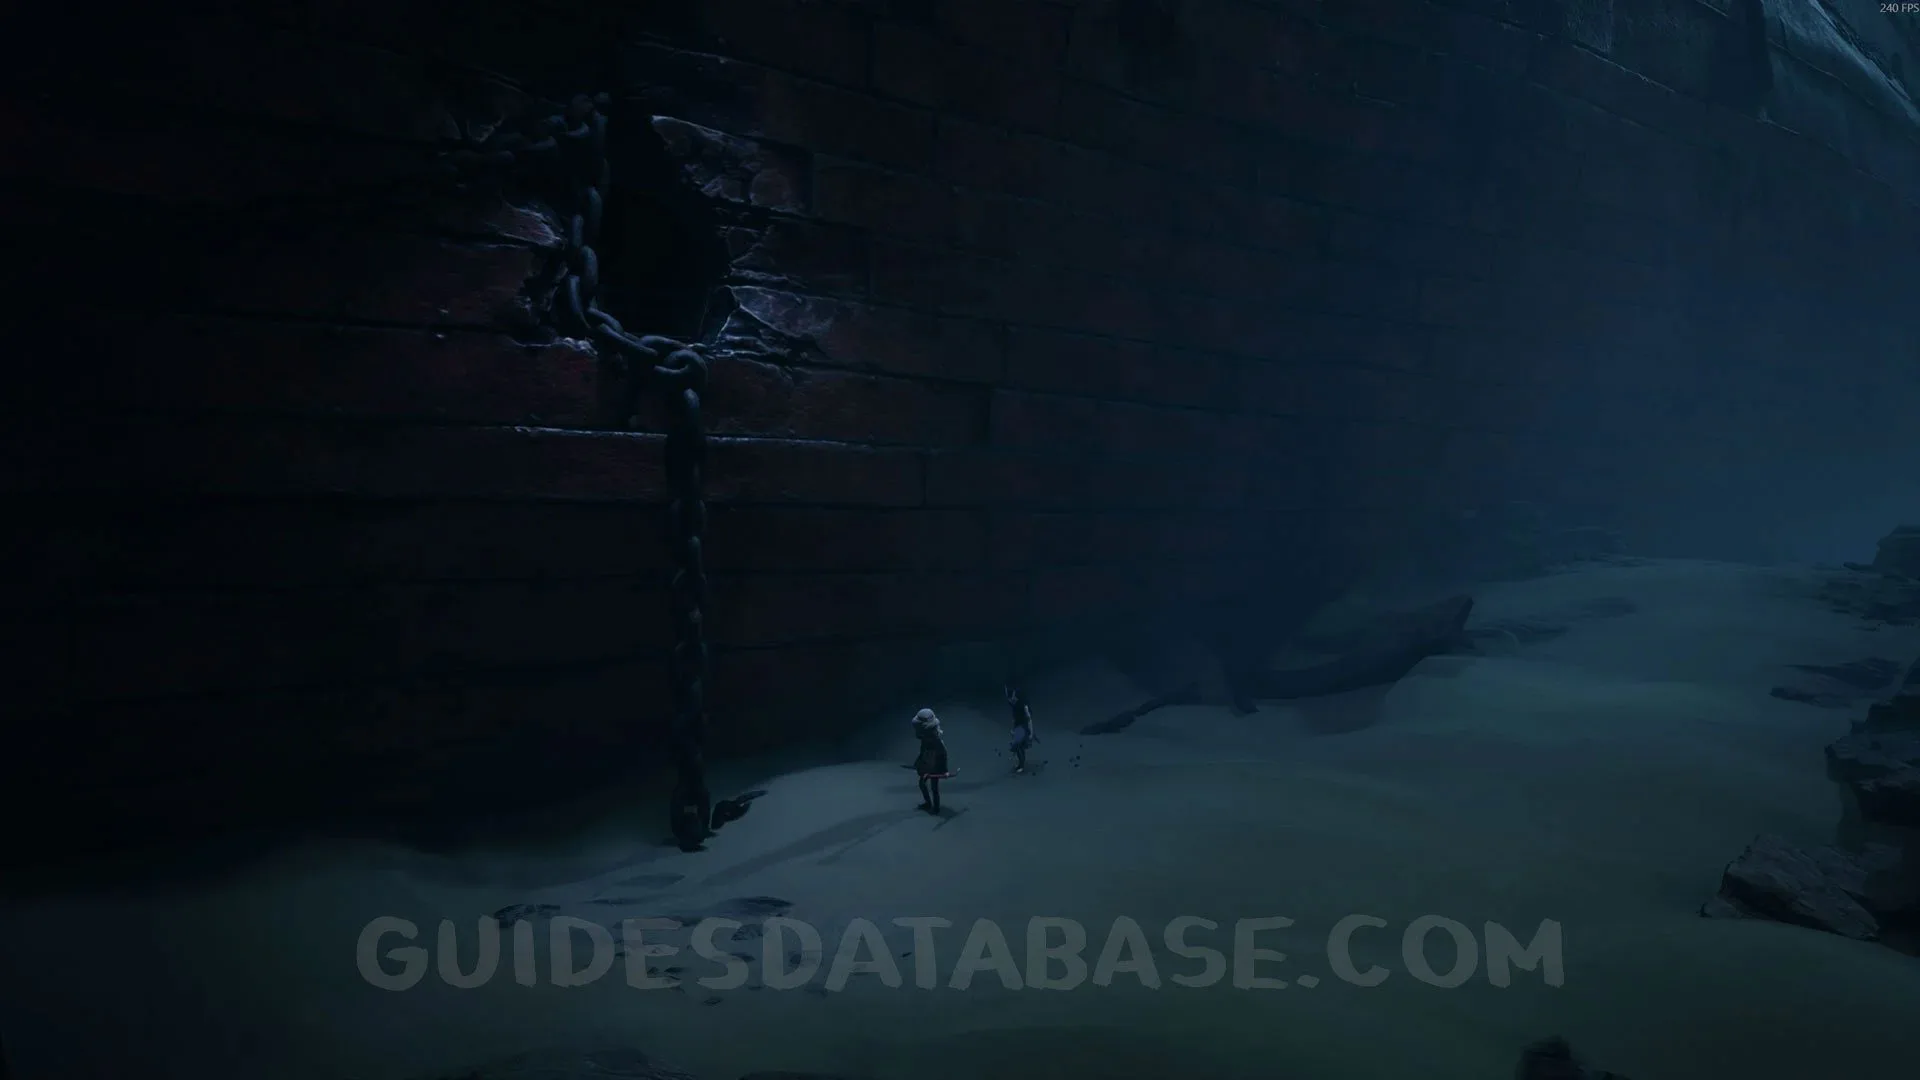
Coffin #3 + Secret #15
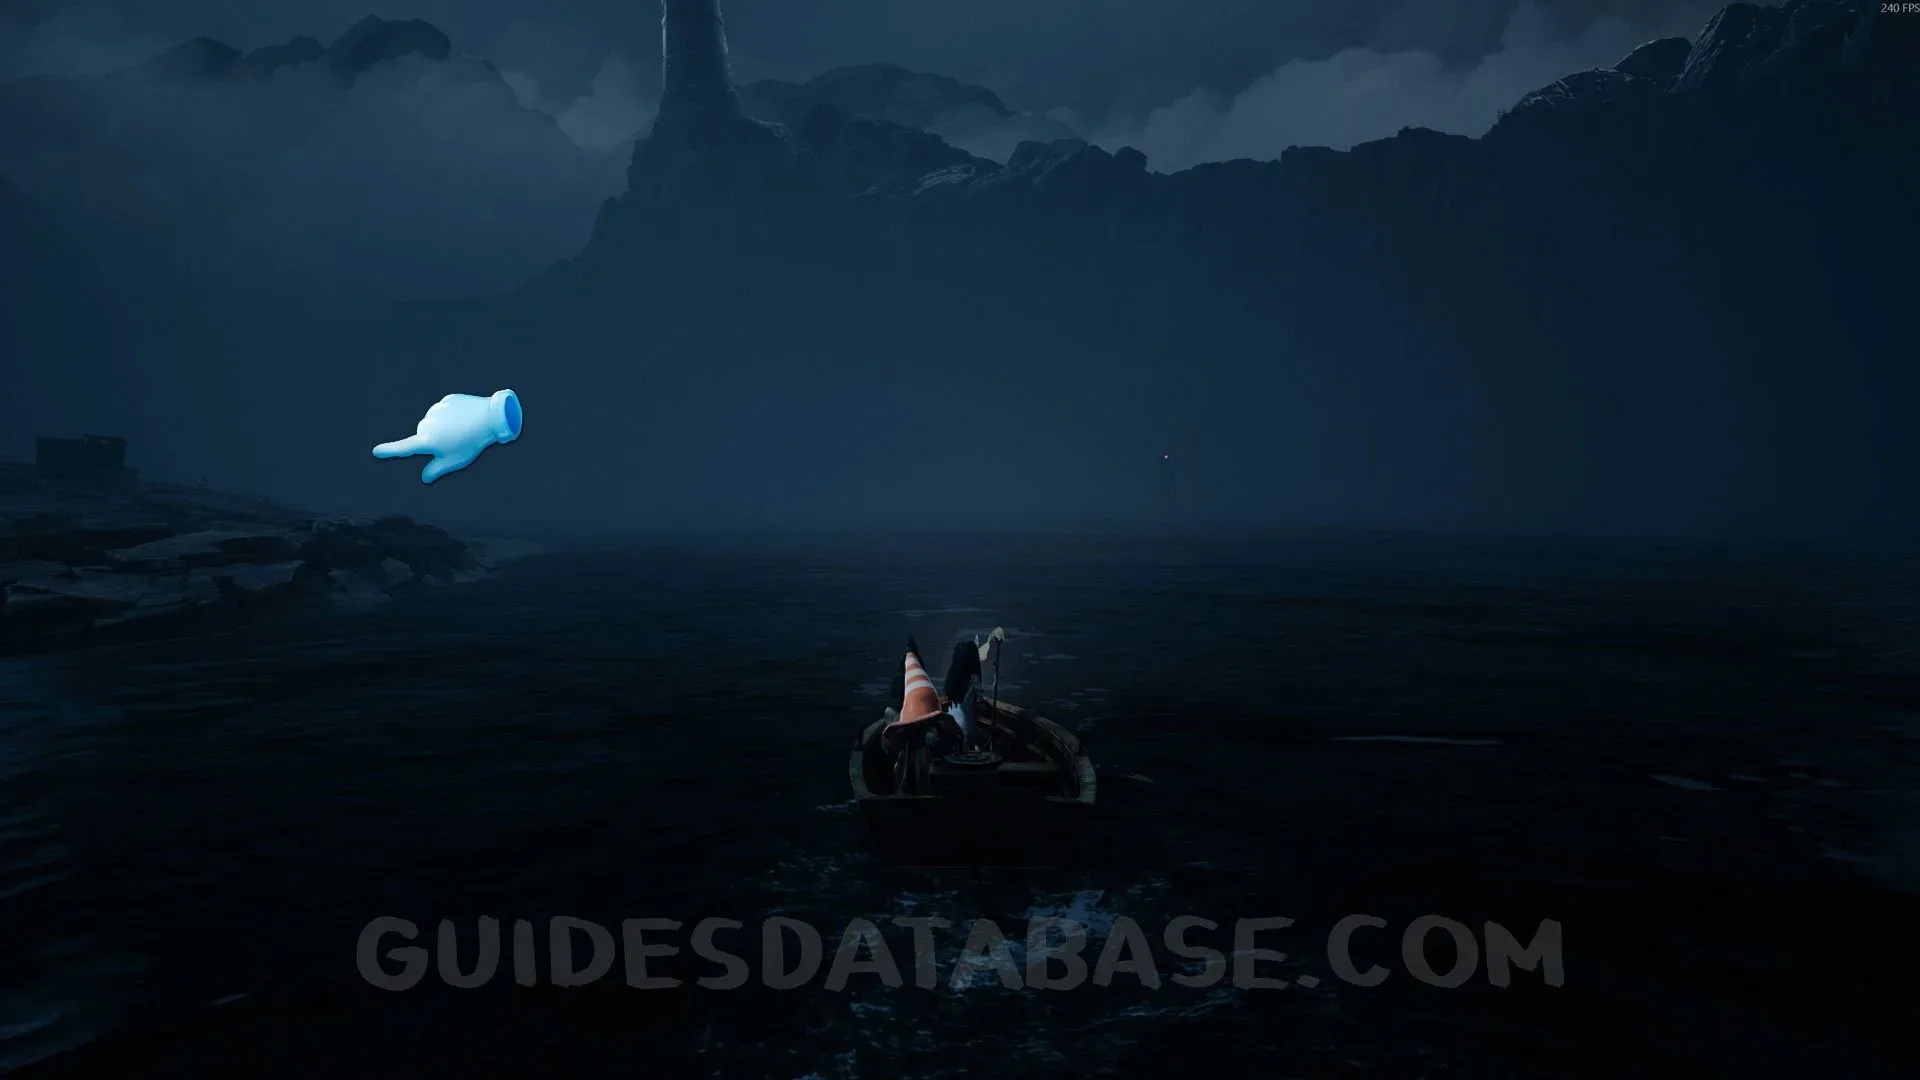
After passing through the hotel and seeing the bird carry one of your friends away, your objective will be to reach the flashing red light and climb a large staircase.
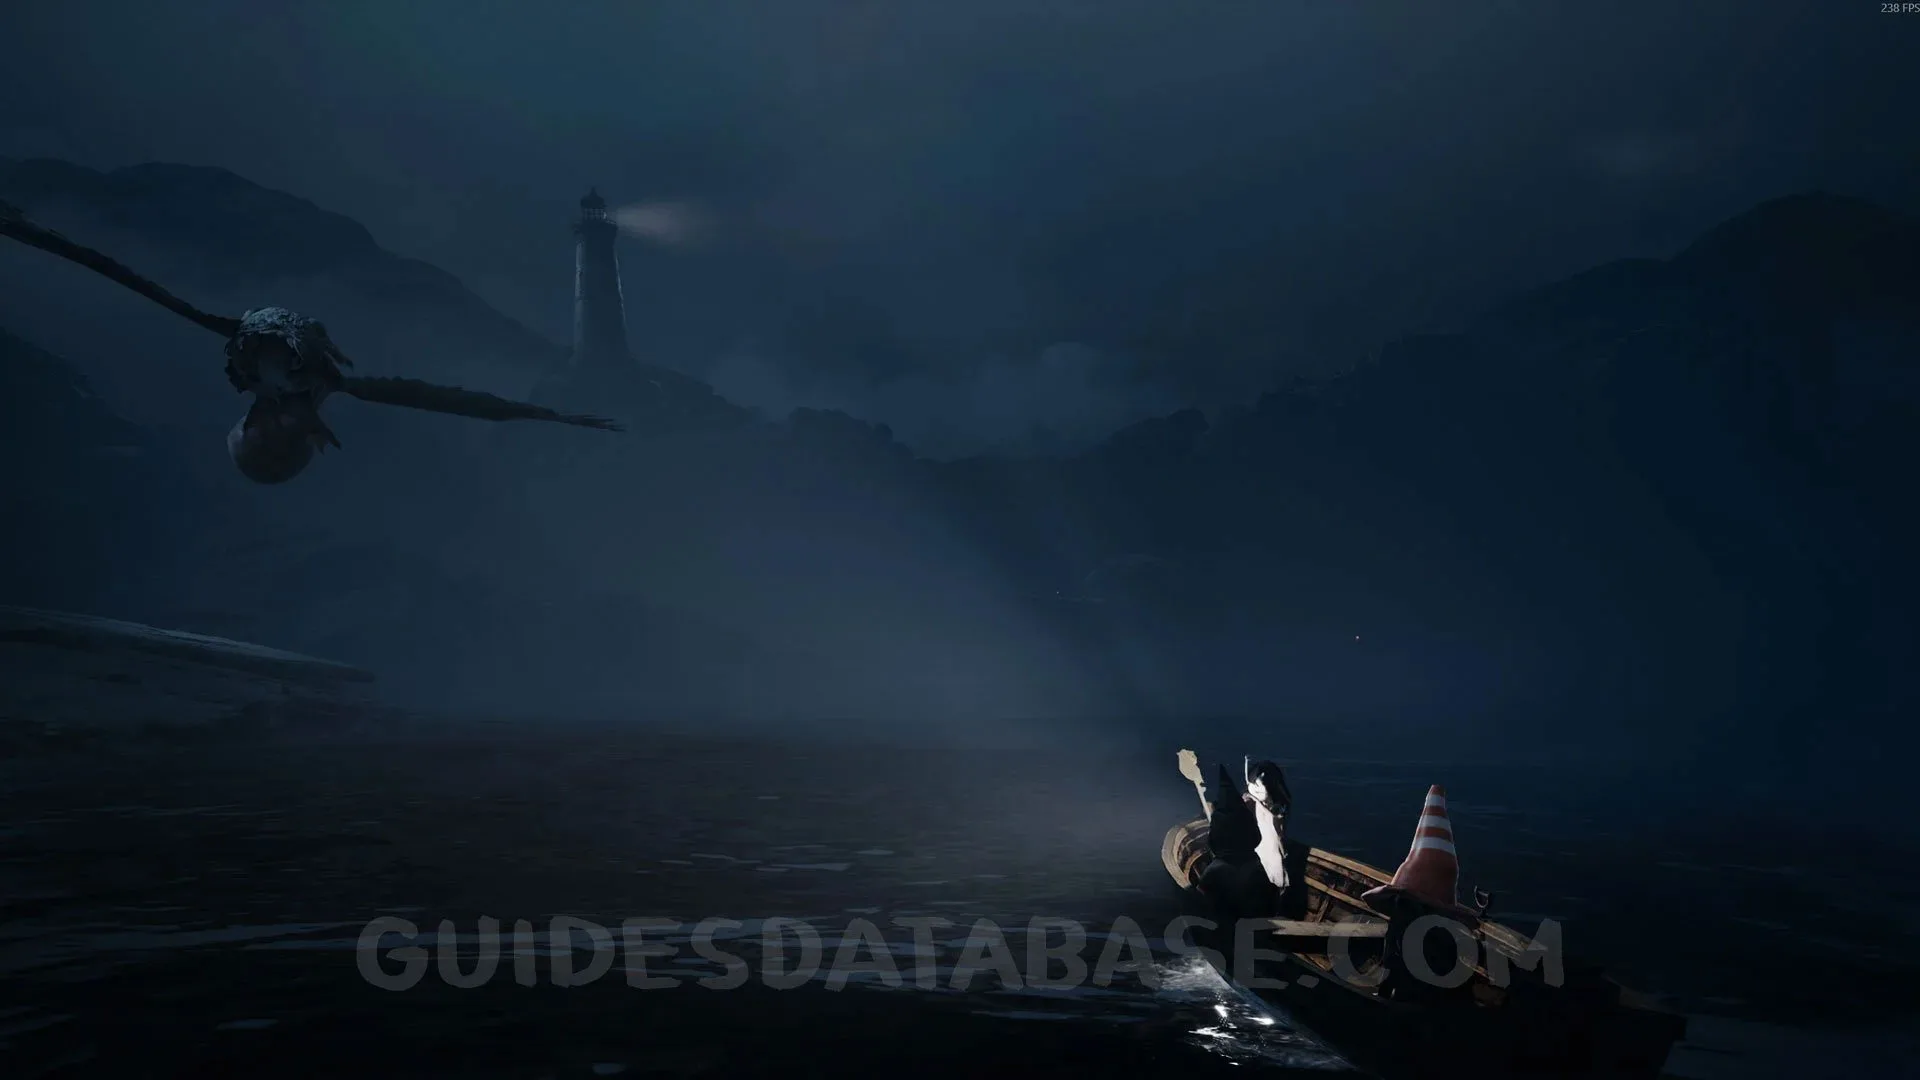 GUIDESDATABASE.COM
Before doing that, go around the area while keeping to the left, and you will reach a cave. Go through the cave, and at the end you will find this coffin.
 GUIDESDATABASE.COM
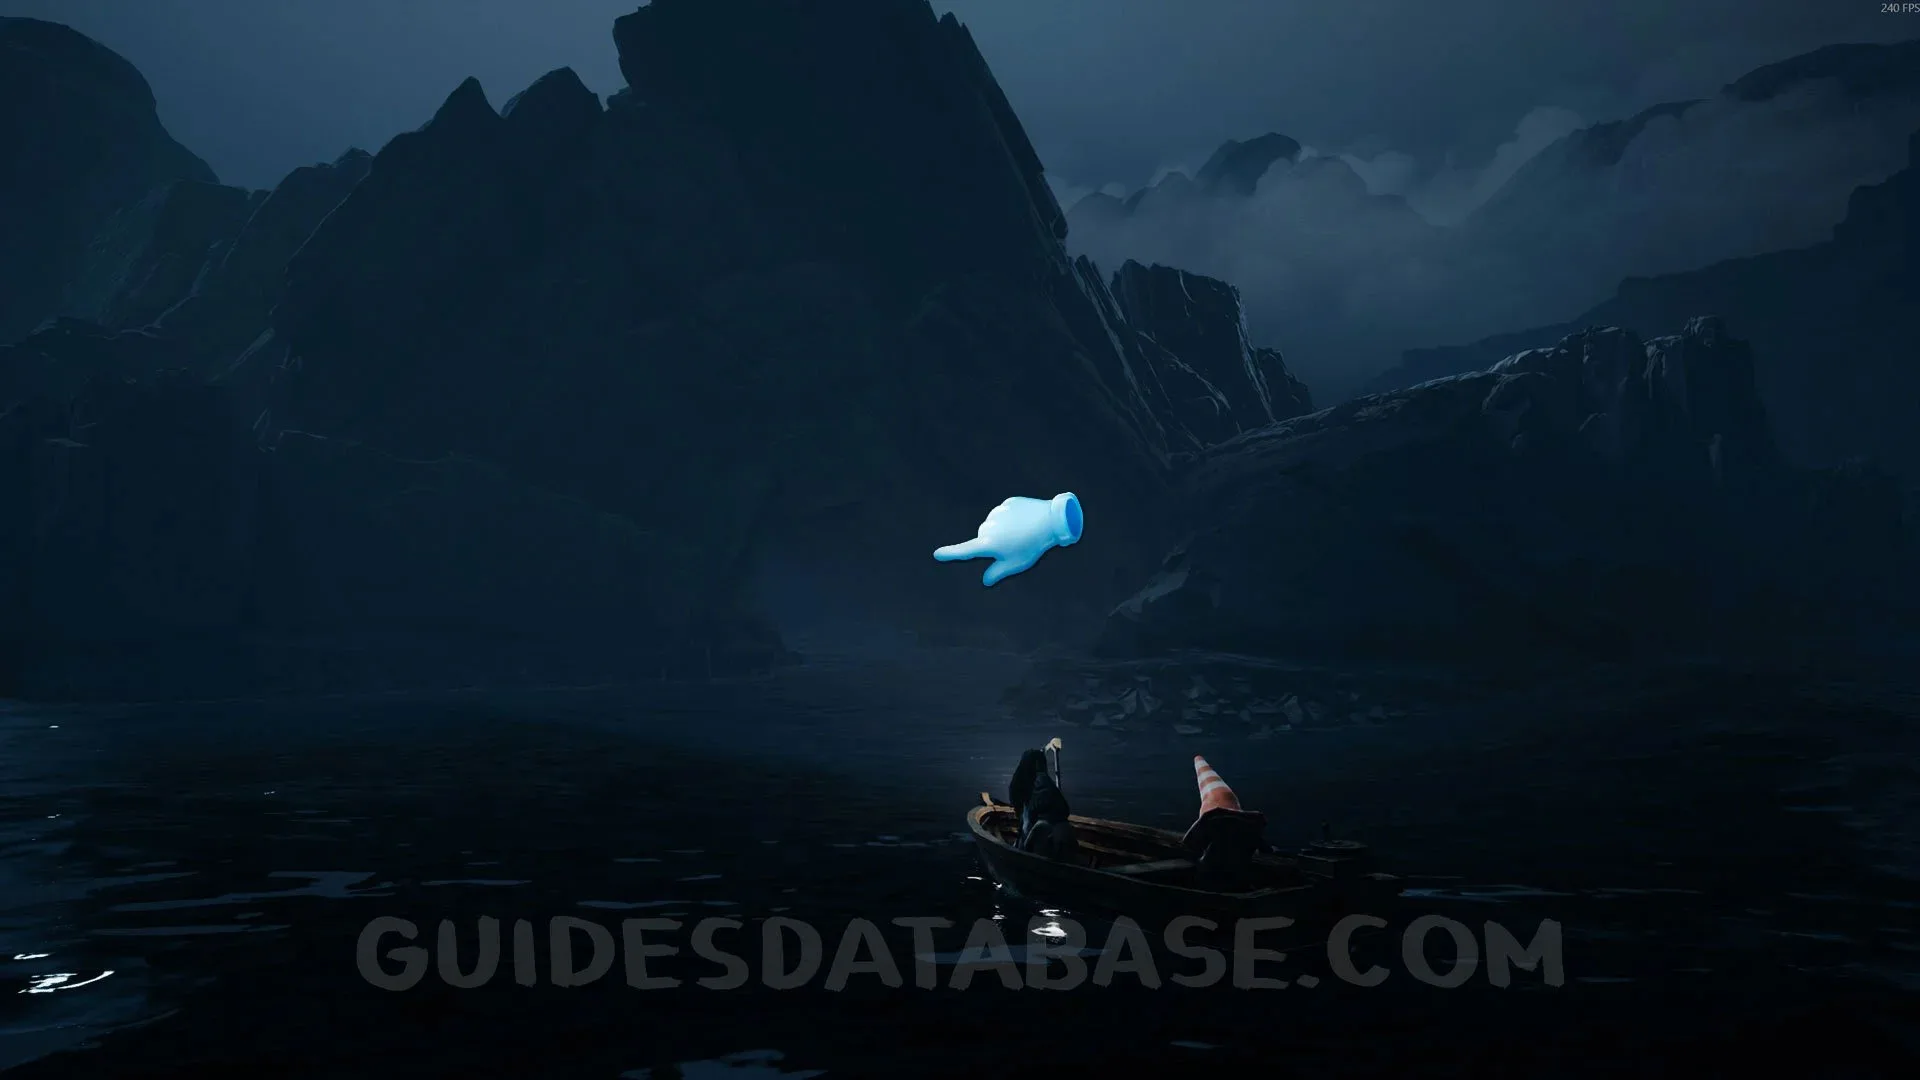 GUIDESDATABASE.COM
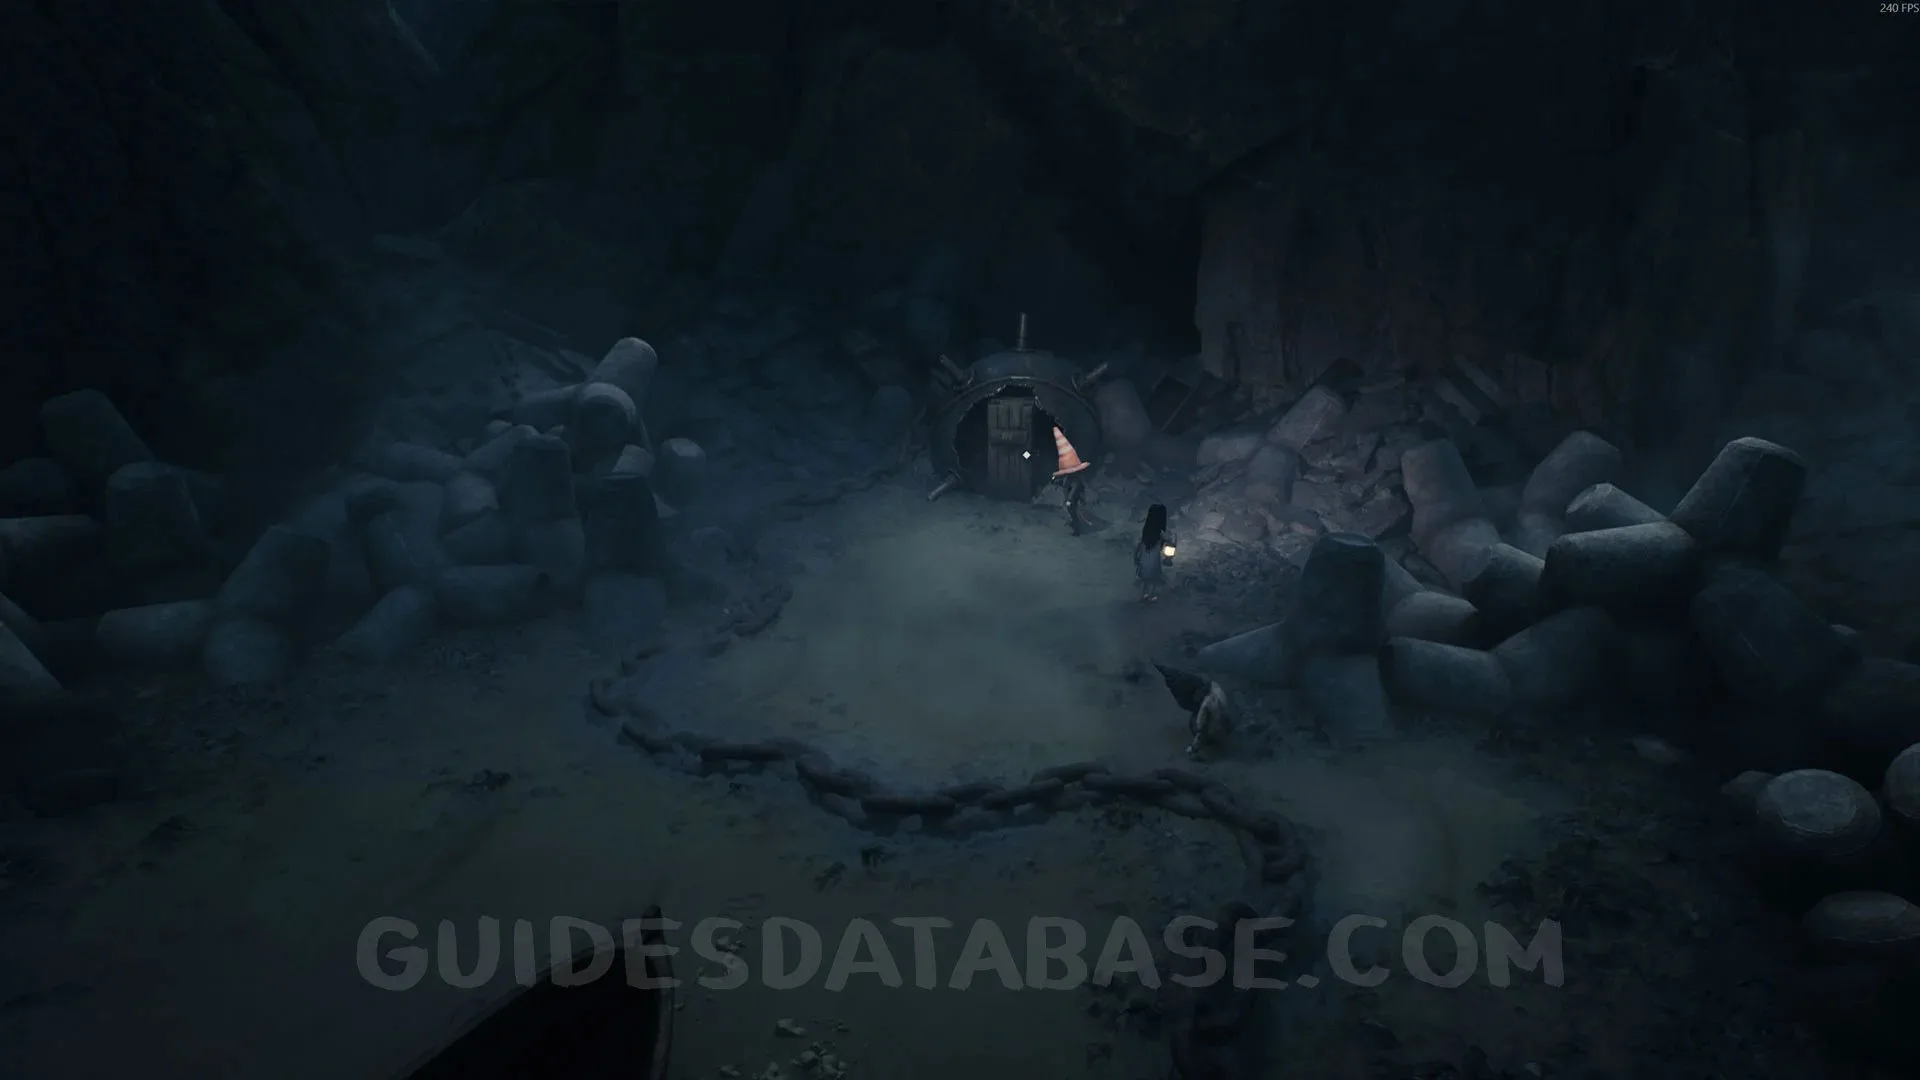 GUIDESDATABASE.COM
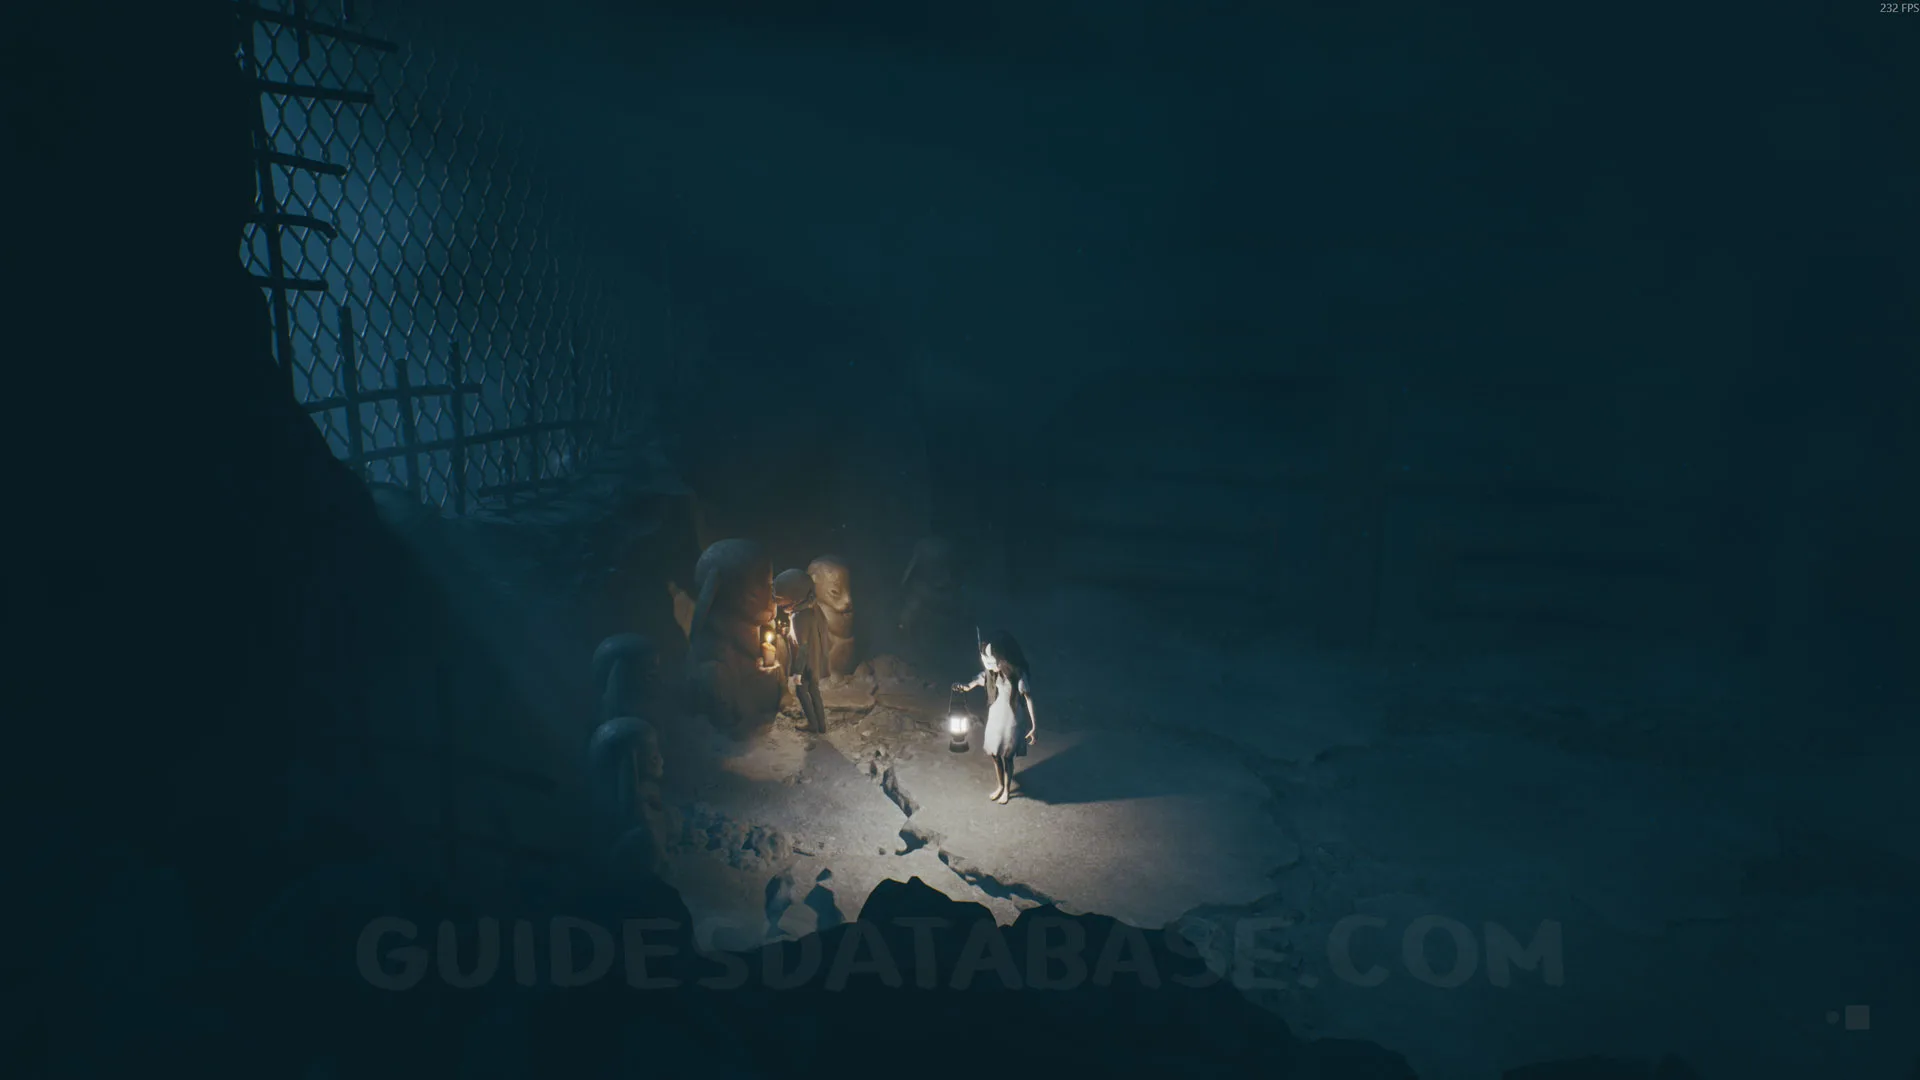
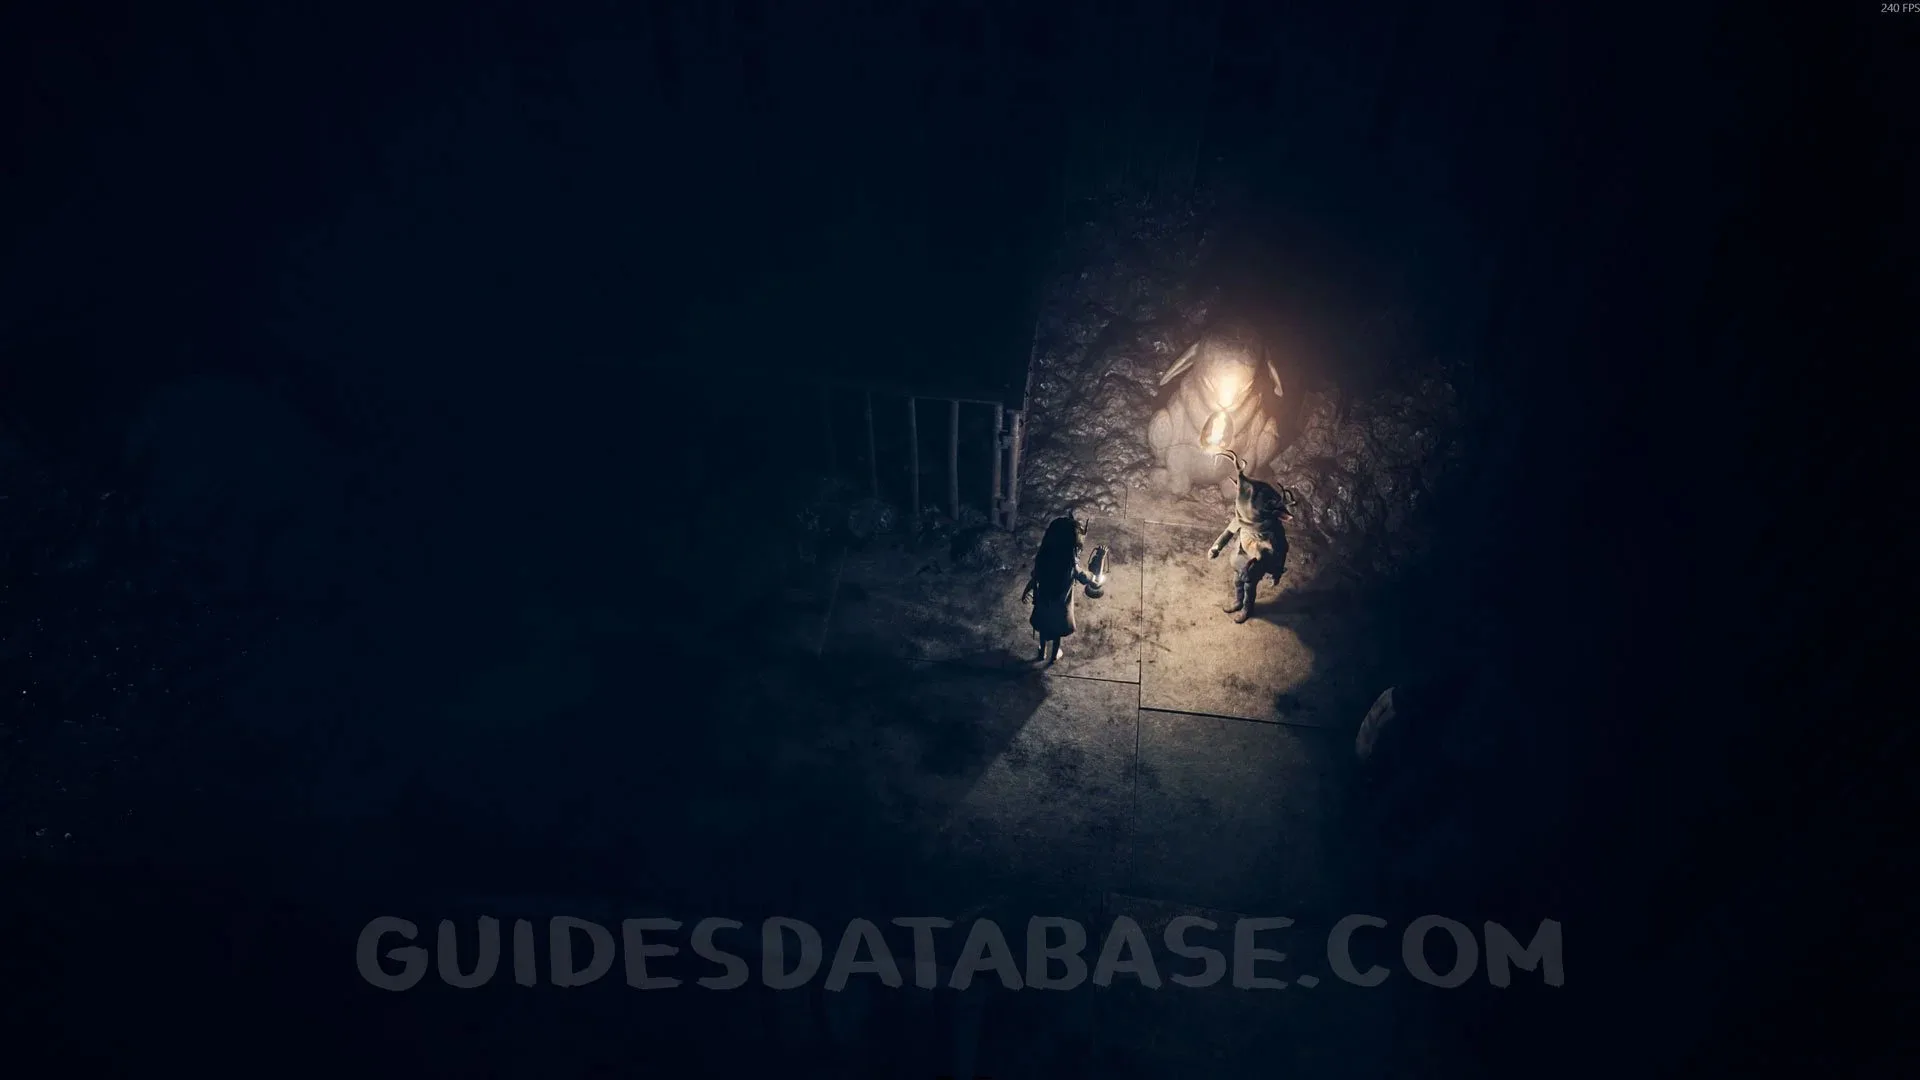
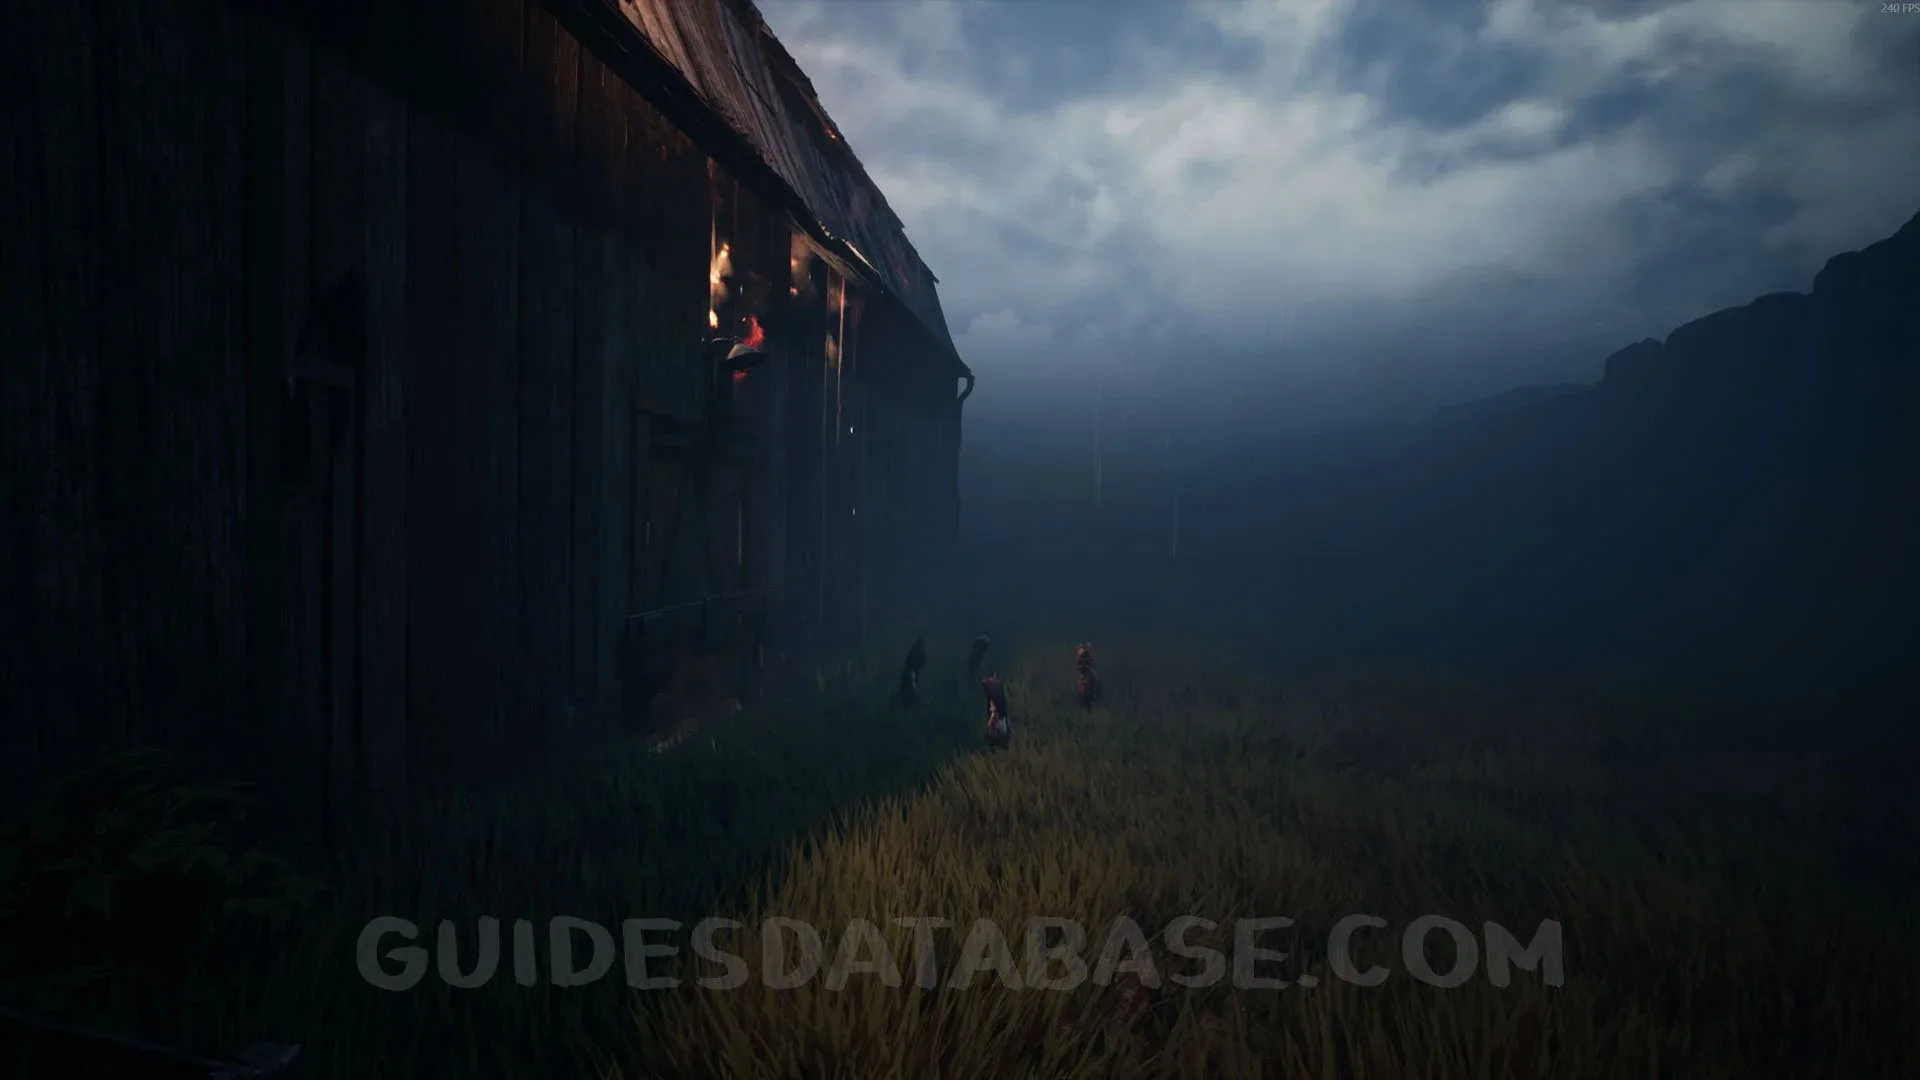
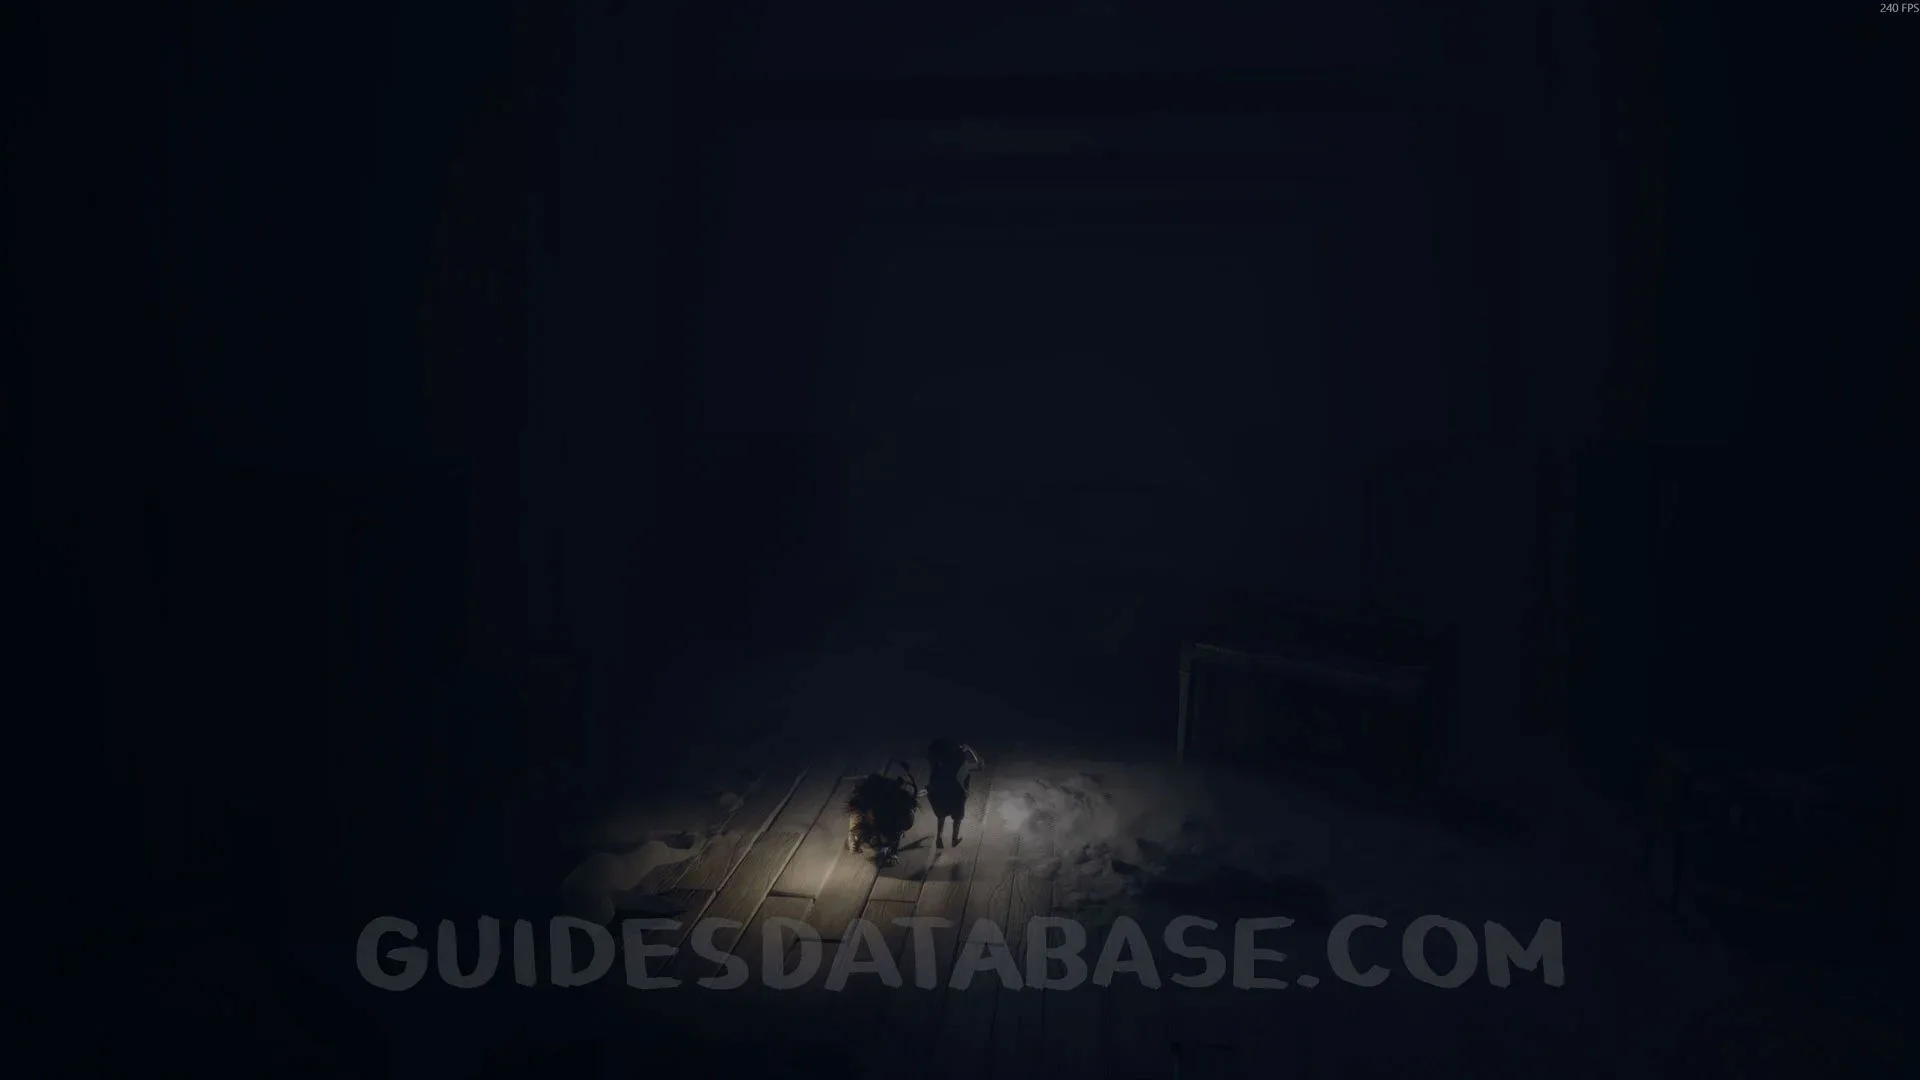
Critter #2 + Mask #6 + Secret #16
After climbing the large staircase, you will arrive in an area full of yellow flowers. Here, go left all the way to the end, and you will see a scarecrow. Hit the scarecrow with your crowbar to make the critter fall down, then defeat it to get the mask.
 GUIDESDATABASE.COM
 GUIDESDATABASE.COM
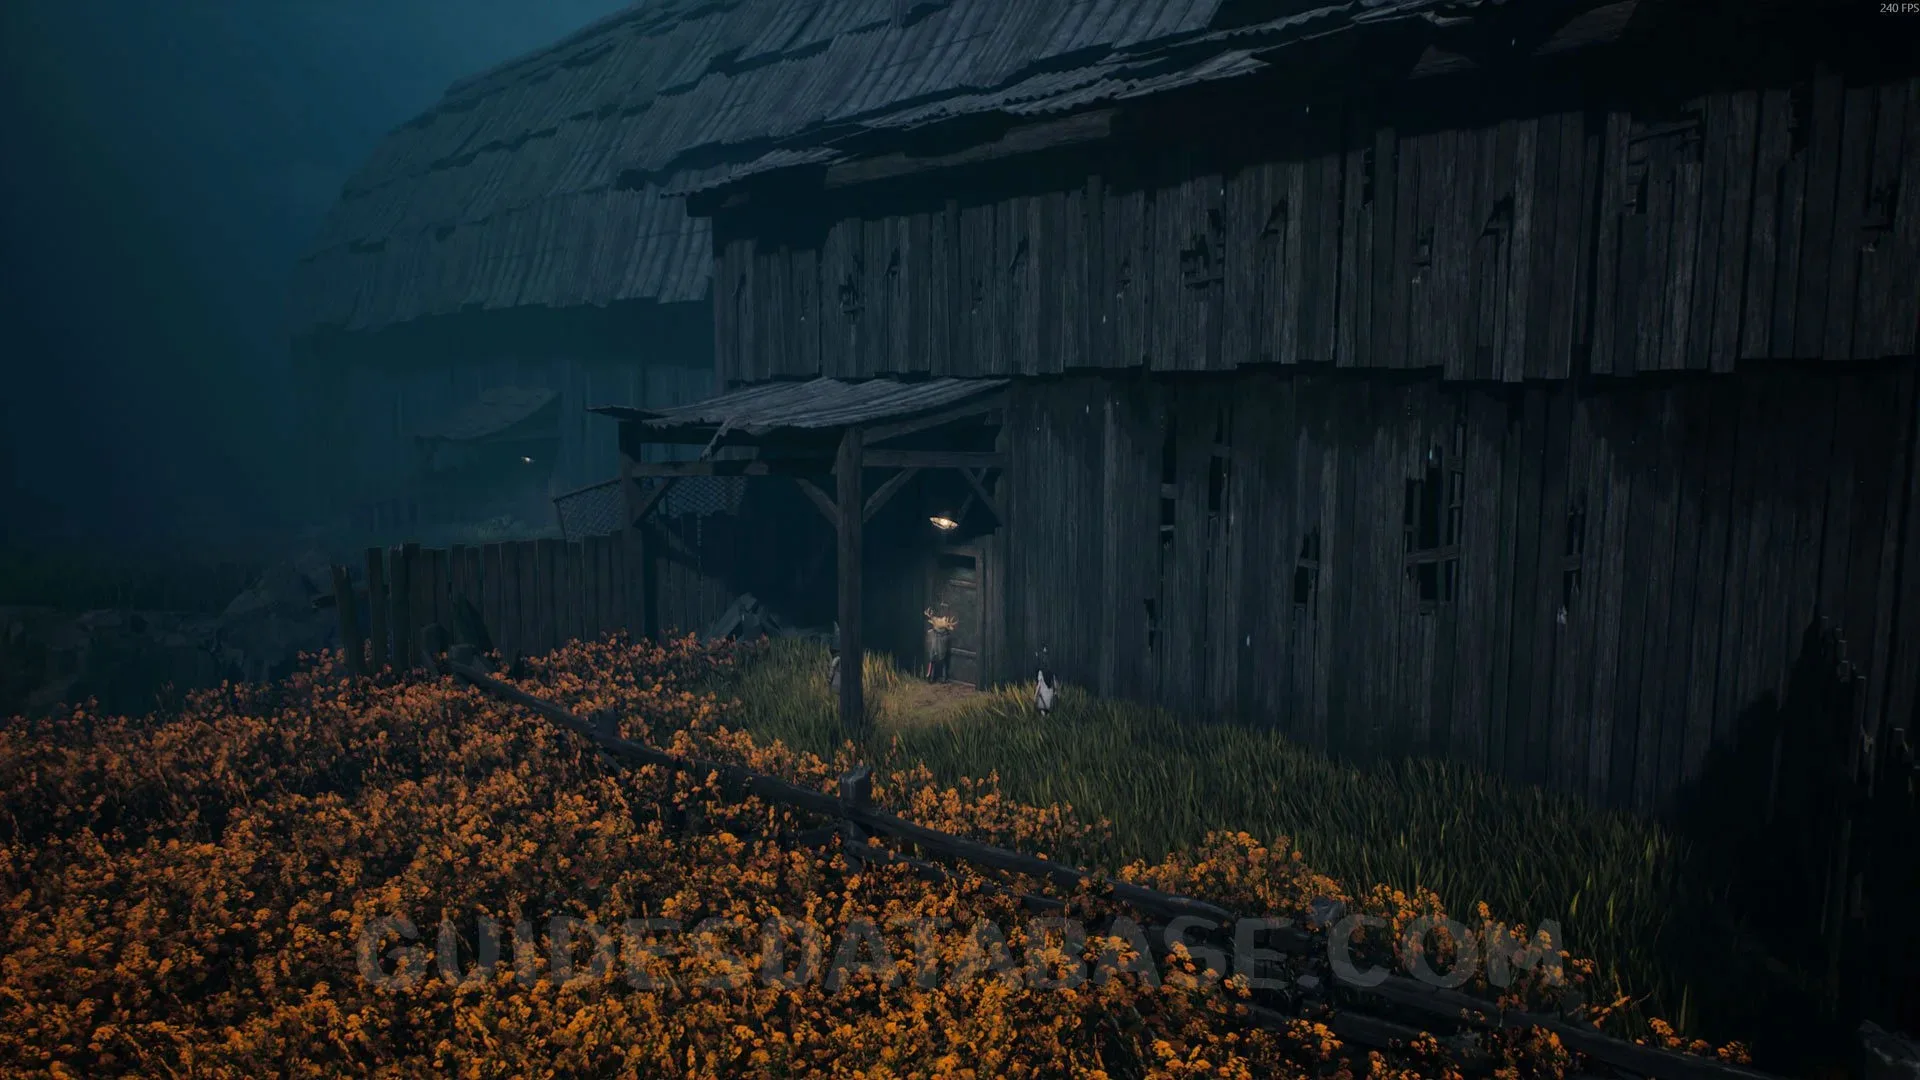
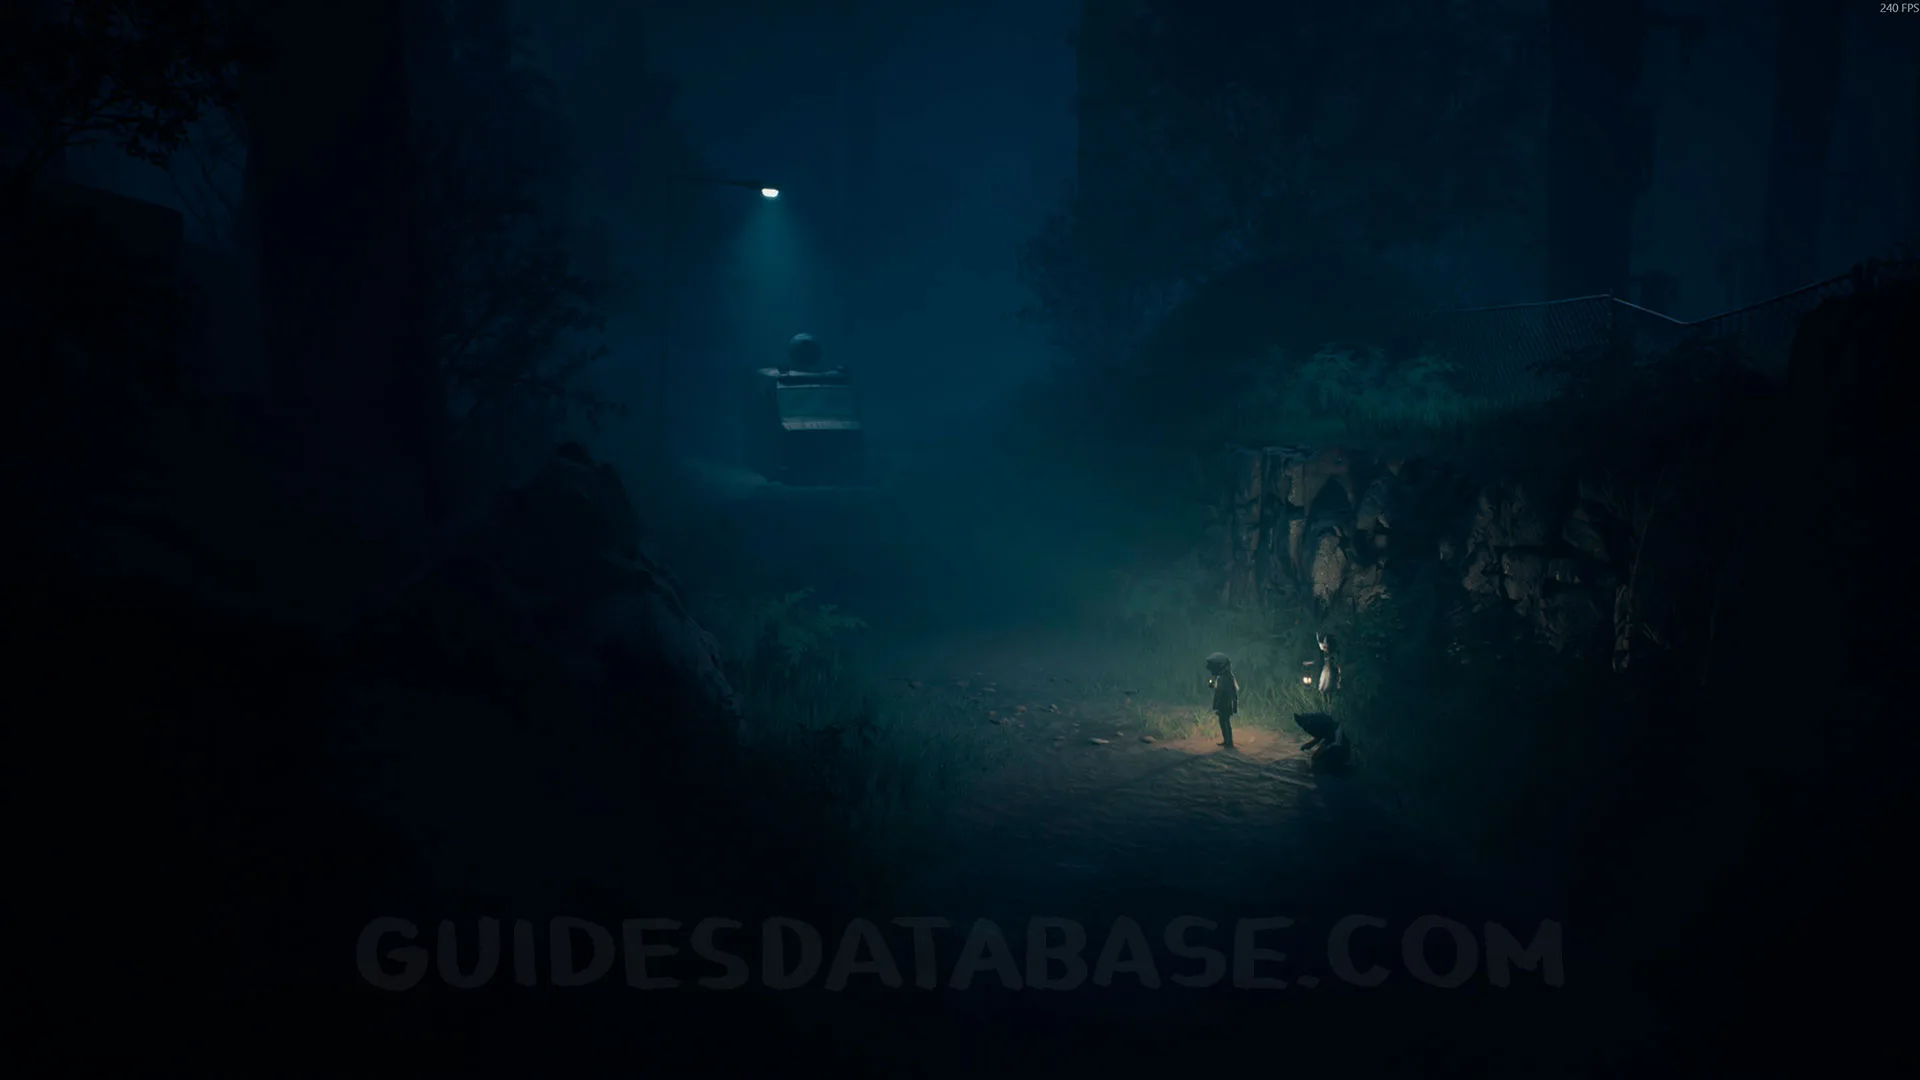
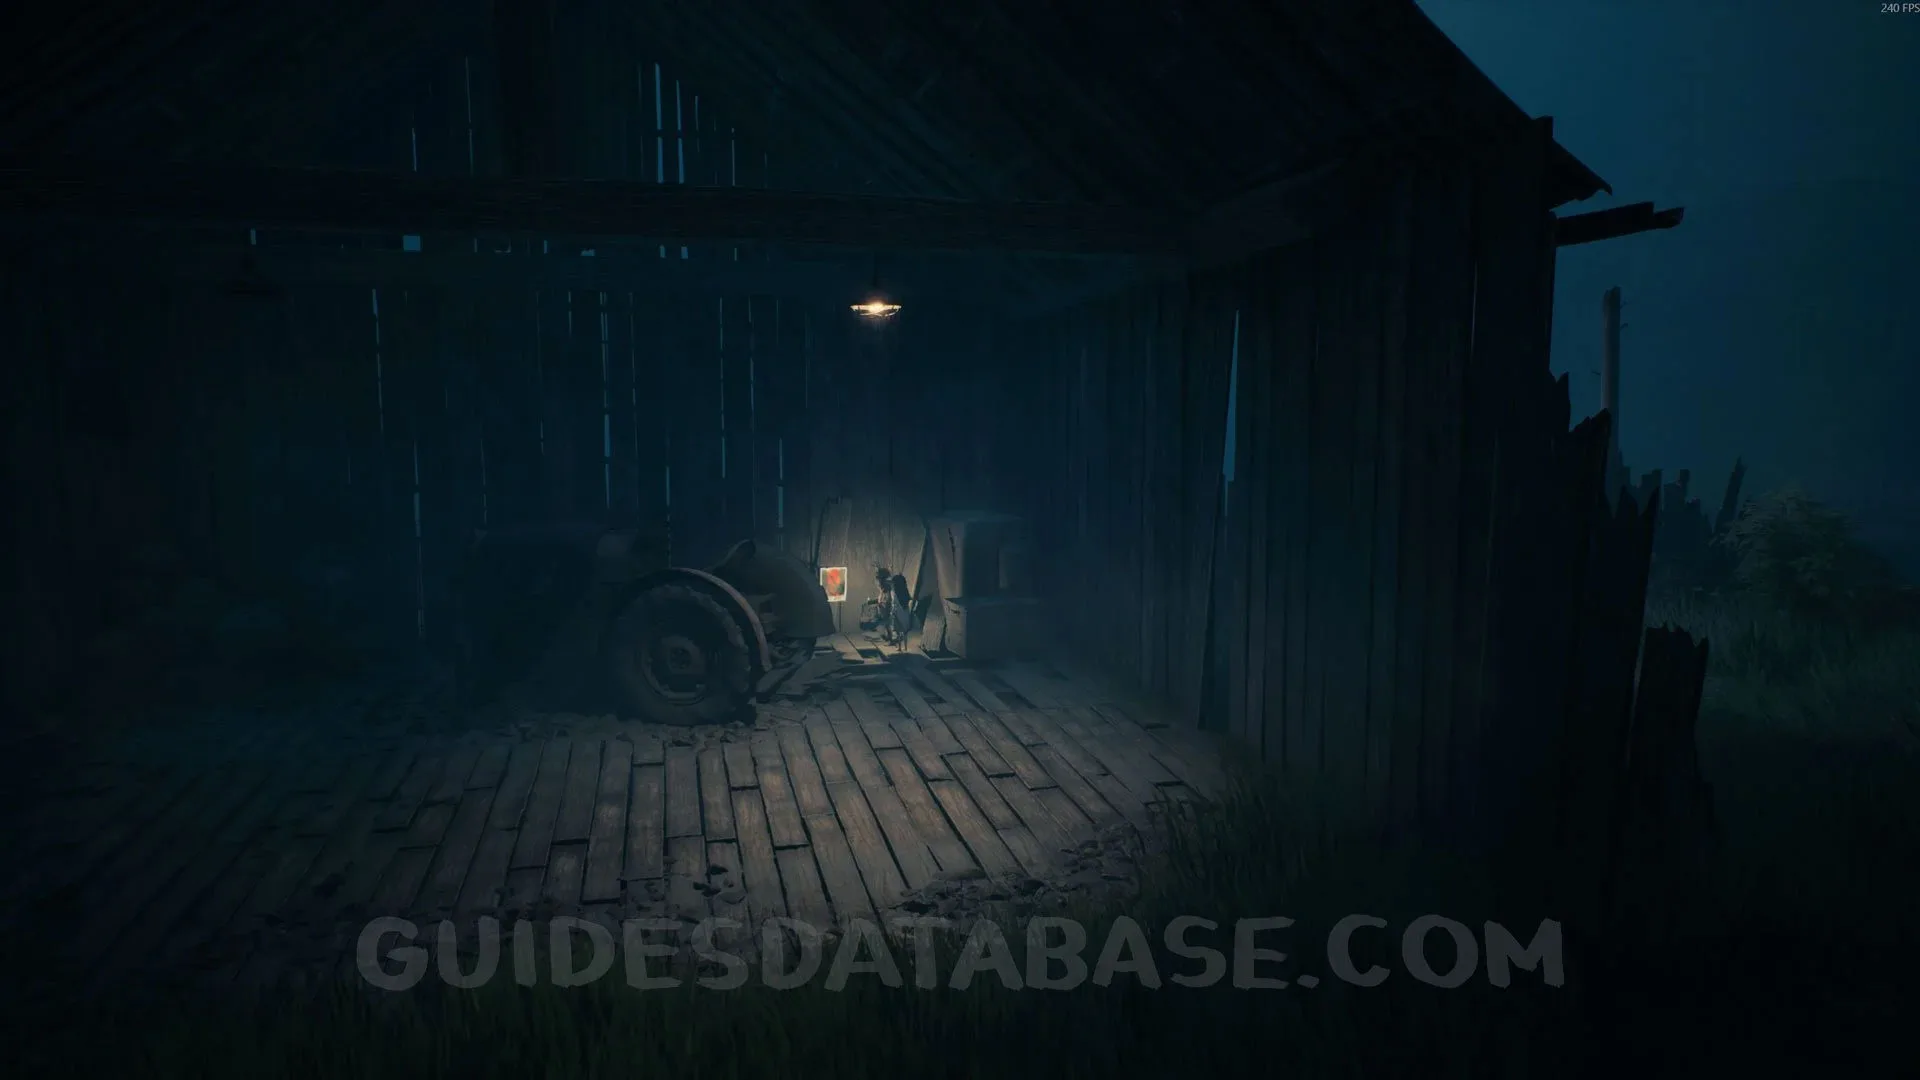
Poster #7 + Secret #18
After passing through the barn, you will need to defend yourself from some herons and go through a hole in a wall. Once on the other side, you will find this poster next to the tractor.
 GUIDESDATABASE.COM
Poster #8 + Secret #19
After escaping from the bird and going through the barn again, you will need to head to the bus stop to move on to the next chapter. Before that, pick up the poster attached to the utility pole next to the bus stop.
 GUIDESDATABASE.COM
 GUIDESDATABASE.COM
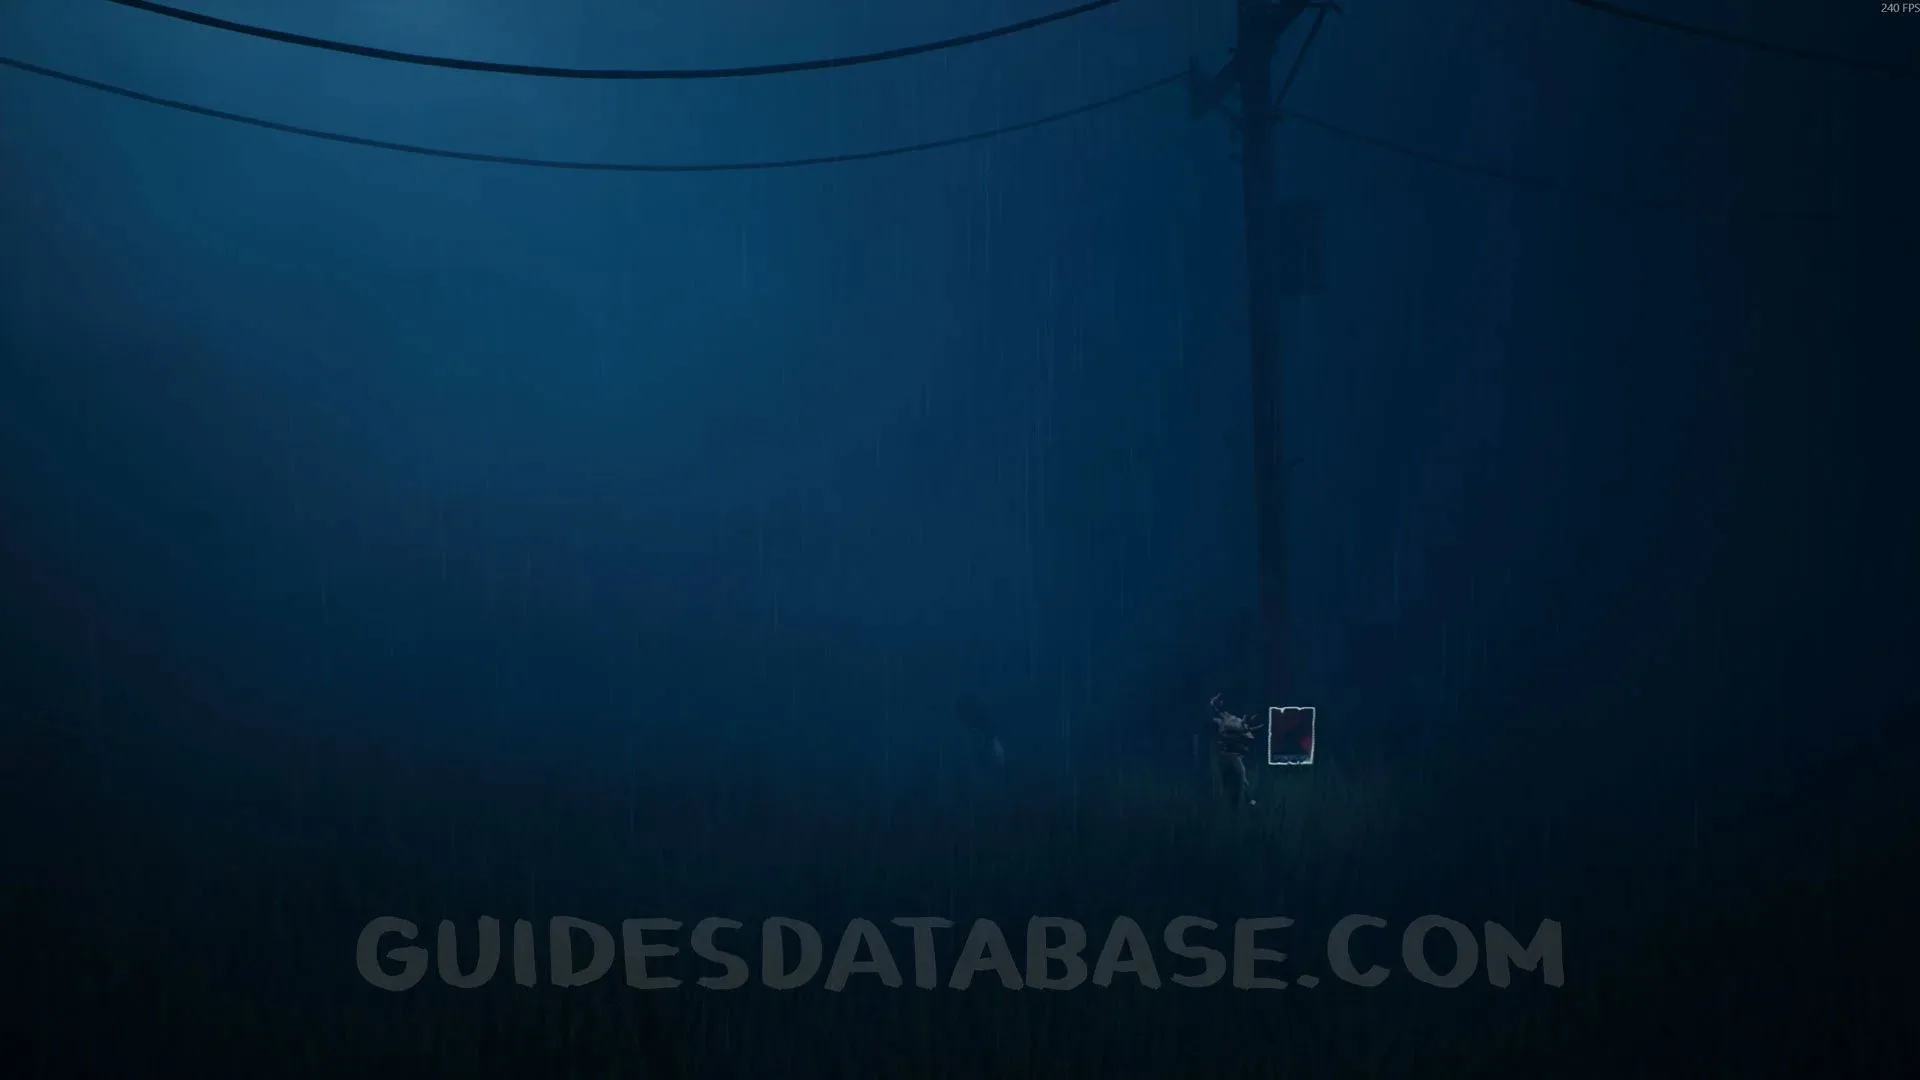 GUIDESDATABASE.COM
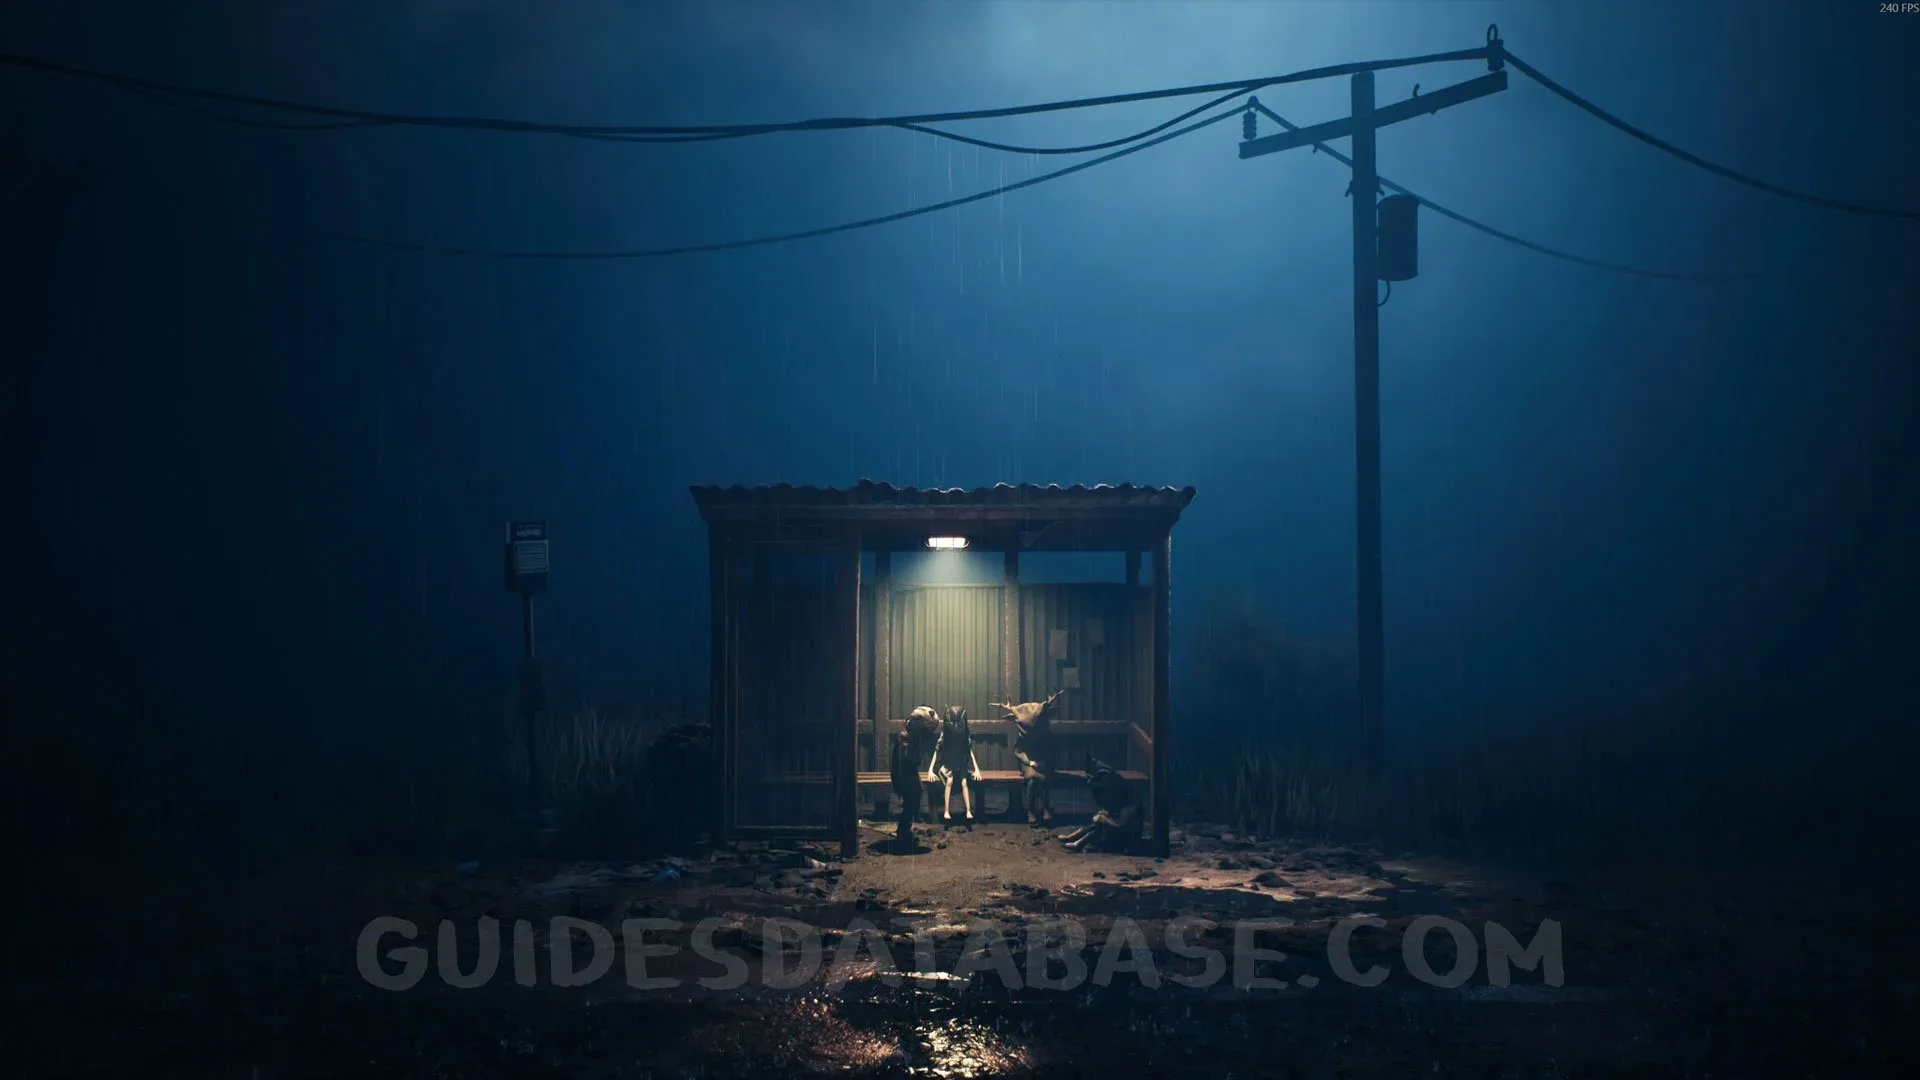
Rest Your Legs #7
Sit at the bus stop to move on to the next chapter. This will count as a Rest Your Legs spot for the trophy.
 GUIDESDATABASE.COM
Chapter 4: No Shelter
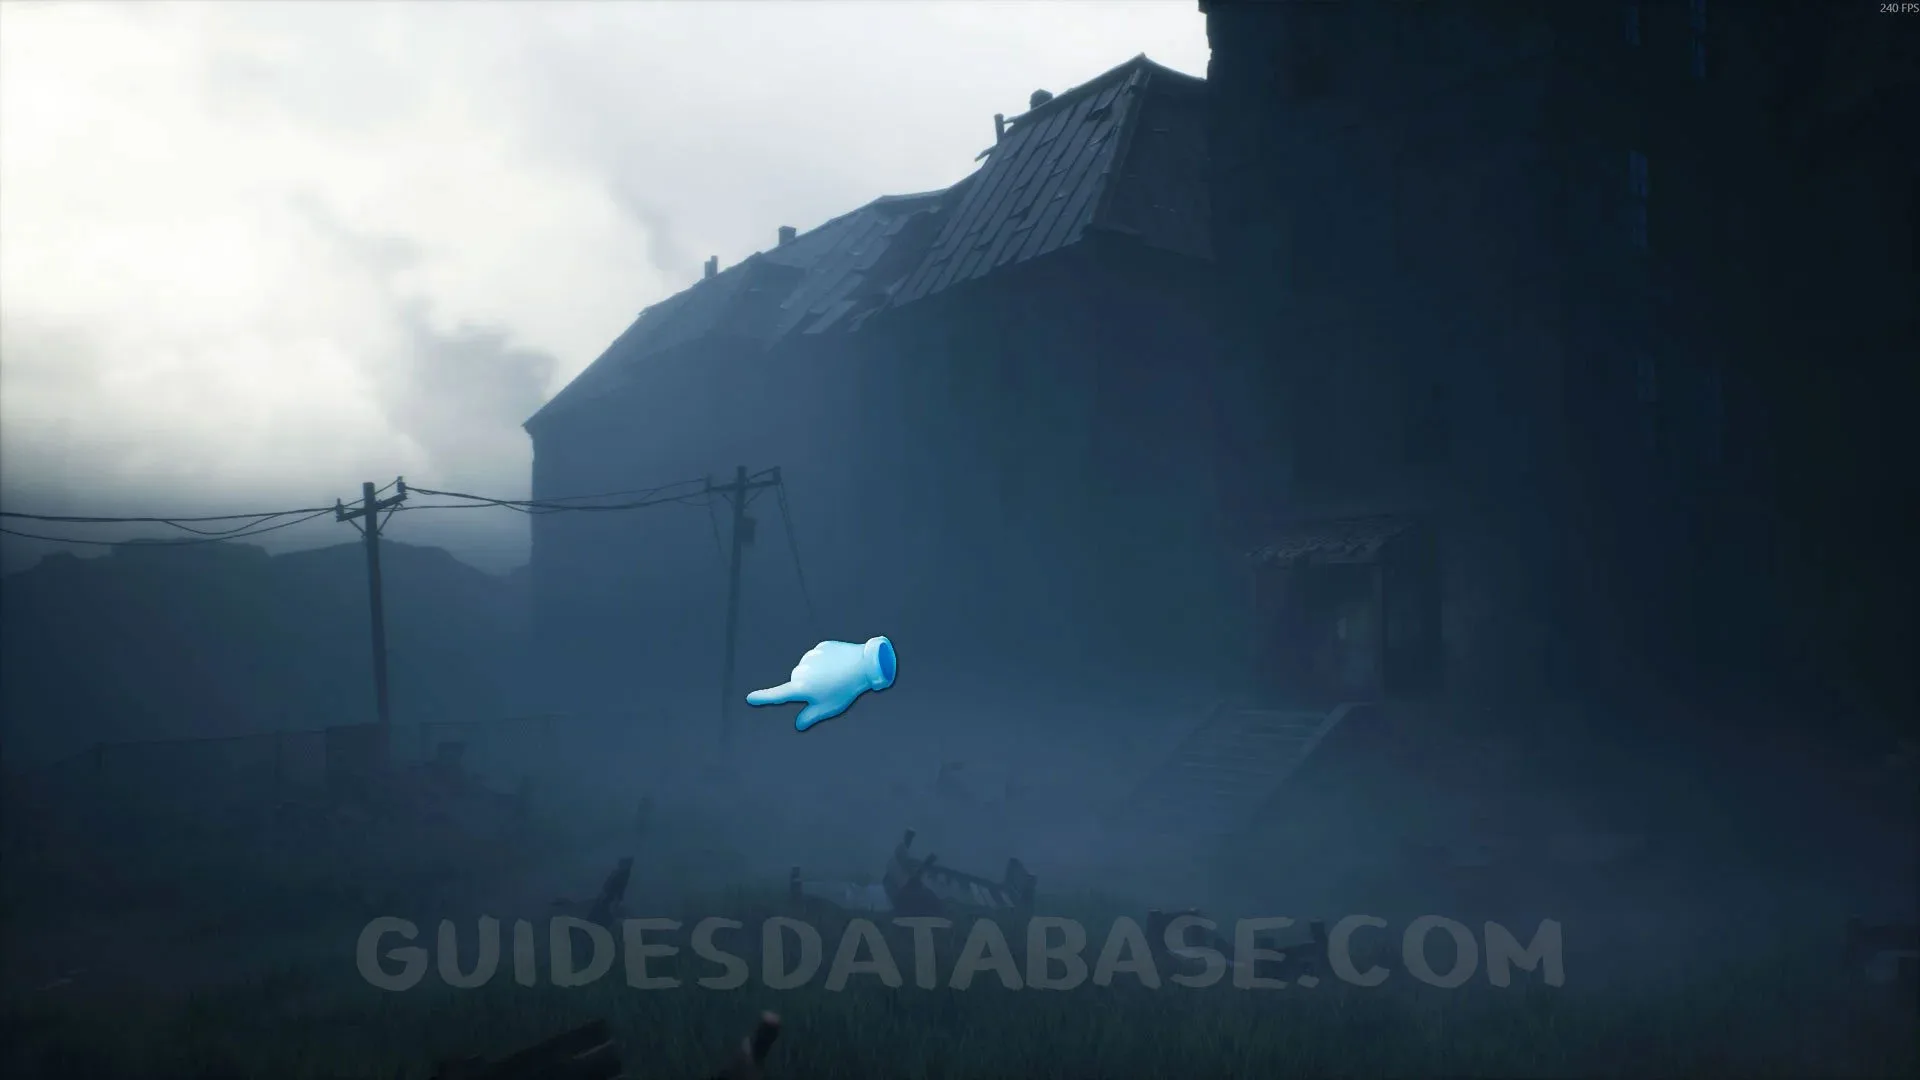
Poster #9 + Secret #20
At the start of the chapter, pick up the poster from the utility pole.
 GUIDESDATABASE.COM
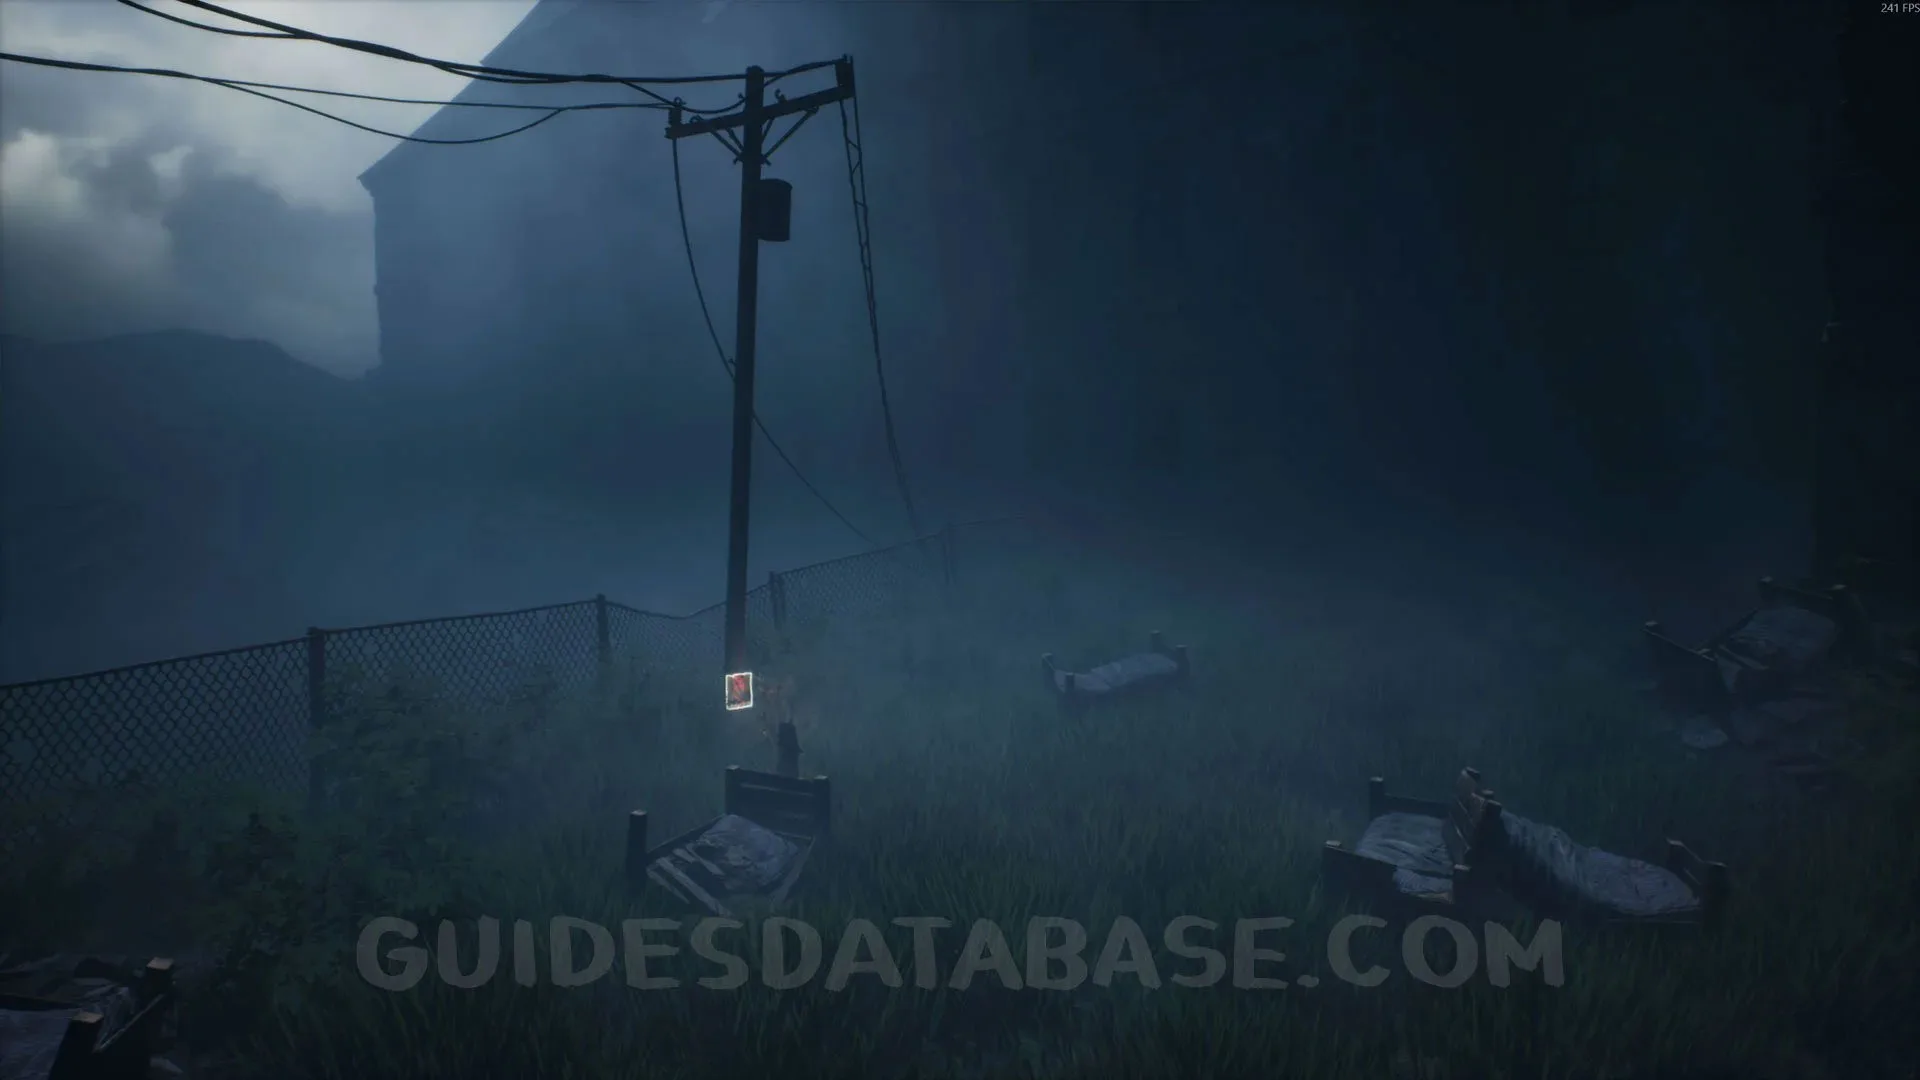 GUIDESDATABASE.COM
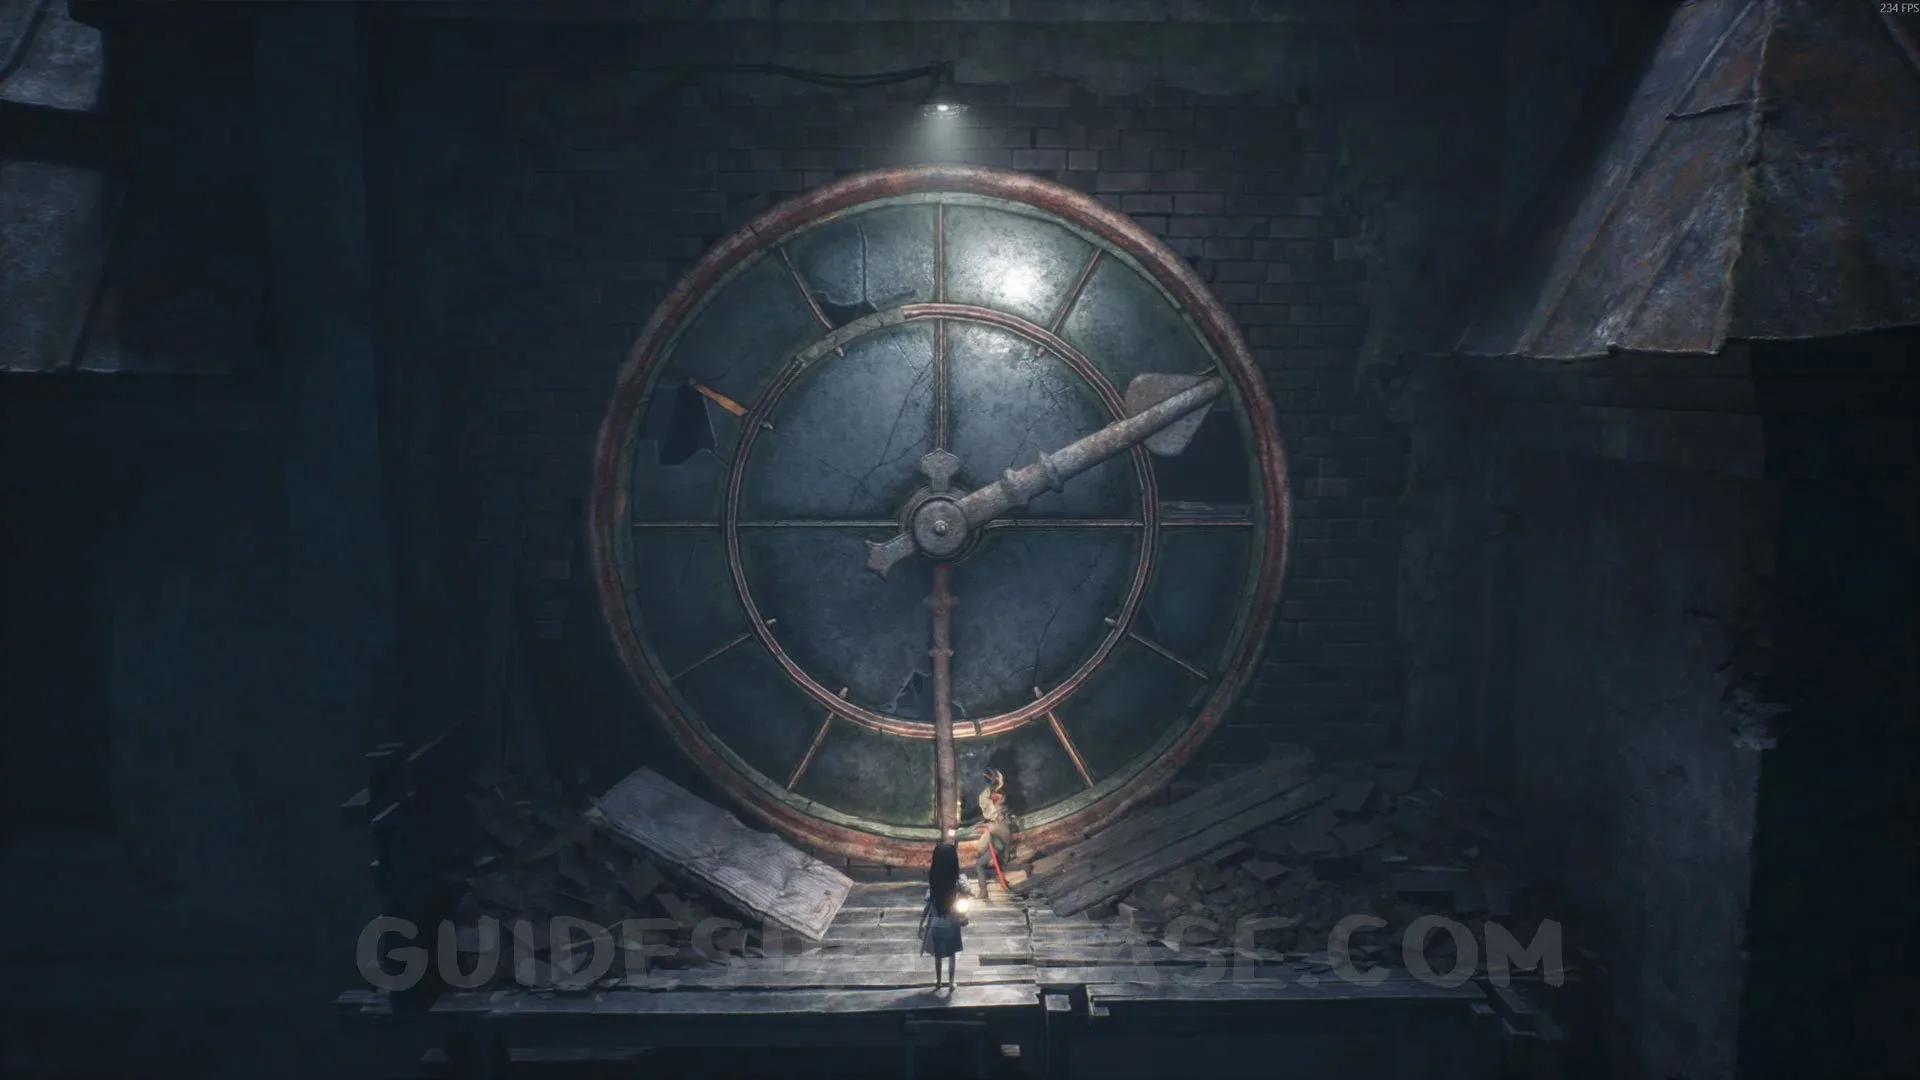
Trophy “Scared to Dust”
After the previous collectible, you will climb a ladder and move the clock hand to get inside. Once you are in, you will see several Dust dolls. Your goal is to destroy all 12 Dust dolls in this room. Some of them are hidden in spots the camera cannot see, so go behind the furniture and keep swinging your crowbar until you destroy them all.
 GUIDESDATABASE.COM
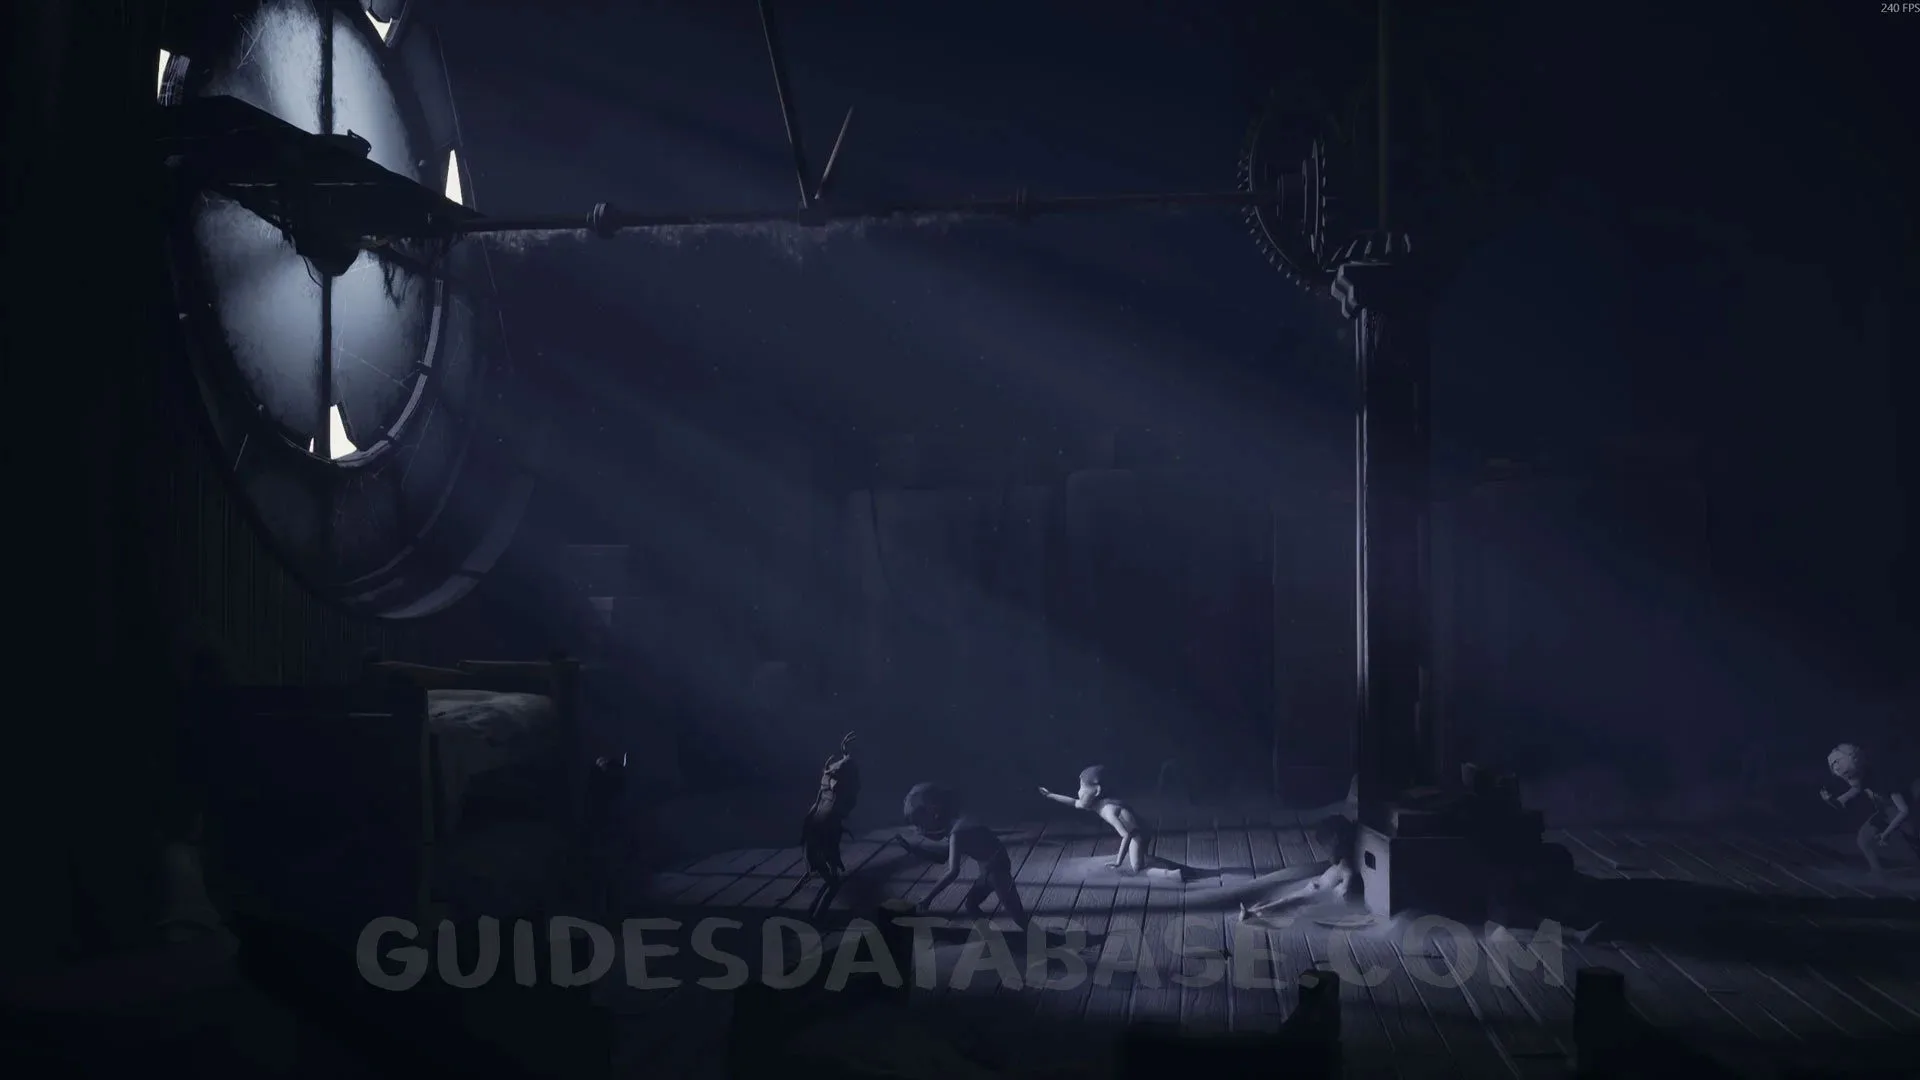 GUIDESDATABASE.COM
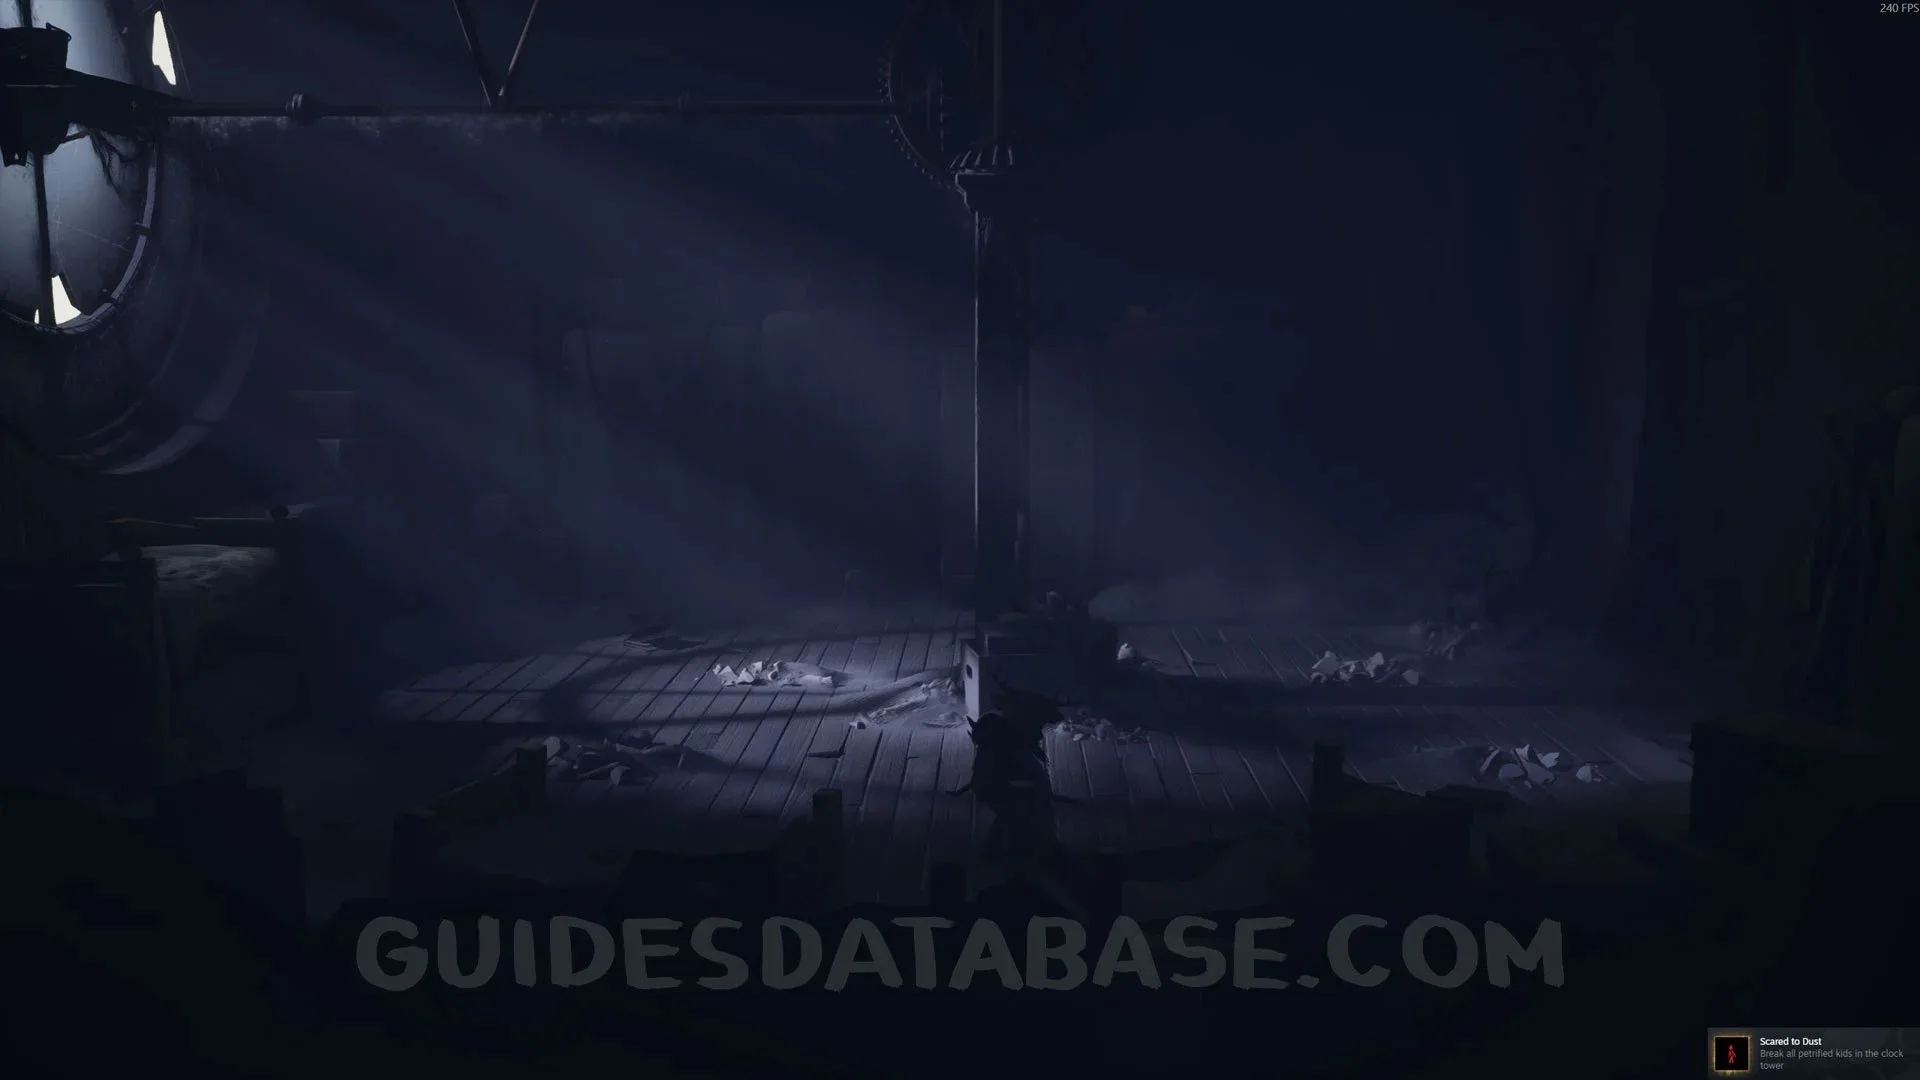 GUIDESDATABASE.COM
Rest Your Legs #8
In the same area, you will find a place to sit.
 GUIDESDATABASE.COM
Poster #10 + Secret #21
Now get up from the sofa and go through the hole in the wall next to it. You will see a critter run past you, but ignore it and pick up the poster on the wall.
 GUIDESDATABASE.COM
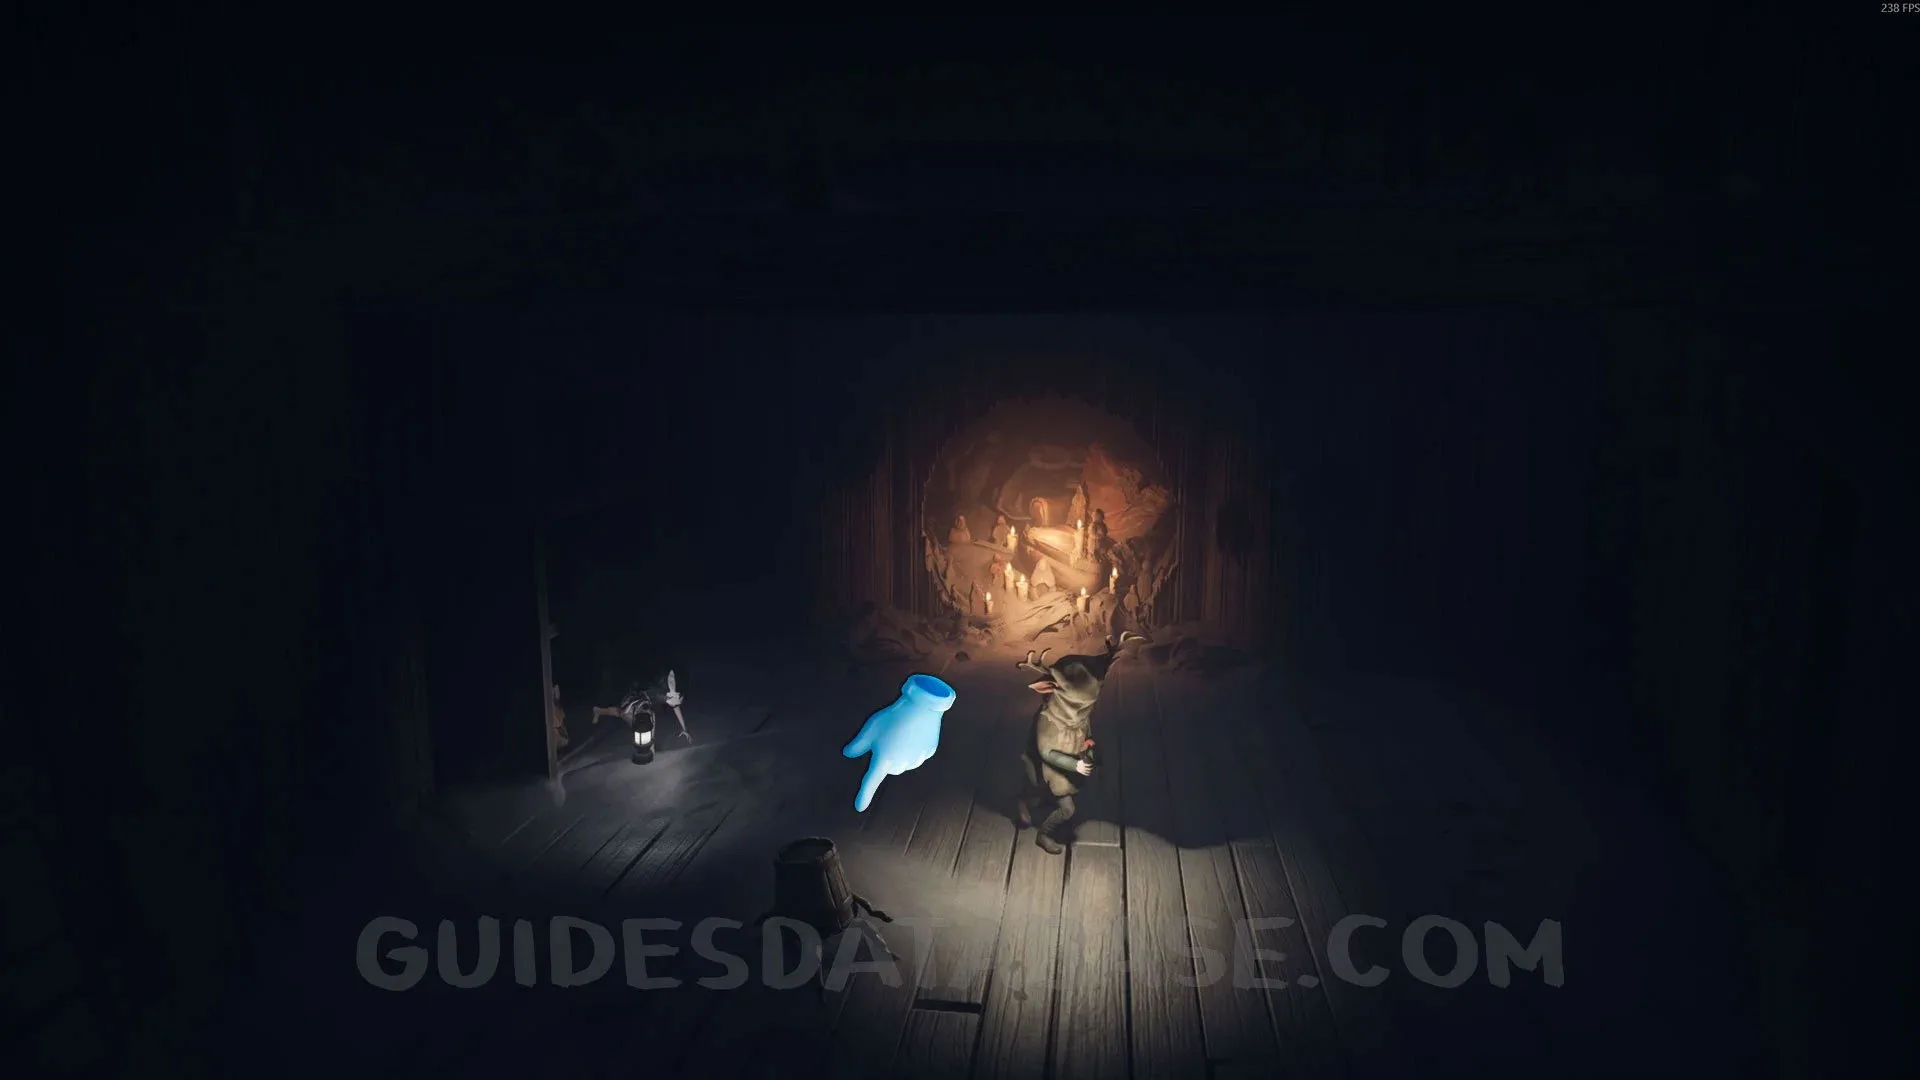 GUIDESDATABASE.COM
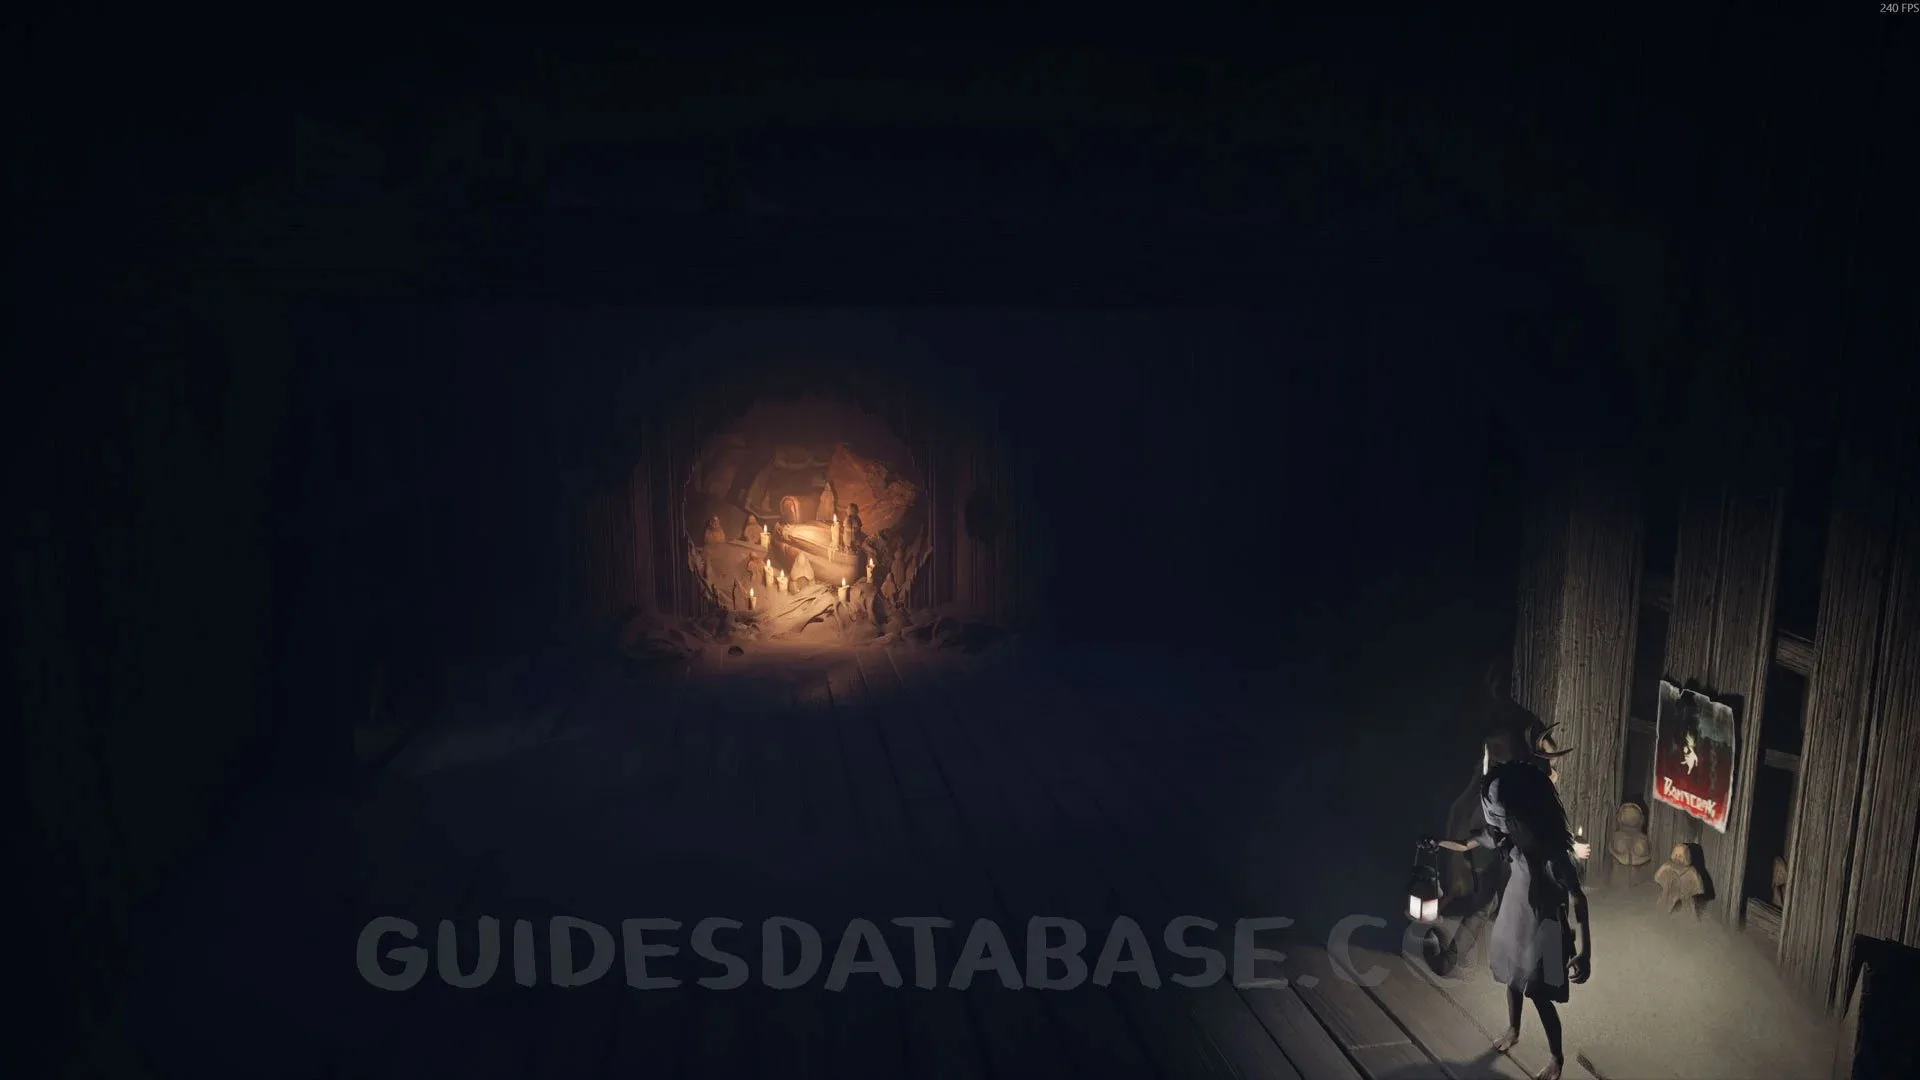 GUIDESDATABASE.COM
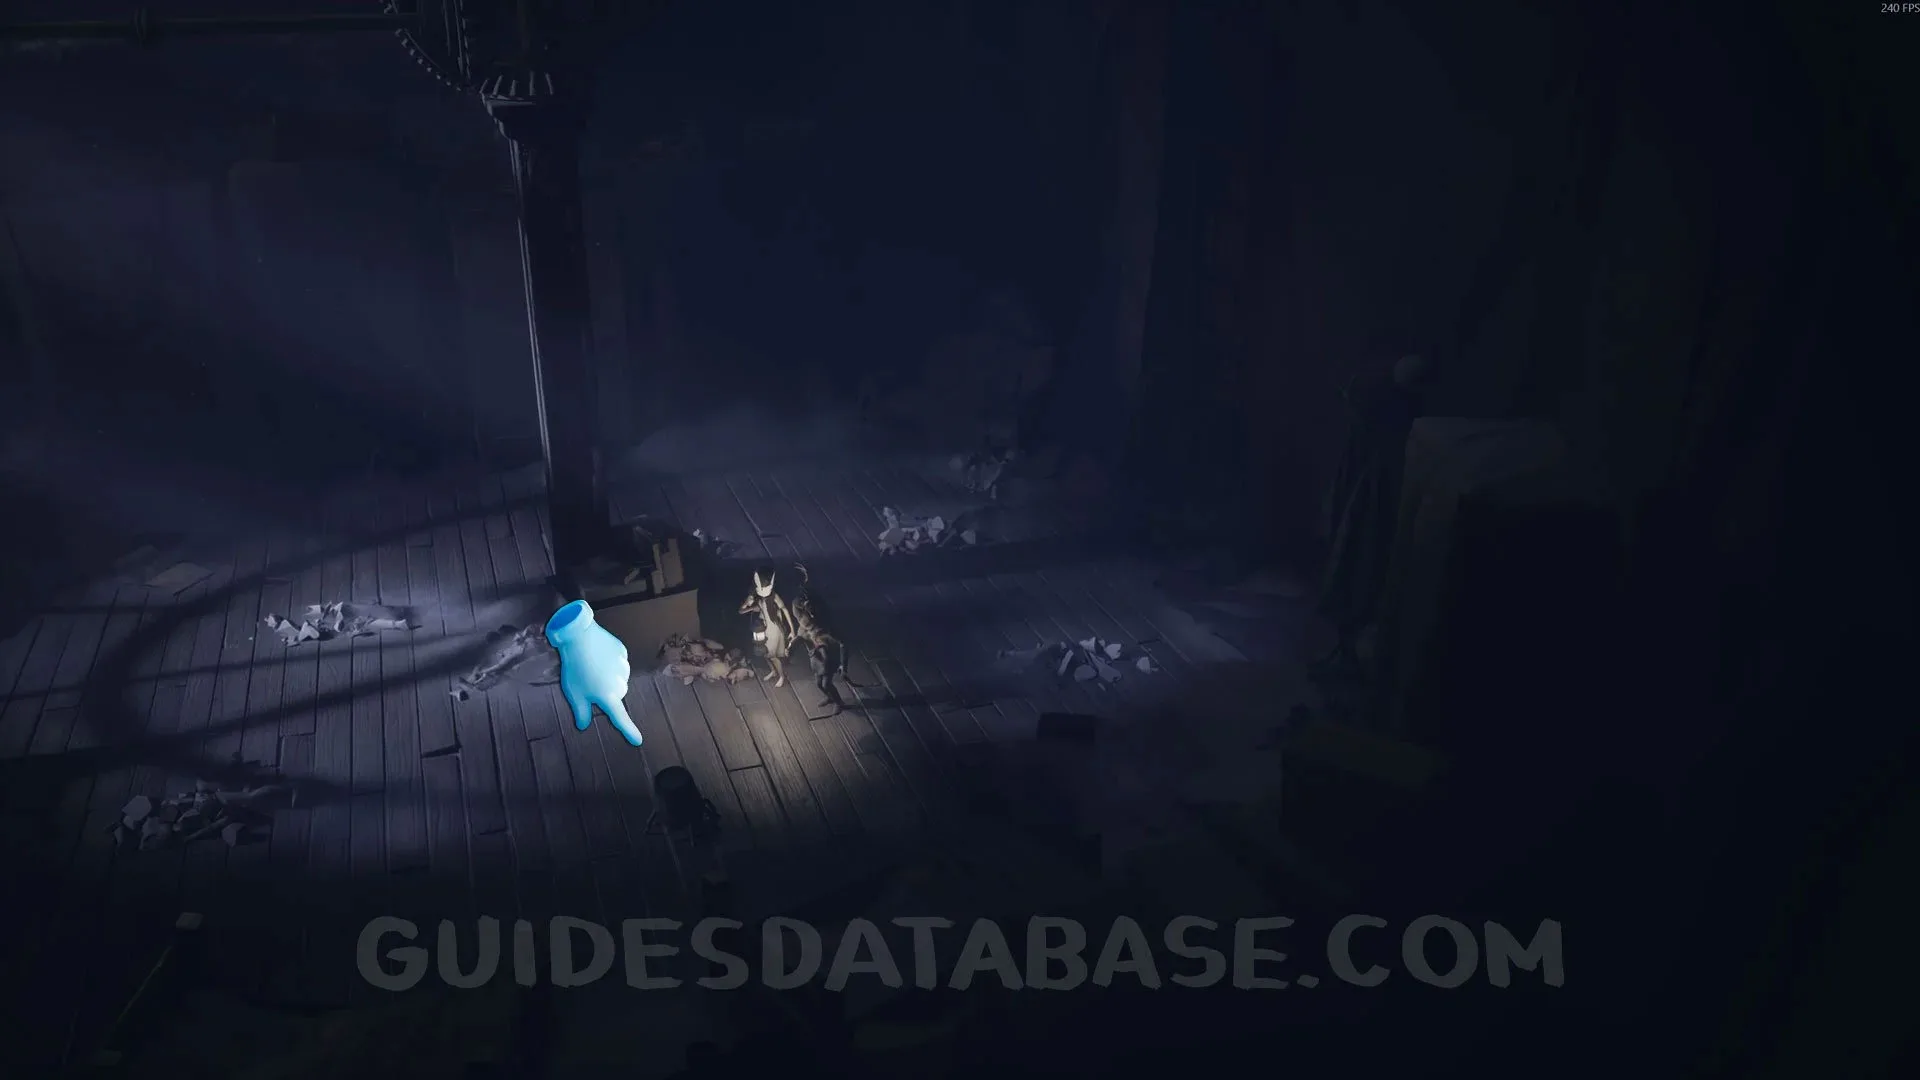
Critter #3 + Mask #7 + Secret #22
Now go back to the previous room where you destroyed the Dust dolls, and you will see the critter that ran away from you. Defeat it to get this mask.
 GUIDESDATABASE.COM
Trophy “Survival Instinct”
To move forward, you will need to open the wardrobe, go through it, push a box, and open a hatch, which will make you fall onto a bed. At the end of this hallway, you will see two Dust Dolls. Your goal is to let them defeat your friend, and this will unlock this trophy.
 GUIDESDATABASE.COM
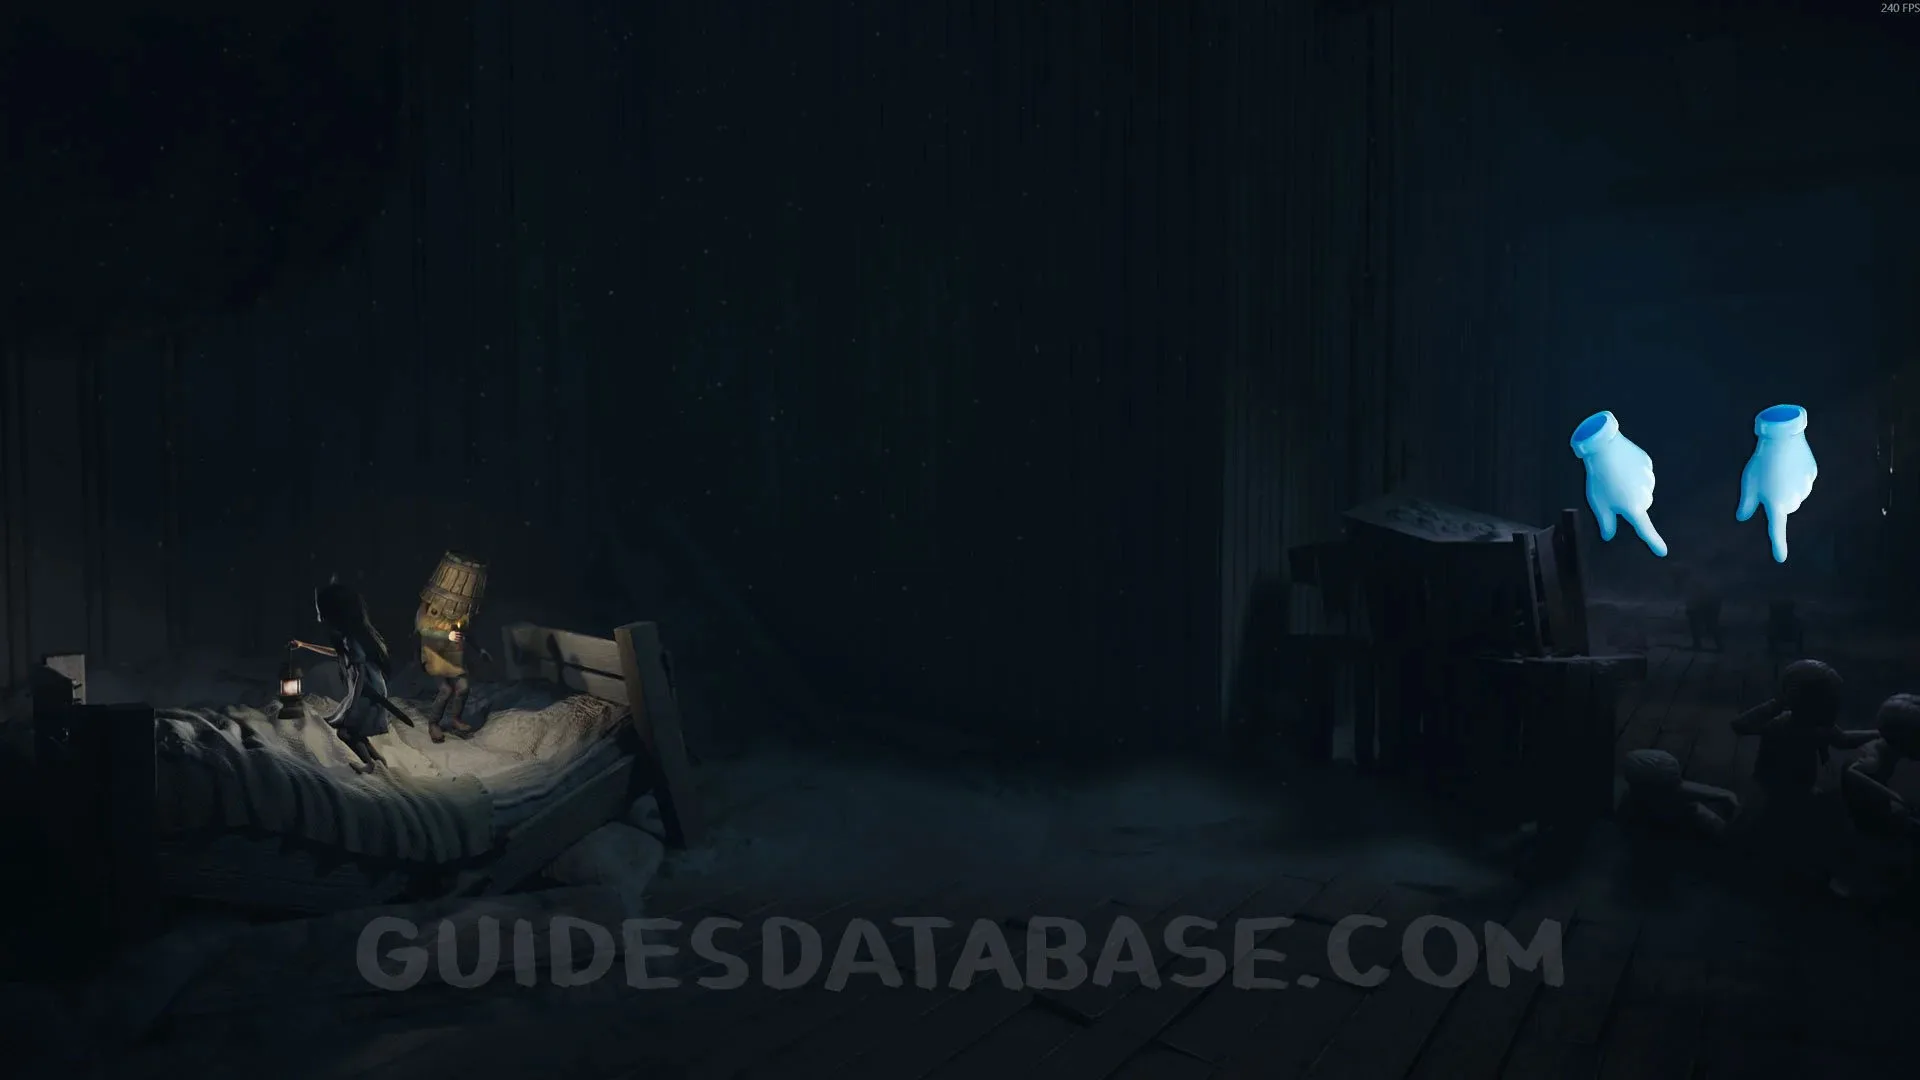 GUIDESDATABASE.COM
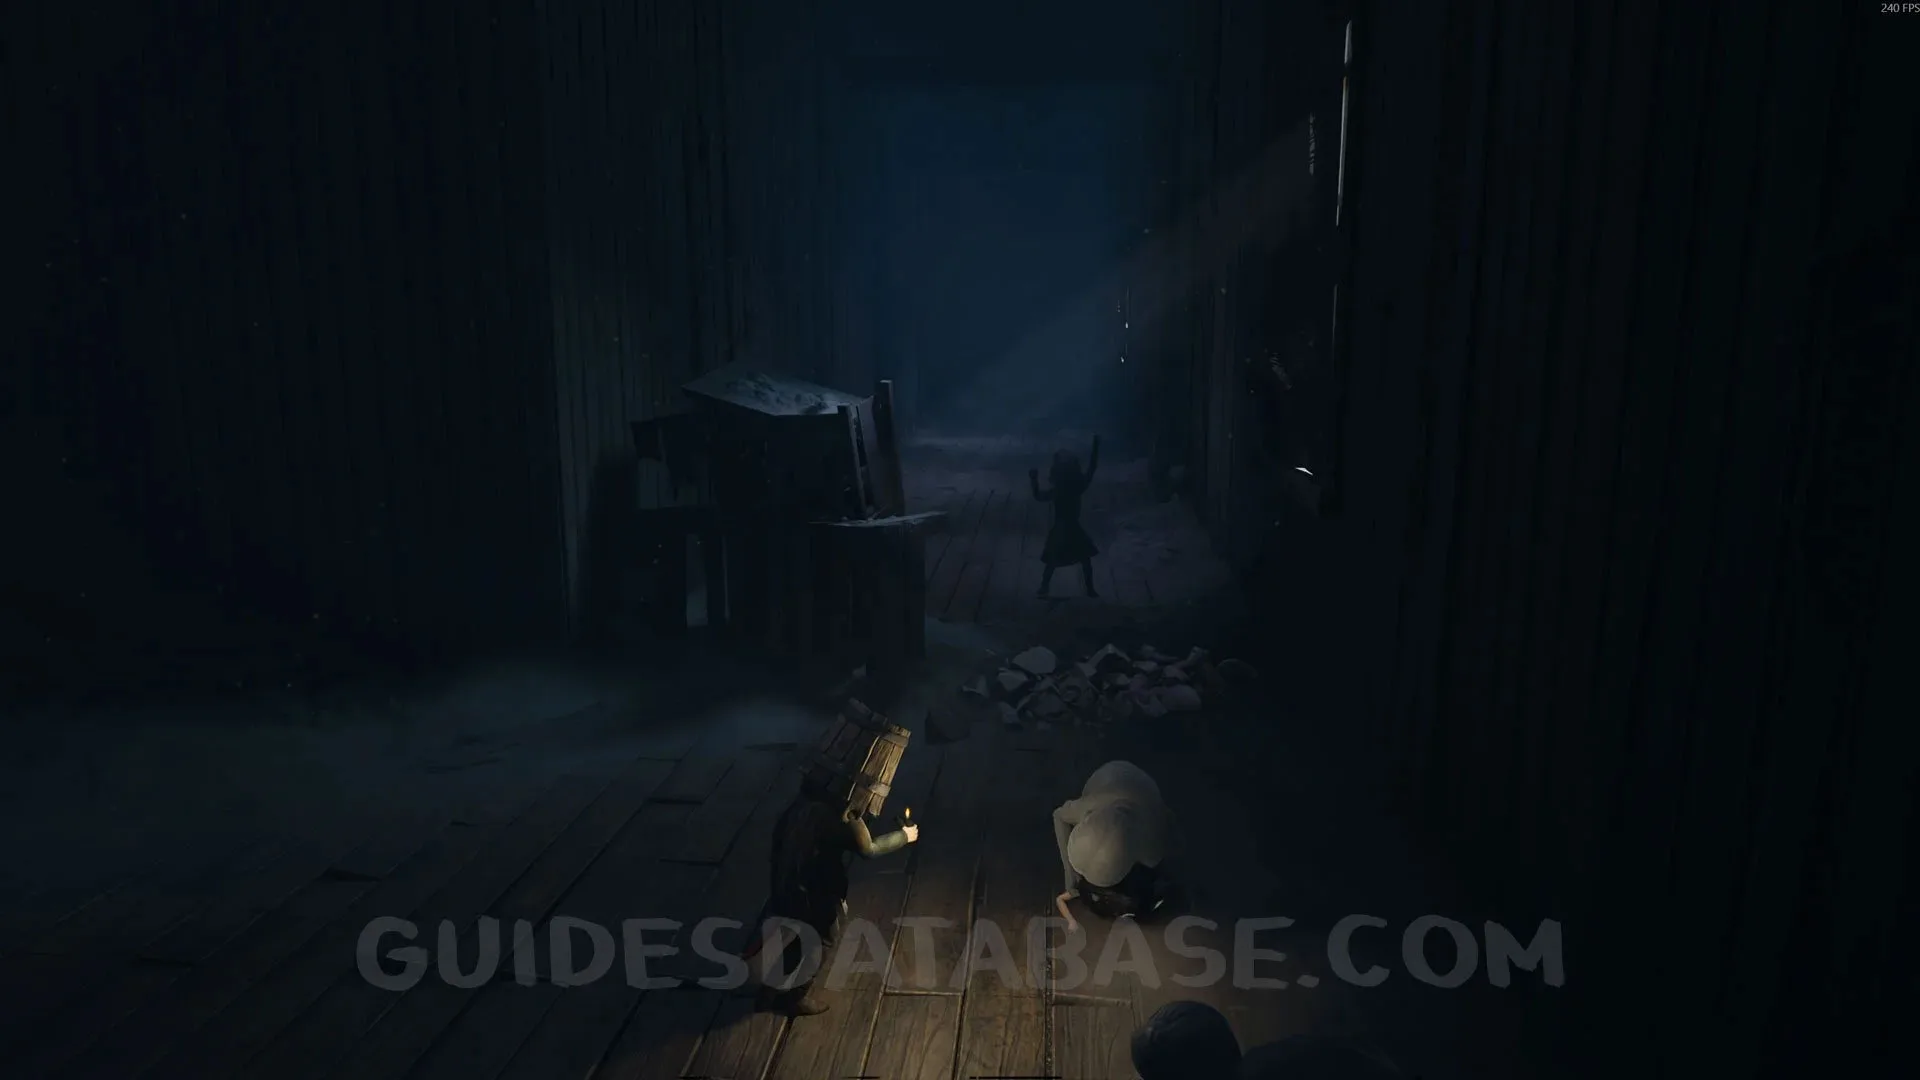 GUIDESDATABASE.COM
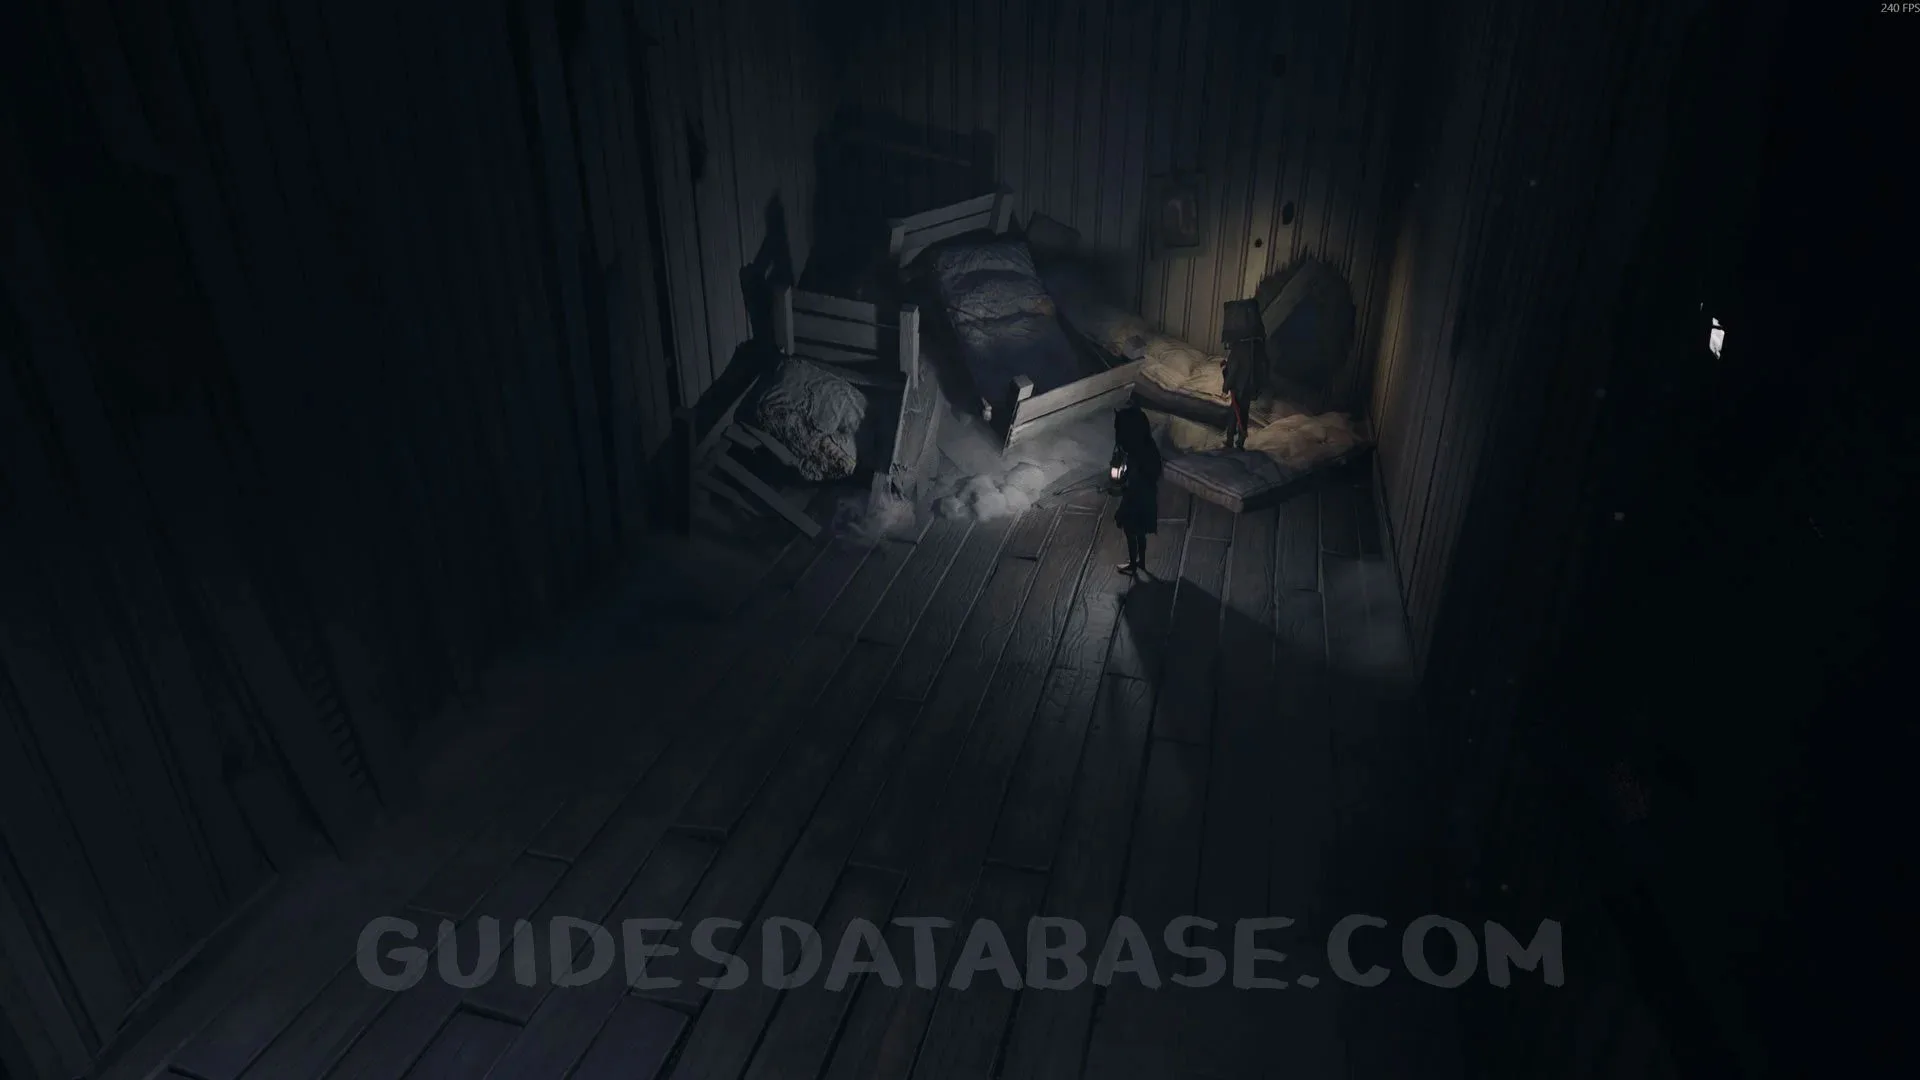
Trophy “Long Live The King” + Mask #8 + Secret #24
After the previous collectible, go back to the hallway and pass through the wall into the next area. You will see a king sitting on a throne, and your goal is to defeat him. Get close and defeat the Dust Dolls so he comes down. Once he does, you will need to be quick because he will run behind his throne and disappear. Chase after him with your crowbar and keep attacking to hit him. After defeating him, pick up the crown, which counts as a mask.
 GUIDESDATABASE.COM
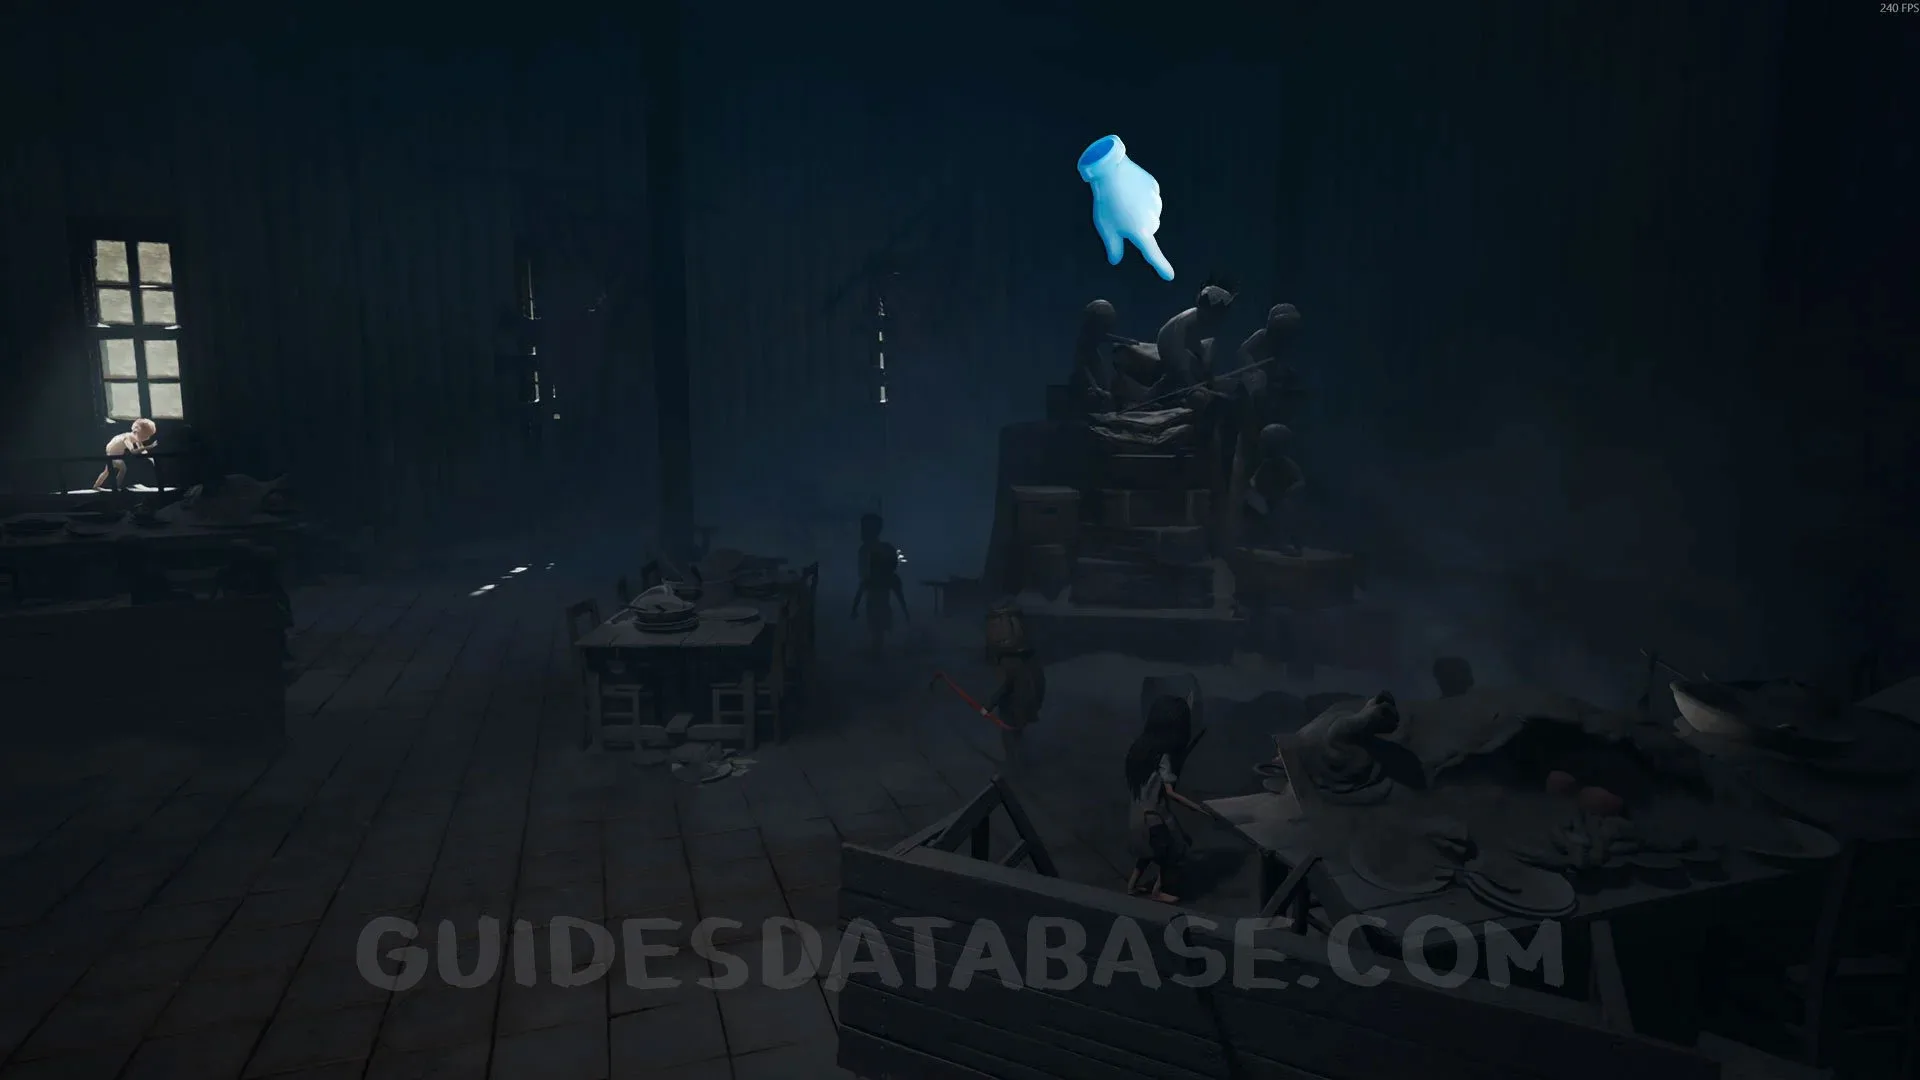 GUIDESDATABASE.COM
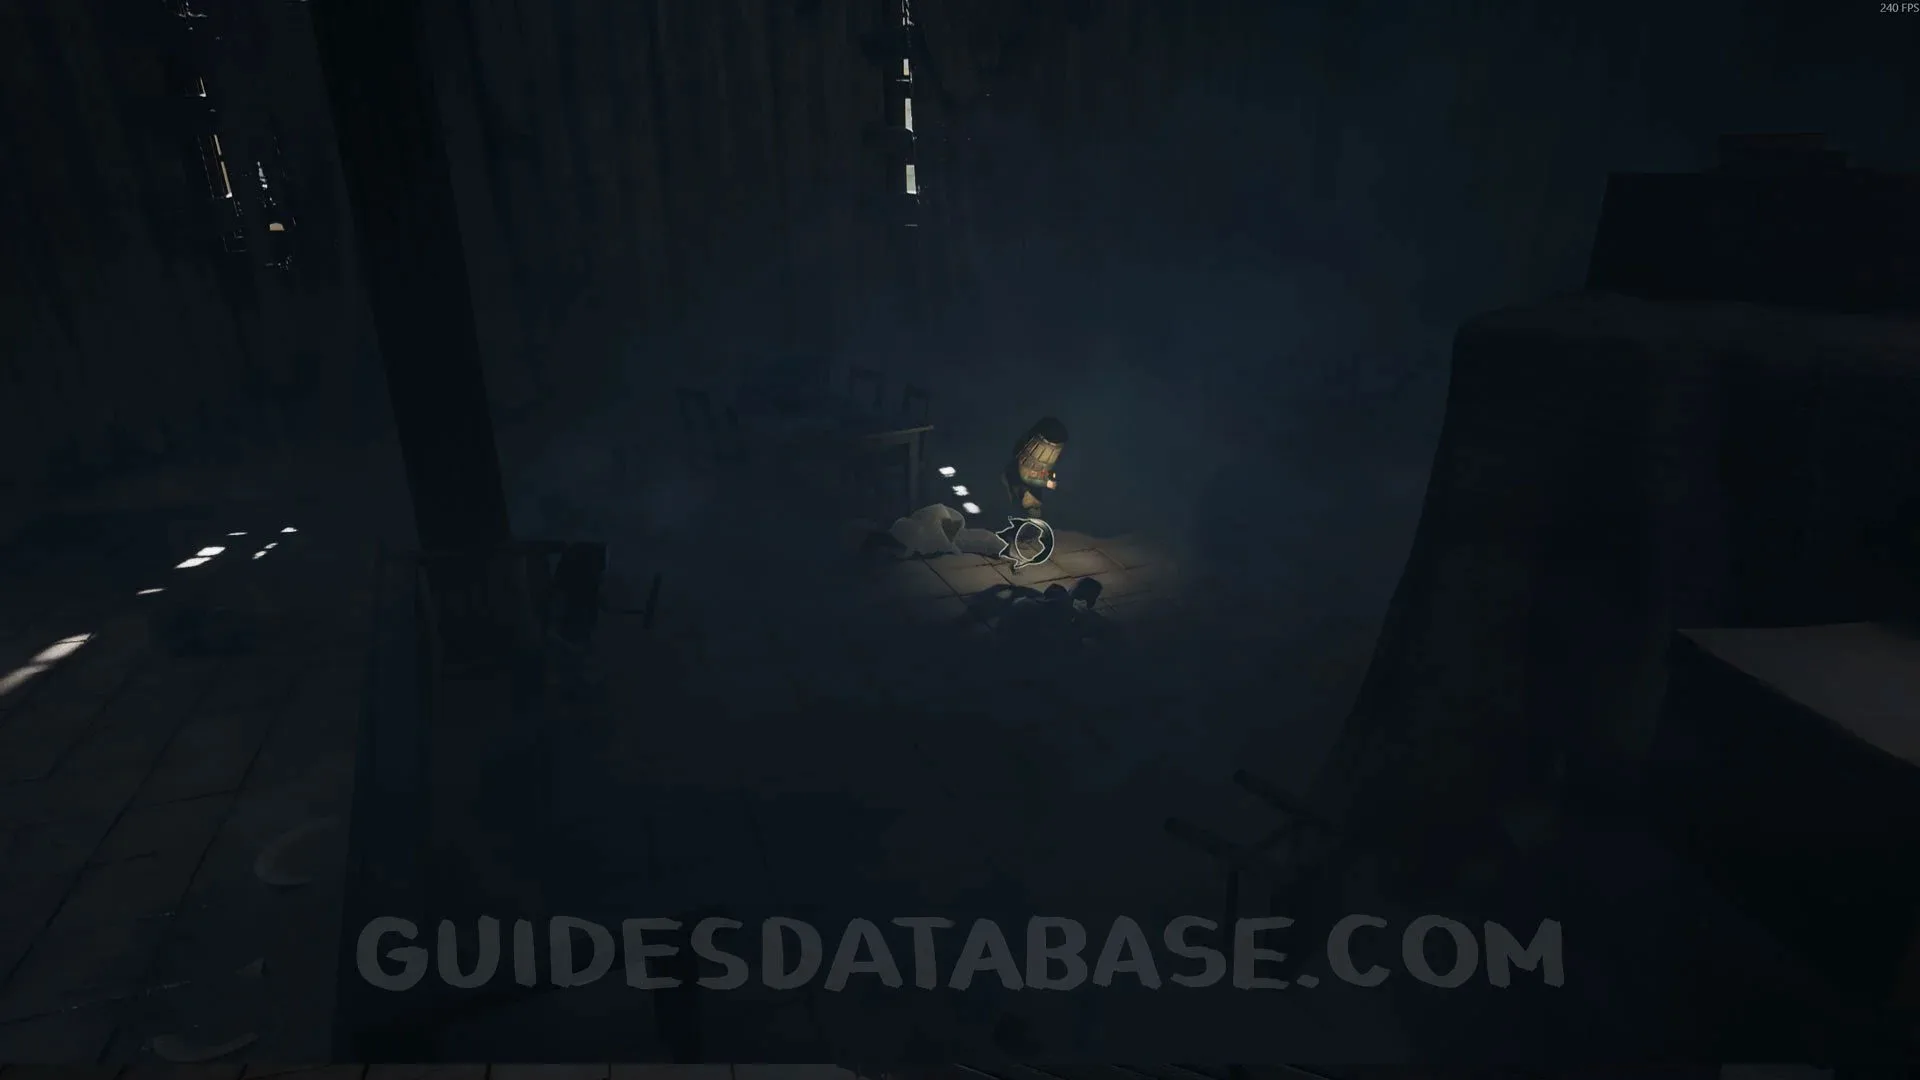 GUIDESDATABASE.COM
Rest Your Legs #9
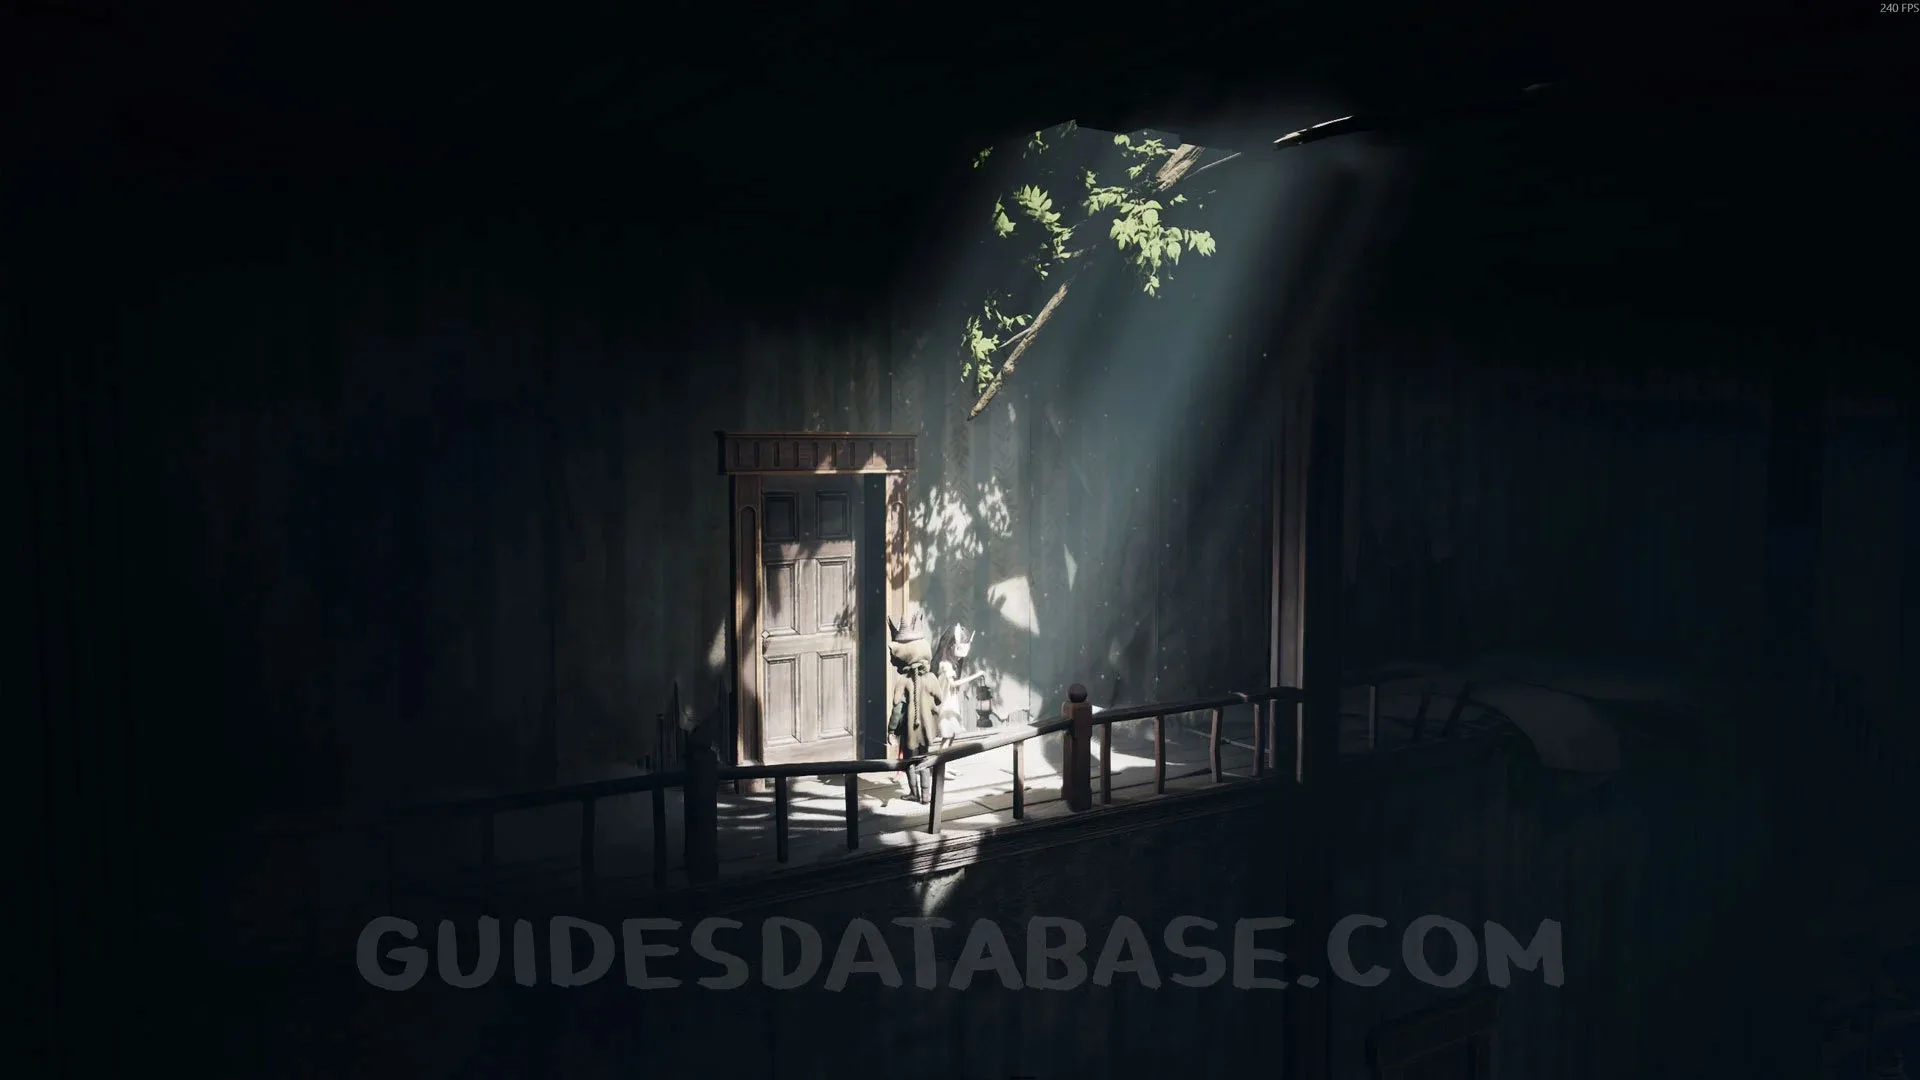
After the previous collectible, you will need to go upstairs and pass through the door. You will see a pig tied up there. Jump across to the other side of the area and go through the last door in the hallway, where you will find a sofa you can sit on.
 GUIDESDATABASE.COM
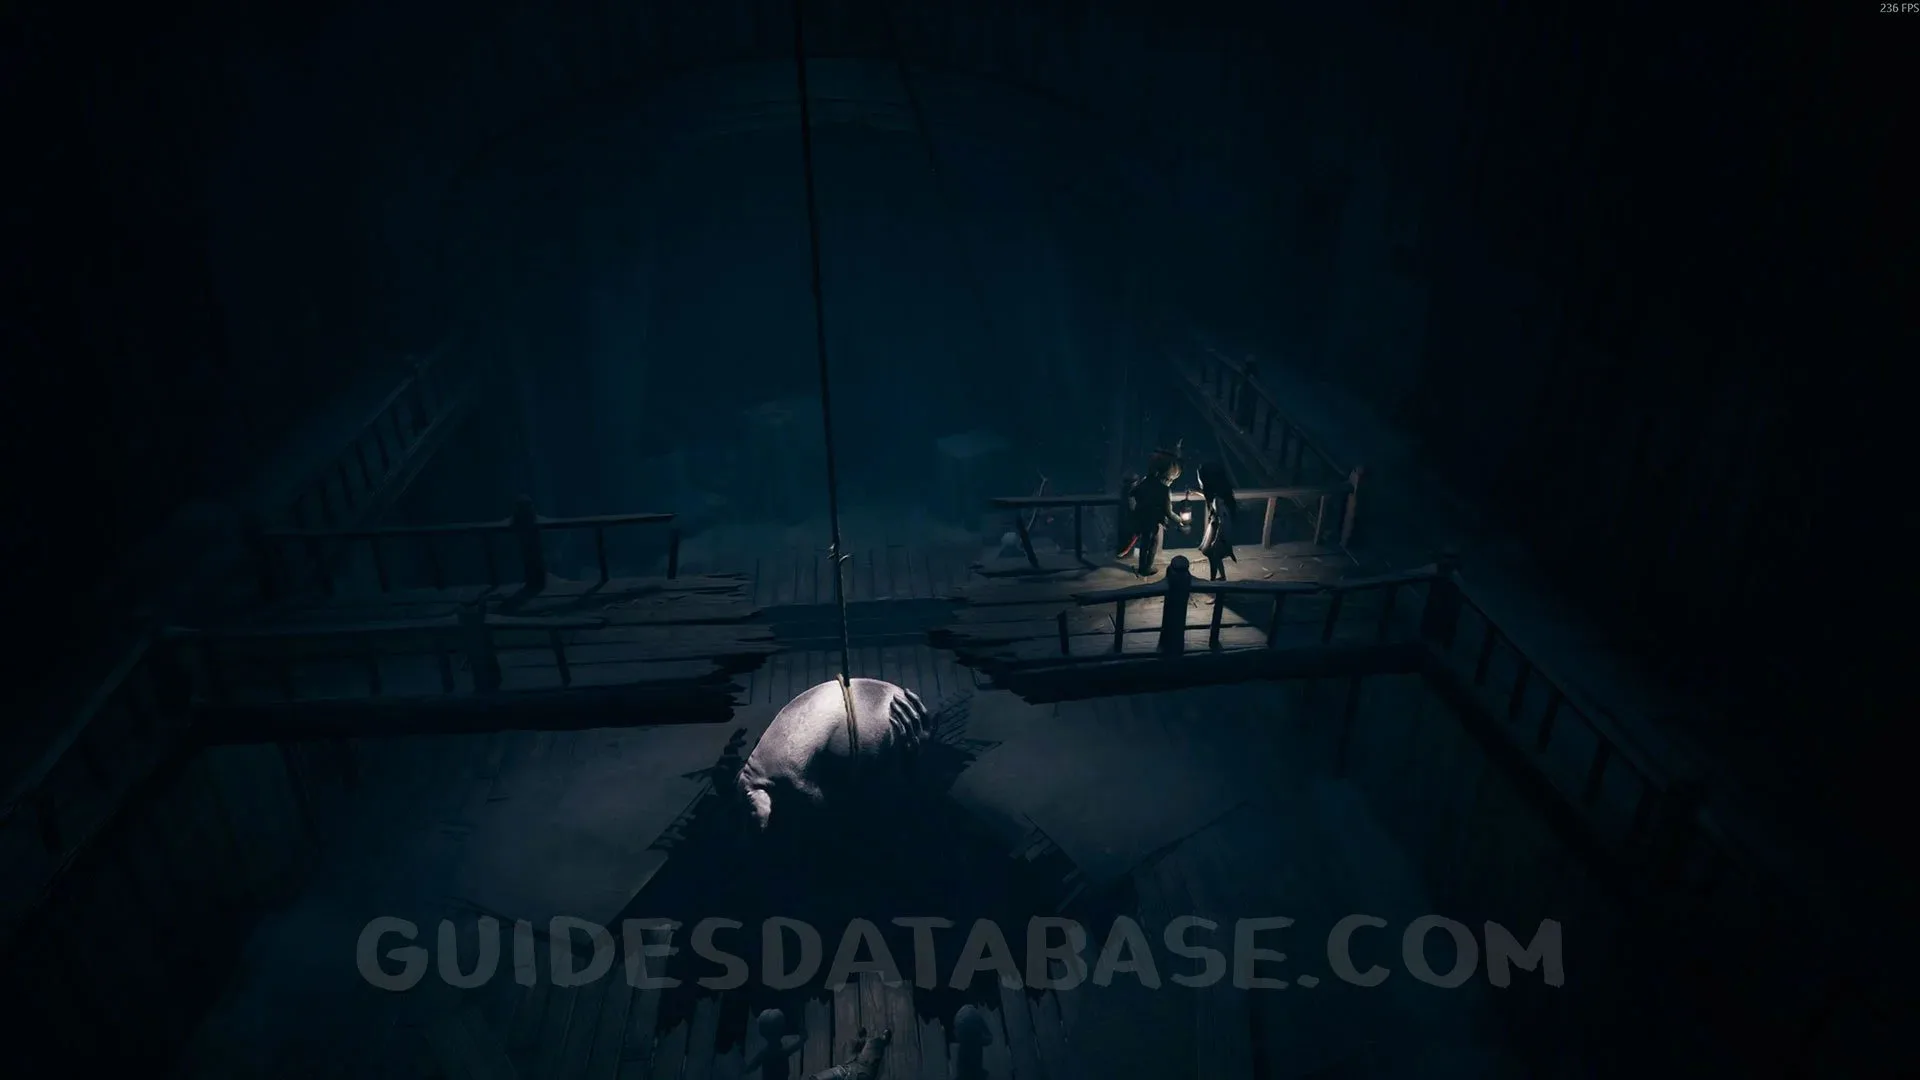 GUIDESDATABASE.COM
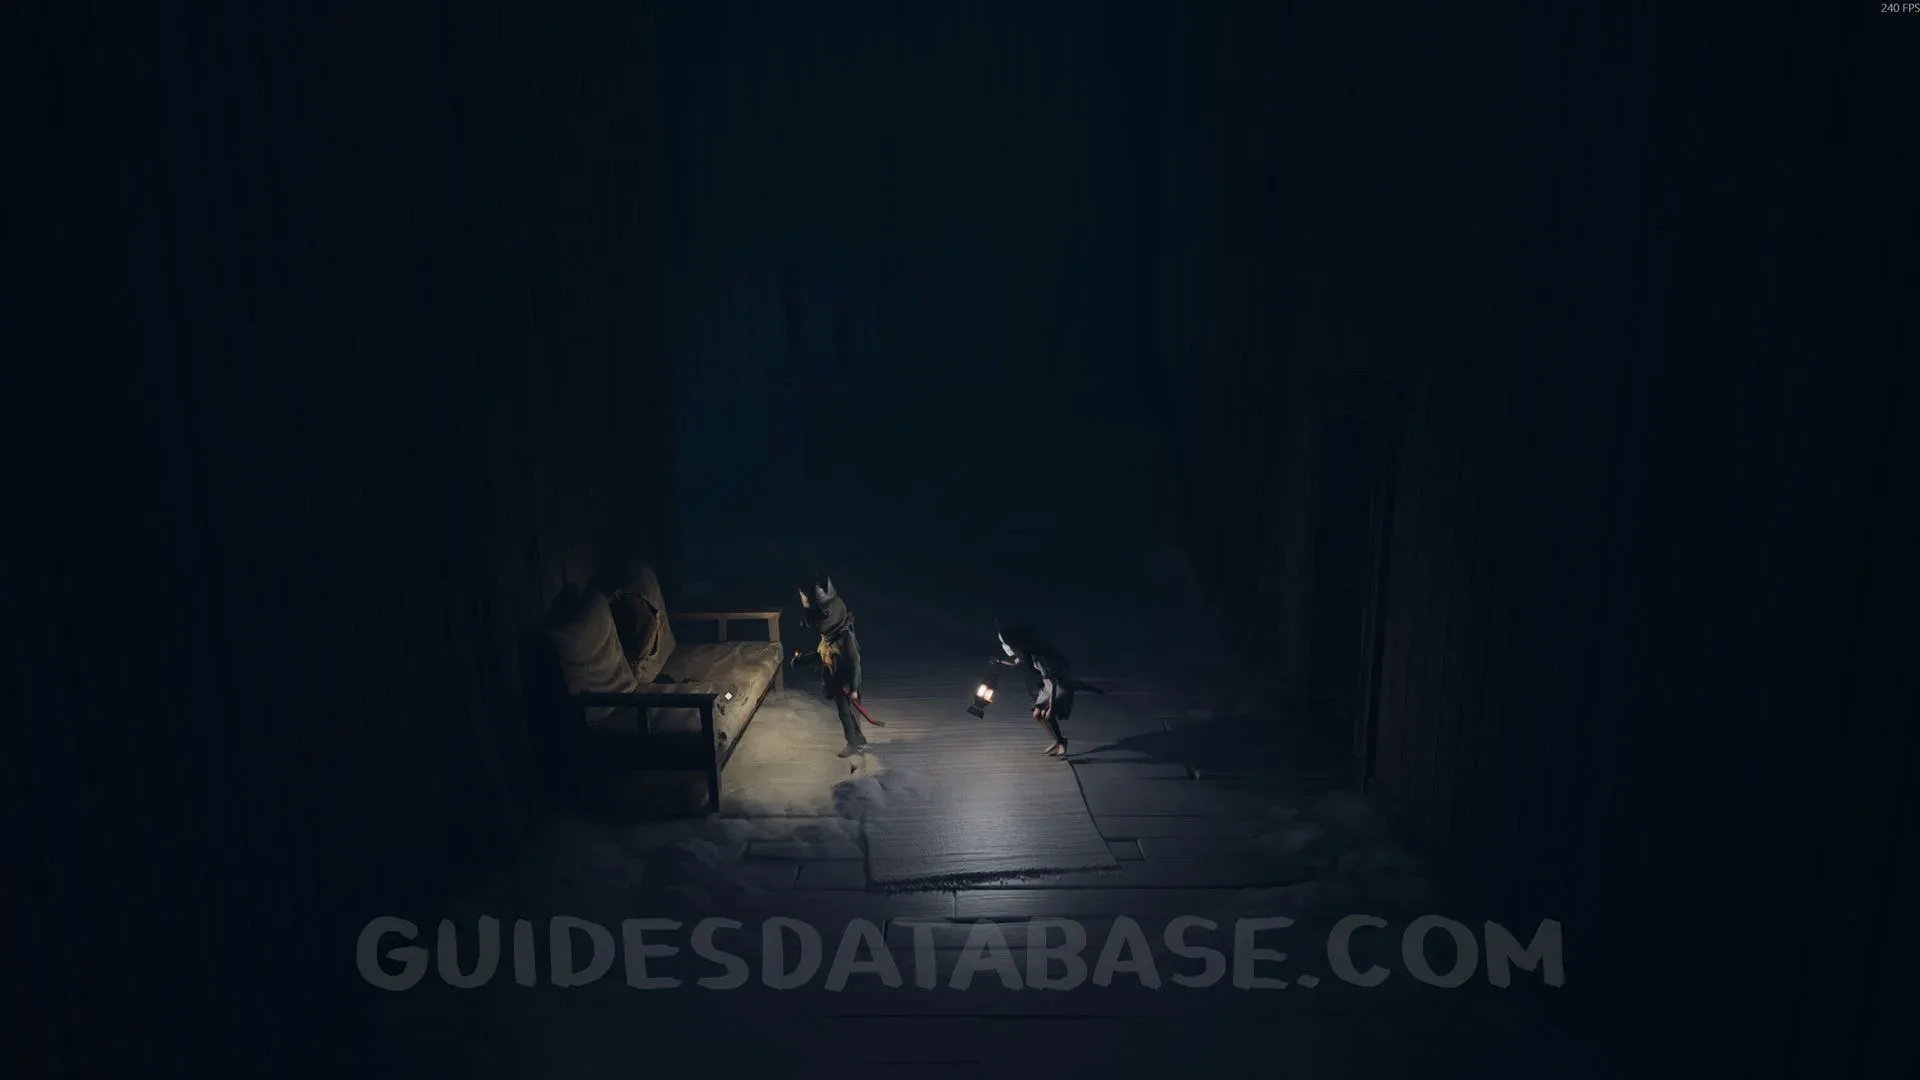 GUIDESDATABASE.COM
Poster #11 + Secret #25
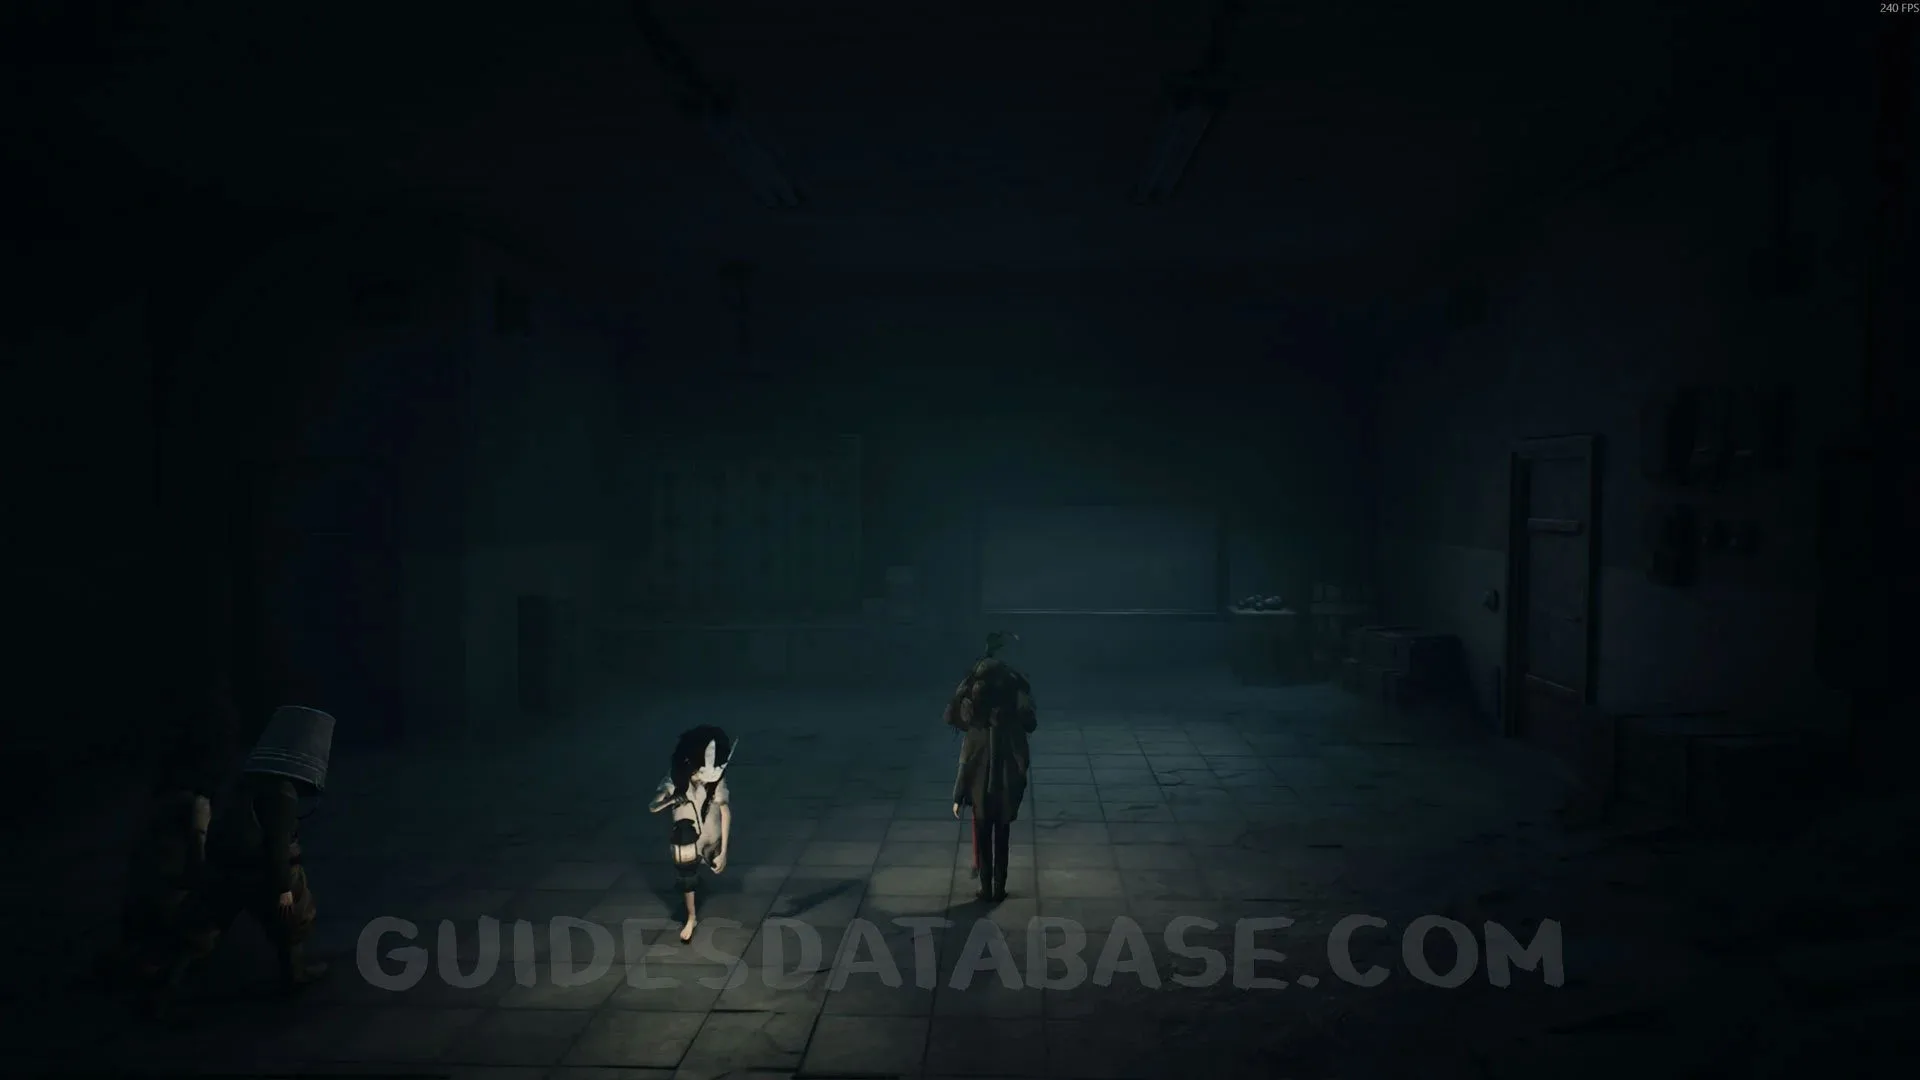
After the previous collectible, you will turn the power back on in the hallway and then need to go through the door on your left. Go straight ahead, defeat the 2 enemies, and you will see this poster right in front of you.
 GUIDESDATABASE.COM
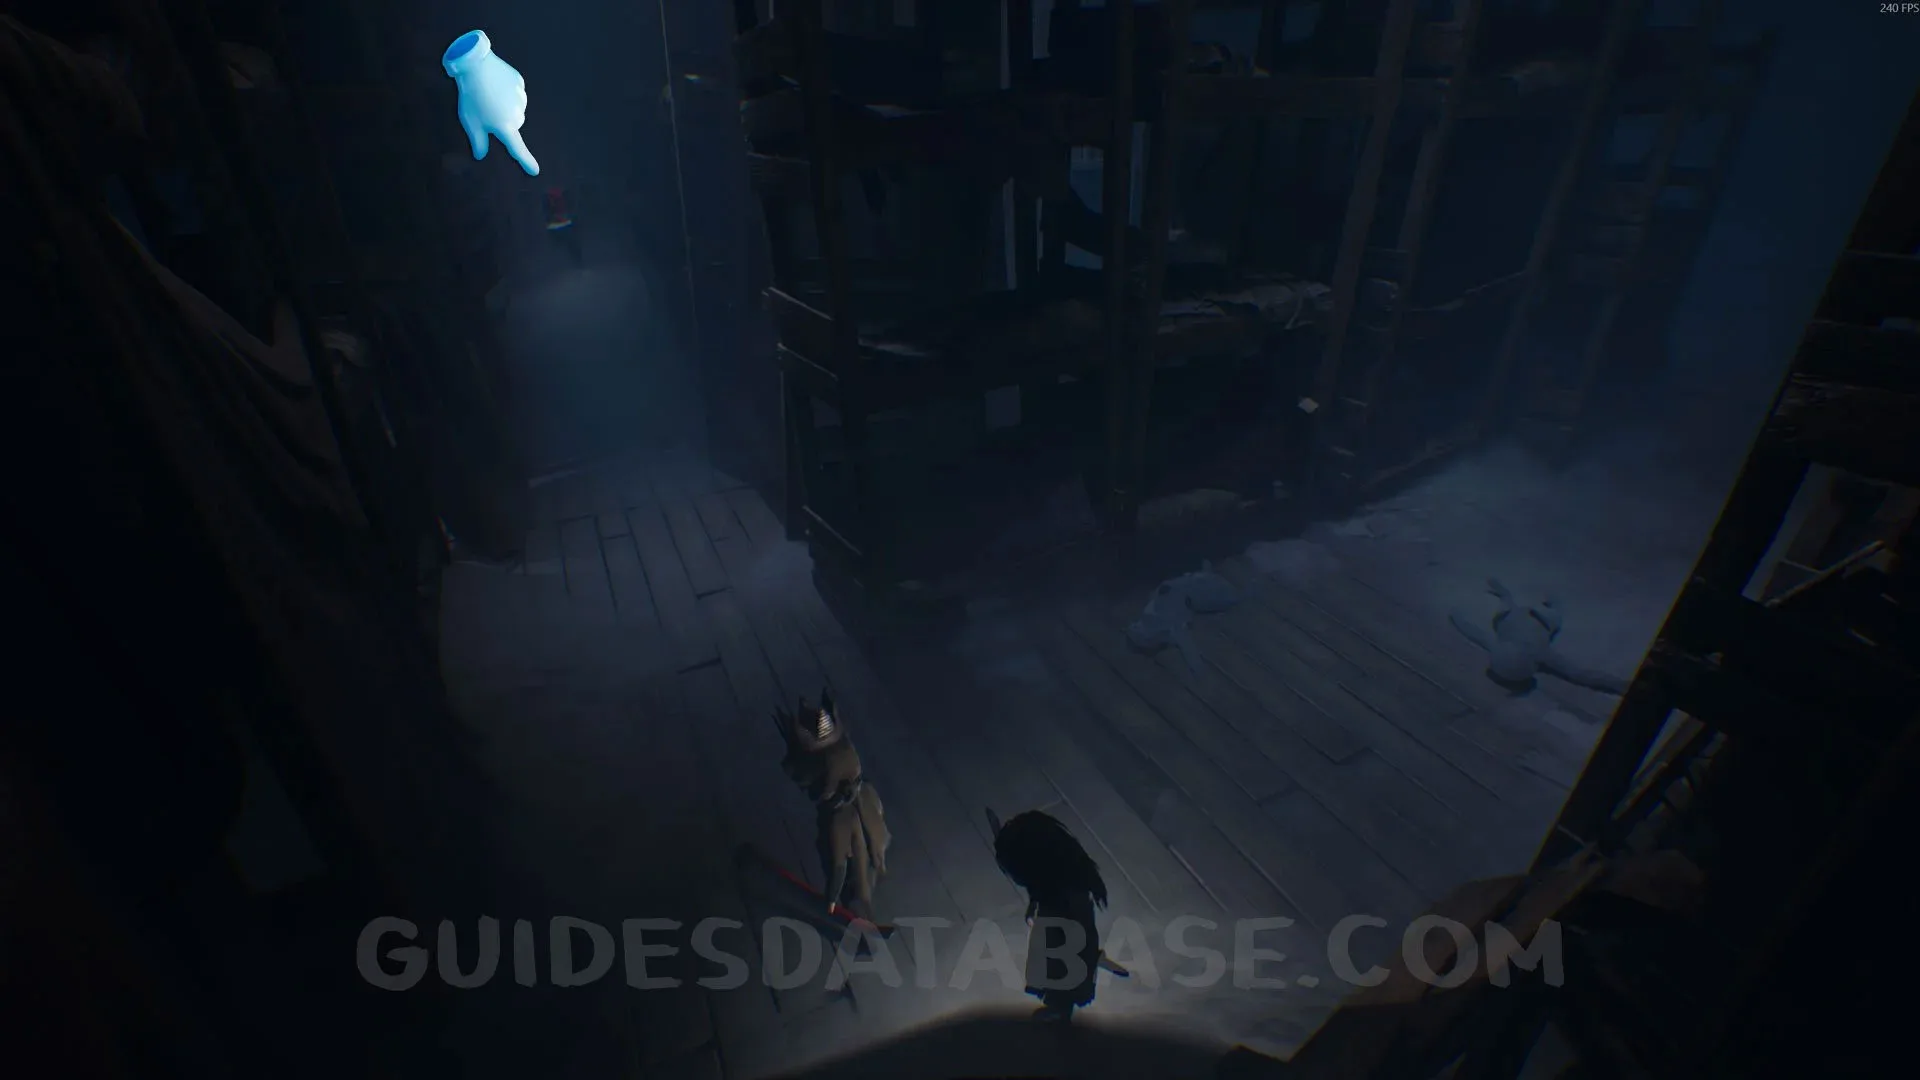 GUIDESDATABASE.COM
Mask #9 + Secret #26
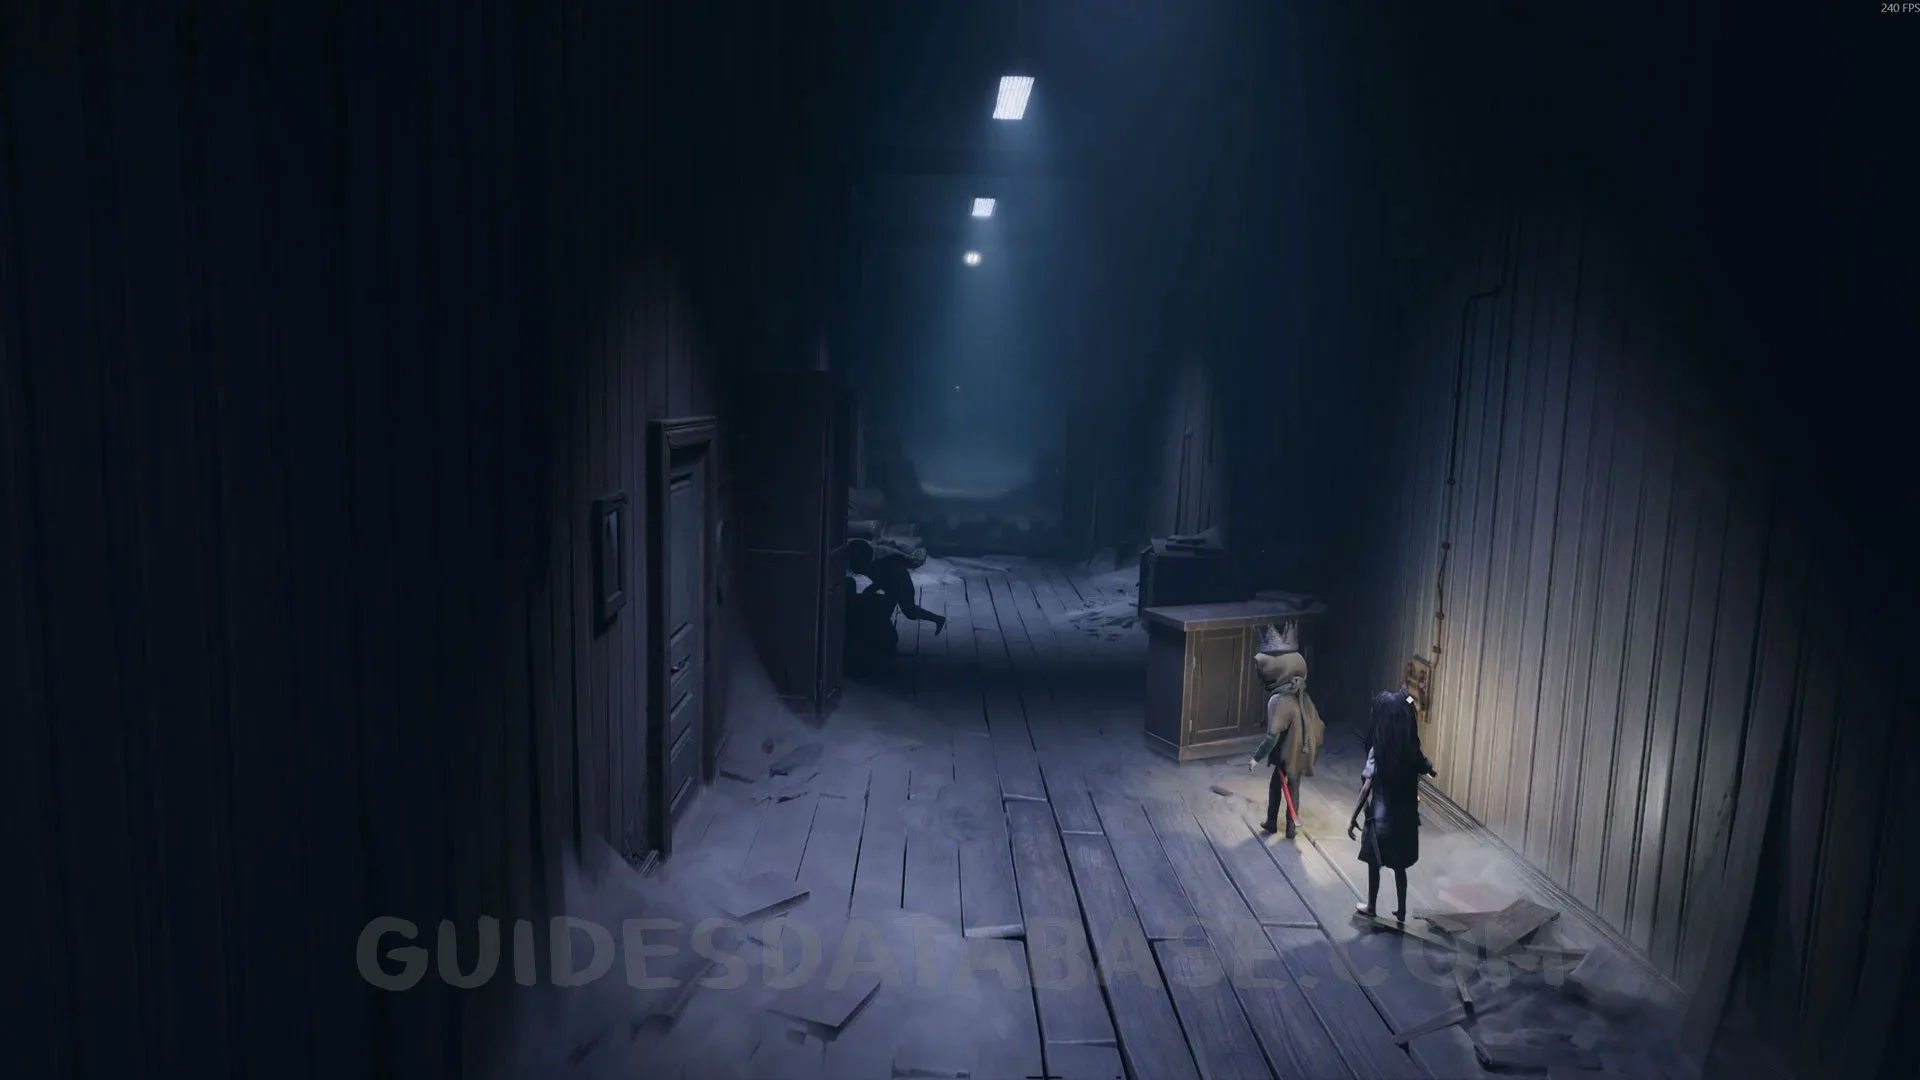
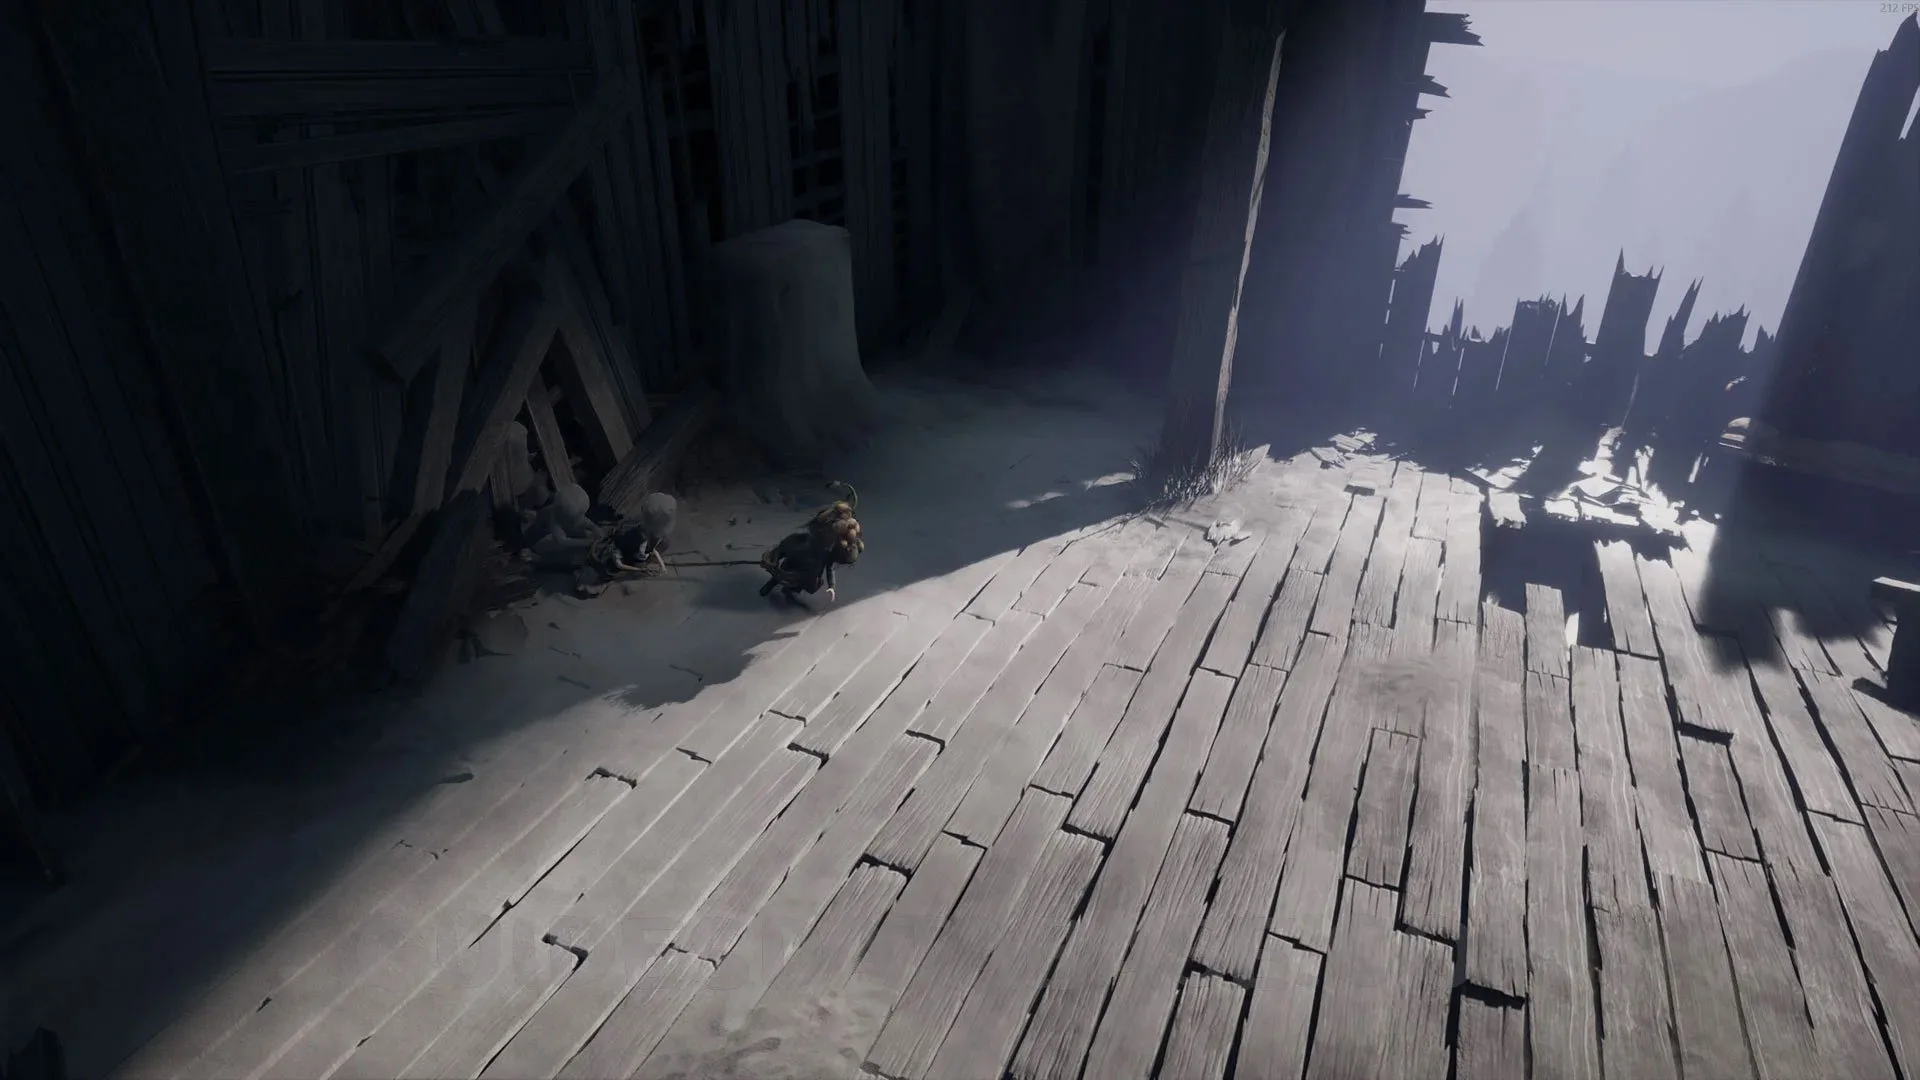
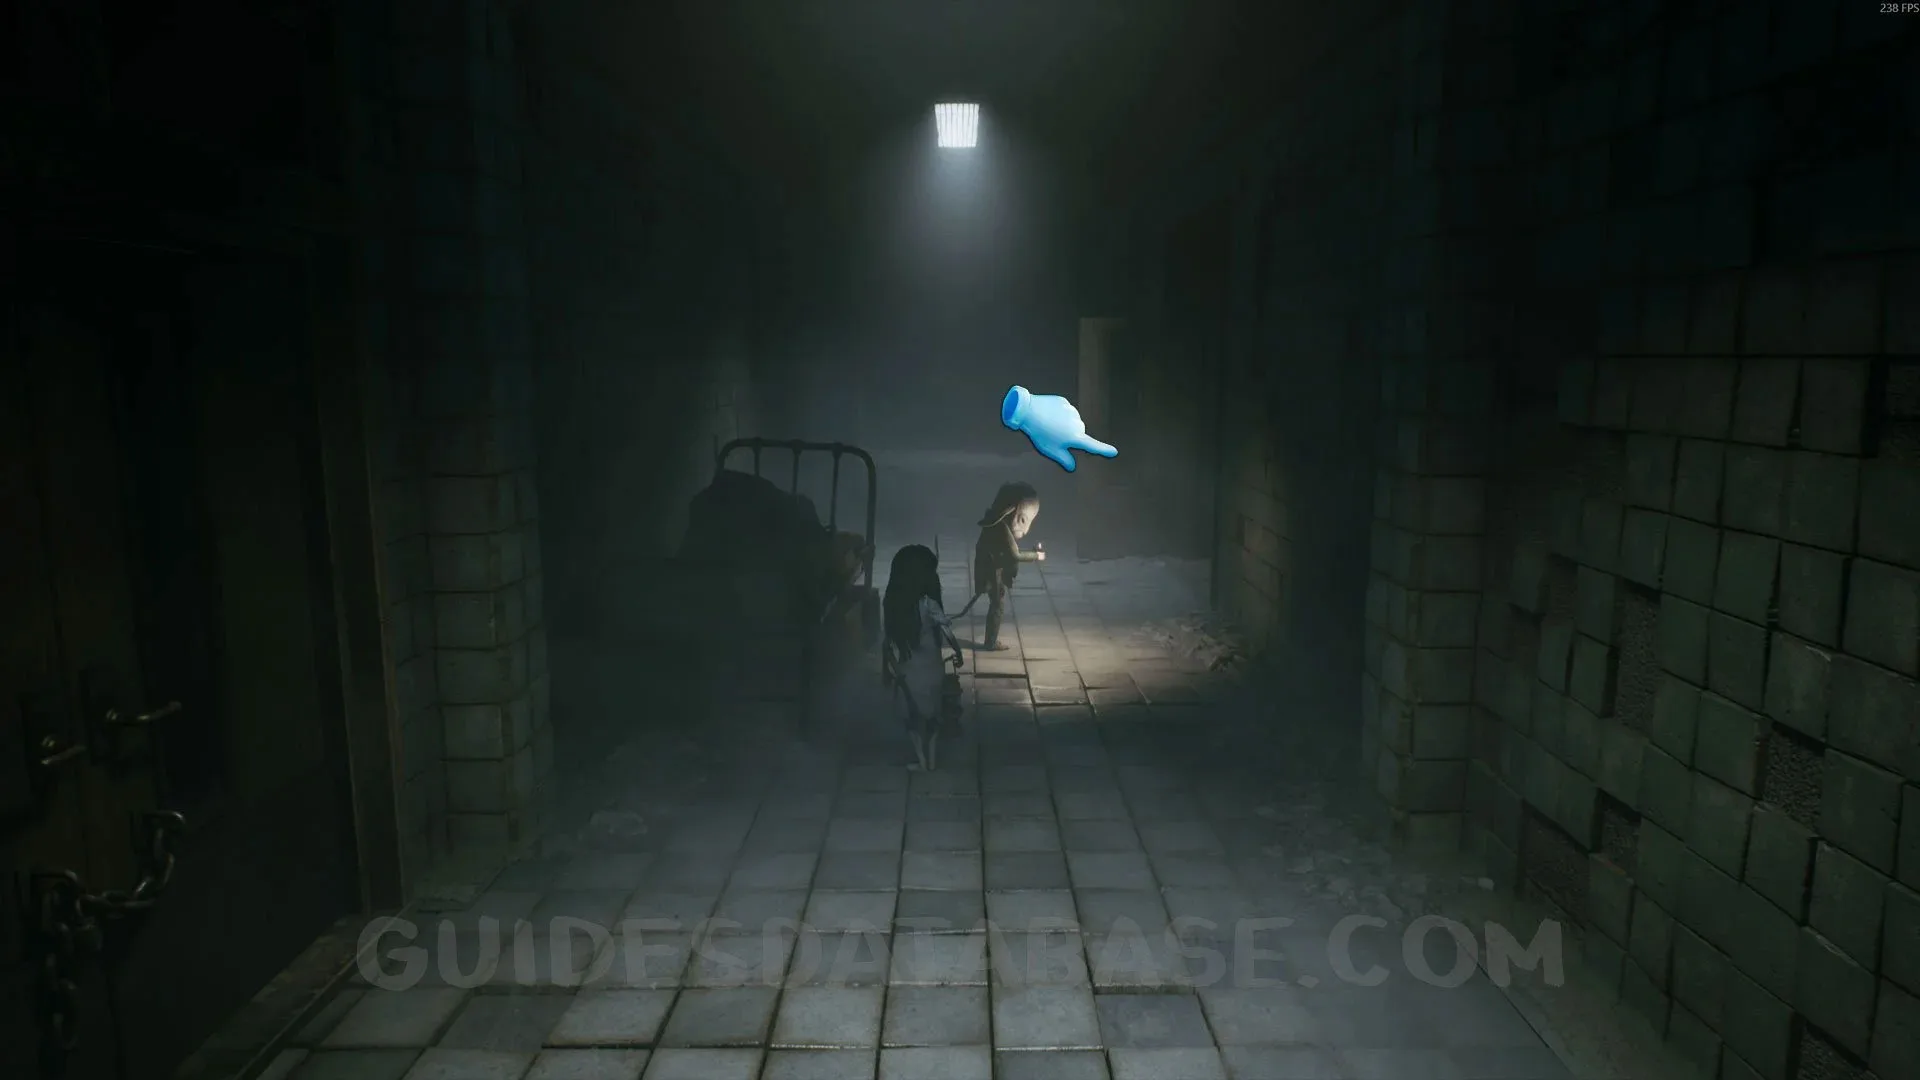
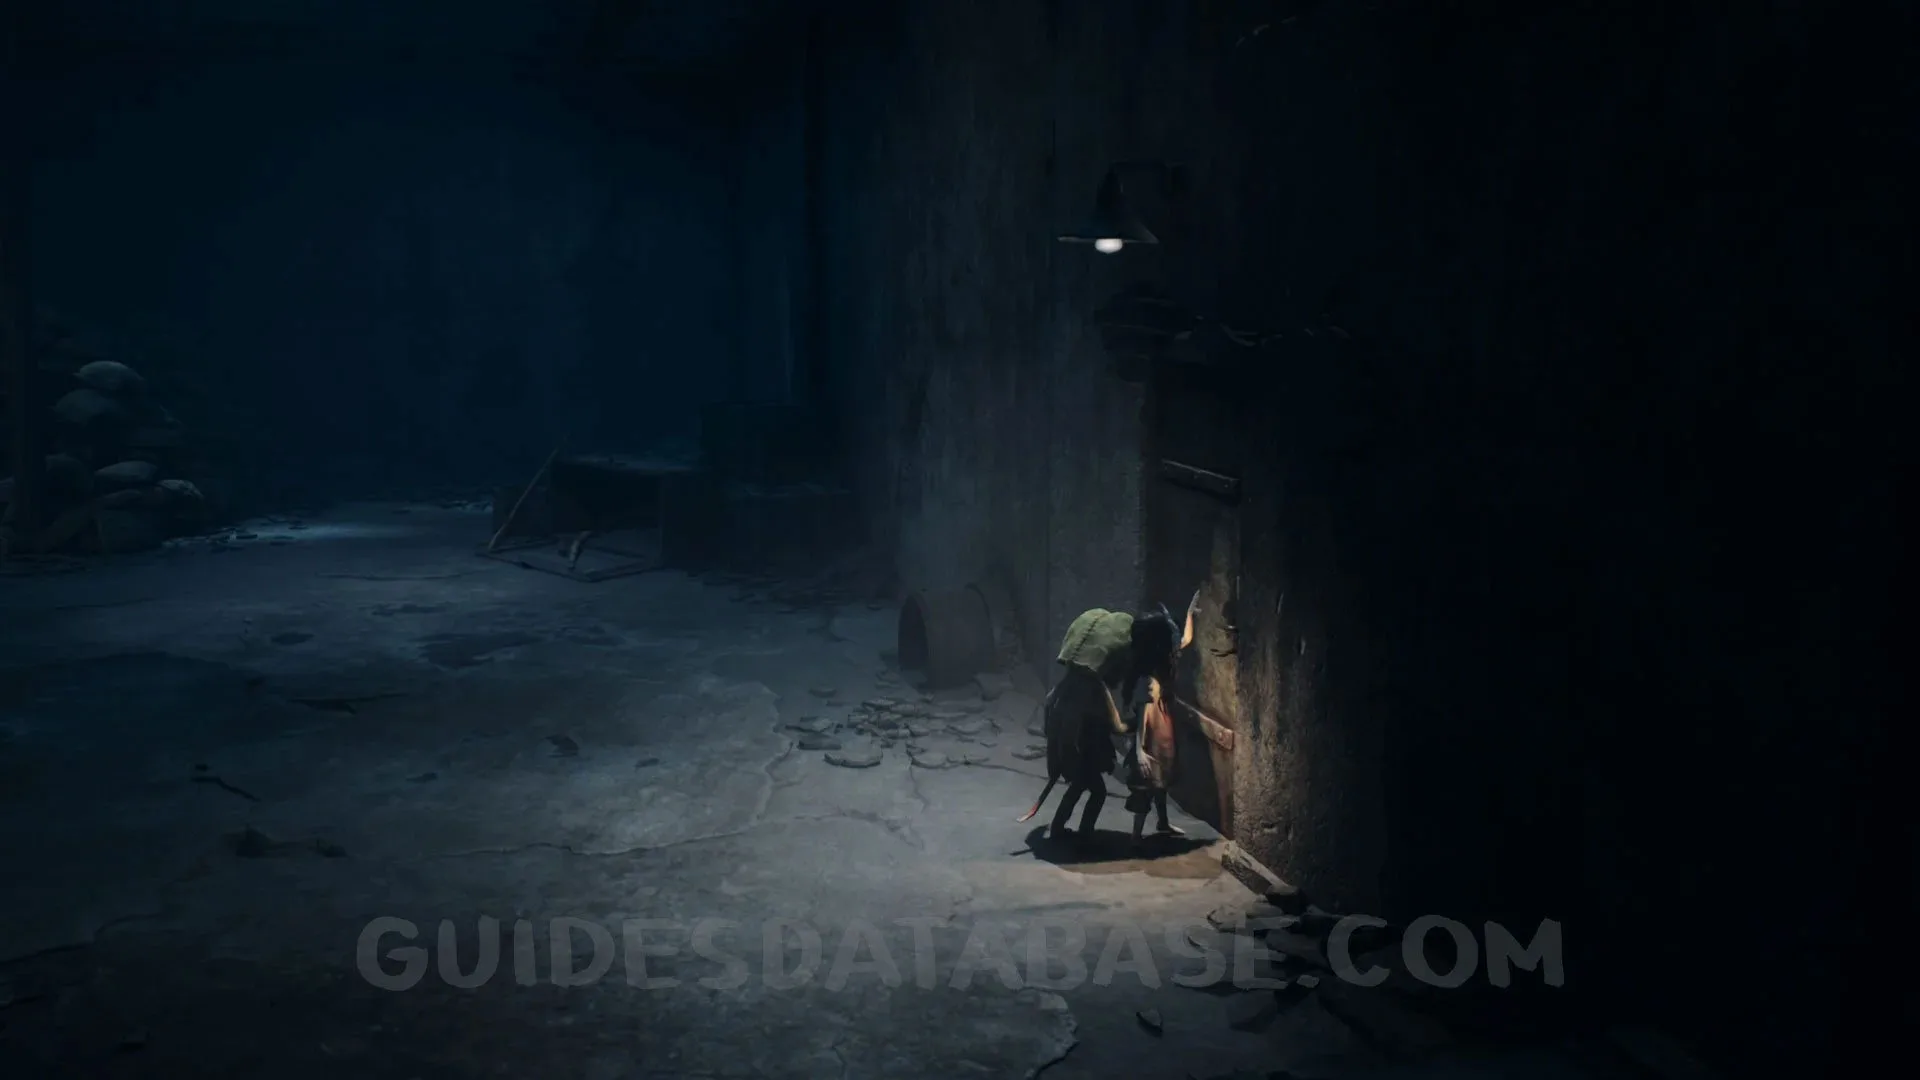
After the previous collectible, you will need to defeat some enemies throwing spears at you. After that, you will sneak your way to a door and end up back in a hallway. Go to the beginning of the hallway to find this mask.
 GUIDESDATABASE.COM
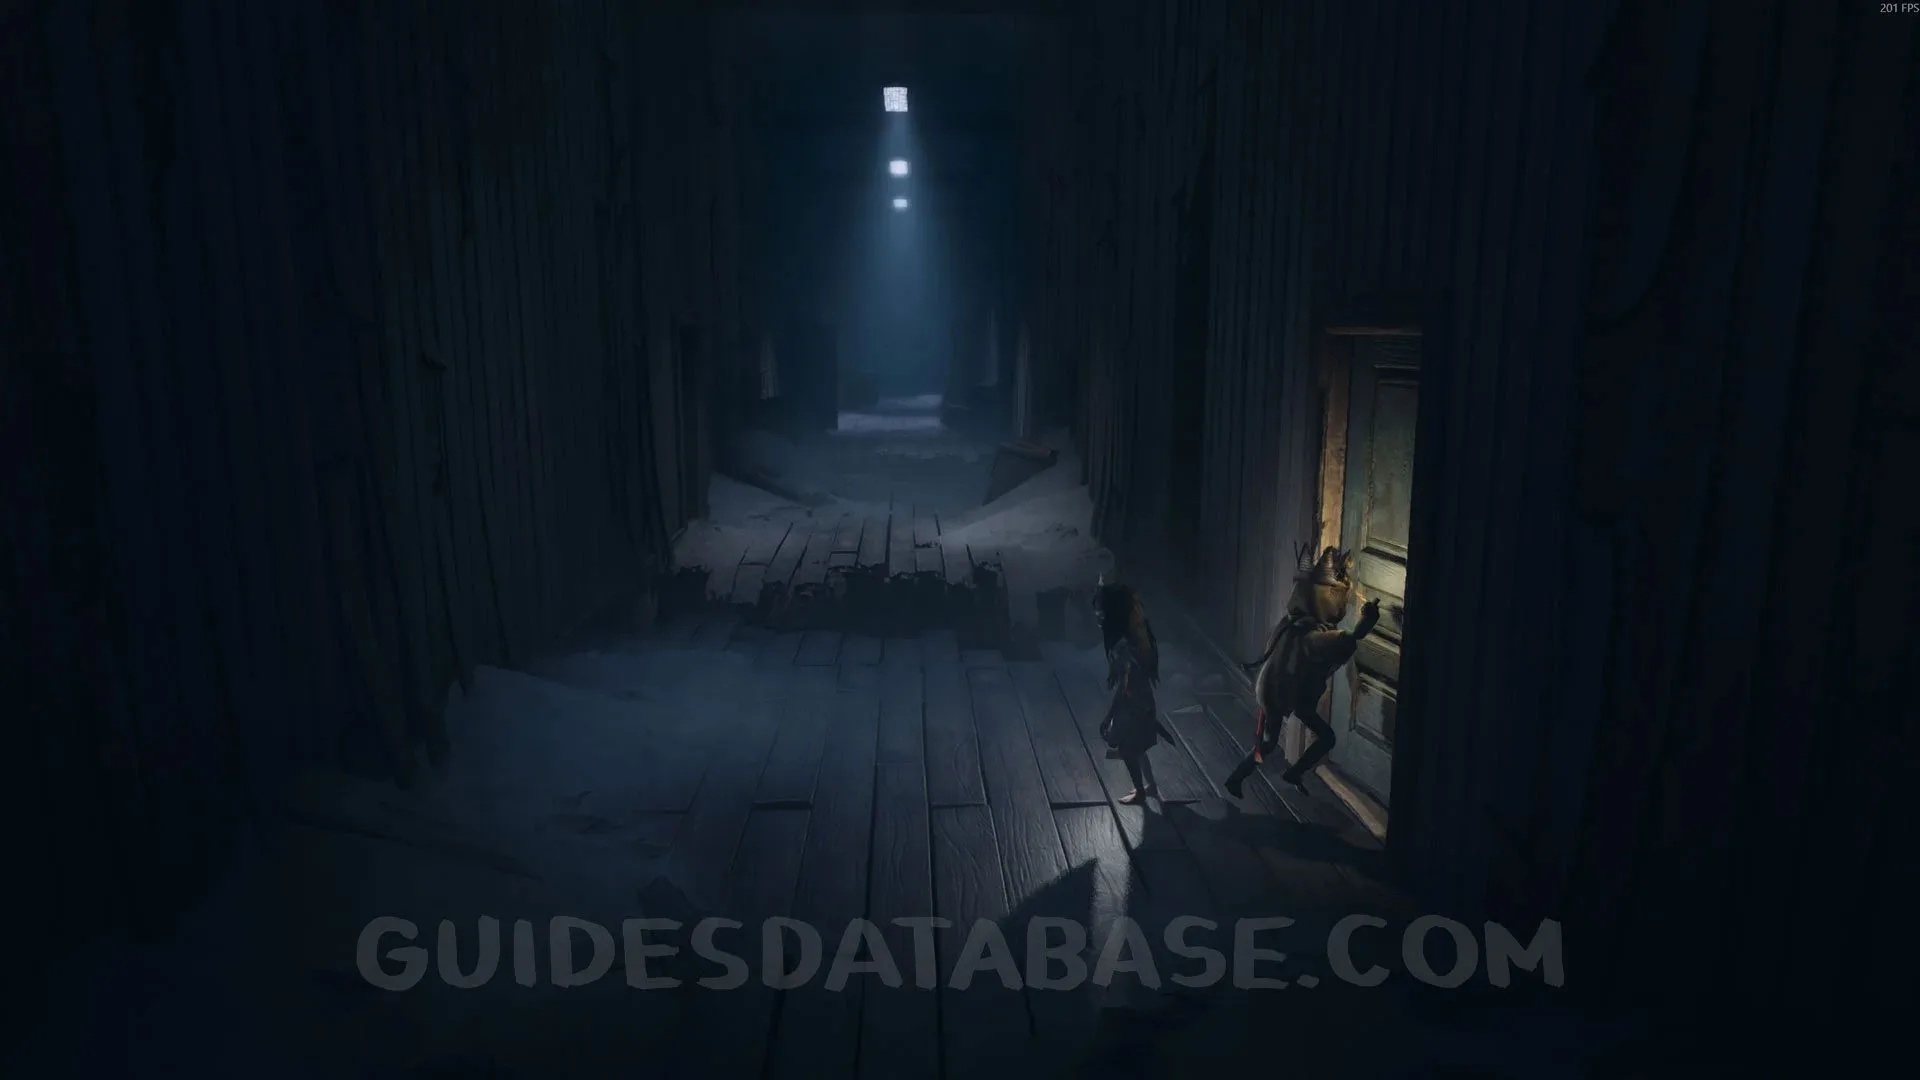 GUIDESDATABASE.COM
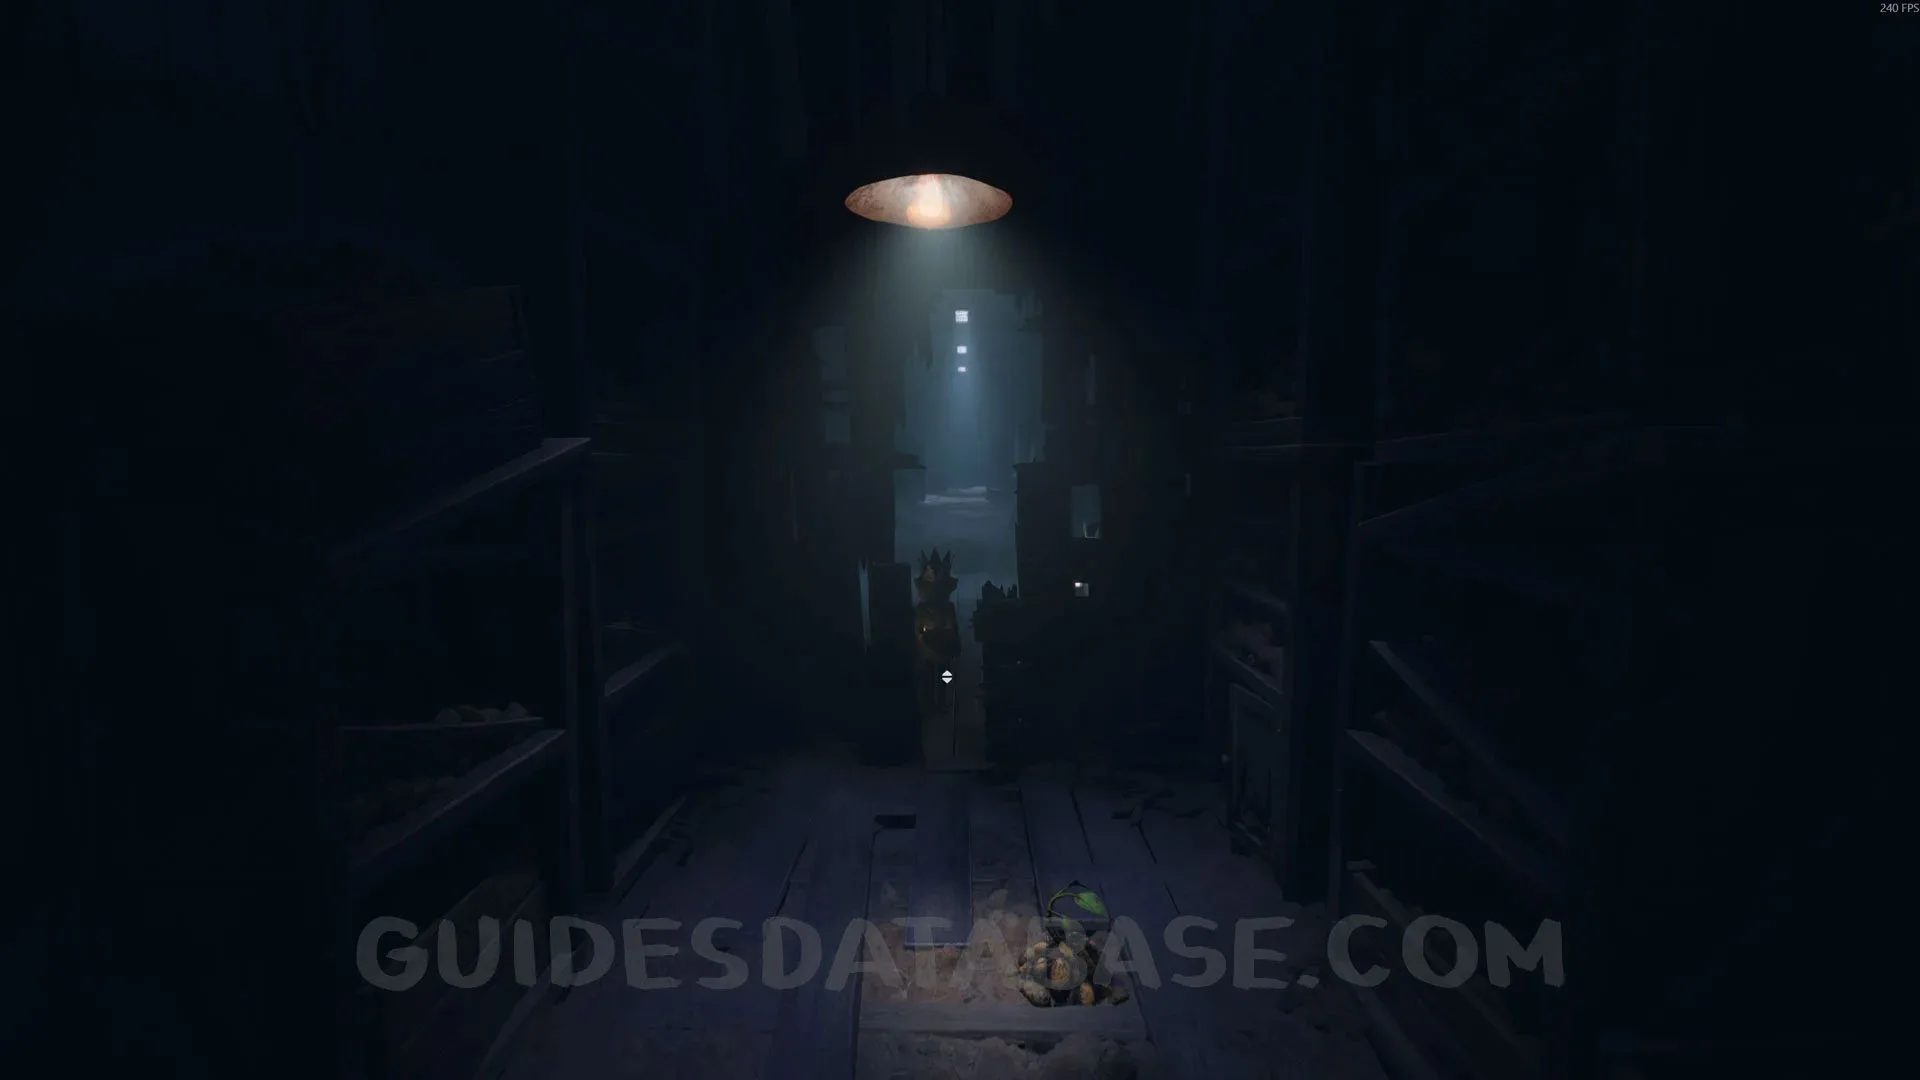 GUIDESDATABASE.COM
Coffin #4 + Secret #27
After the previous collectible, you will pass by some sleeping Dust Dolls, knock over a bookshelf so your friend can get to the other side, and see one of your friends being lowered by a rope by other Dust Dolls. In this area, before using the crank to bring your friend back up to the surface, go to the back and enter the last door on the left to find this coffin.
 GUIDESDATABASE.COM
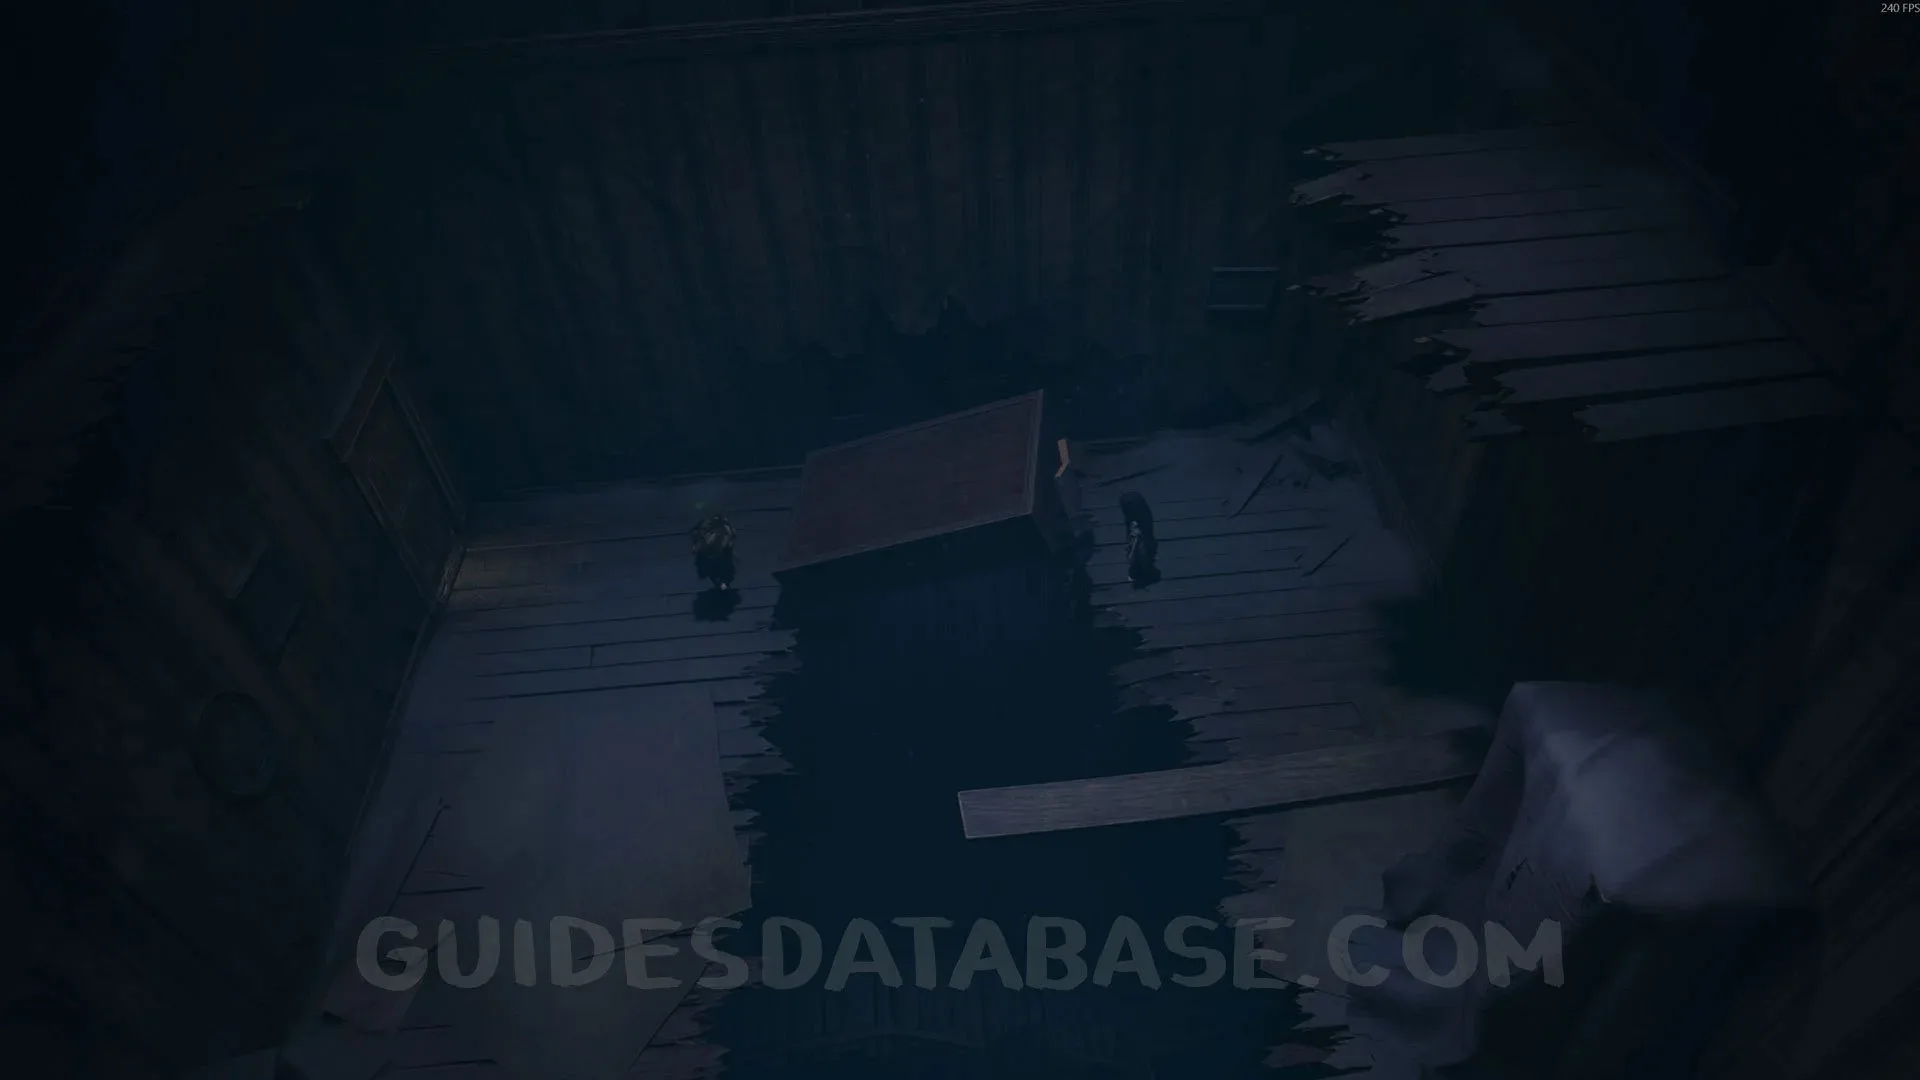 GUIDESDATABASE.COM
 GUIDESDATABASE.COM
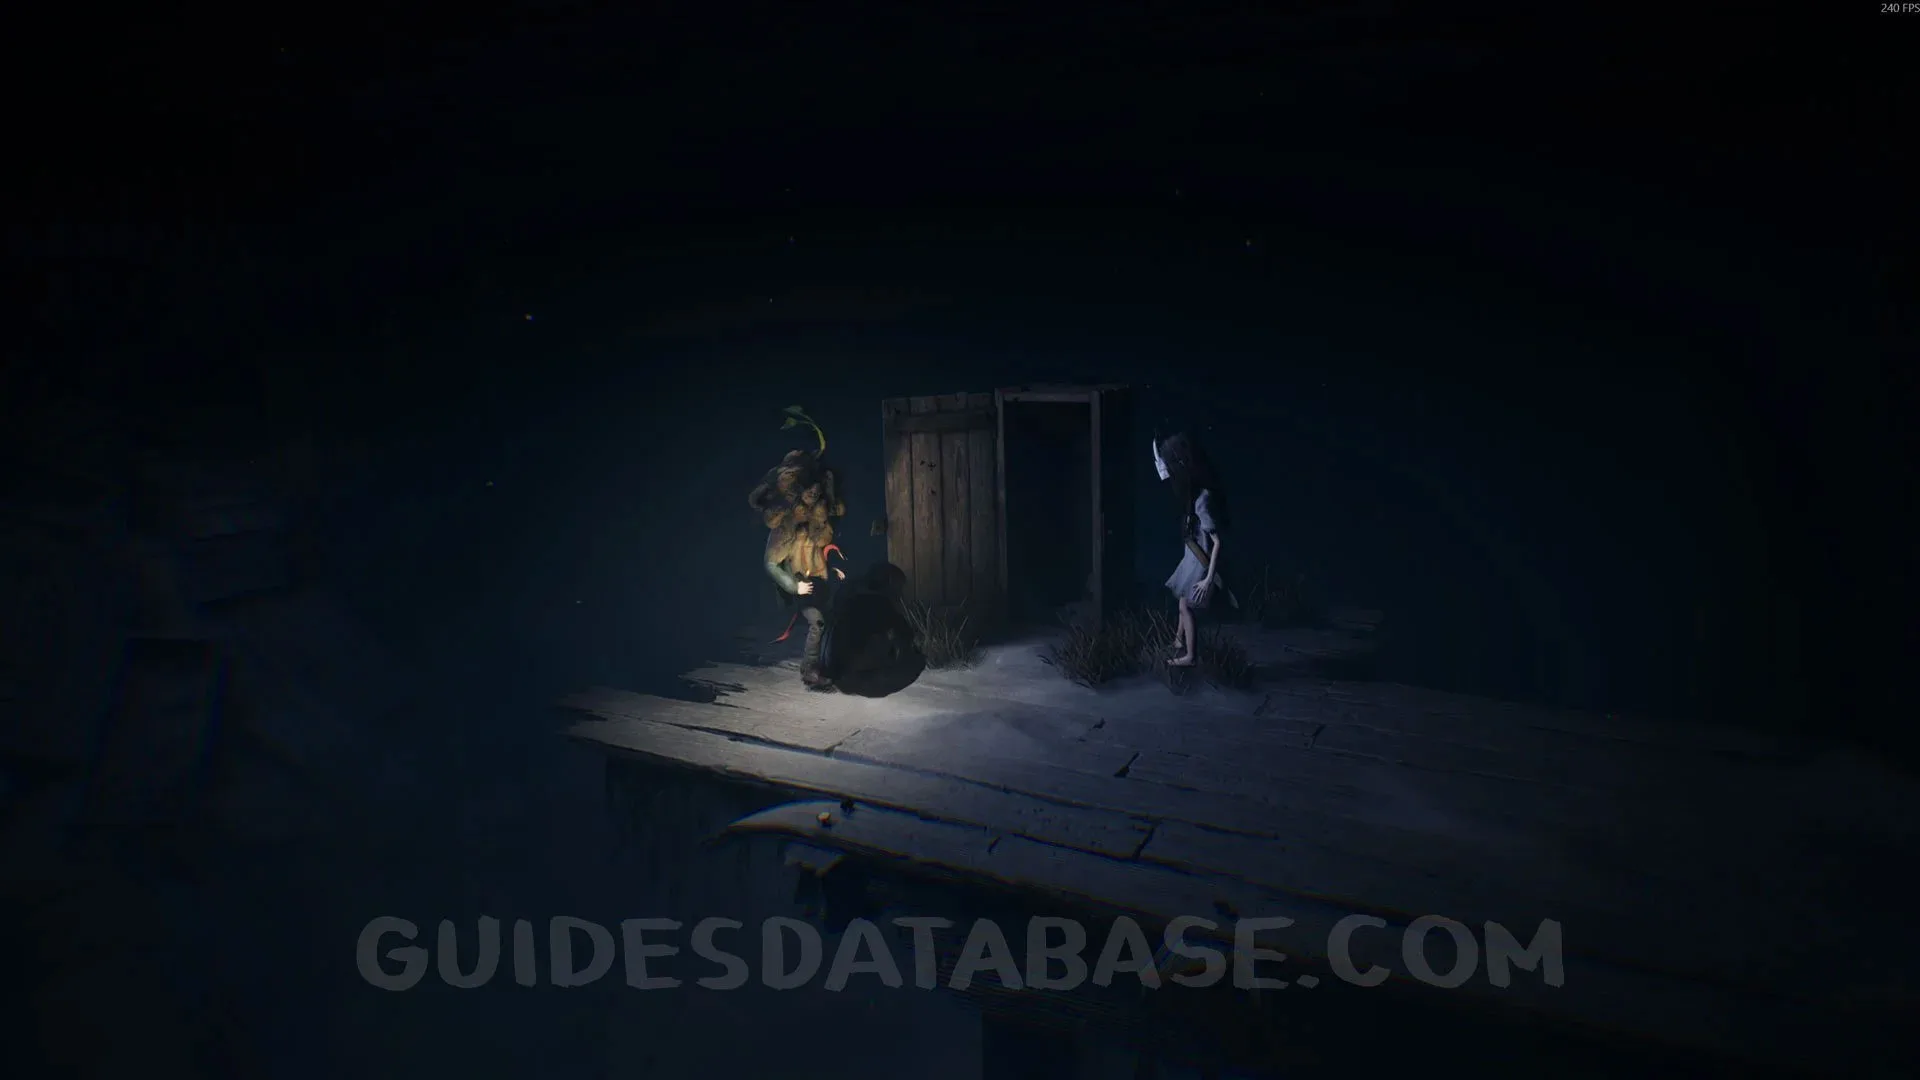 GUIDESDATABASE.COM
Chapter 5: Down in a Hole
Trophy “Creature Comforts”
At the start of the chapter, you will see a pig running around. Go after it on the left side and pet it to get the trophy.
 GUIDESDATABASE.COM
 GUIDESDATABASE.COM
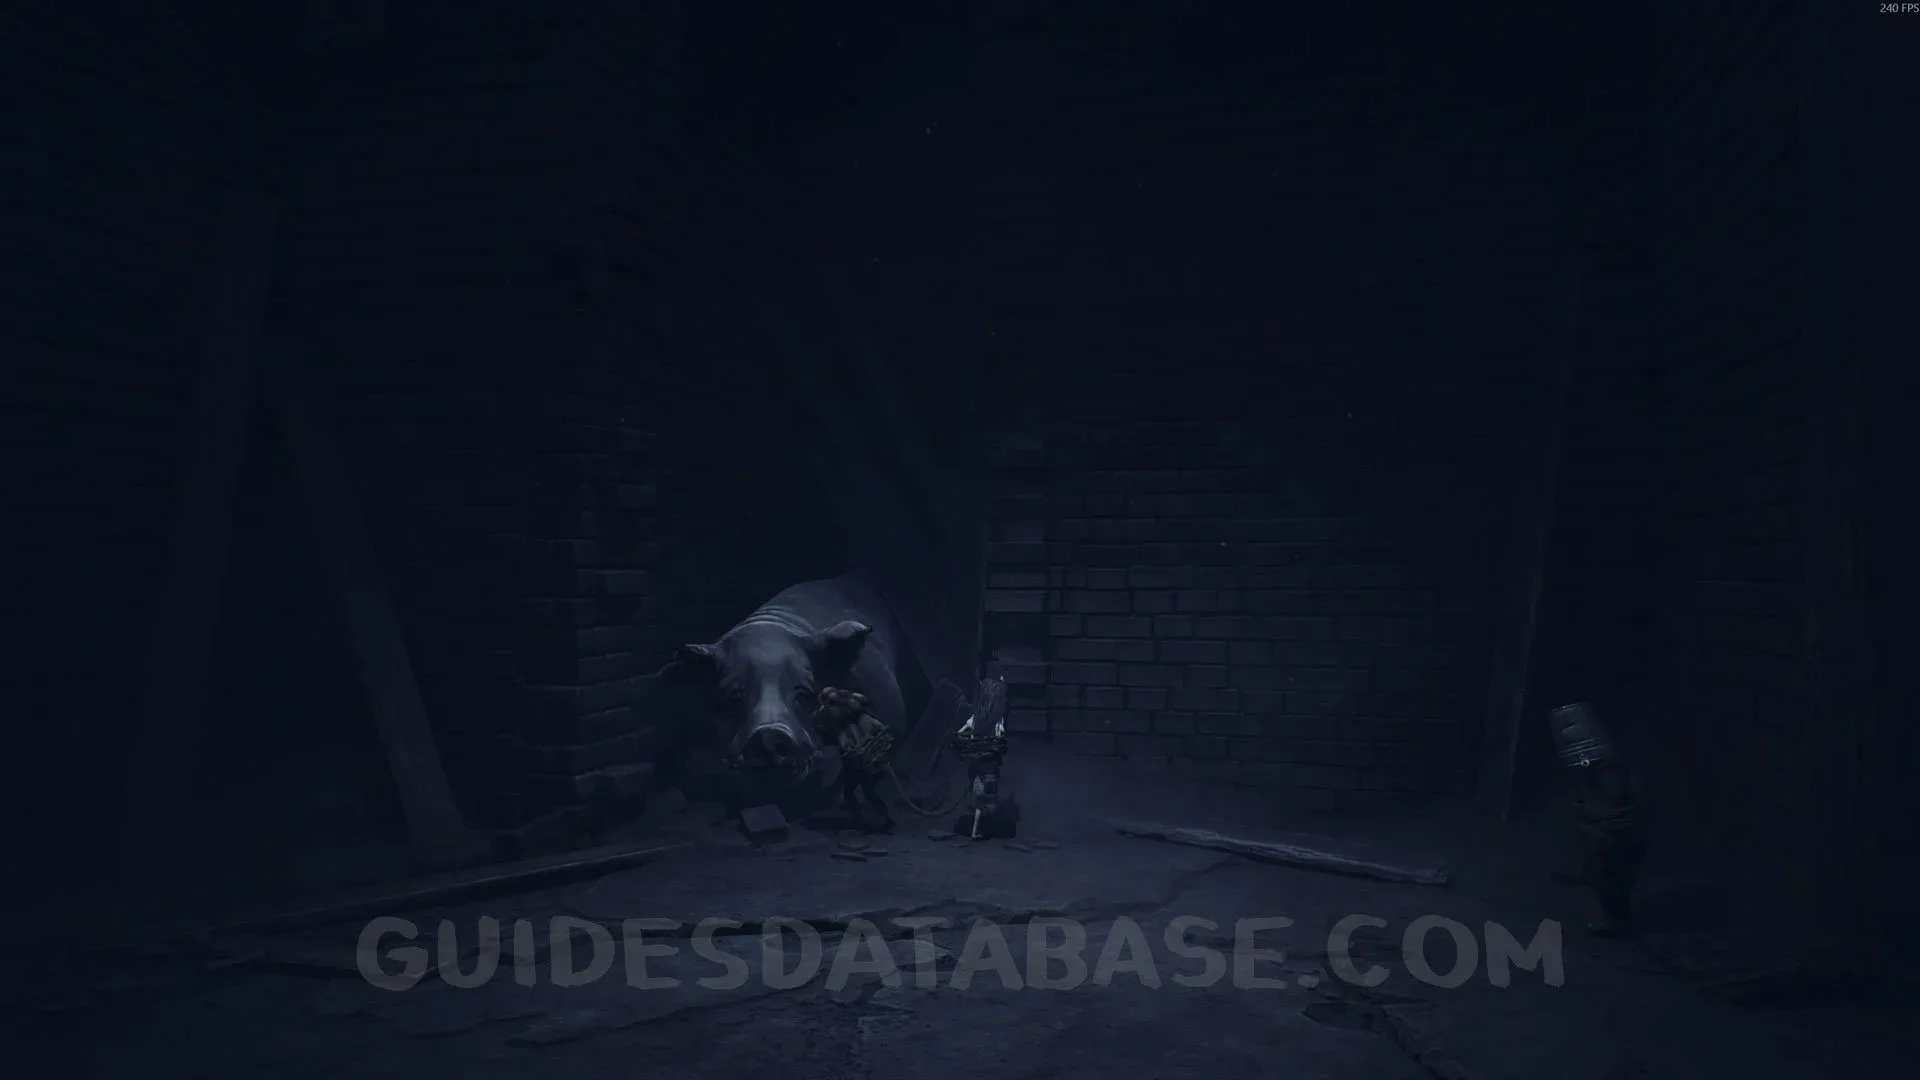 GUIDESDATABASE.COM
Poster #12 + Secret #28
After escaping from some Spider Kids and the boss, you will be freed from the rope that was tying you to your friend. In this new area, use your crowbar on the wardrobe and go through to the other side to find this poster.
 GUIDESDATABASE.COM
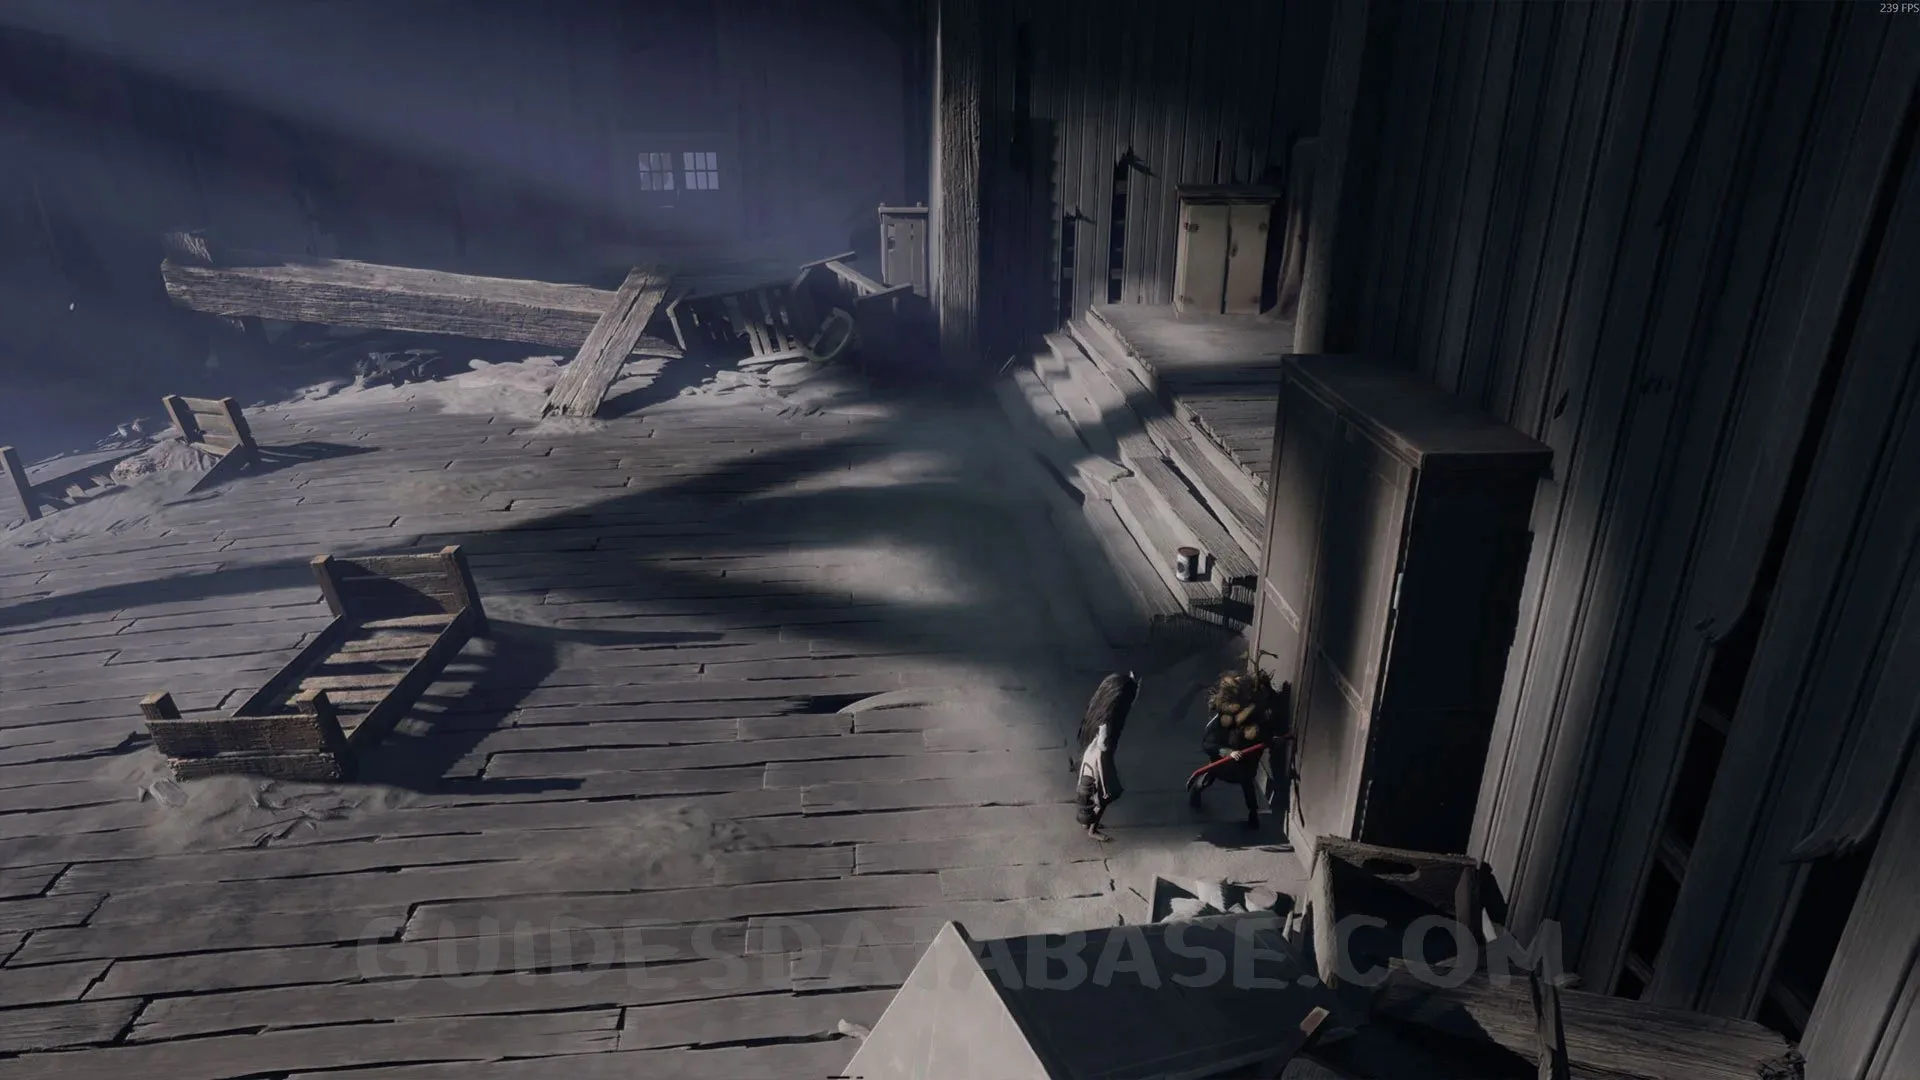 GUIDESDATABASE.COM
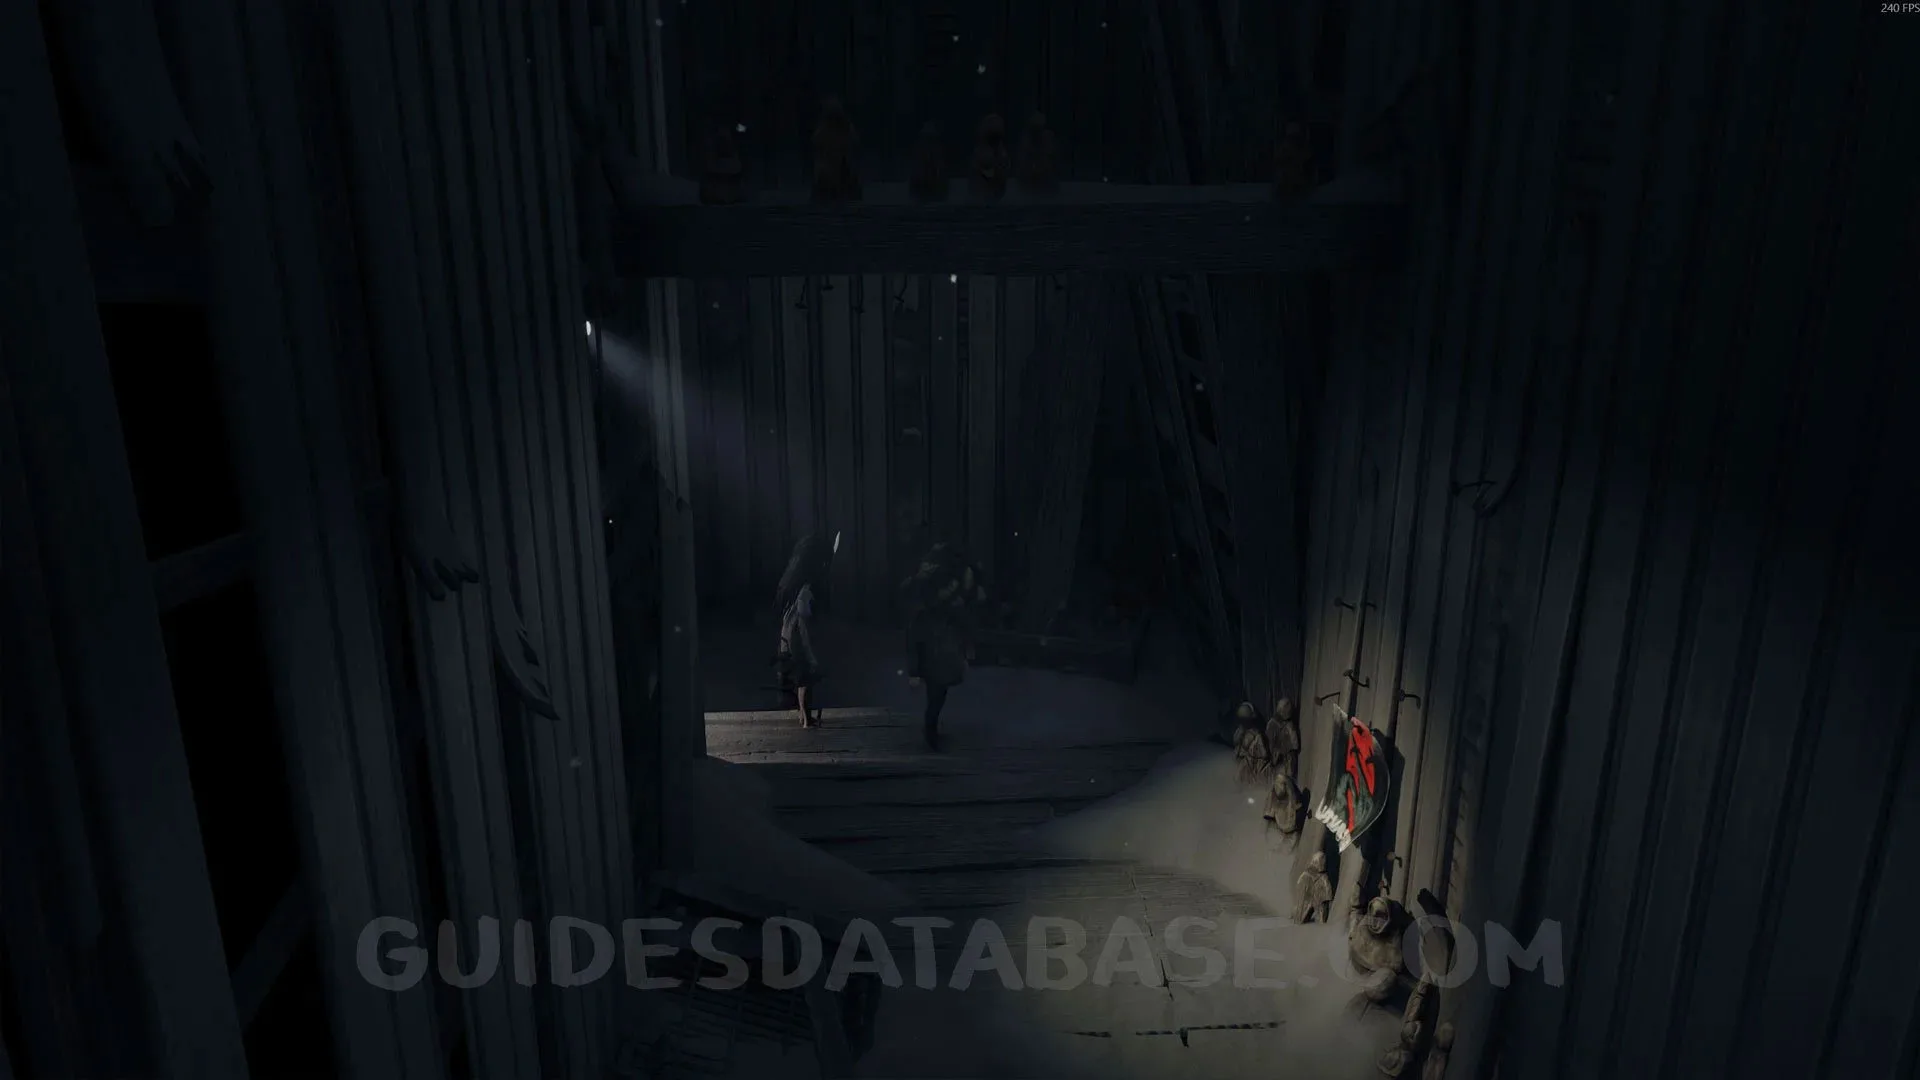 GUIDESDATABASE.COM
Rest Your Legs #10
After the previous collectible, you will find a chair to sit on. If you have rested your legs in 10 different spots, you will unlock the Take a Load Off trophy here. There will be more opportunities to get this trophy later in the game if you missed any.
 GUIDESDATABASE.COM
Trophy “Lullabye”
After the previous collectible, go through the door at the back, and you will see a piano. Interact with the piano 3 times to get this trophy.
 GUIDESDATABASE.COM
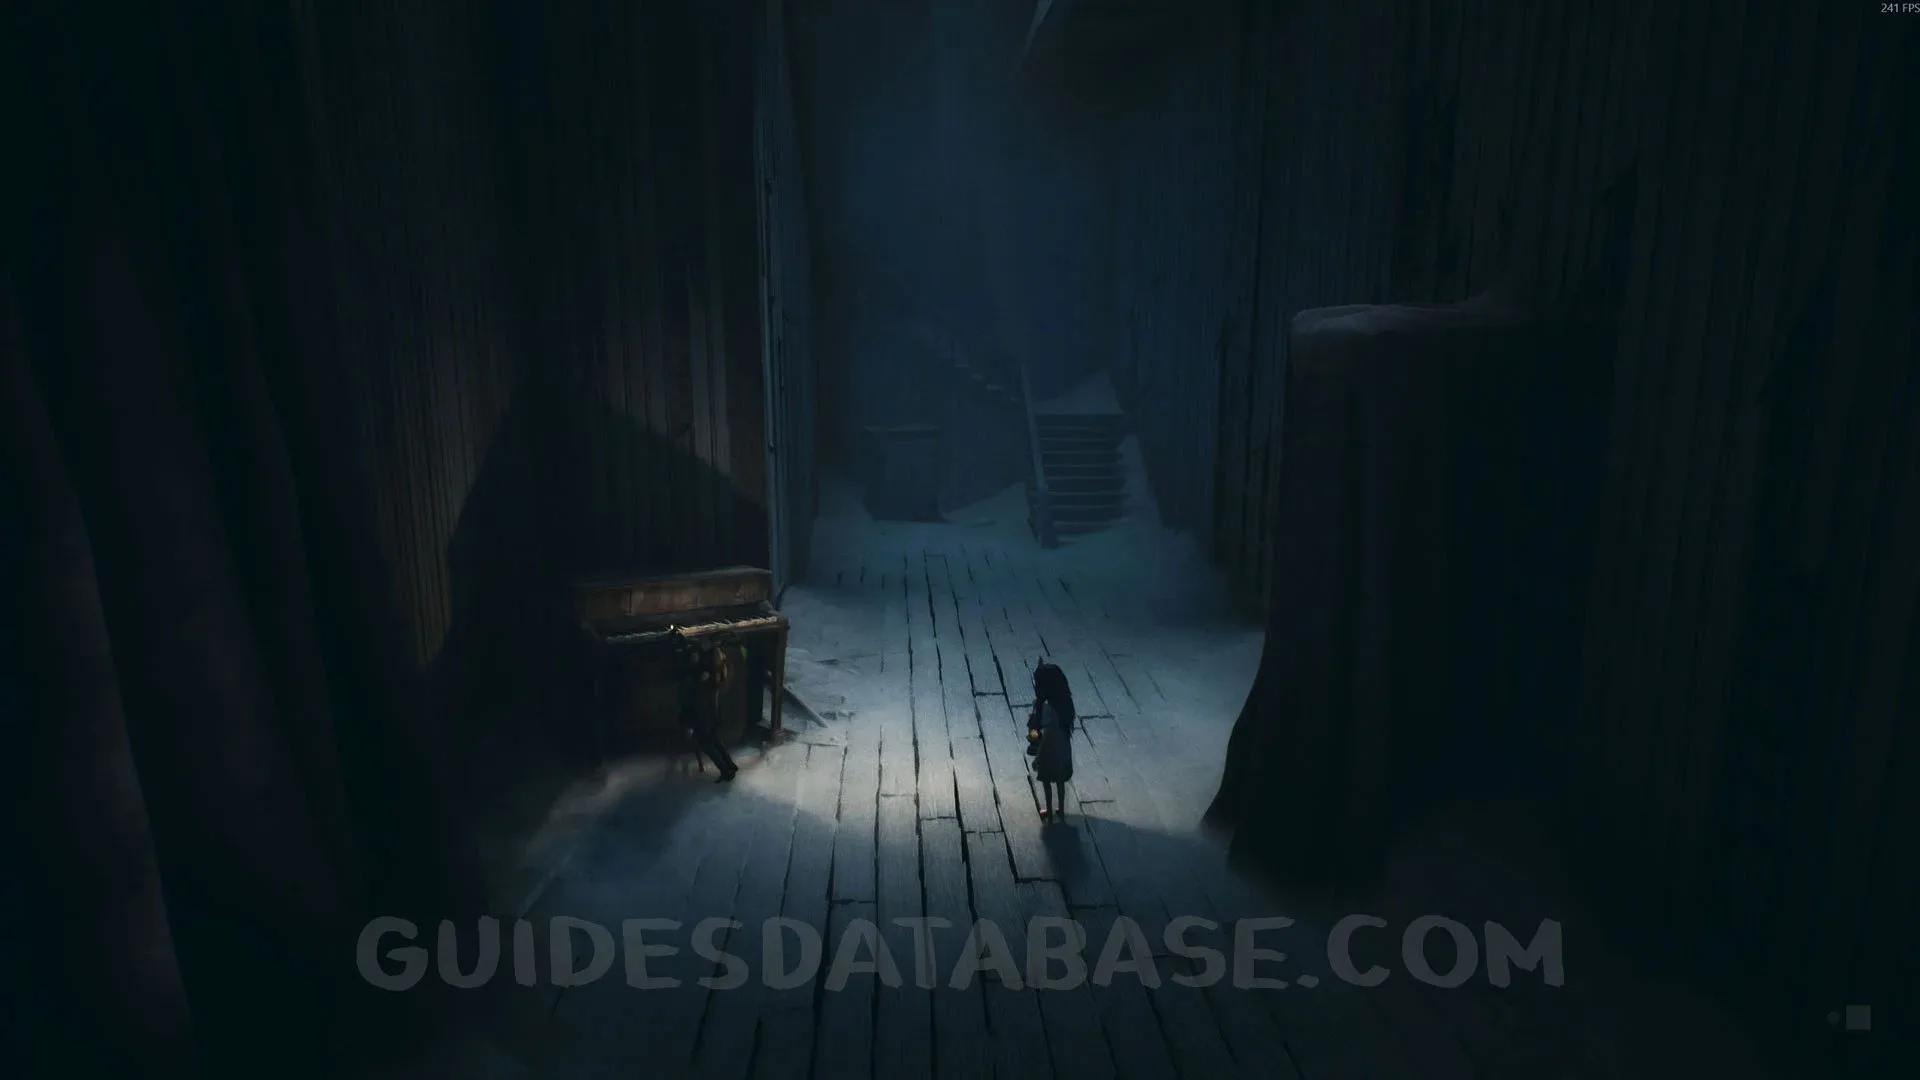 GUIDESDATABASE.COM
Poster #13 + Secret #29
After the previous trophy, go upstairs and enter the first door on the left. Go to the end of the balcony to find this poster.
 GUIDESDATABASE.COM
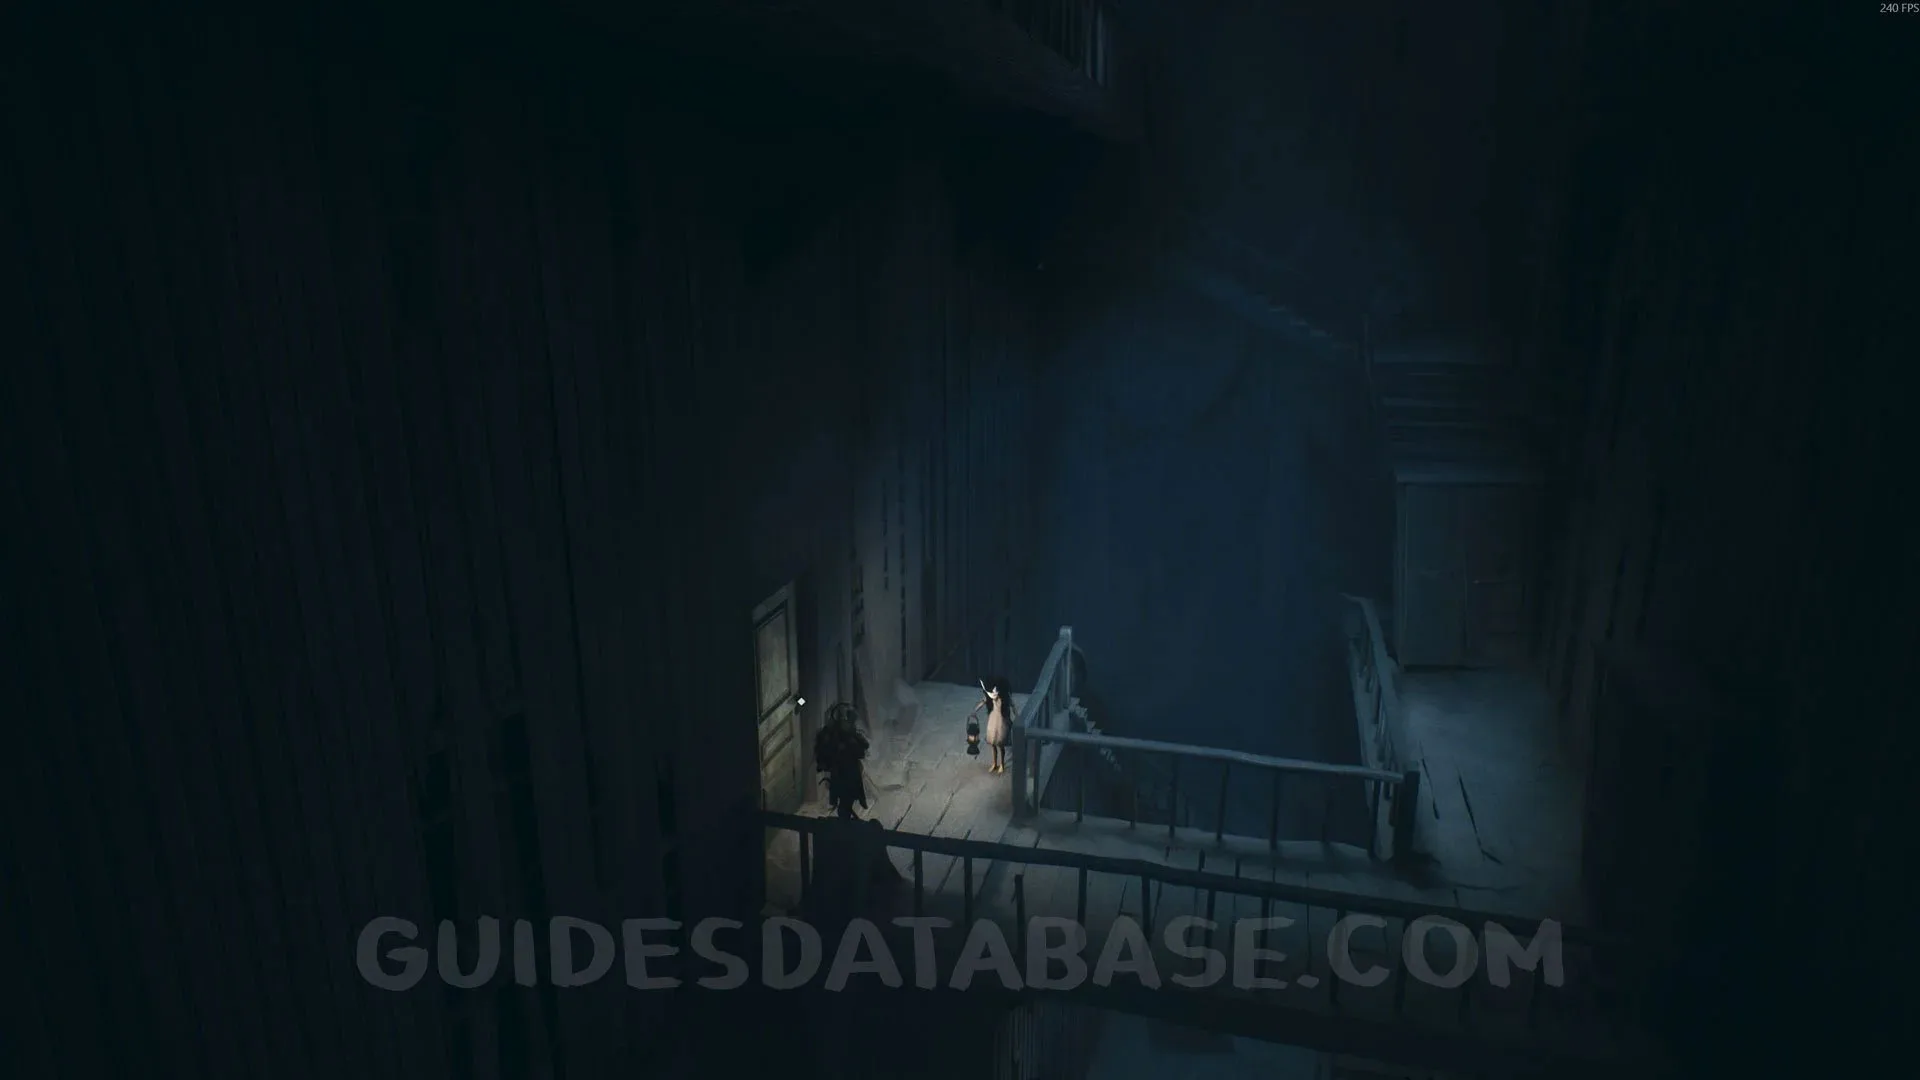 GUIDESDATABASE.COM
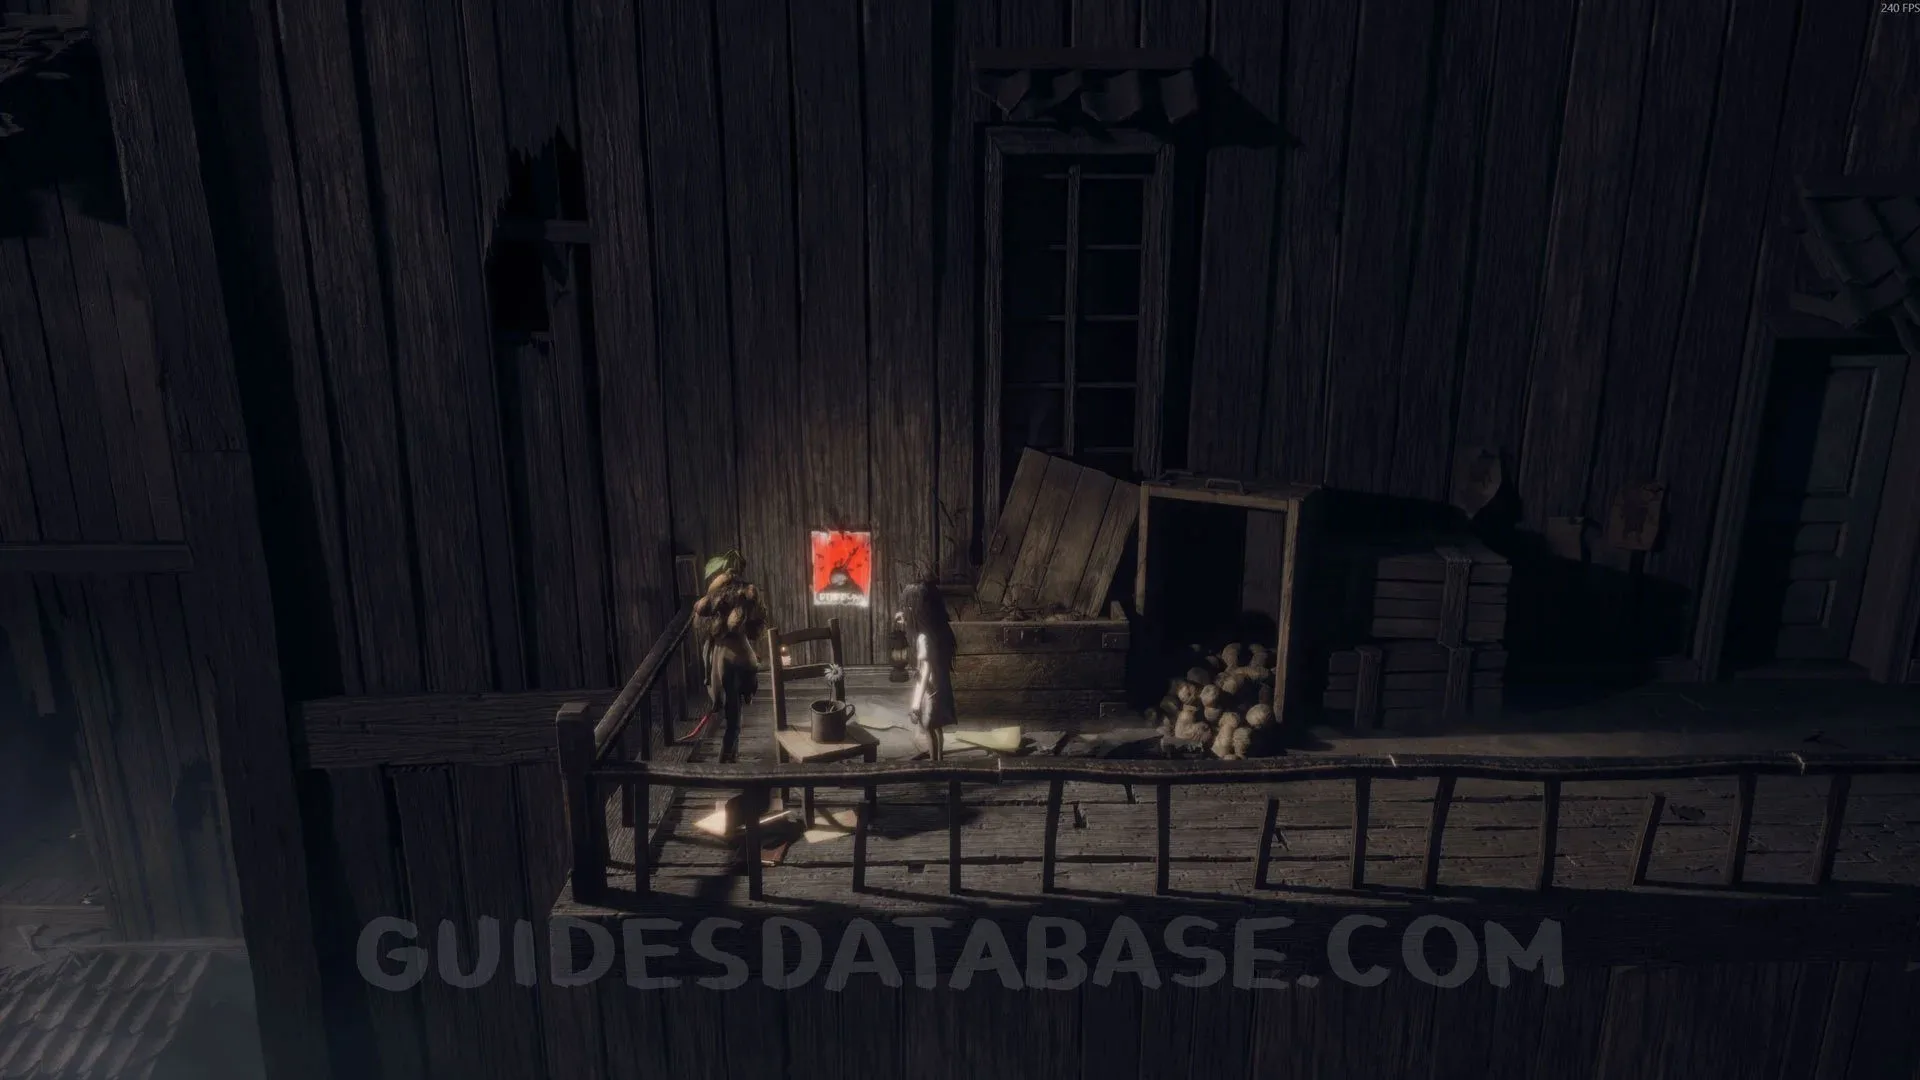 GUIDESDATABASE.COM
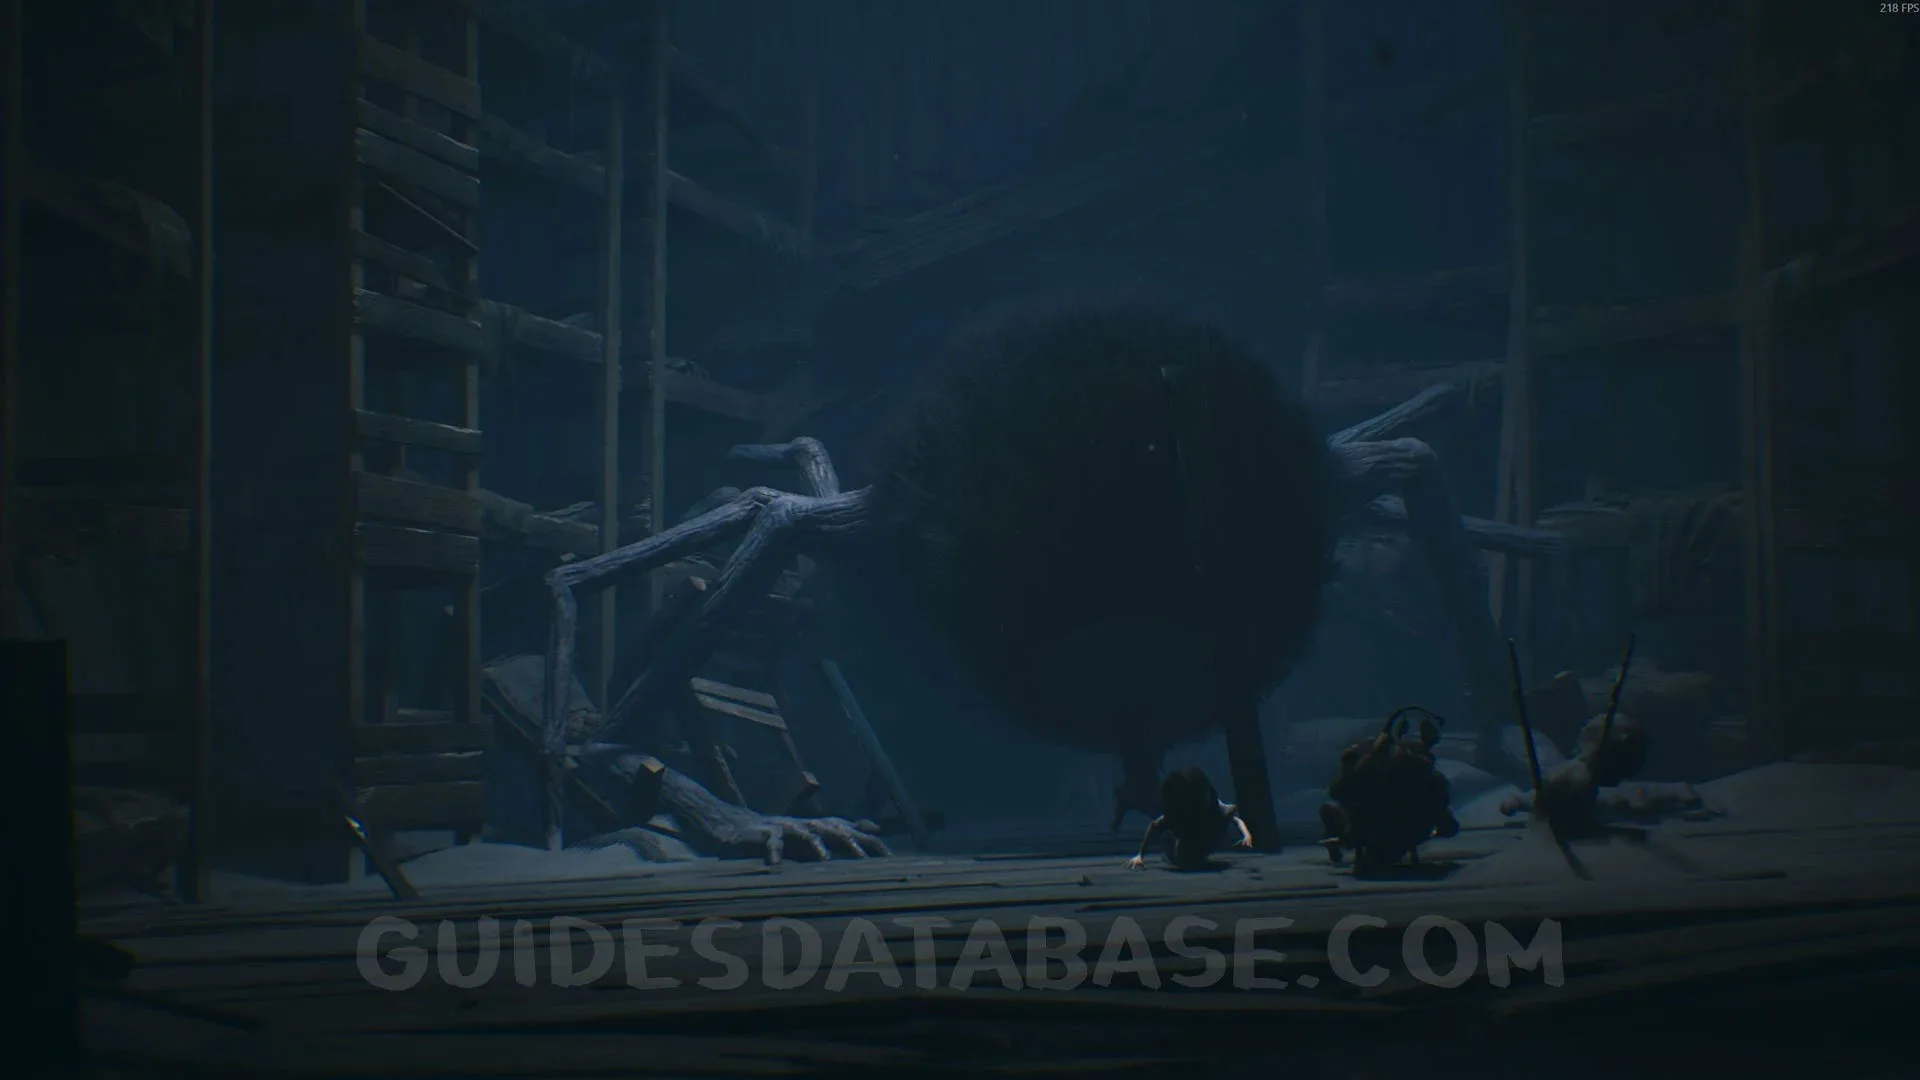
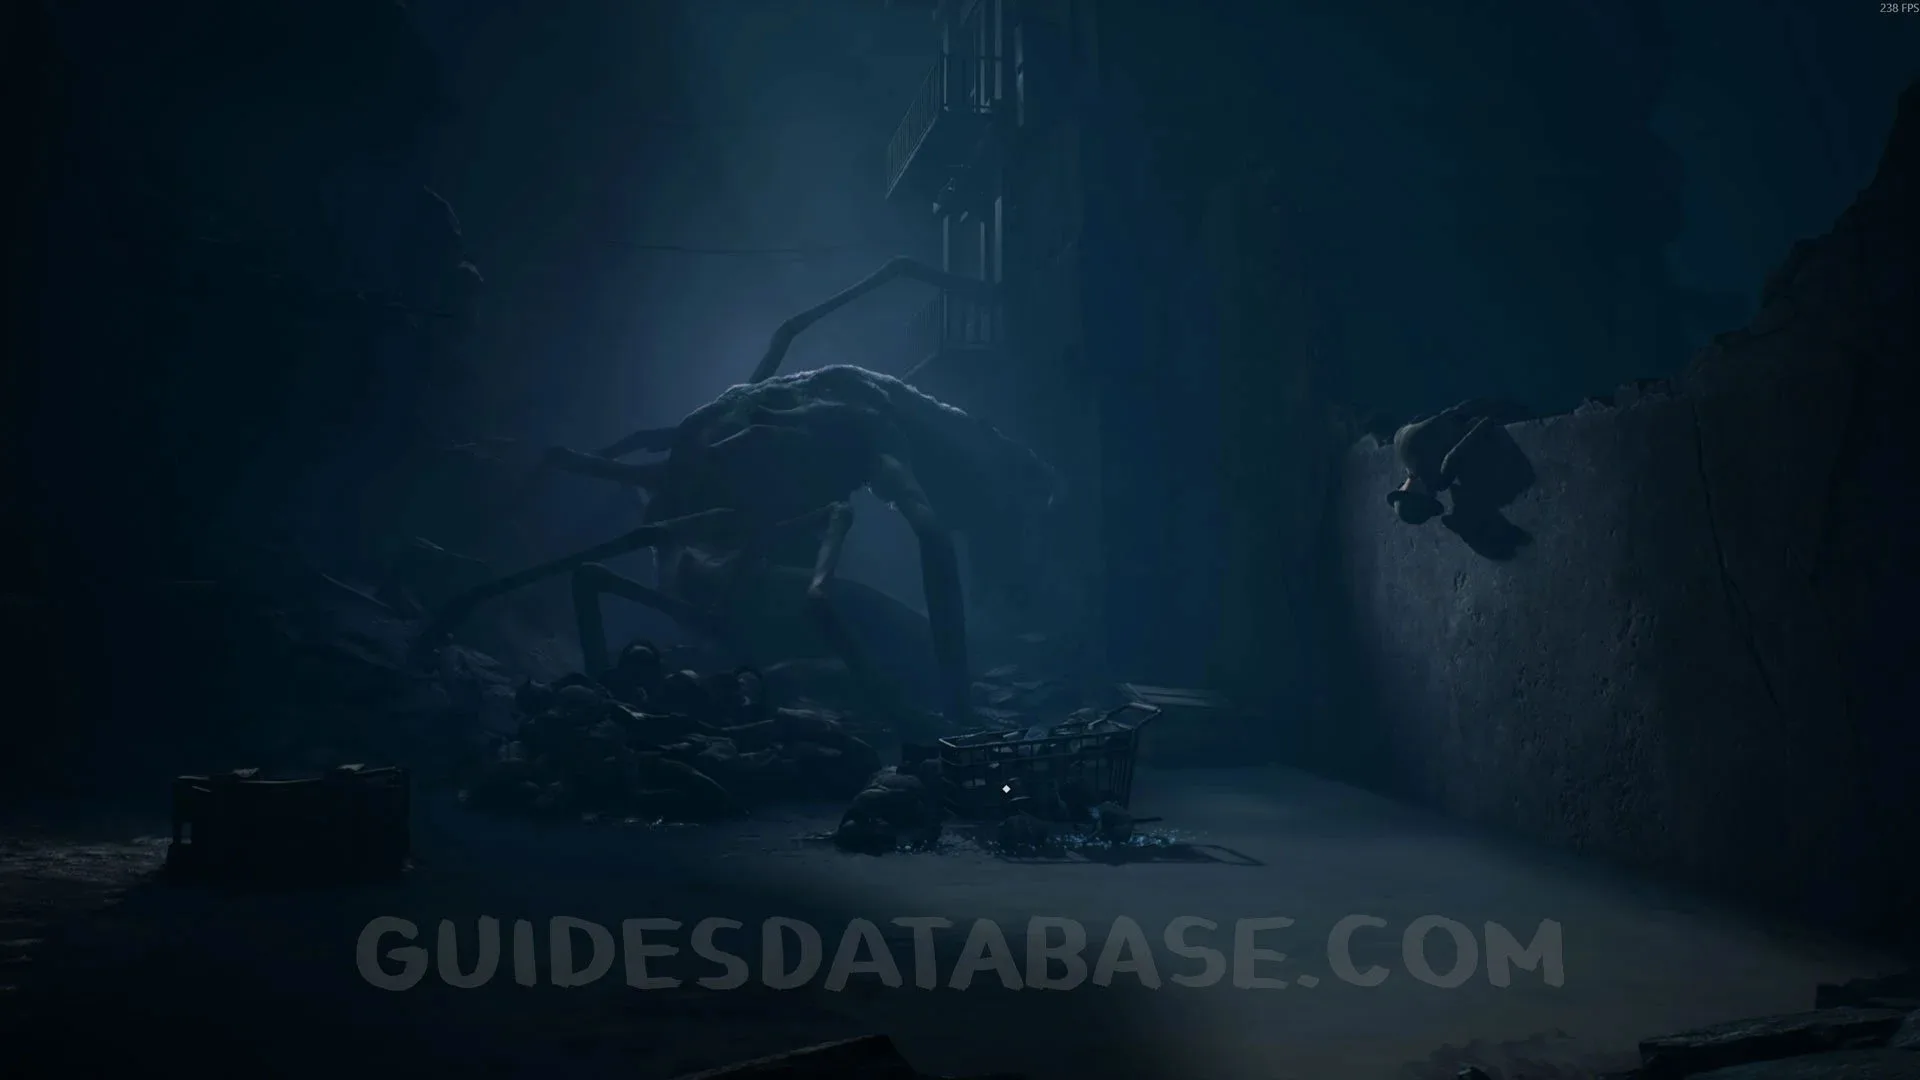
Trophy “Shot Through the Heart”
During the boss fight against the spider, the Spider Kids will keep throwing spears at you. Your goal is to defeat 10 Spider Kids with the spears they throw at you. Do not attack the boss with a spear until you have unlocked this trophy.
 GUIDESDATABASE.COM
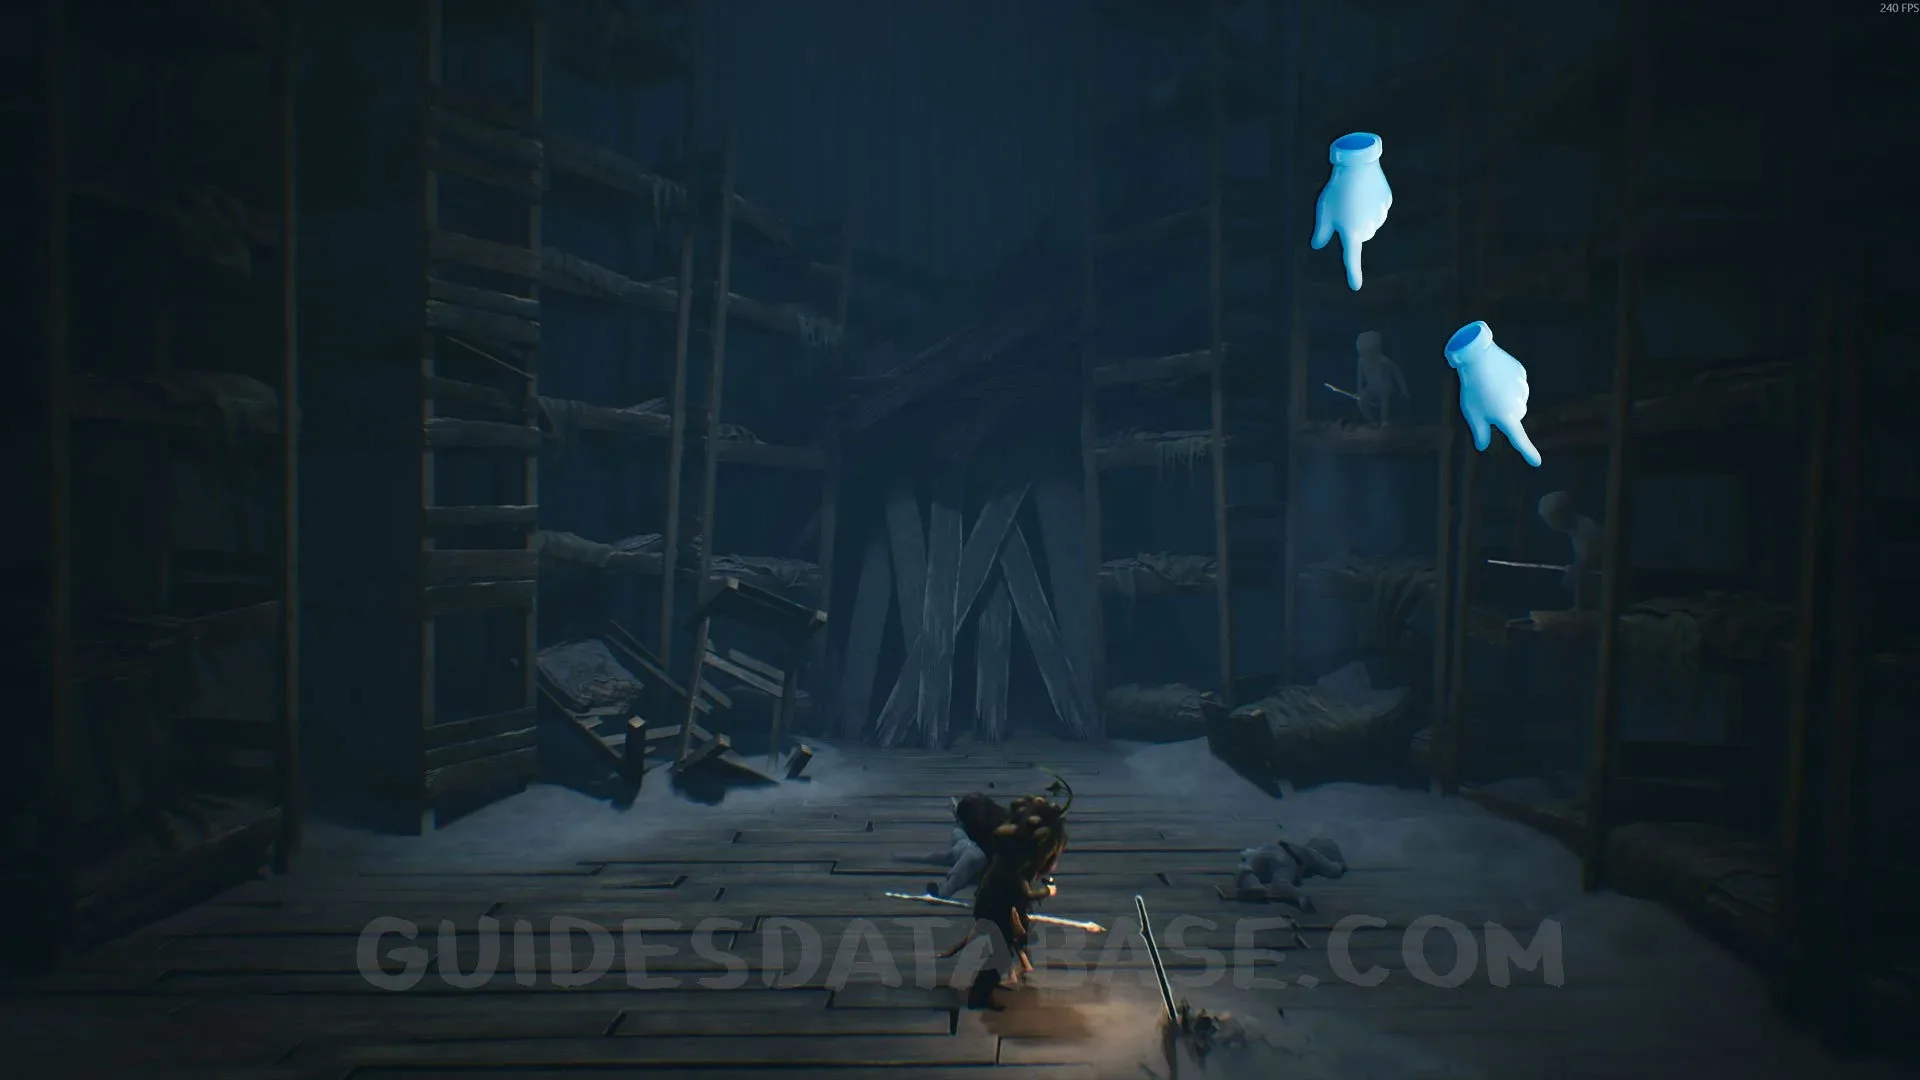 GUIDESDATABASE.COM
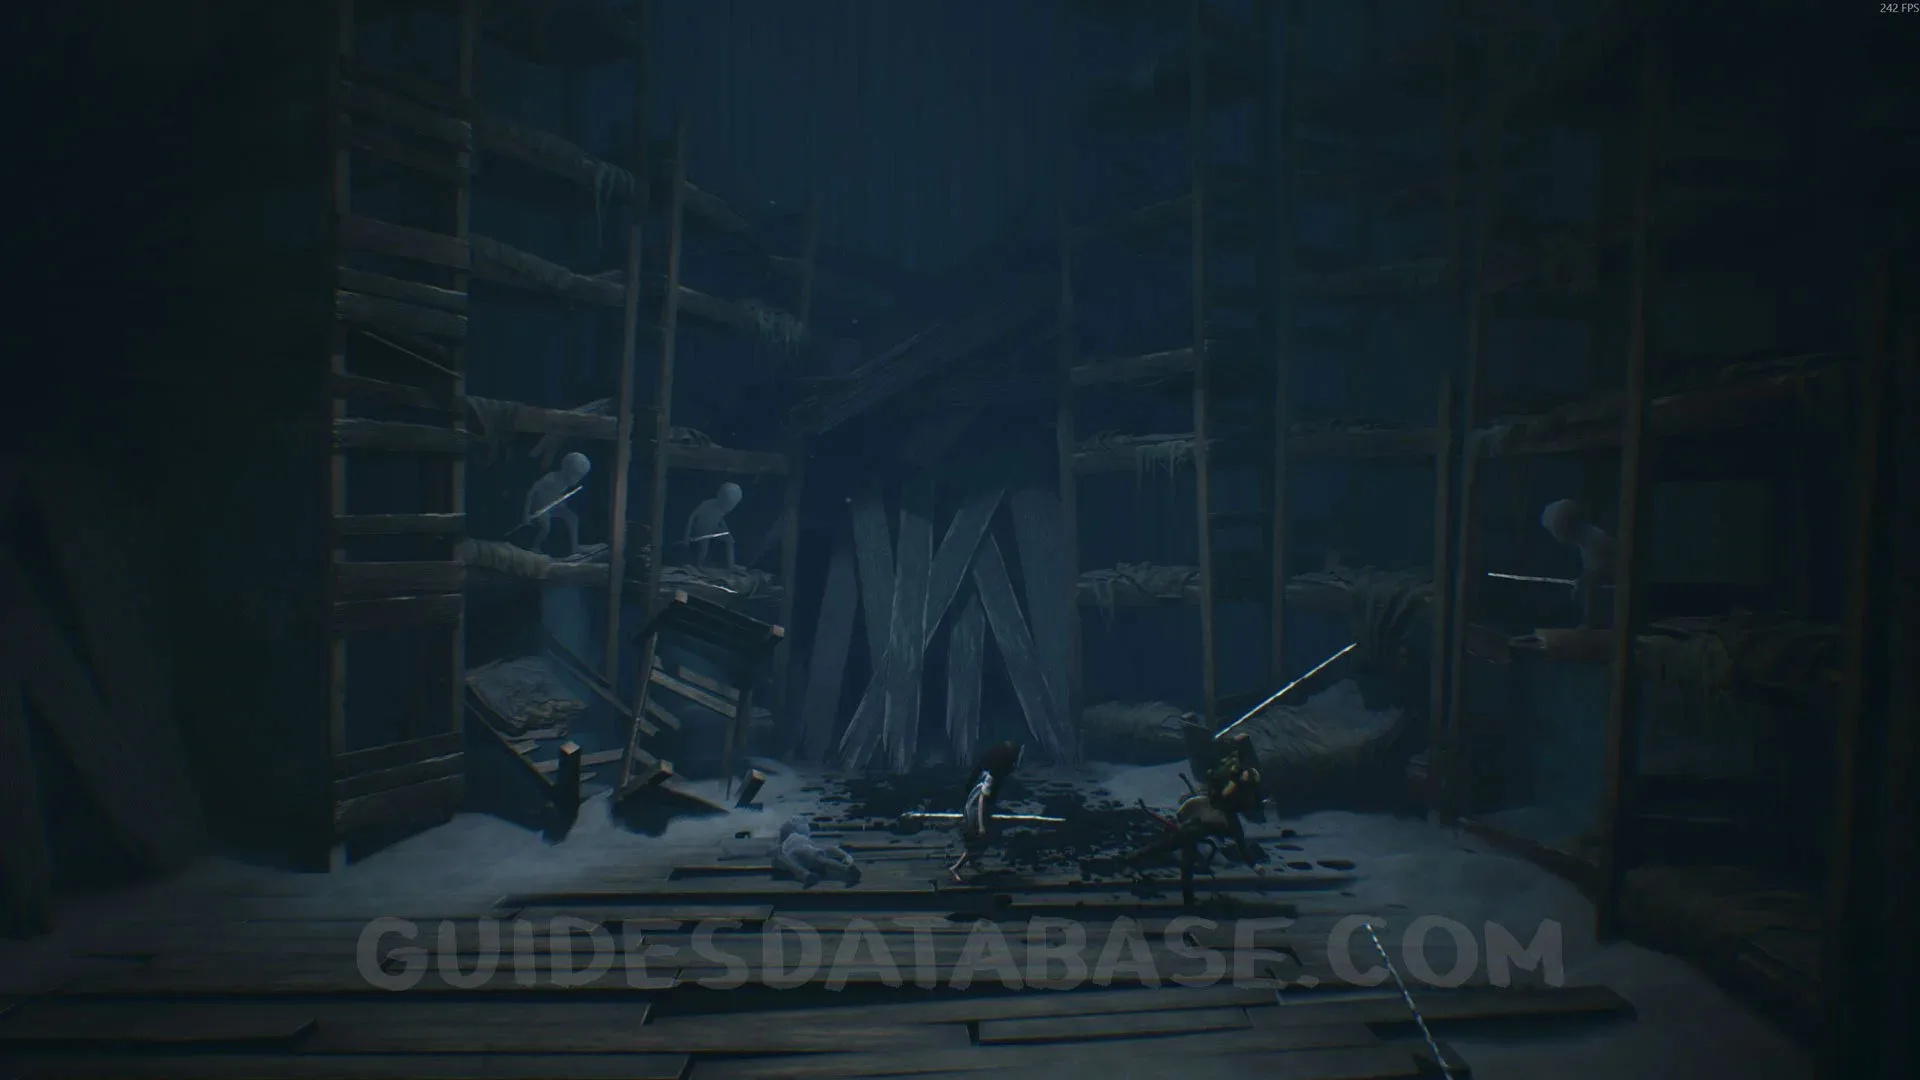 GUIDESDATABASE.COM
Chapter 6: Nobody Left Behind
Trophy “Secret Bunker”
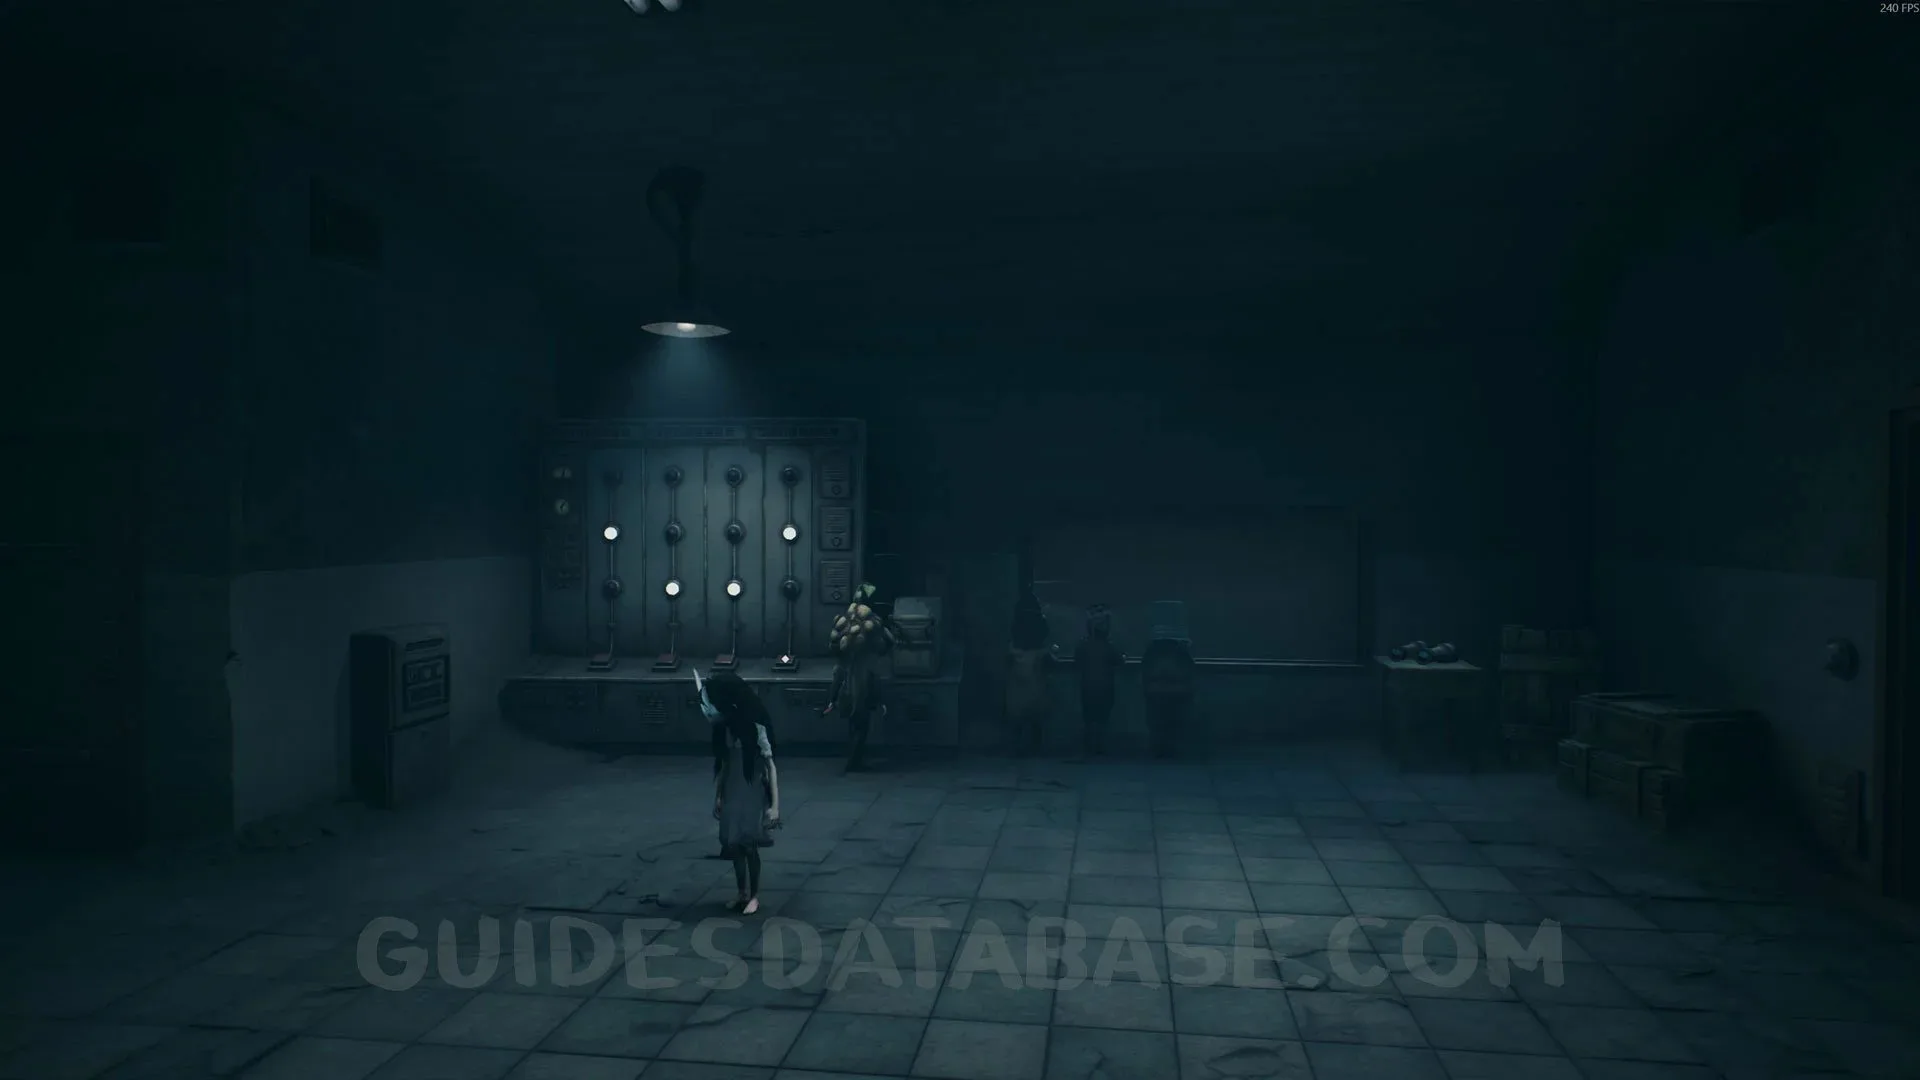
At the start of the chapter, you will come to a bunker. Turn the power on and enter the code 2-3-3-2 into the machine to get the trophy.
 GUIDESDATABASE.COM
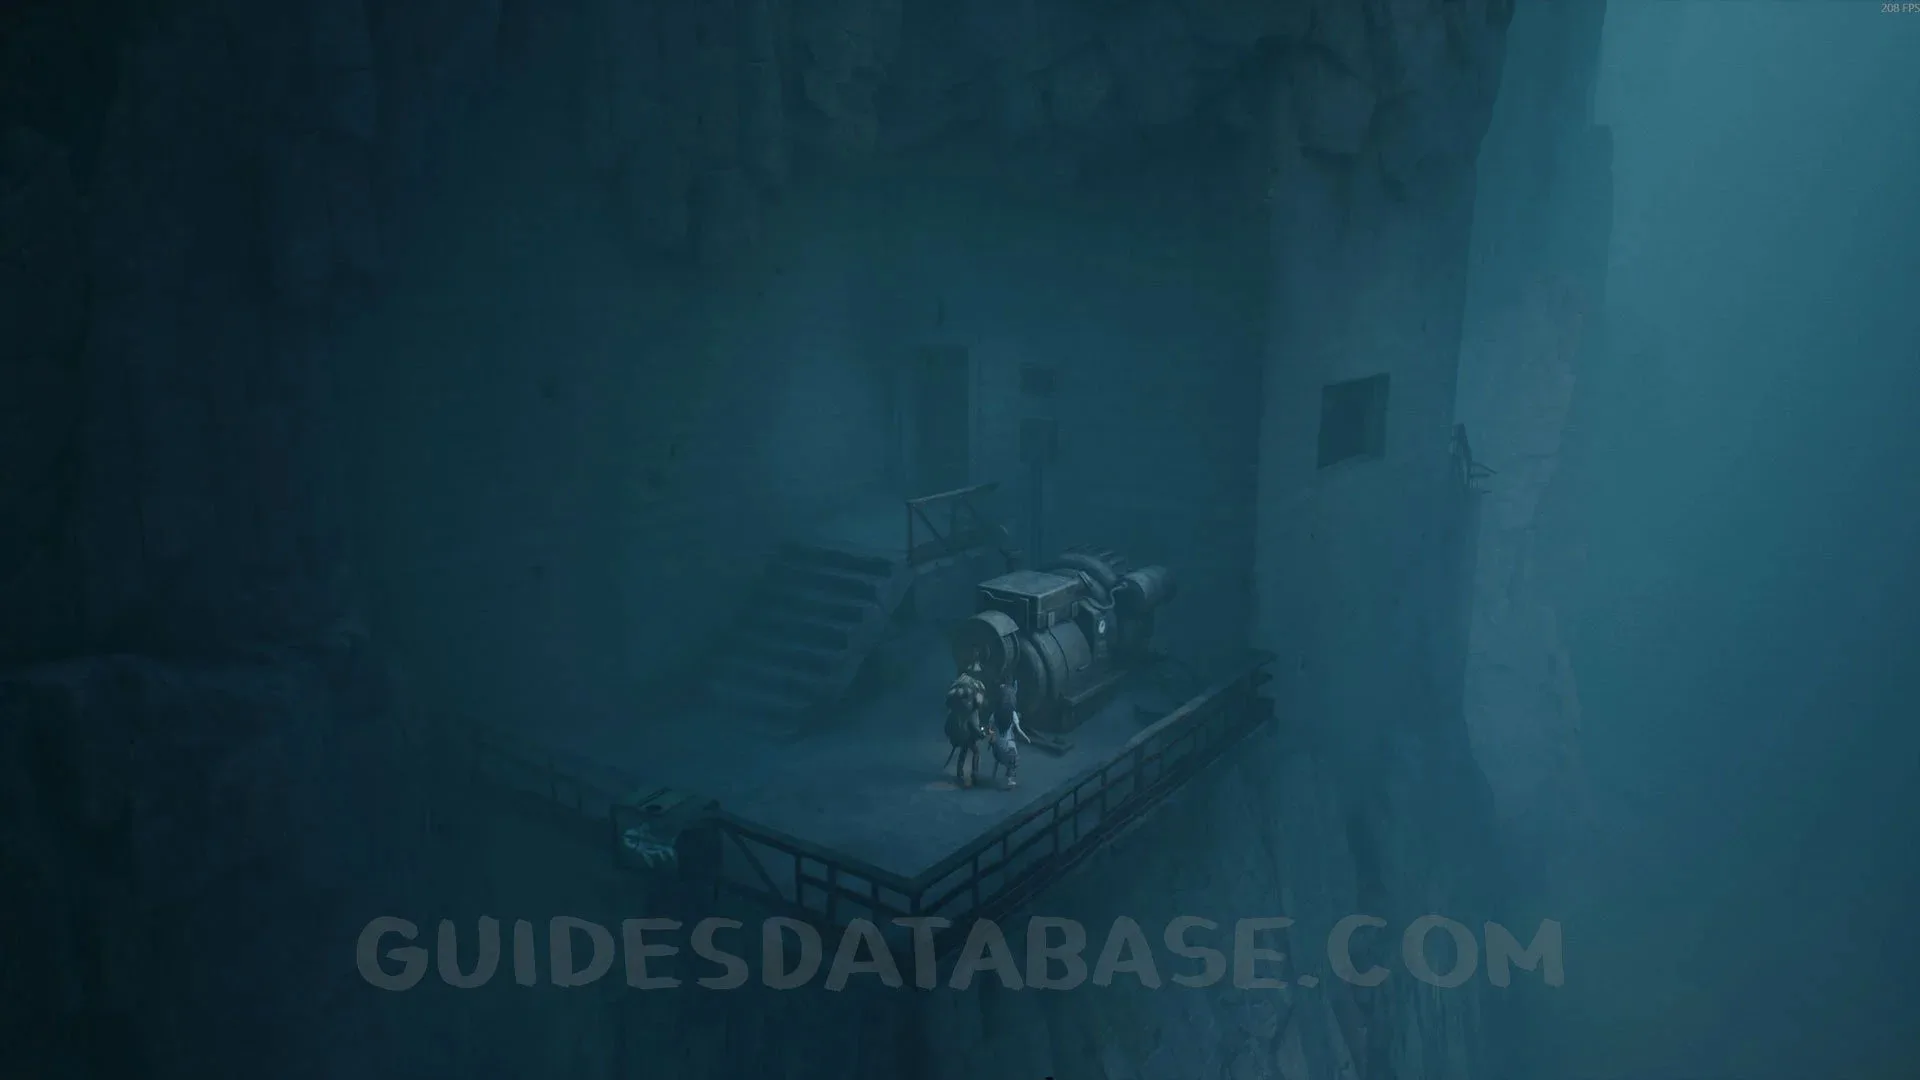 GUIDESDATABASE.COM
 GUIDESDATABASE.COM
Poster #14 + Secret #30
In the same area as the previous trophy, this poster will only appear if you entered the code 2-3-3-2 into the machine.
 GUIDESDATABASE.COM
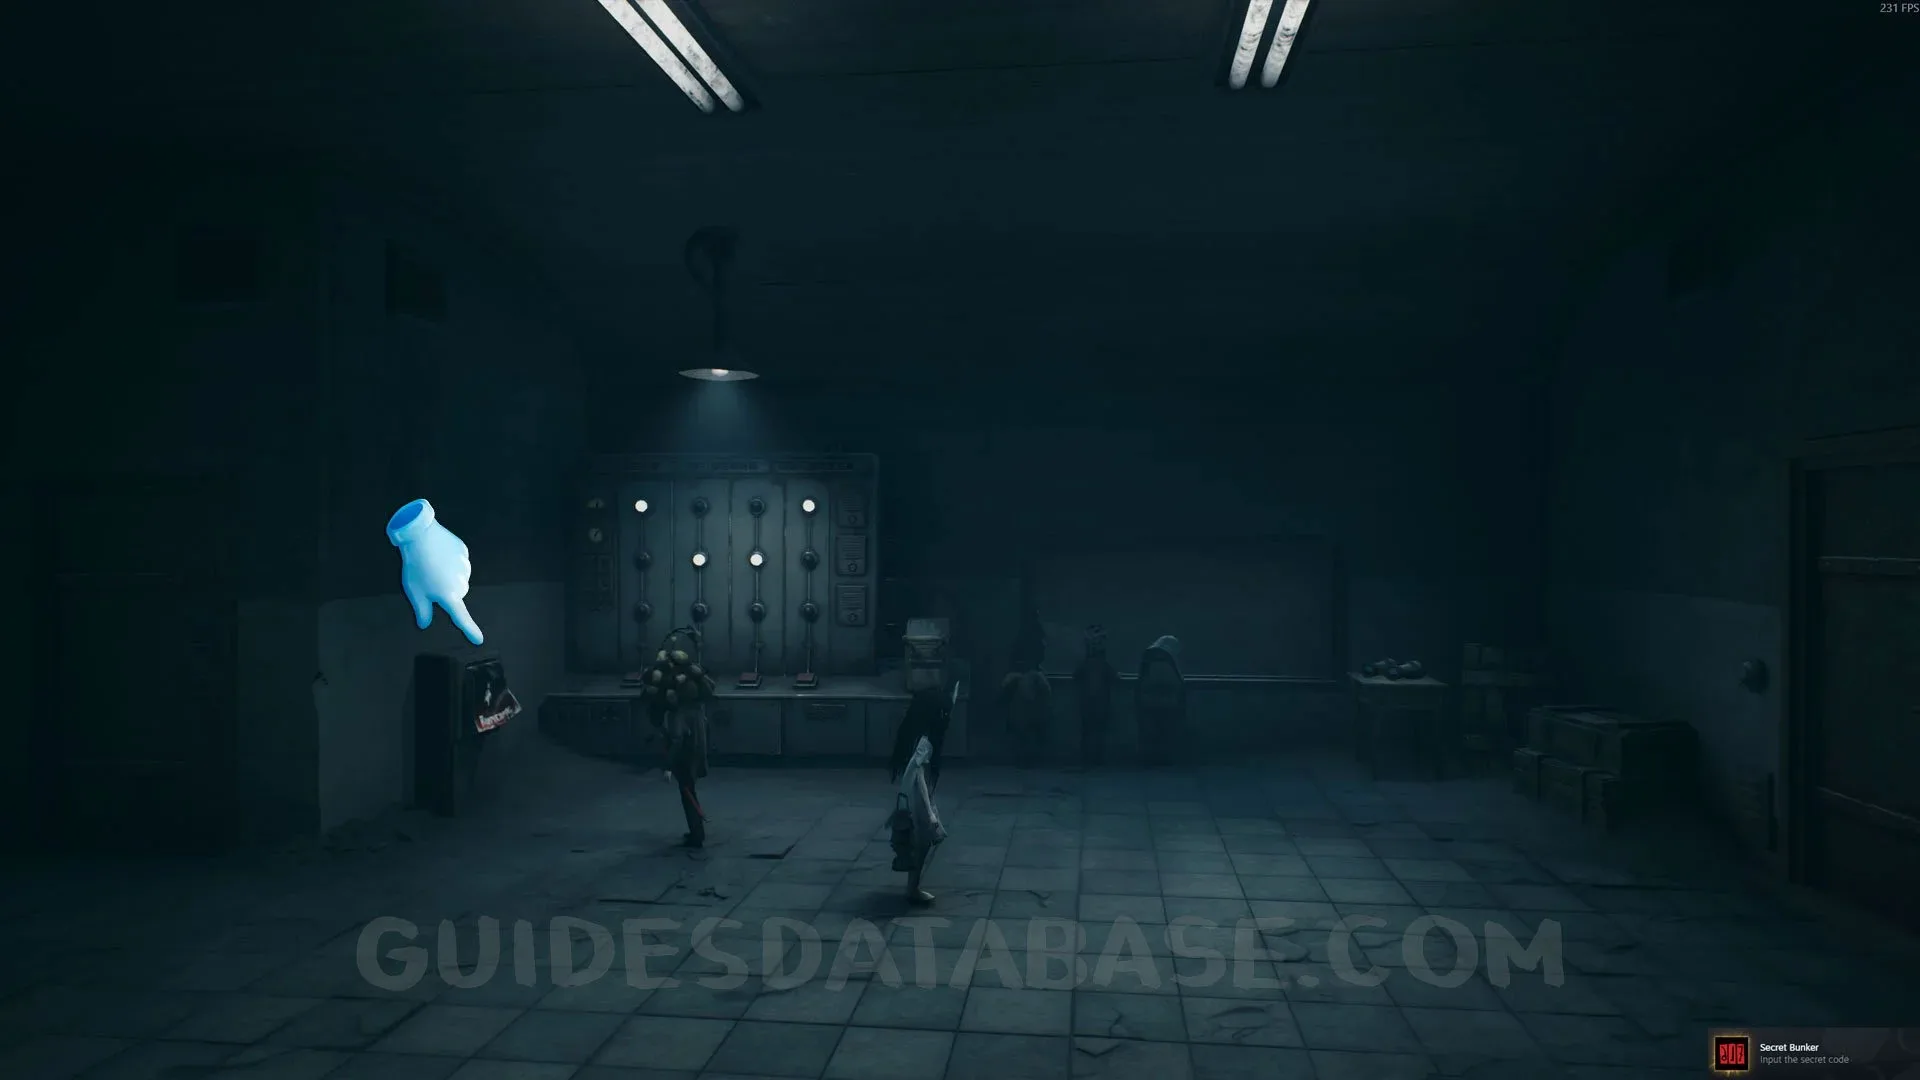 GUIDESDATABASE.COM
Critter #4 + Mask #10 + Secret #31
After the previous collectible, go back to the area where you turned the power on and kick the crate. Go through the door and head downstairs, then follow the beach all the way to the end to find the critter. Defeat it to get the mask.
 GUIDESDATABASE.COM
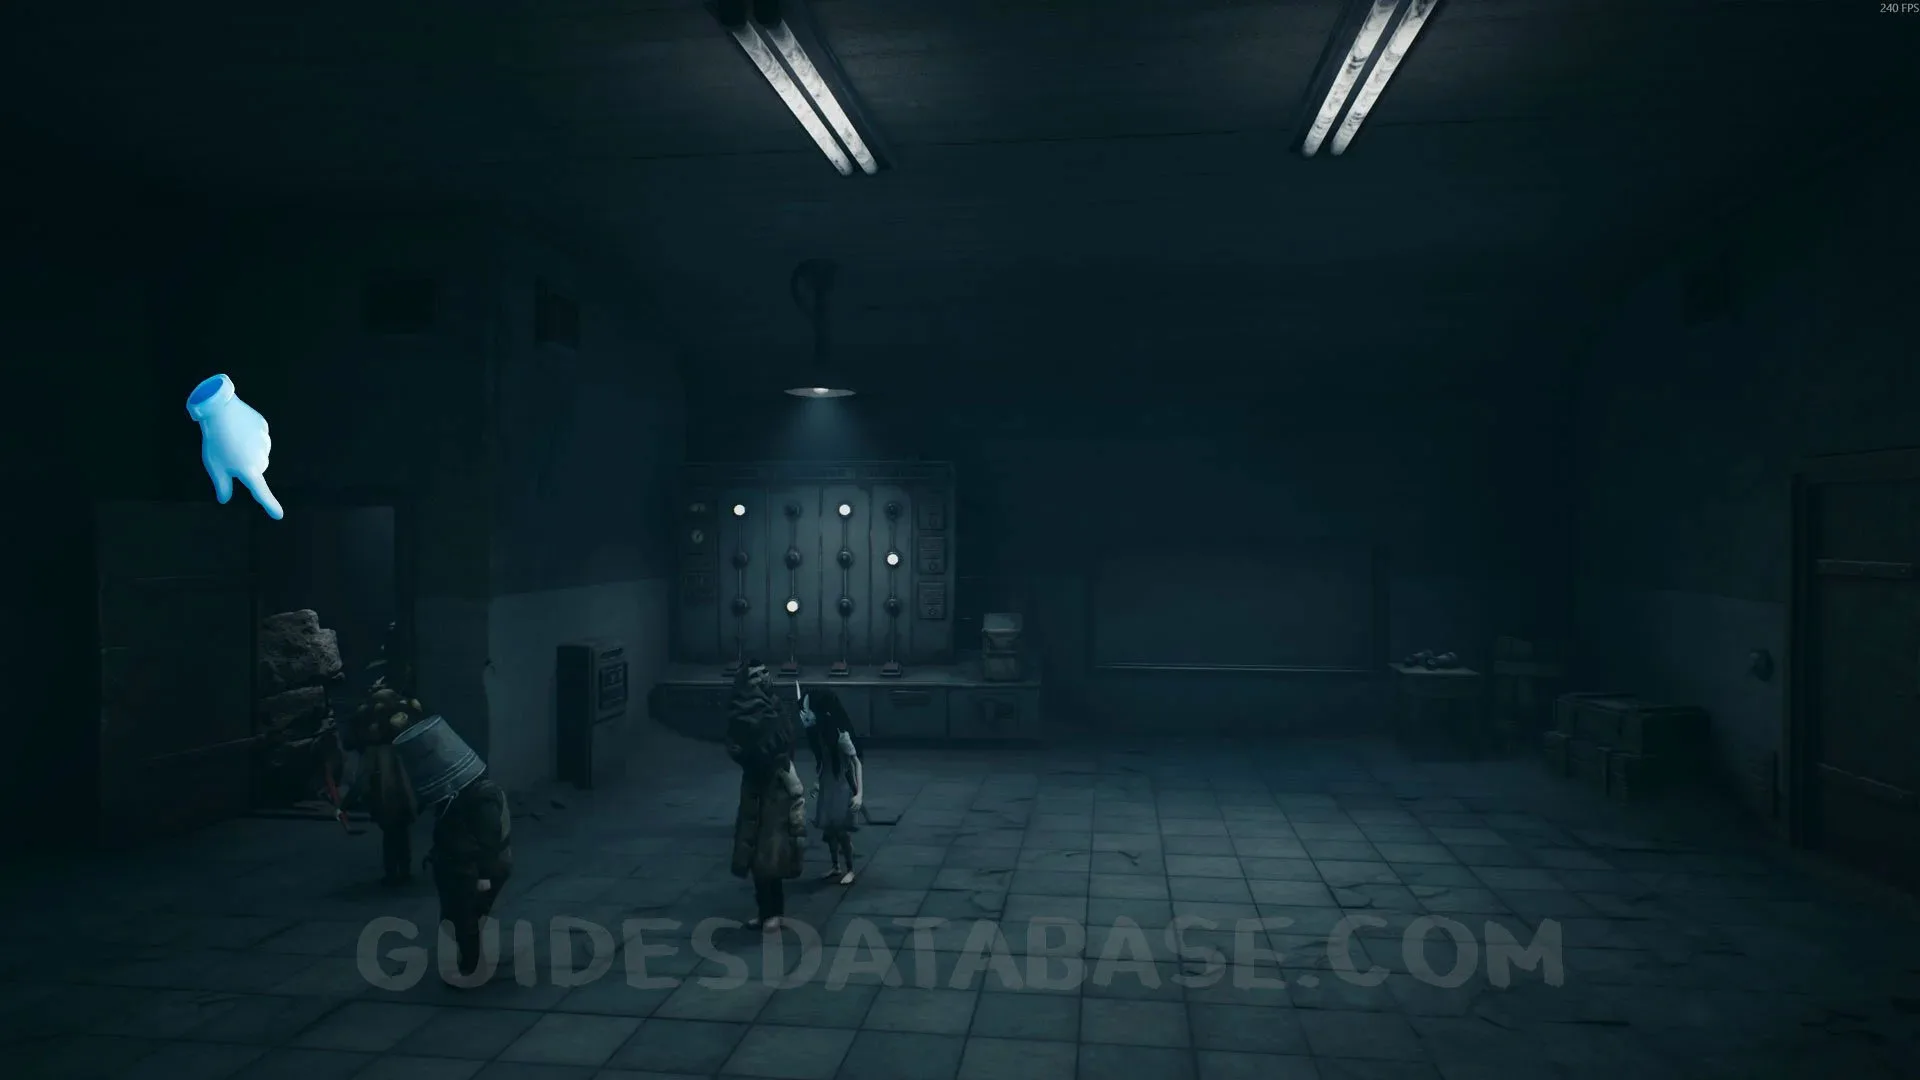 GUIDESDATABASE.COM
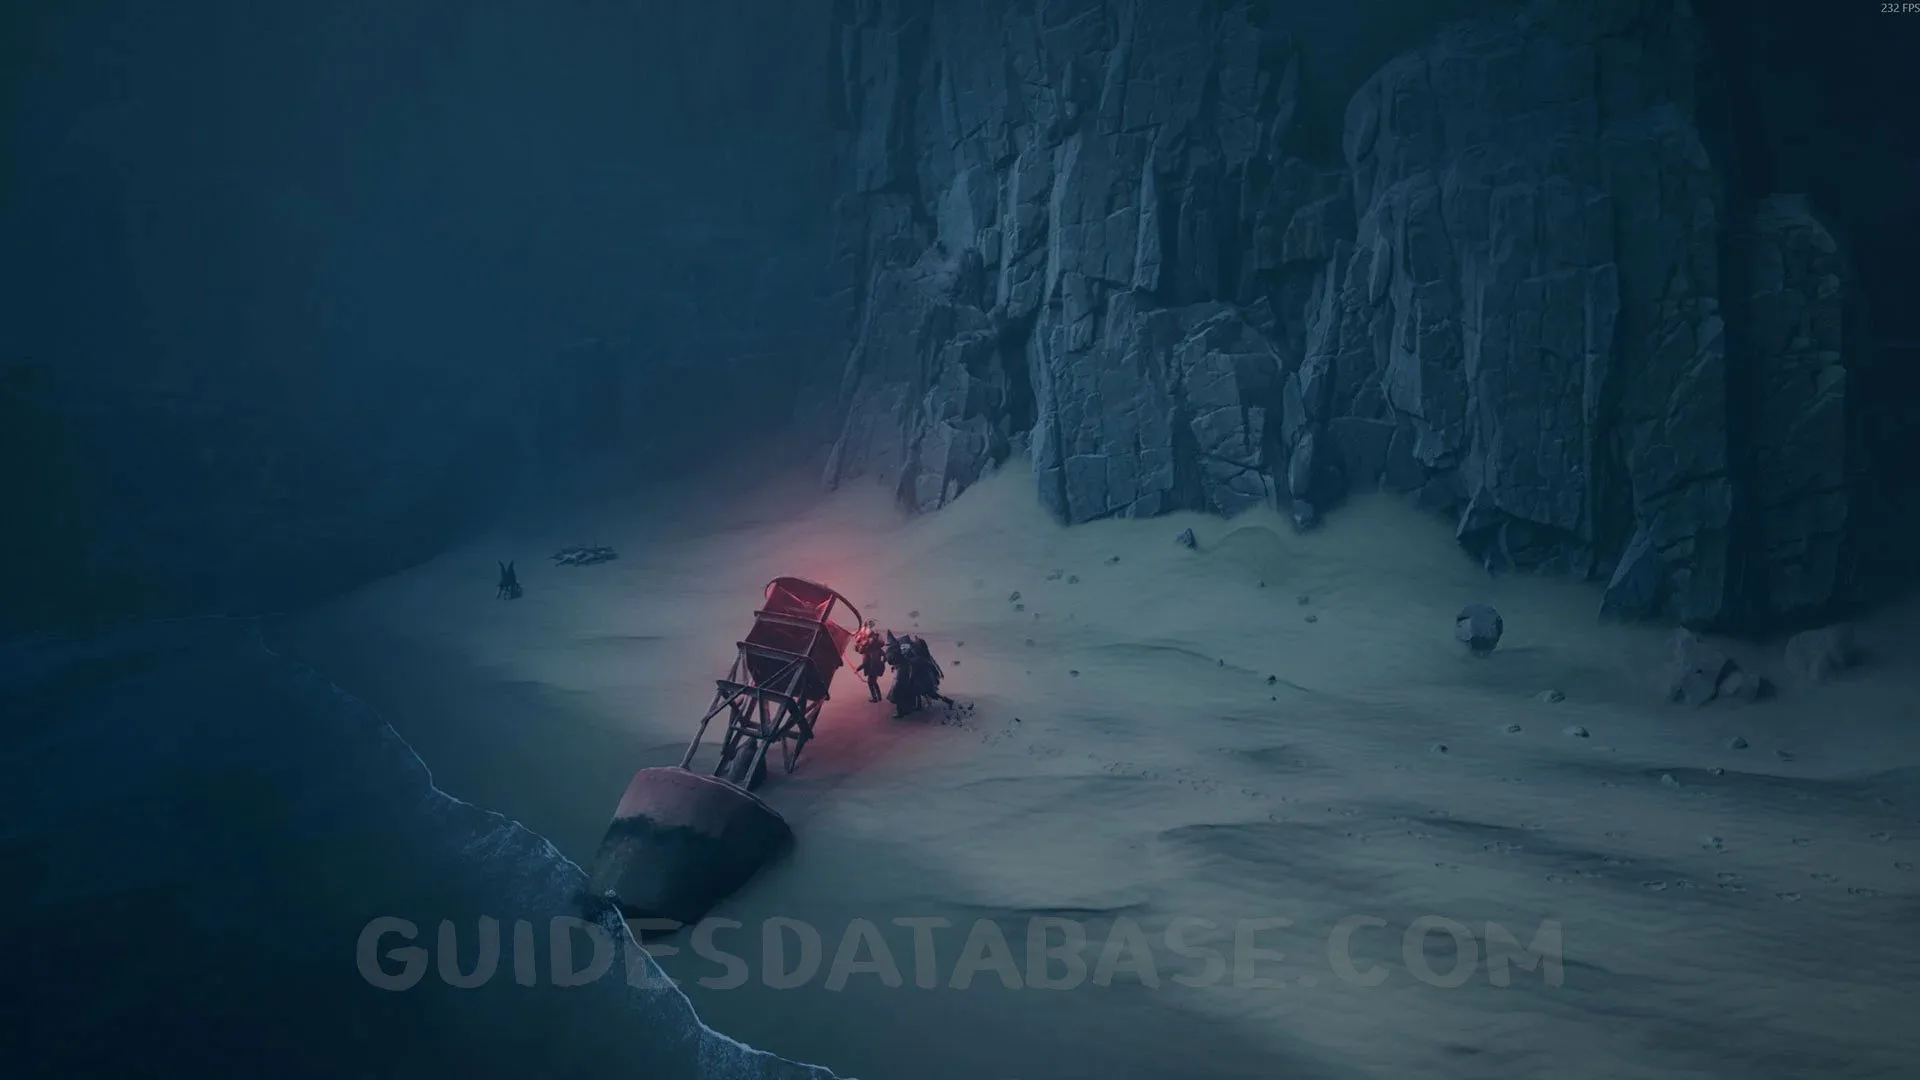 GUIDESDATABASE.COM
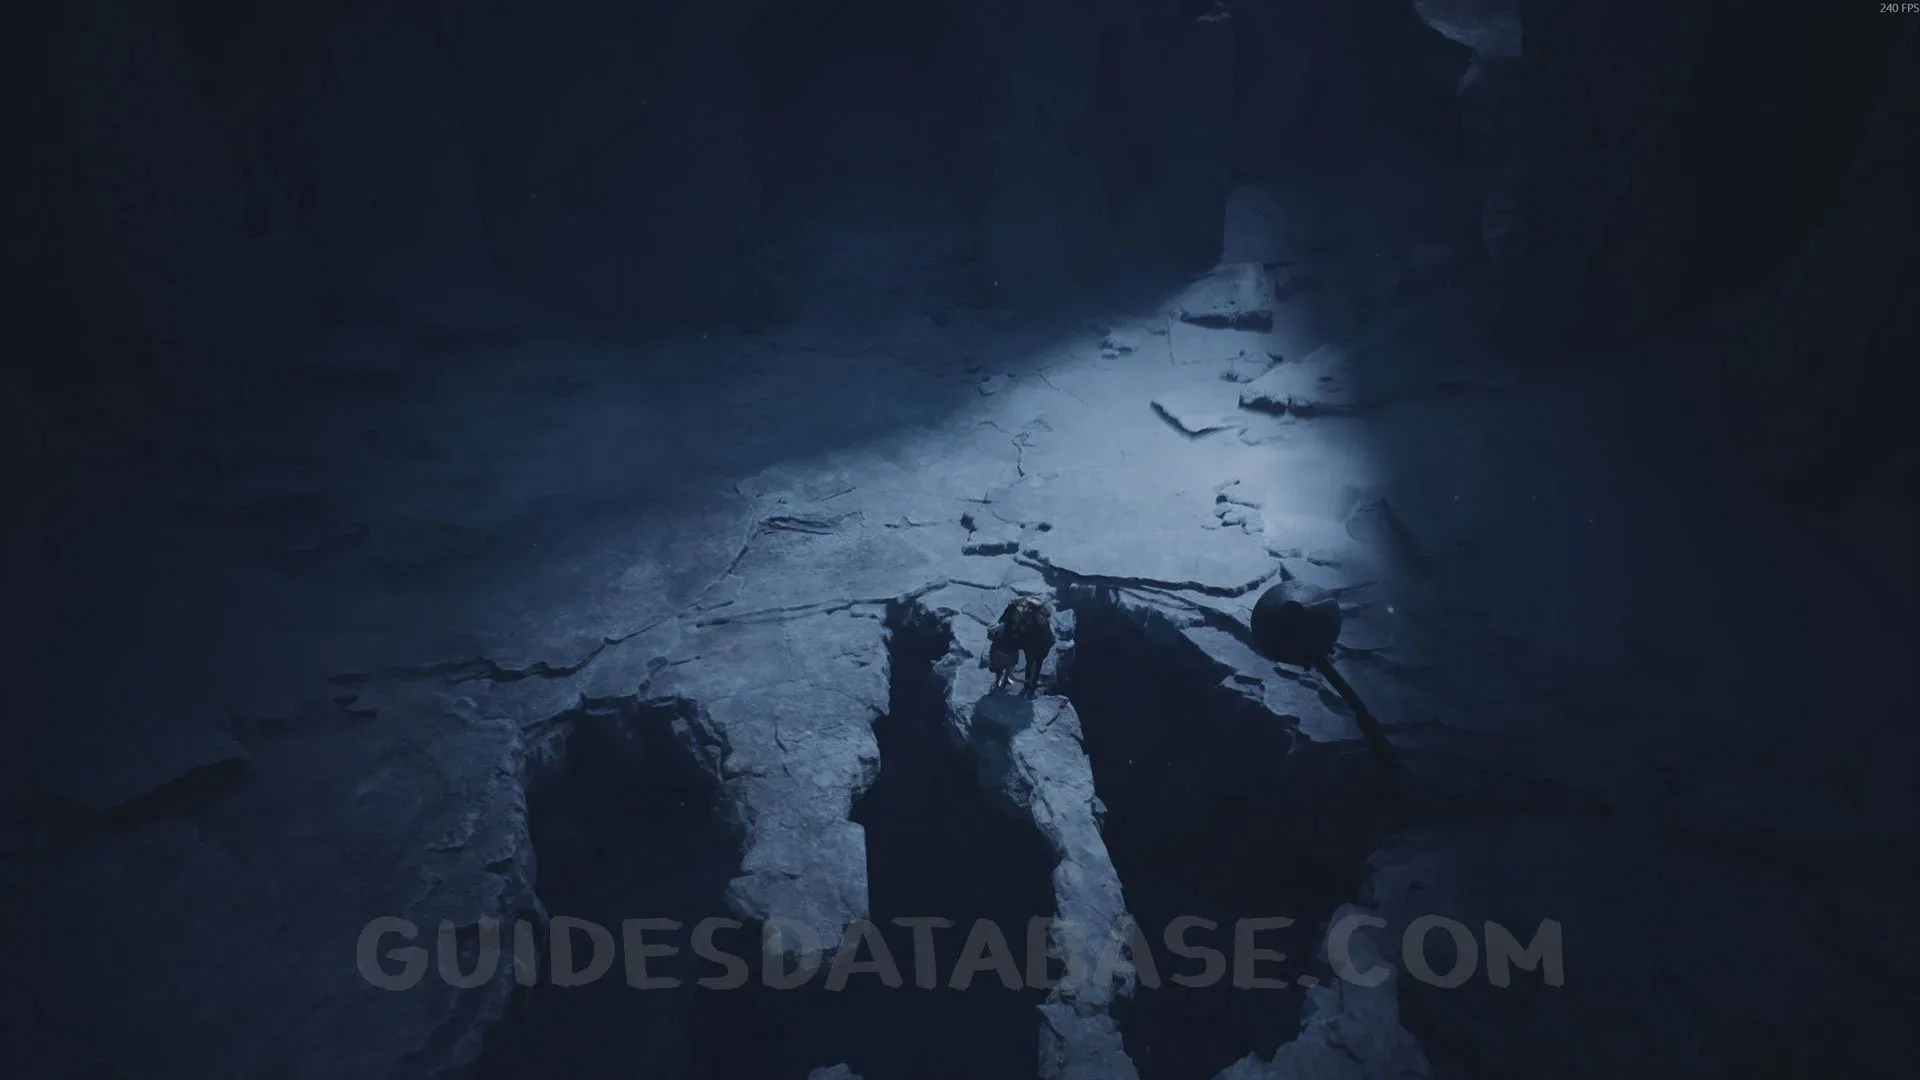
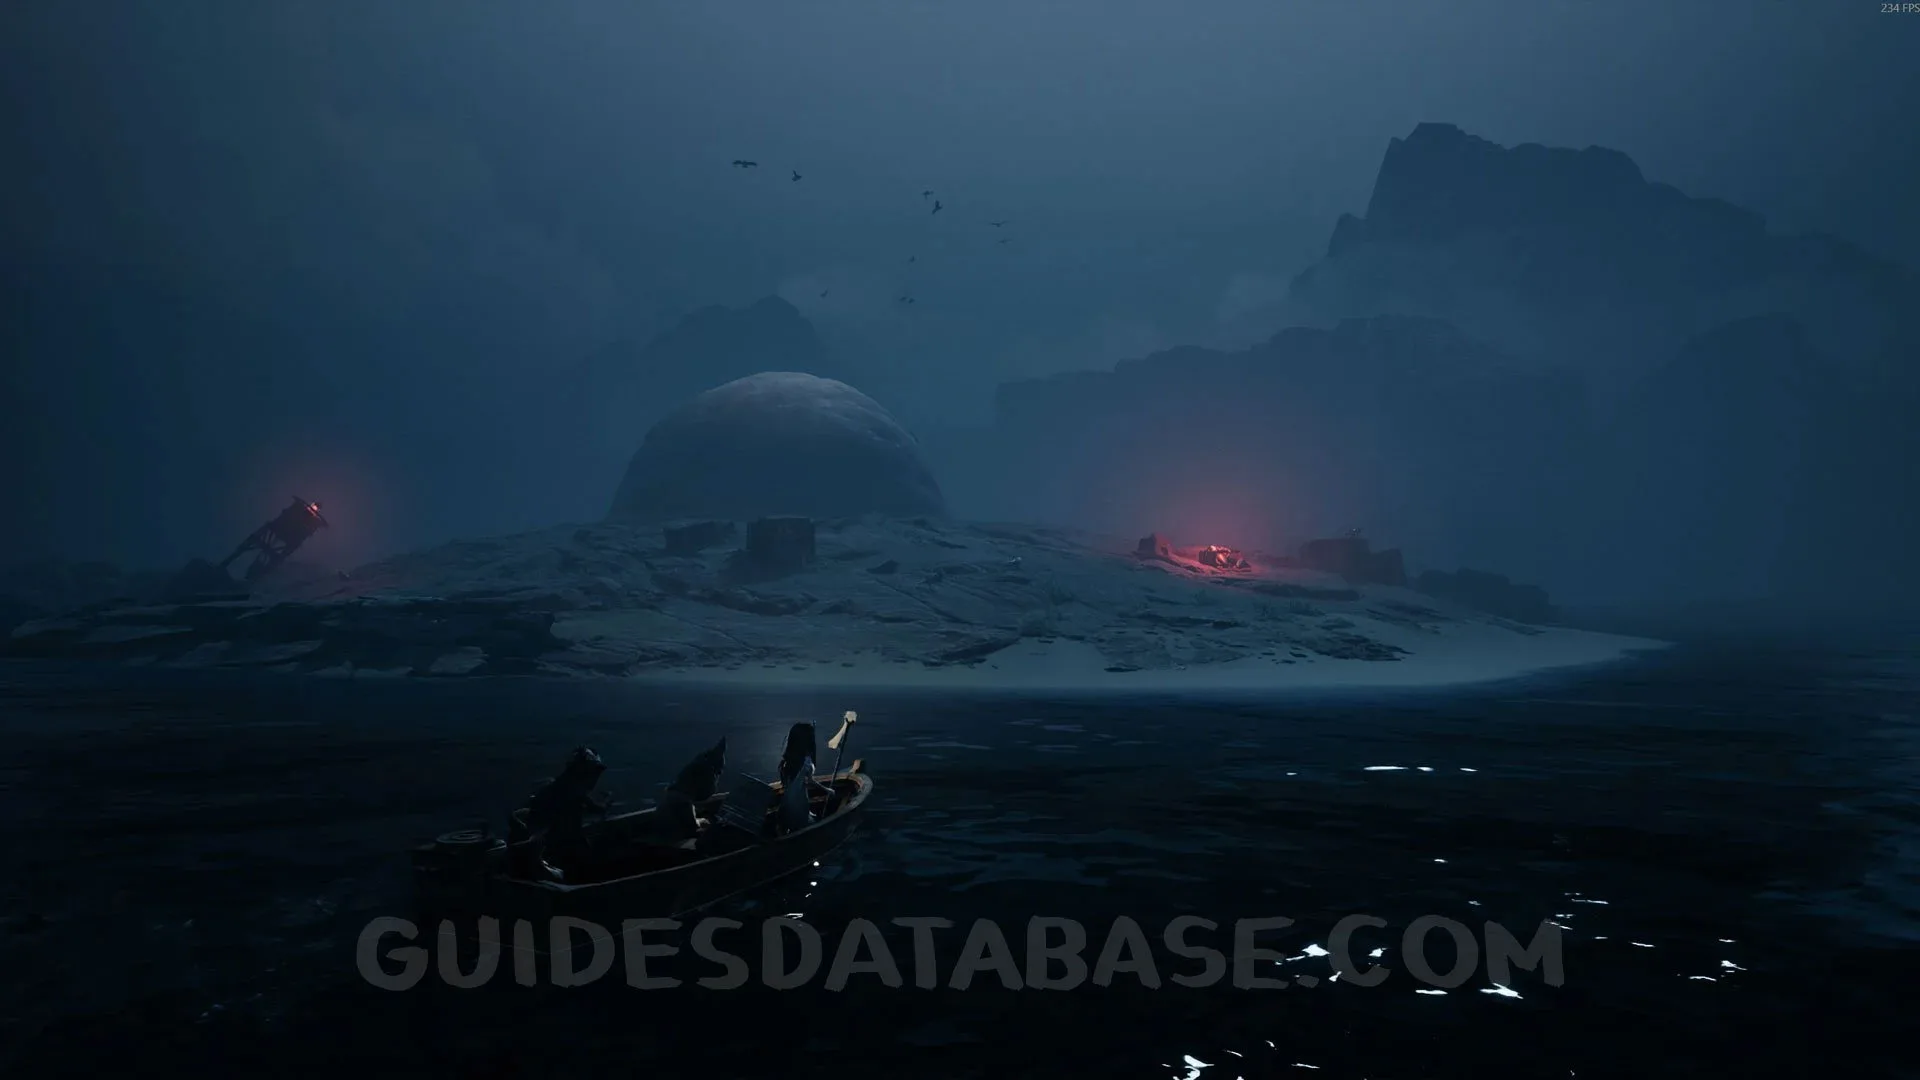
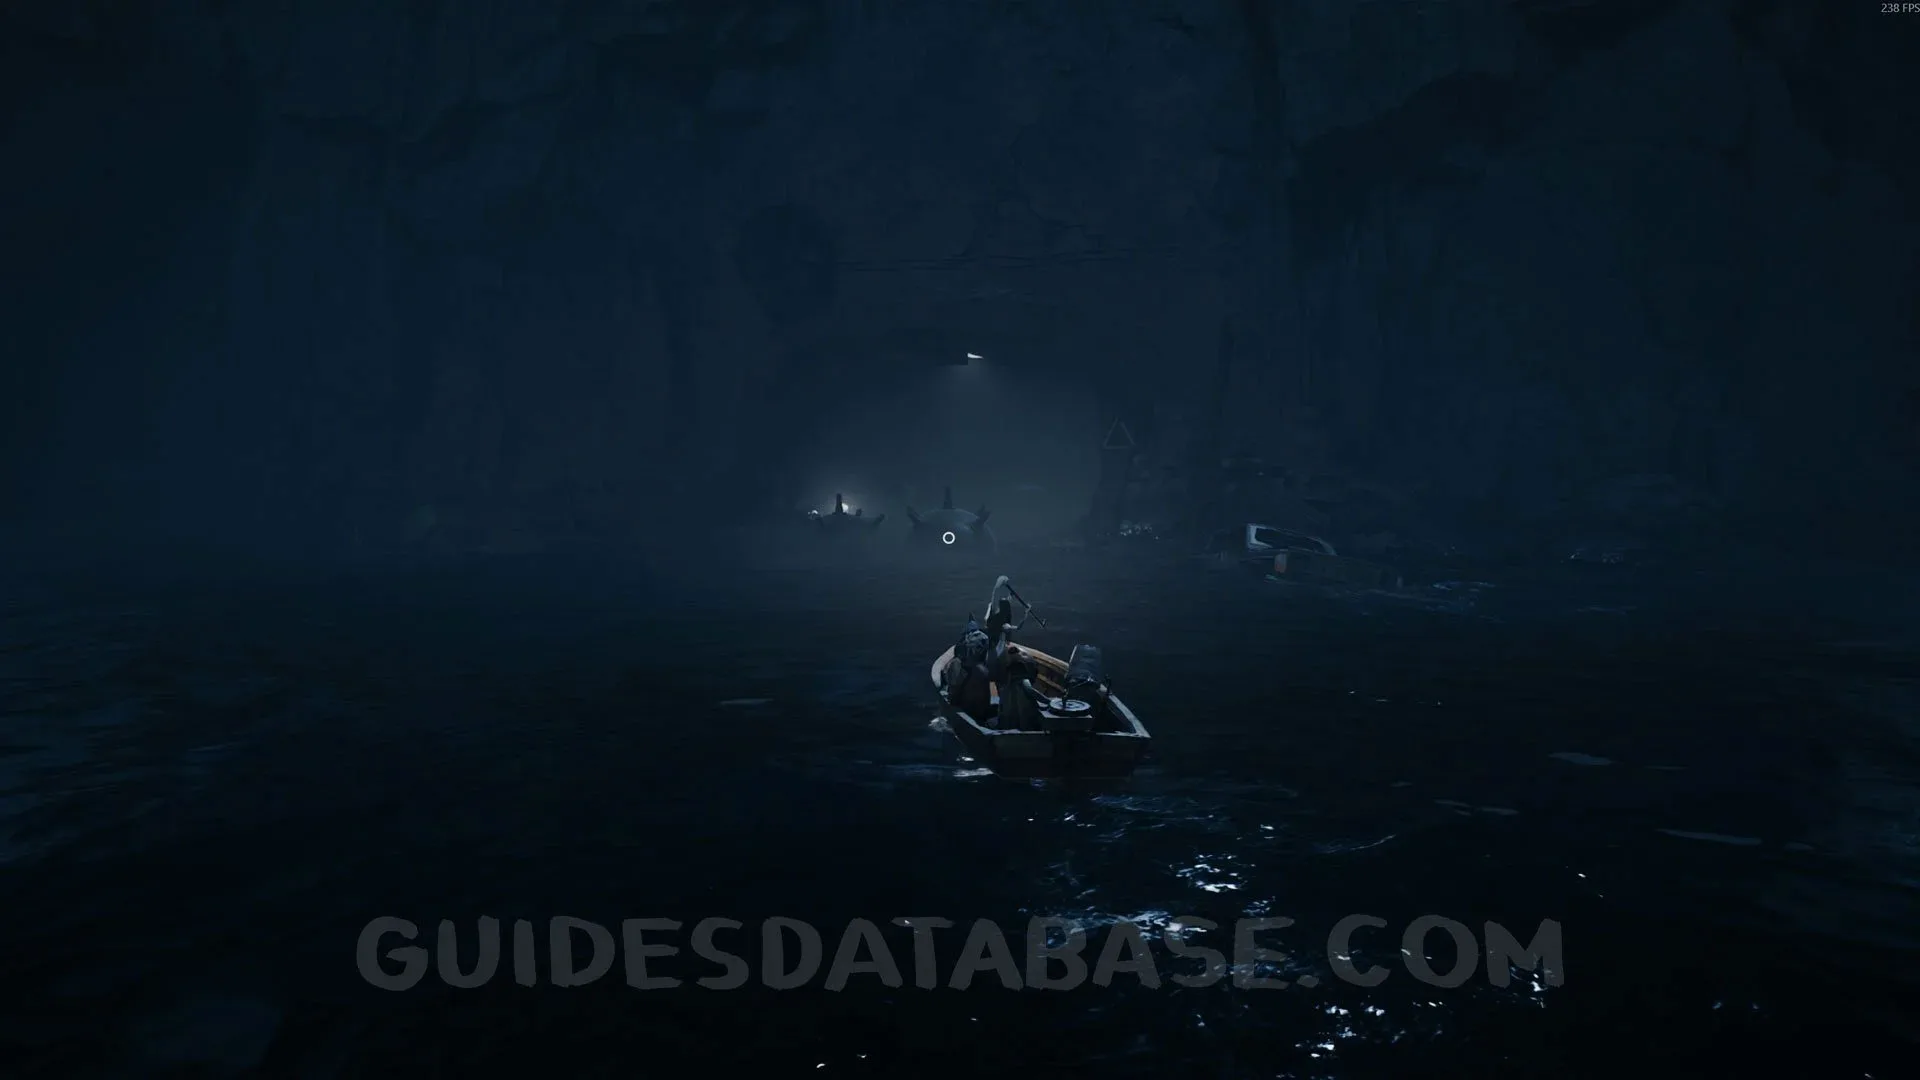
Trophy “Non-Cannonical”
Go to the island in the middle and dock the boat. Pick up the cannonball and load the cannon, then use the crank to turn it and aim it at the bunker where you were earlier. Fire at the bunker to get the trophy.
 GUIDESDATABASE.COM
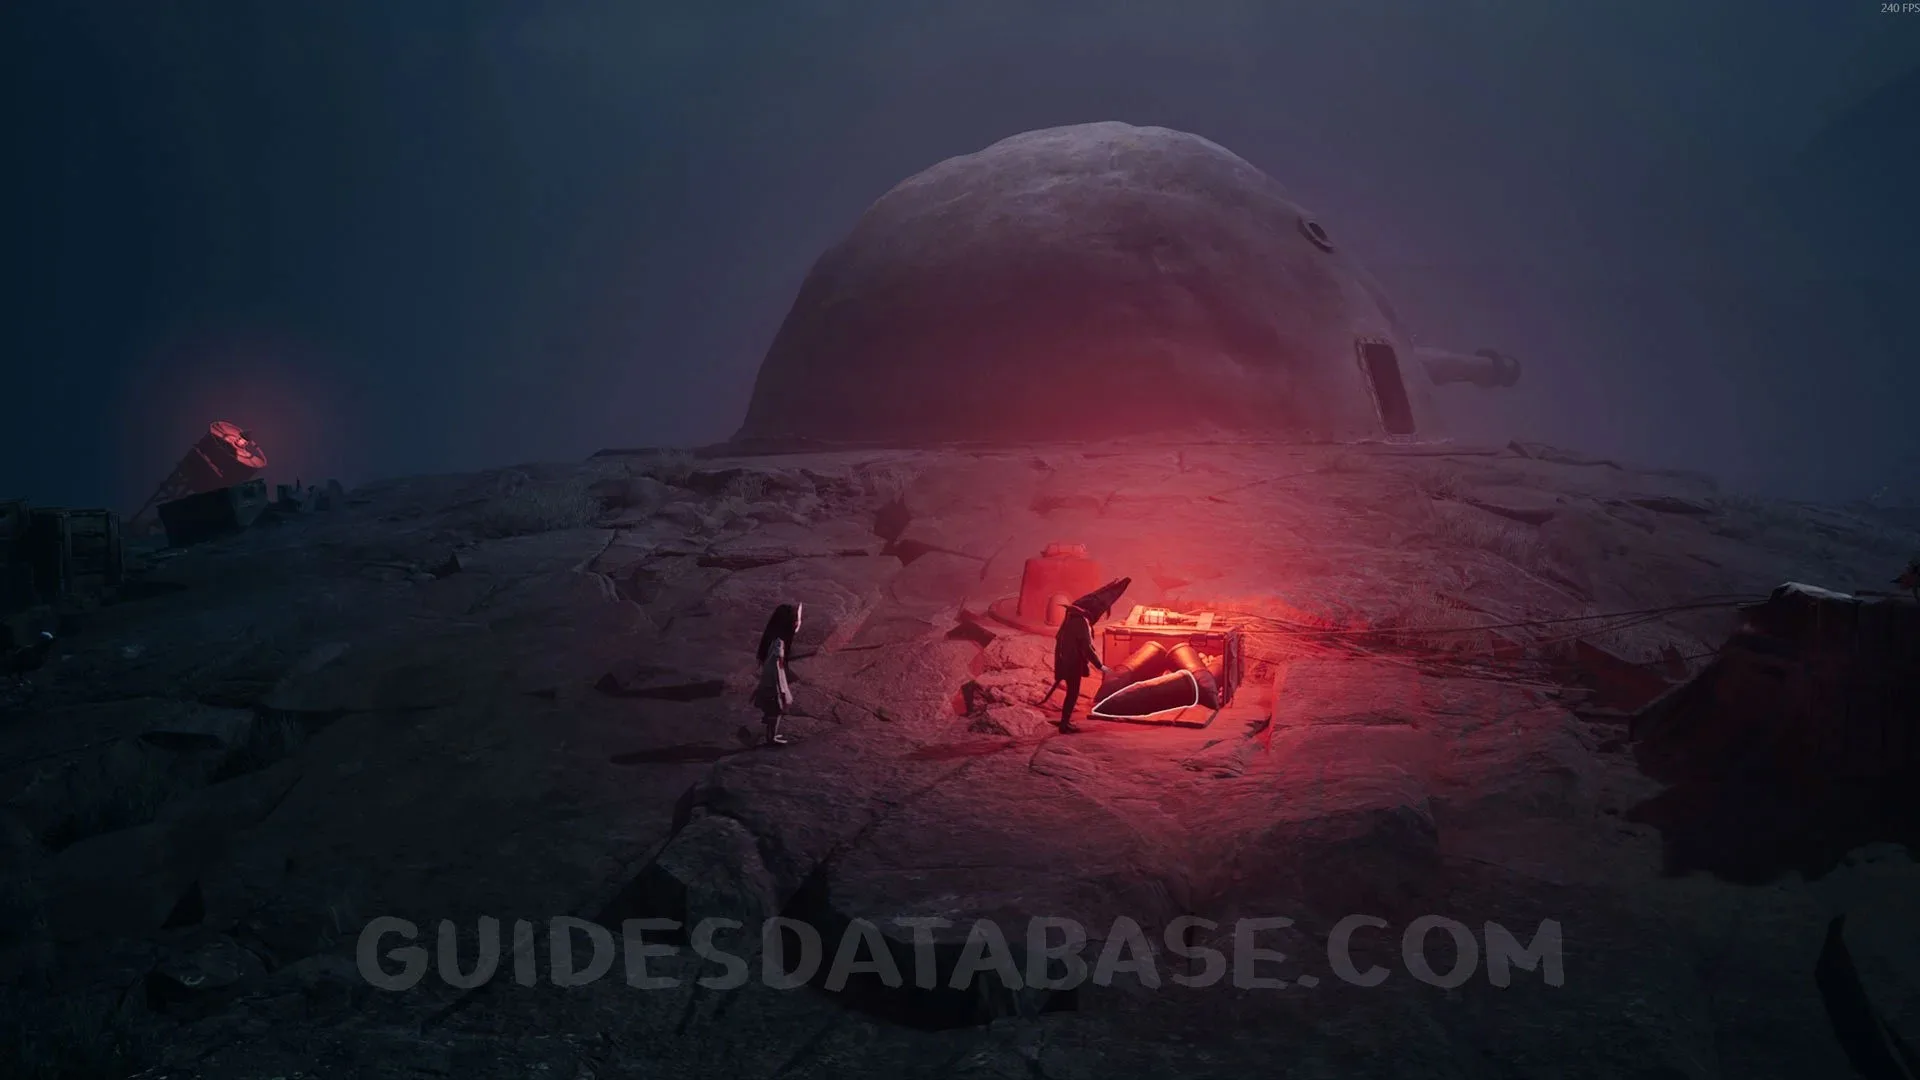 GUIDESDATABASE.COM
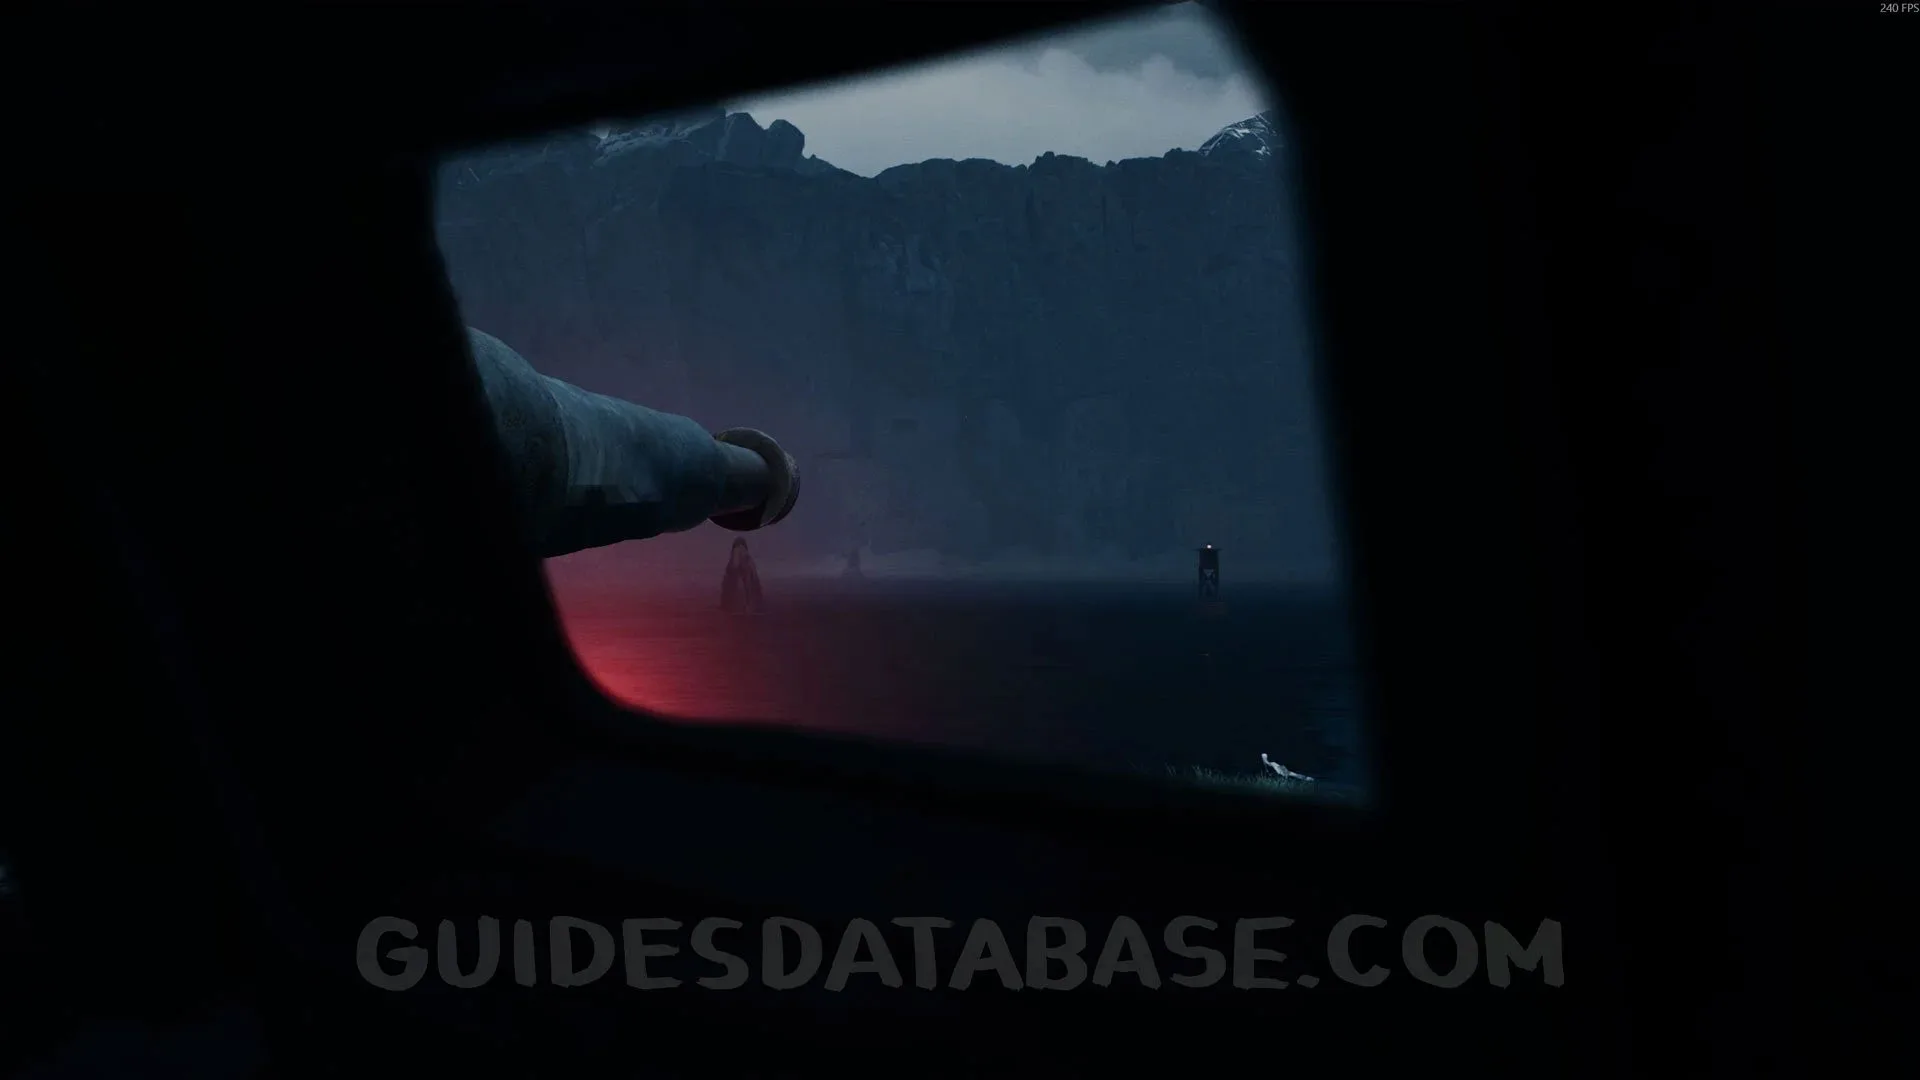 GUIDESDATABASE.COM
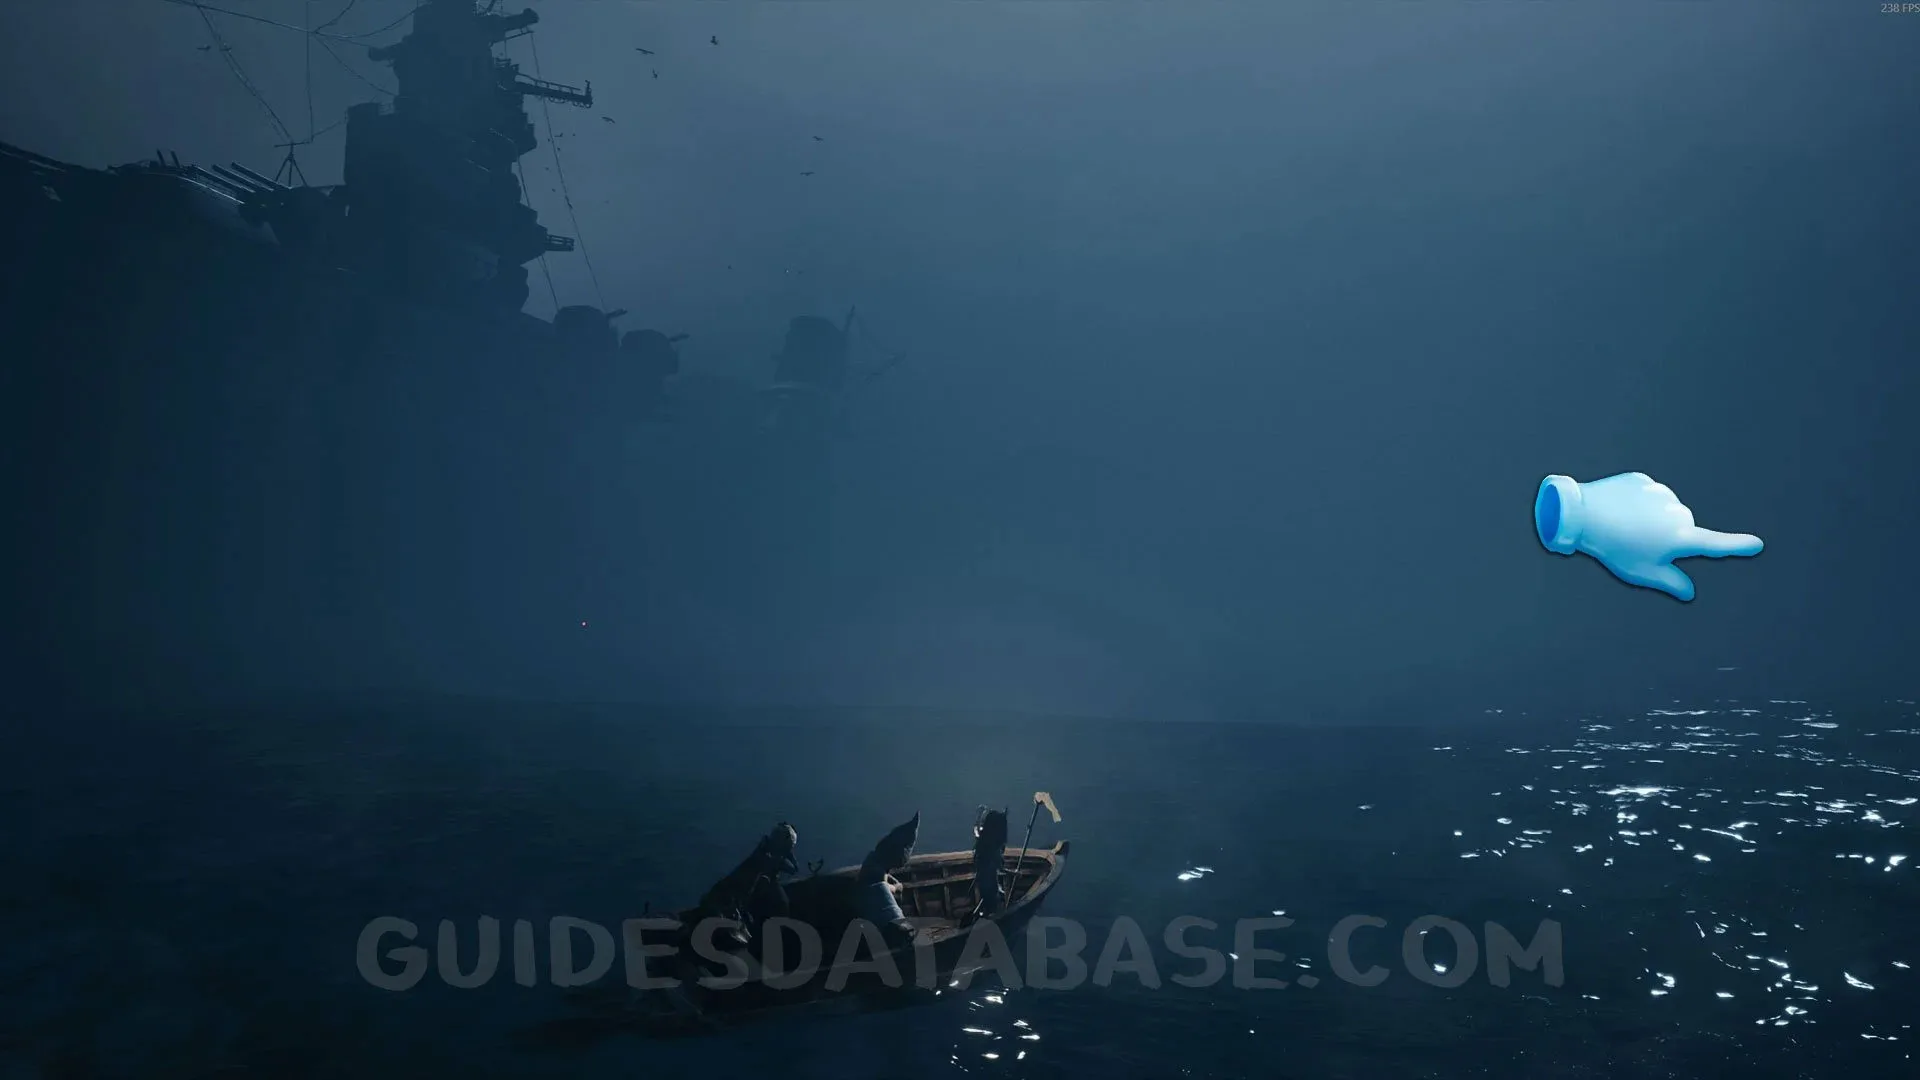
Mask #11 + Secret #32
After using the cannon to defeat the monster in the water, head toward the area where the monster was, and you will eventually reach a large ship. Instead of going into the ship, go right first and you will see 3 Naval Mines. Blow them up to reach the beach. Once you get to the beach, you will find this mask.
 GUIDESDATABASE.COM
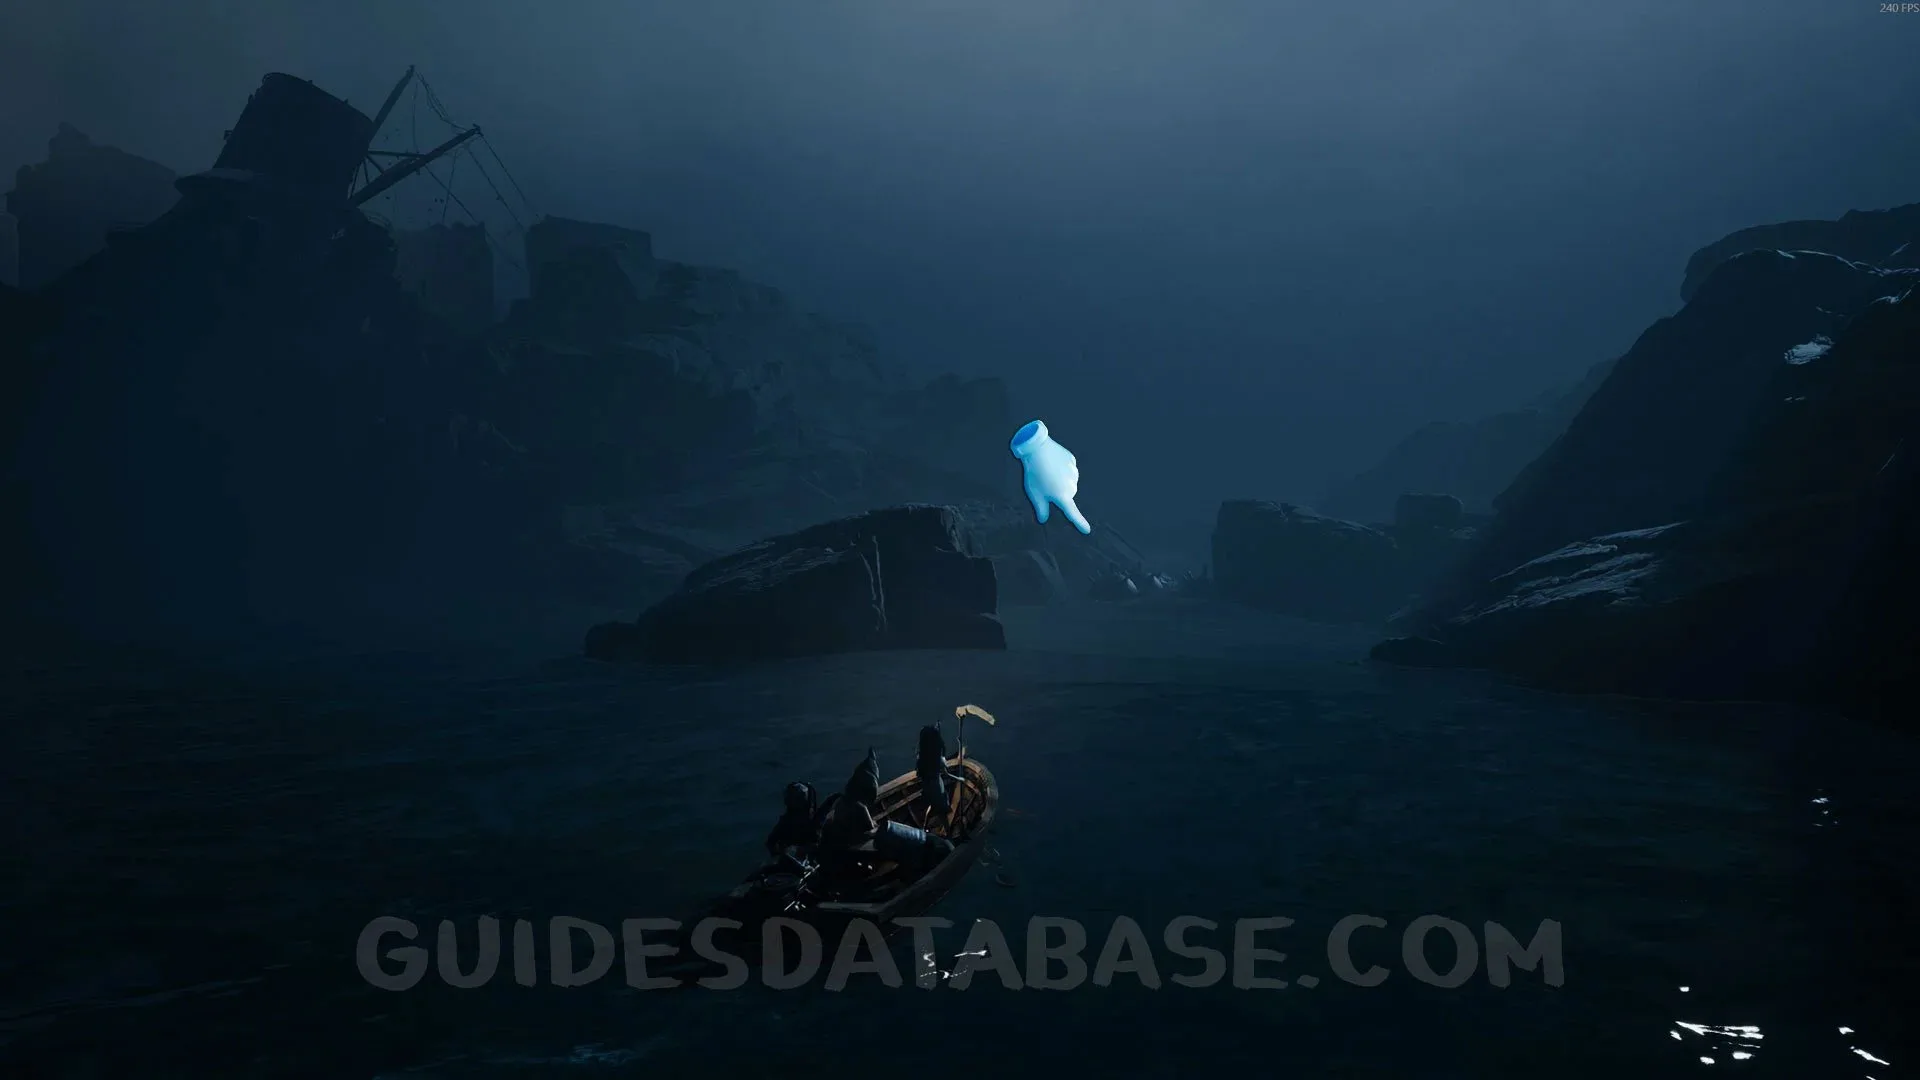 GUIDESDATABASE.COM
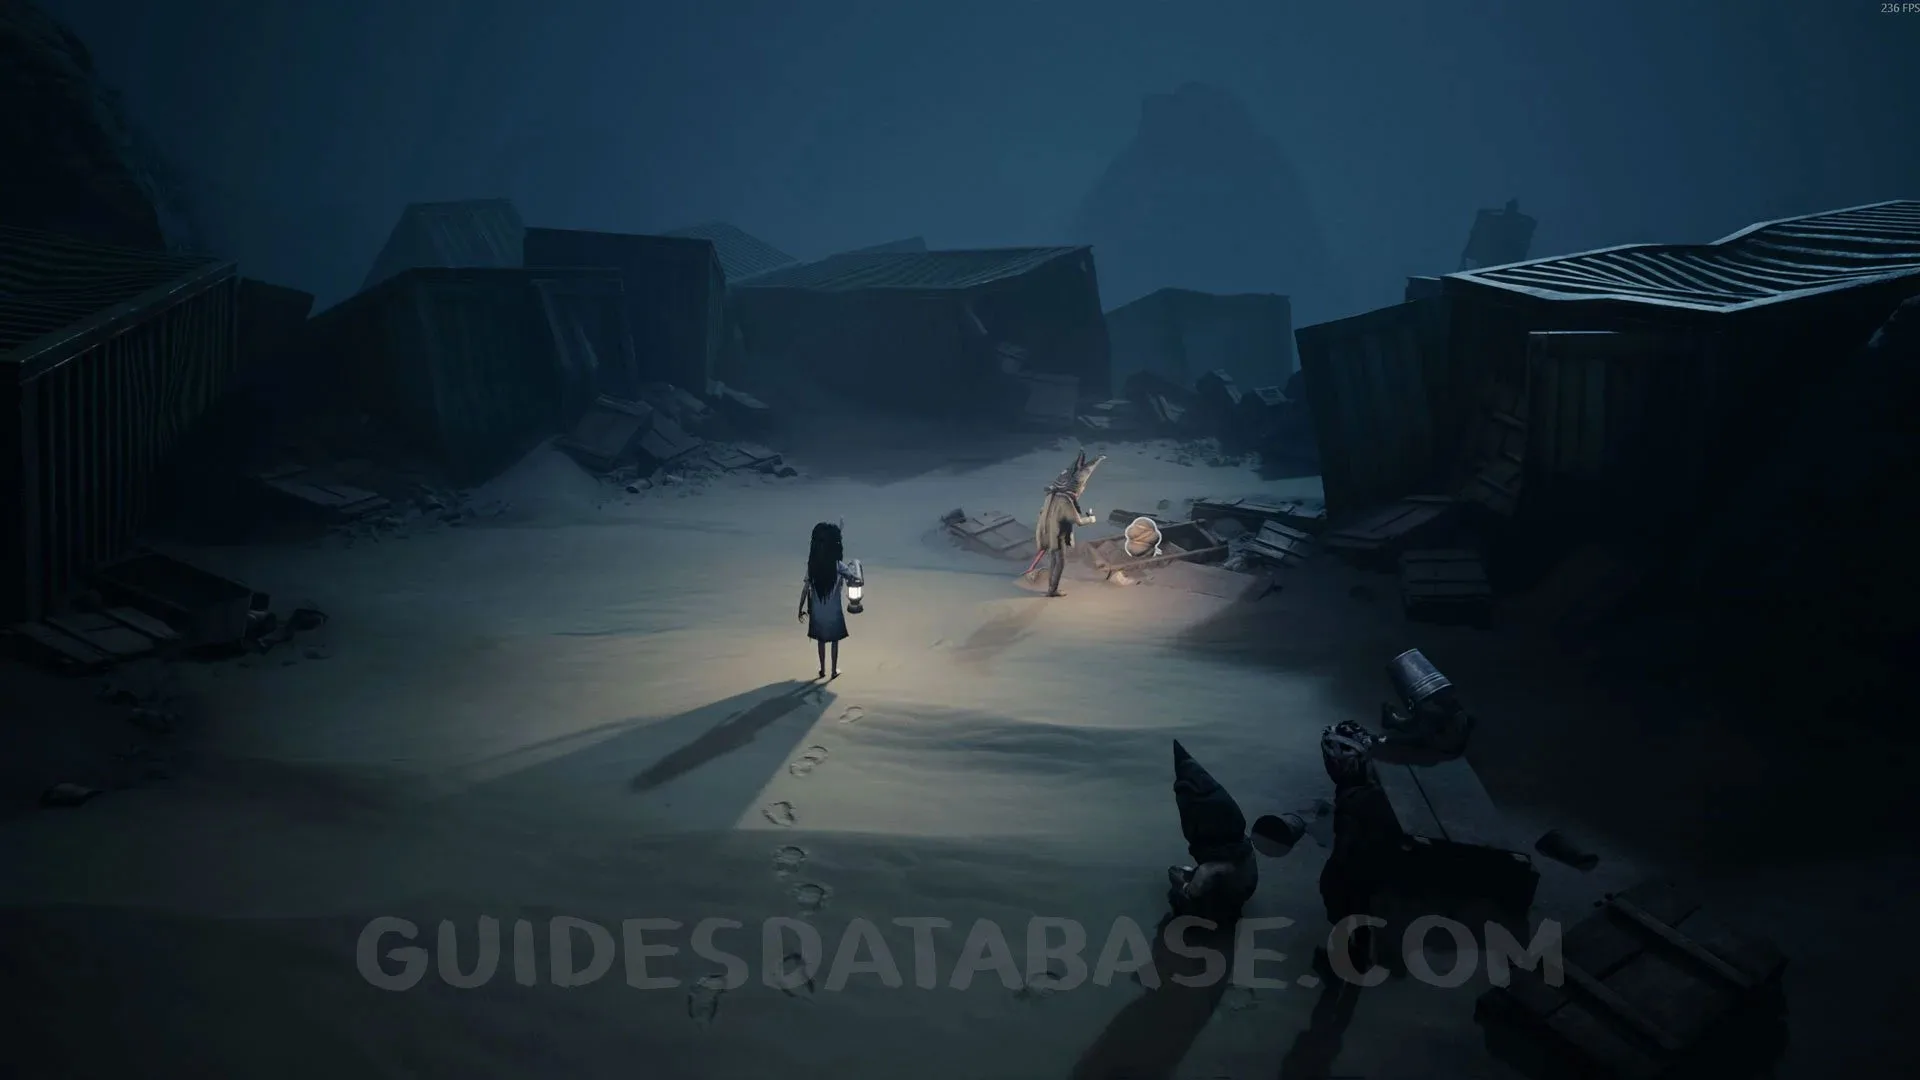 GUIDESDATABASE.COM
Poster #15 + Secret #33
After the previous collectible, go into the hull of the large ship, and you will see this poster right in front of you.
 GUIDESDATABASE.COM
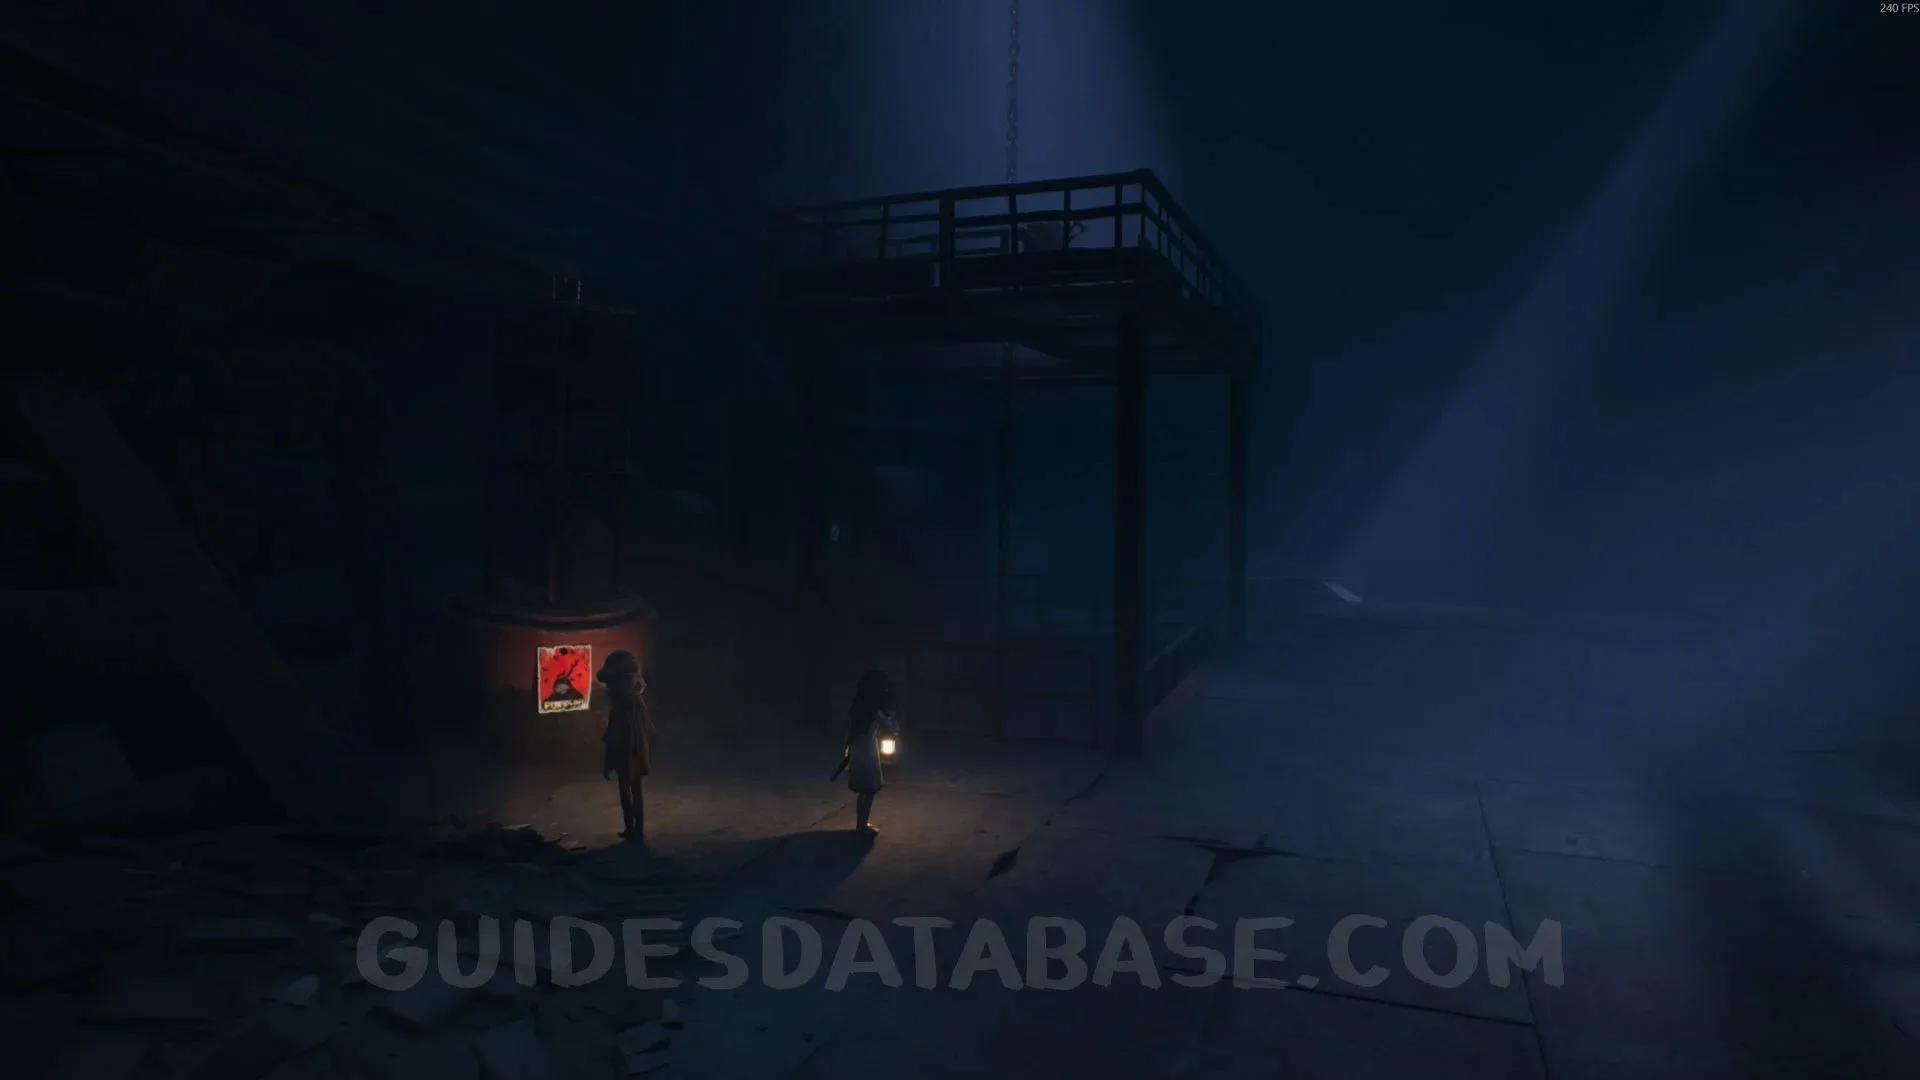 GUIDESDATABASE.COM
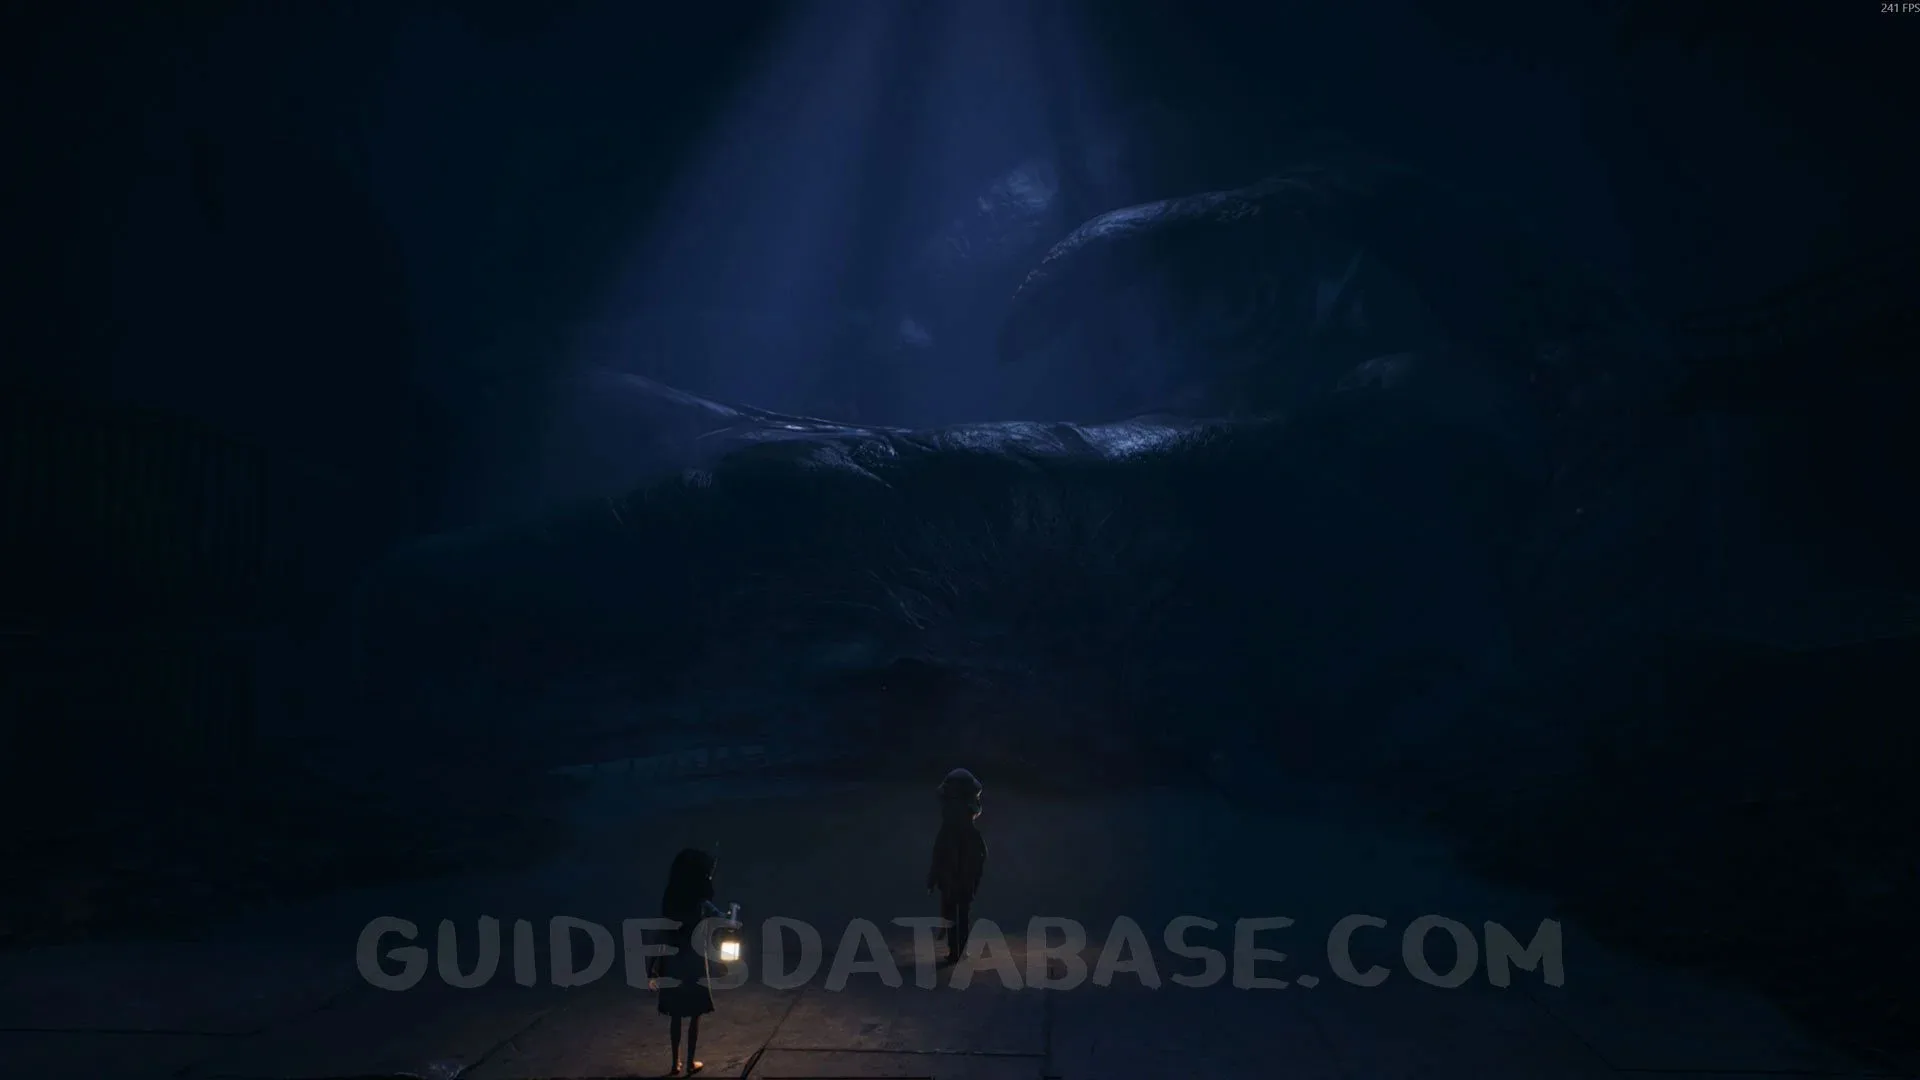
Mask #12 + Secret #34 + Mask #13 + Secret #35
After the previous collectible, keep going and you will see that a whale is blocking your path. Your objective is to take the elevator down and get the eye of the monster you defeated earlier with the cannon. After picking up the eye and giving it to the whale, it will move out of the way and you will remove your diving suit. After that, the 2 masks will be on the ground. Pick them up before leaving.
 GUIDESDATABASE.COM
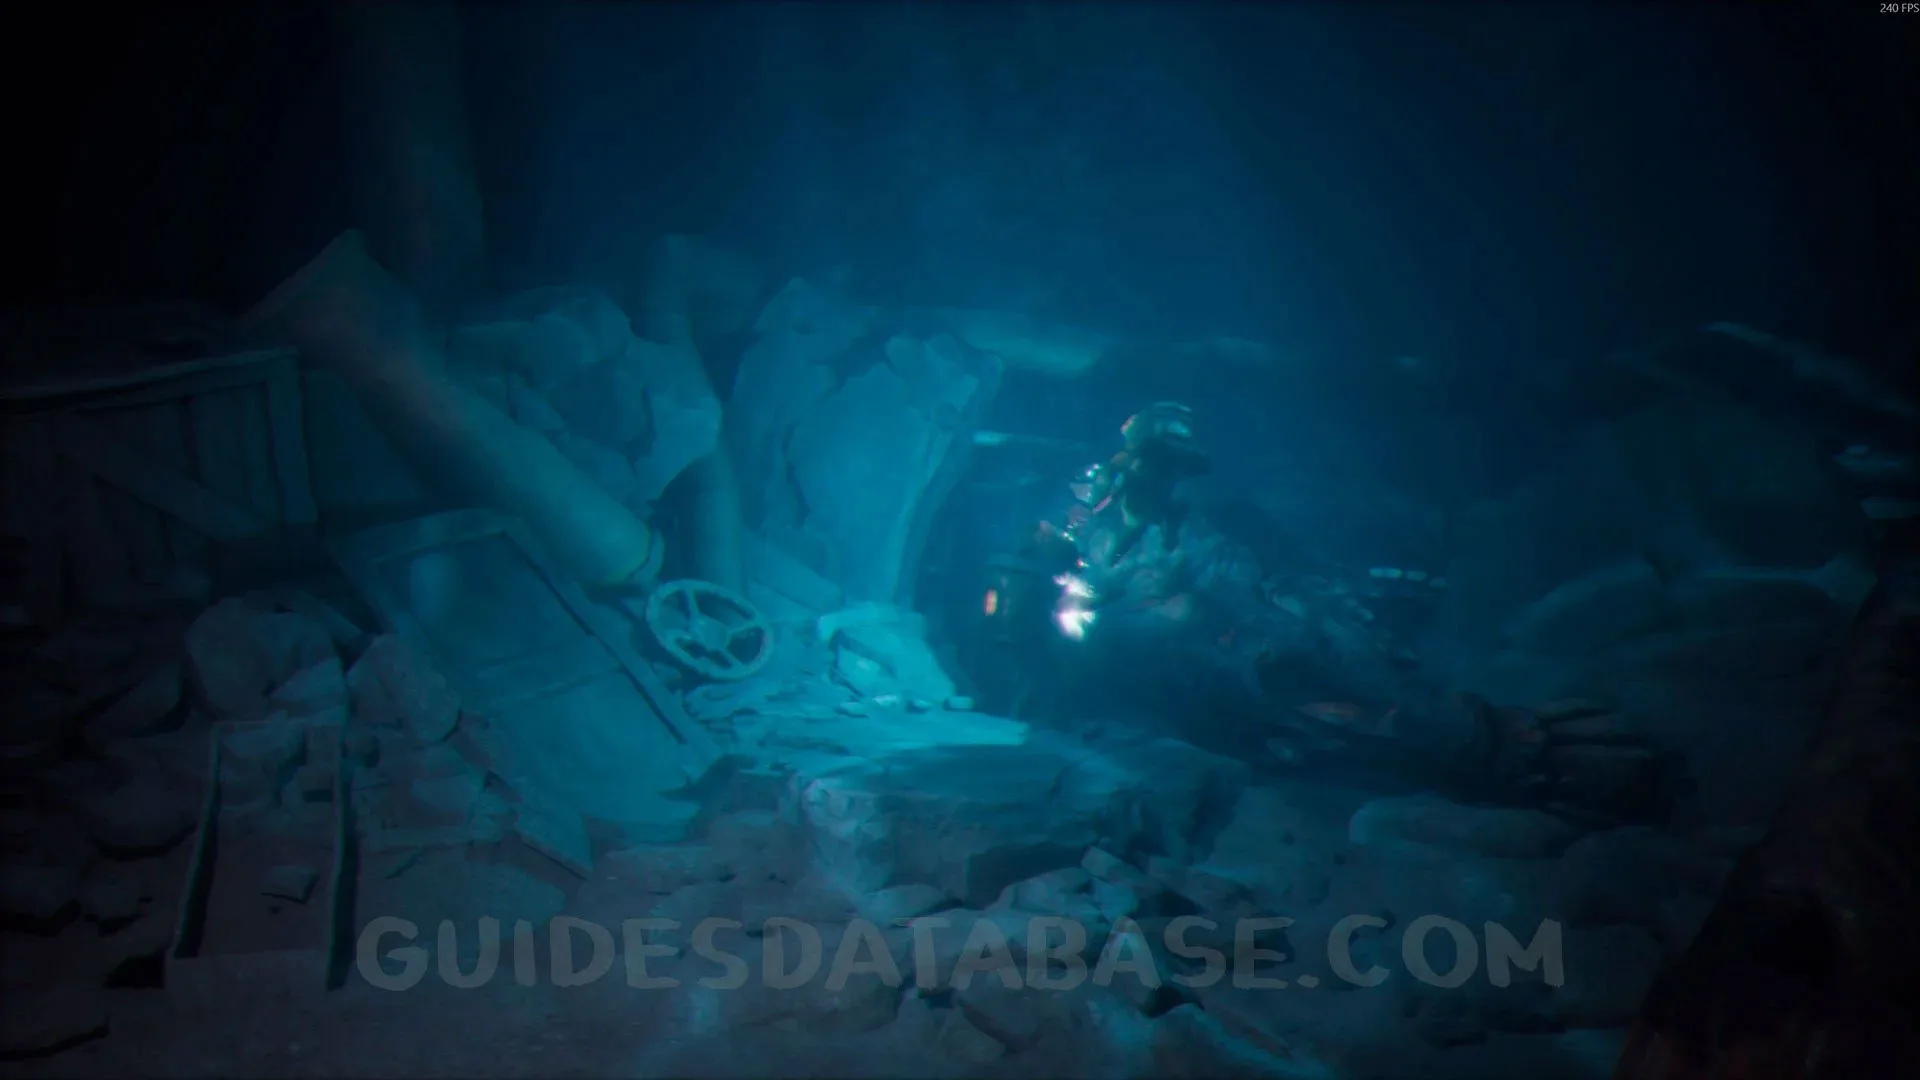 GUIDESDATABASE.COM
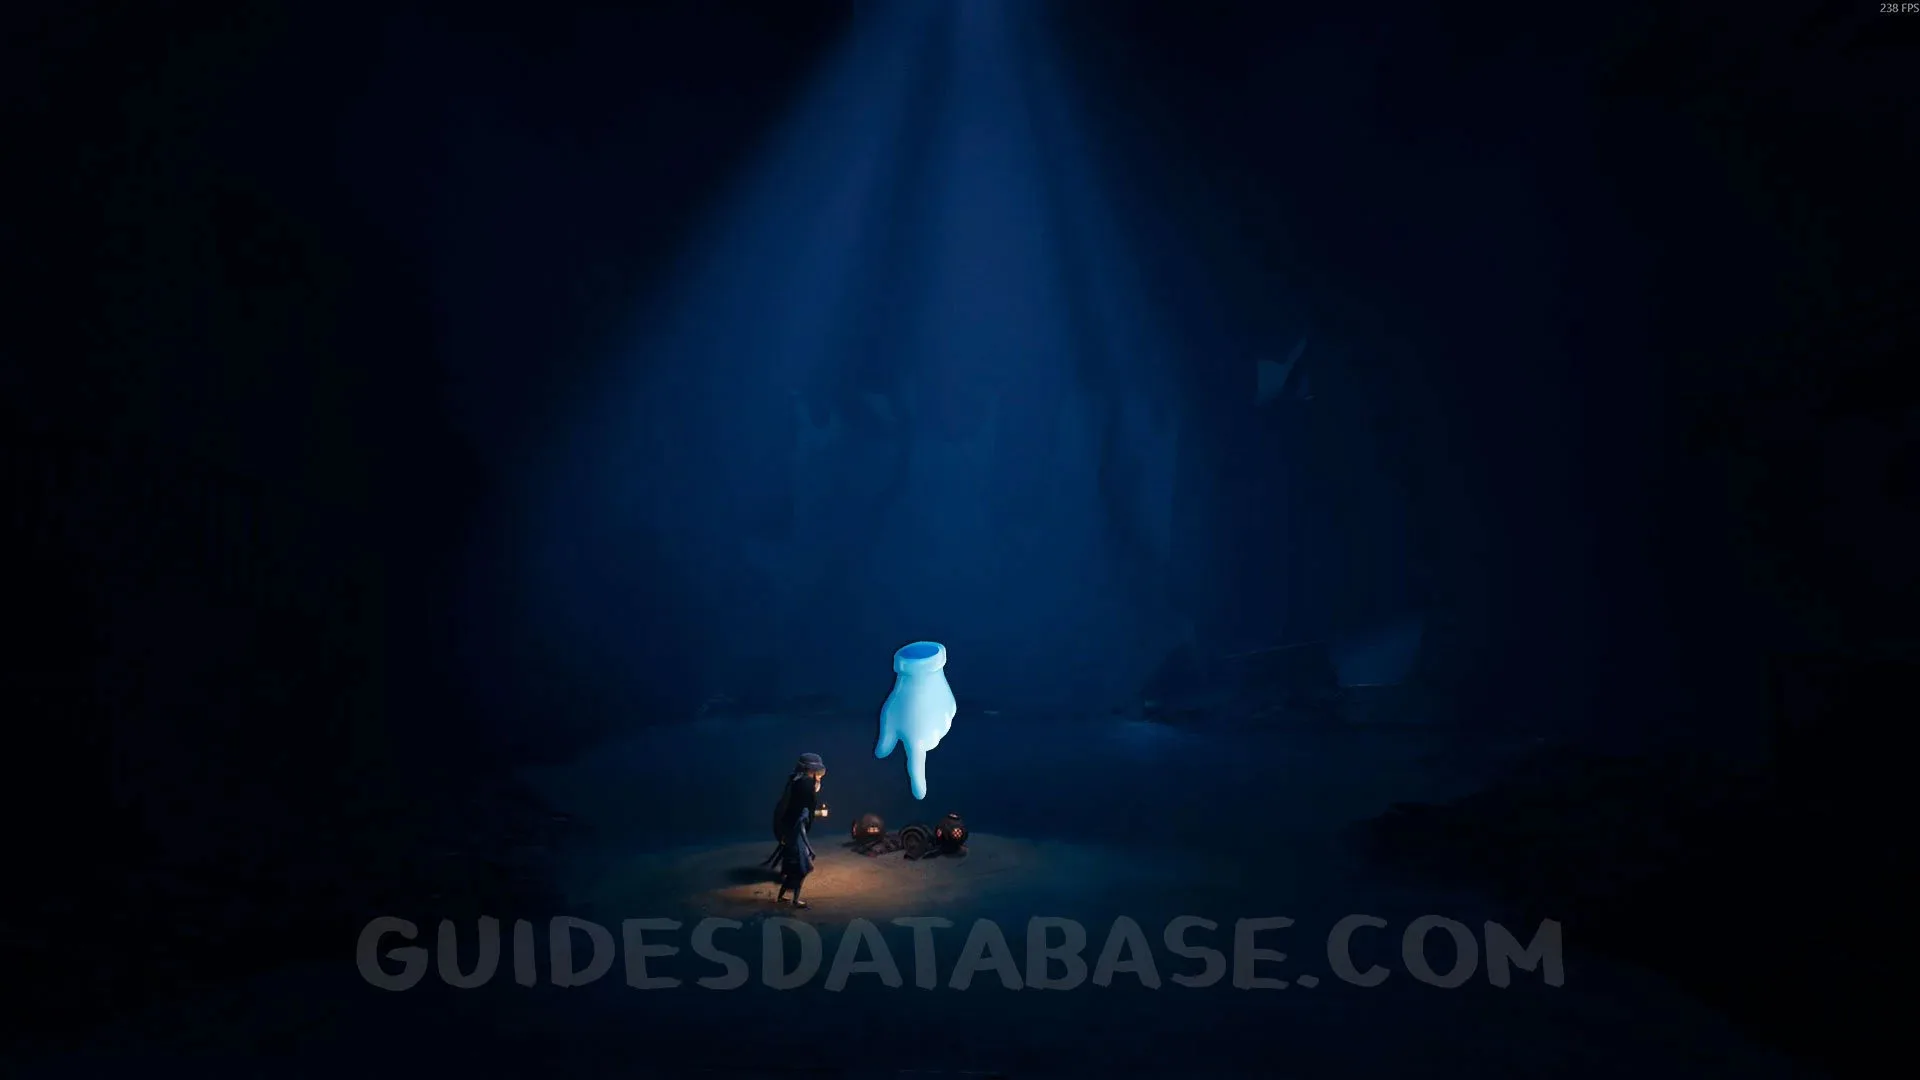 GUIDESDATABASE.COM
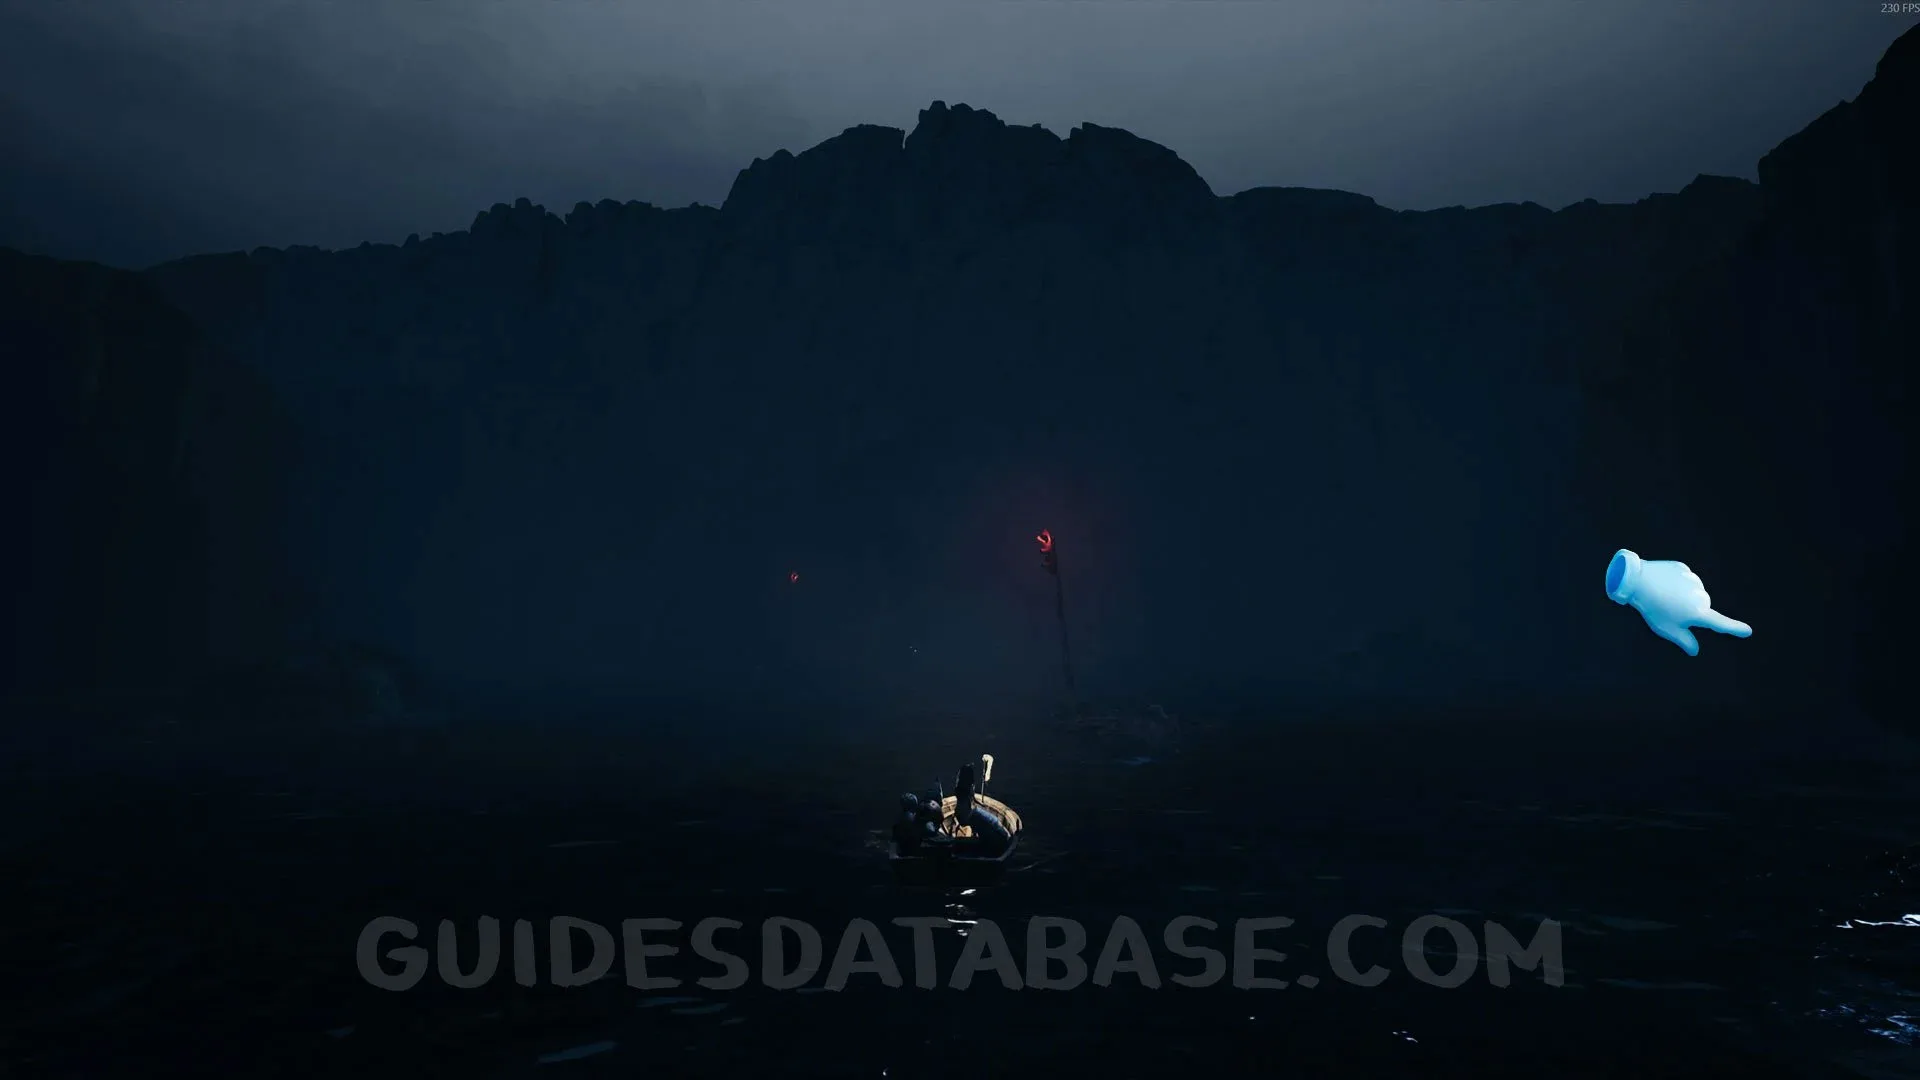

Trophy “Naval Blazing”
After the previous collectible, leave and continue along the normal story path, and you will see 2 more Naval Mines. If you destroyed the other 18 Naval Mines, you will unlock the Naval Blazing trophy here. Farther ahead in this area, you will find 4 more Naval Mines.
 GUIDESDATABASE.COM
Trophy “Lost at Sea”
This will be the last time you use the boat in Reanimal. Make sure to get the Lost at Sea trophy now. You just need to travel a total of 10,000 meters with the boat, so keep driving in circles until it unlocks. You can also come back later through Chapter Select and do this at the start of Chapter 1.
Chapter 7: The Spoils
Poster #16 + Secret #37
At the start of the chapter, on the left side.
 GUIDESDATABASE.COM
Mask #14 + Secret #38
After the previous collectible, go through the door on the right and pick up this mask.
 GUIDESDATABASE.COM
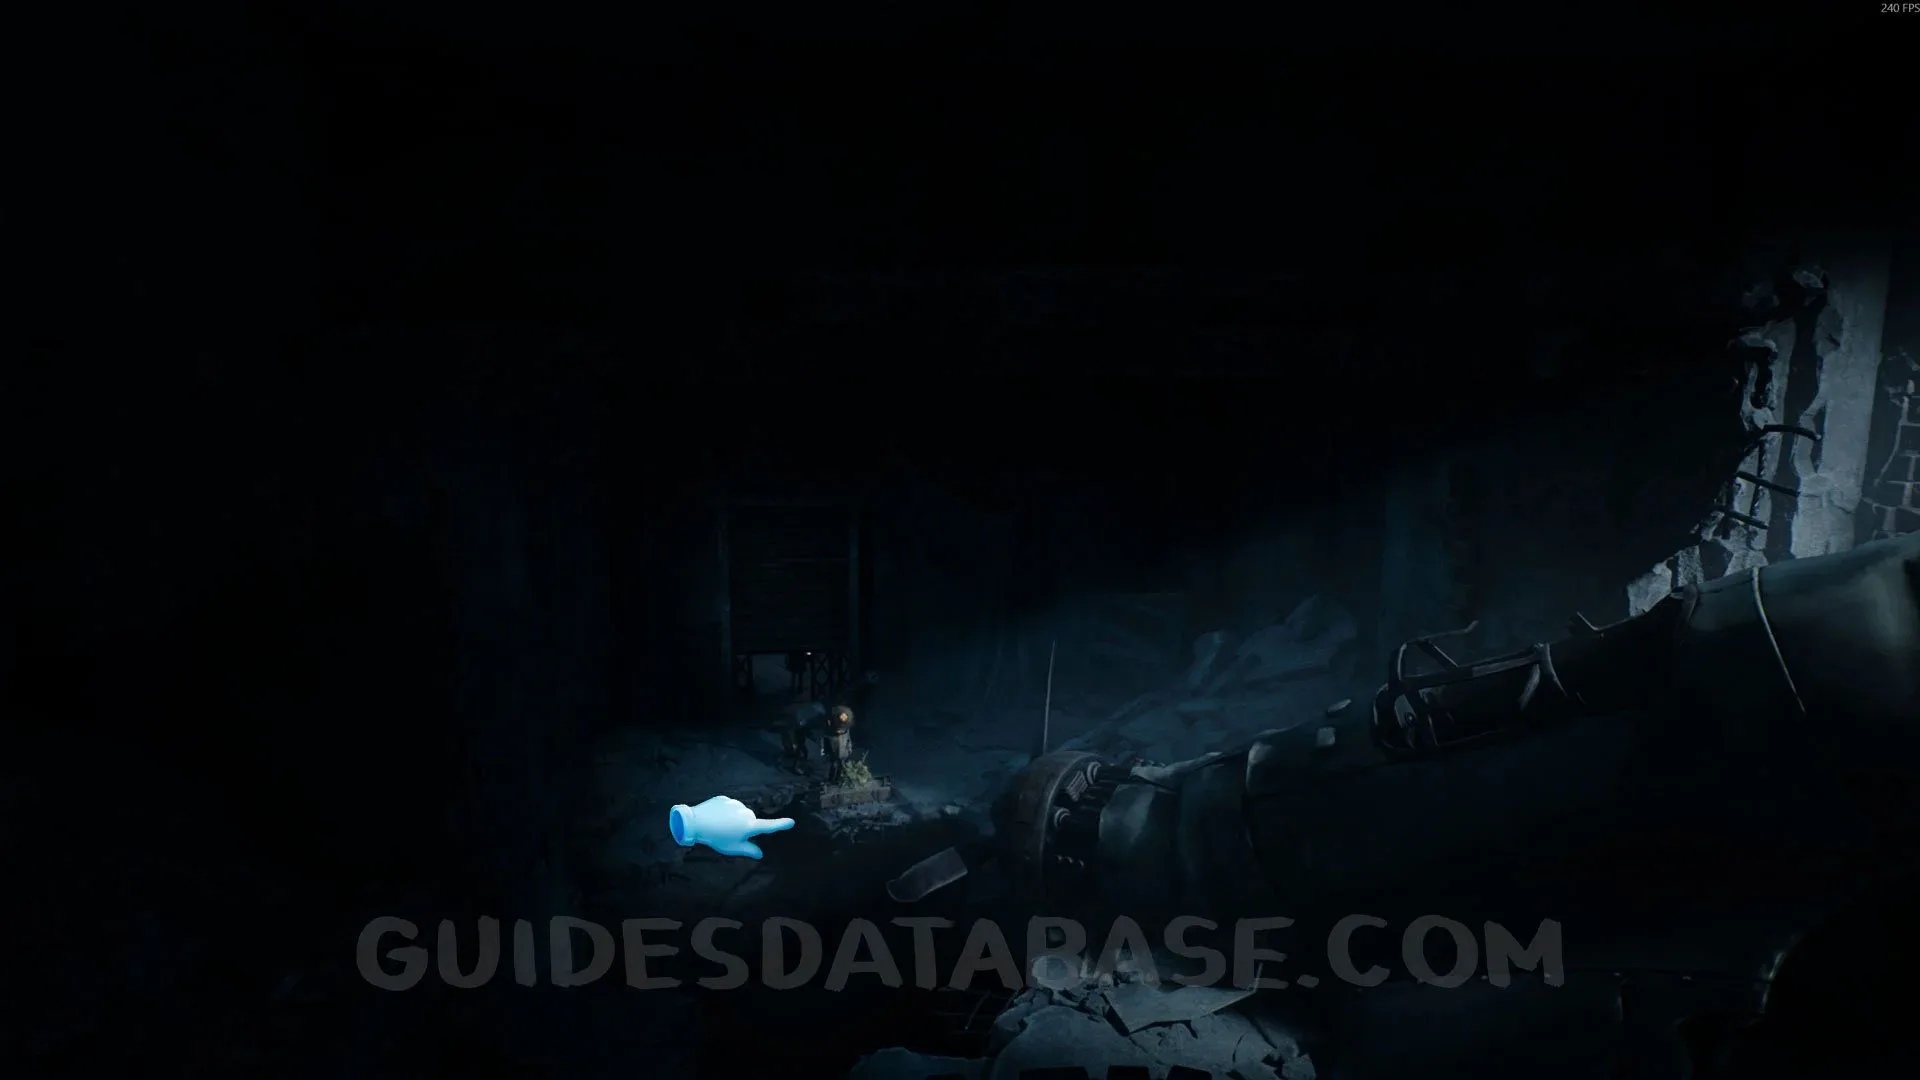 GUIDESDATABASE.COM
Mask #15 + Secret #39
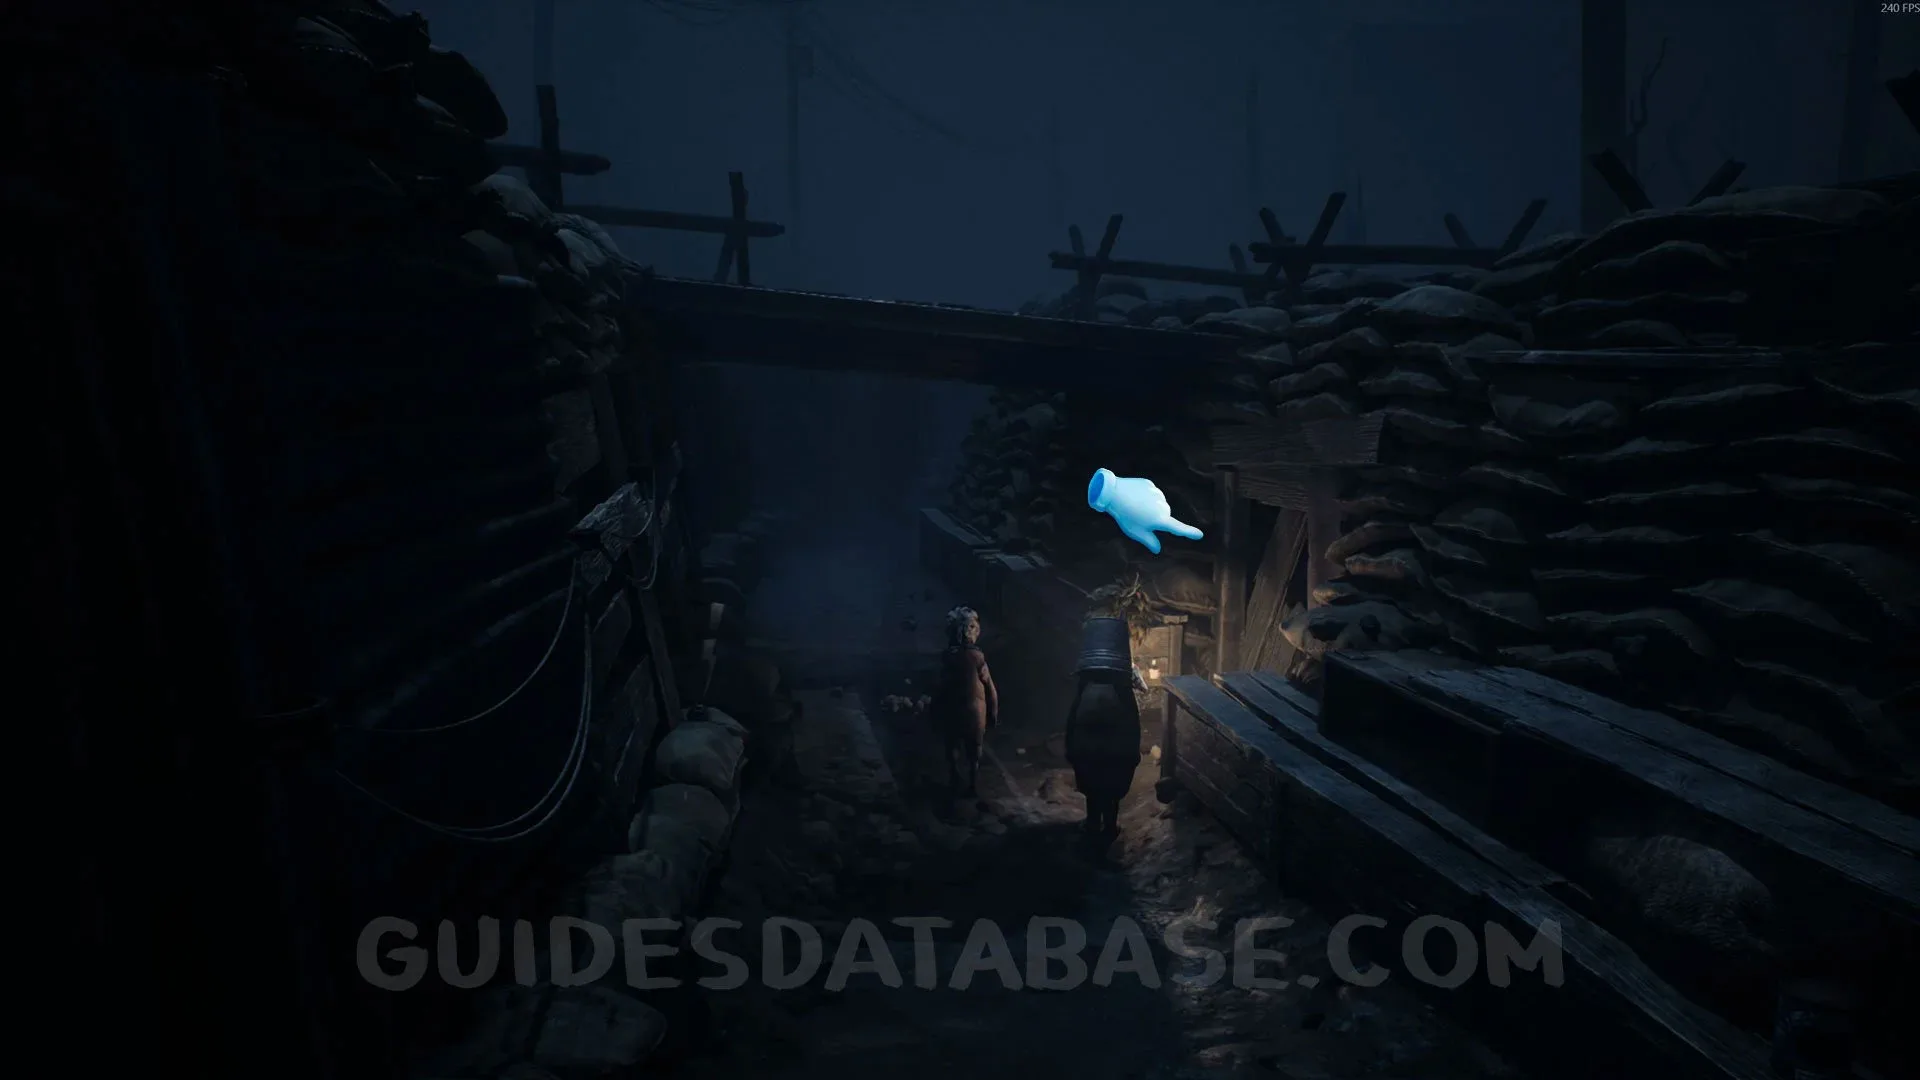
Follow the trench while staying on the right side, and go past some wooden boards on the right to reach this mask.
 GUIDESDATABASE.COM
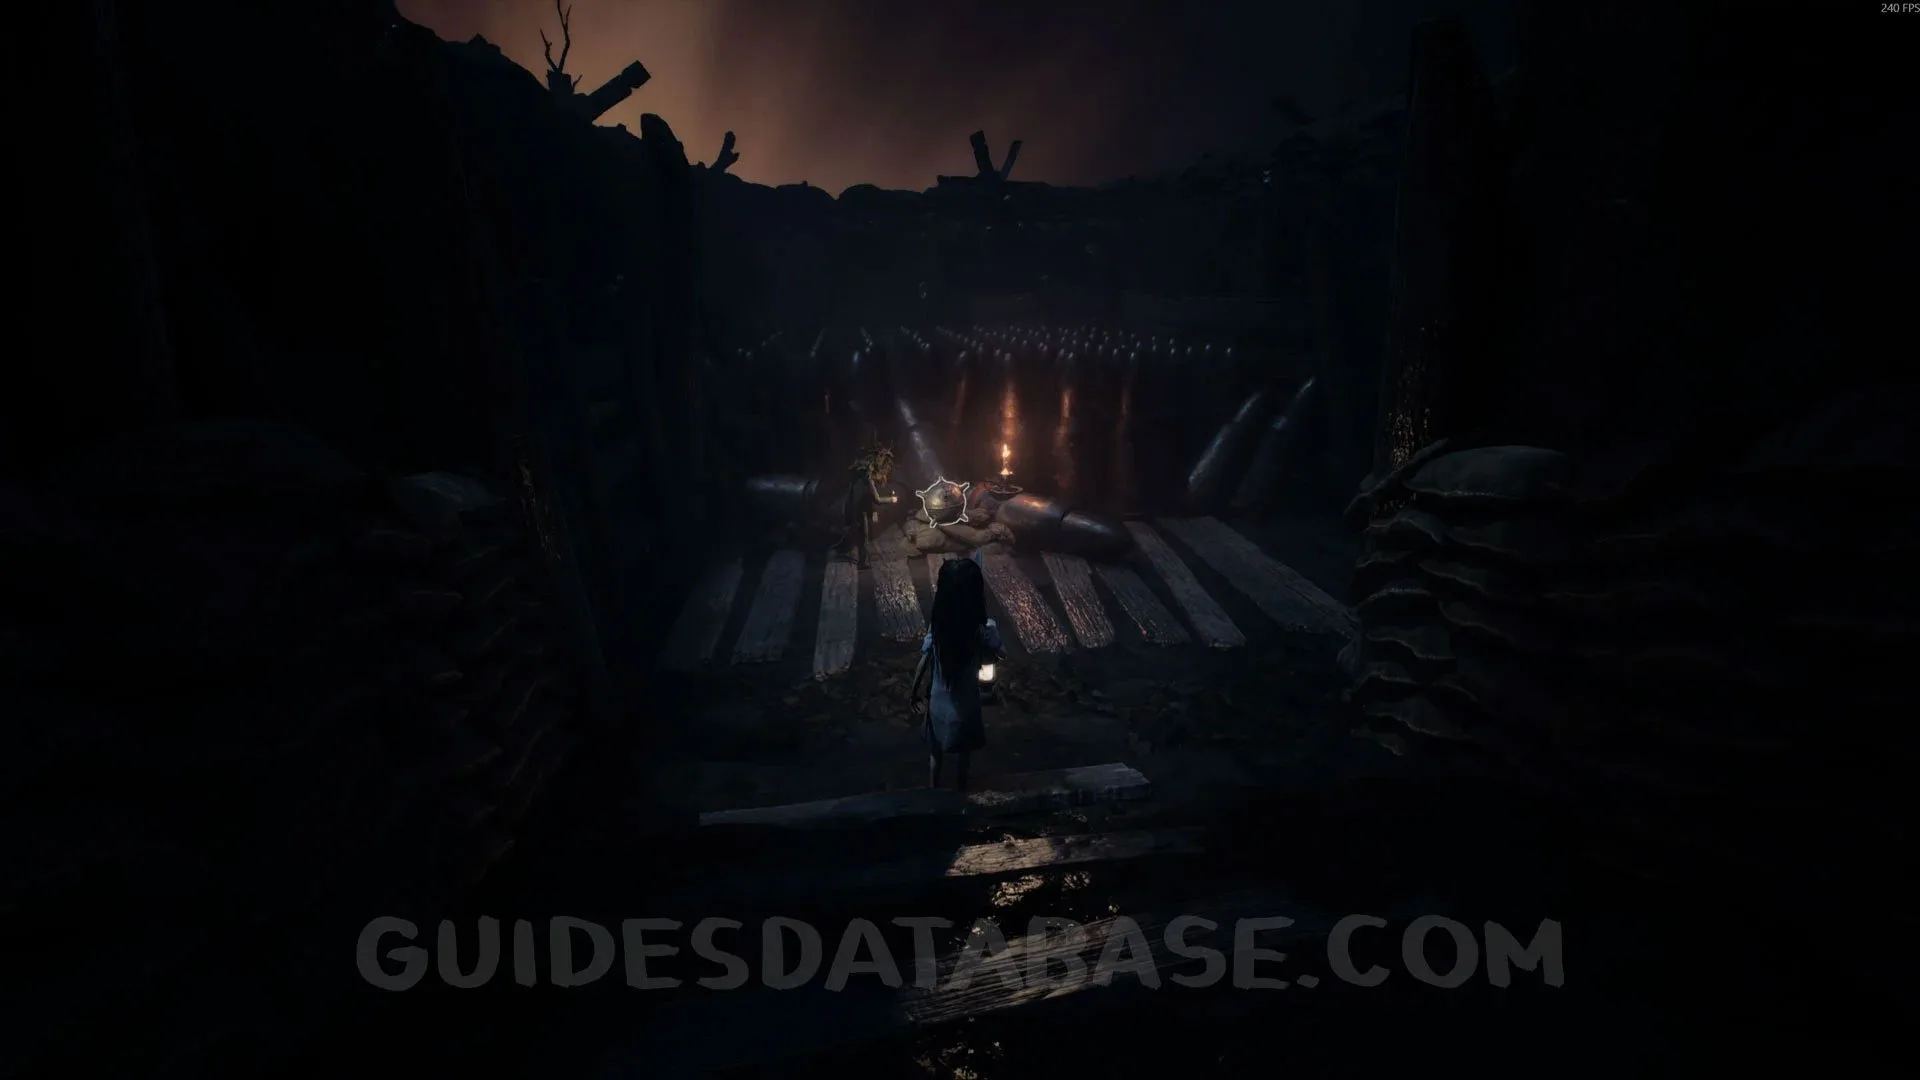 GUIDESDATABASE.COM
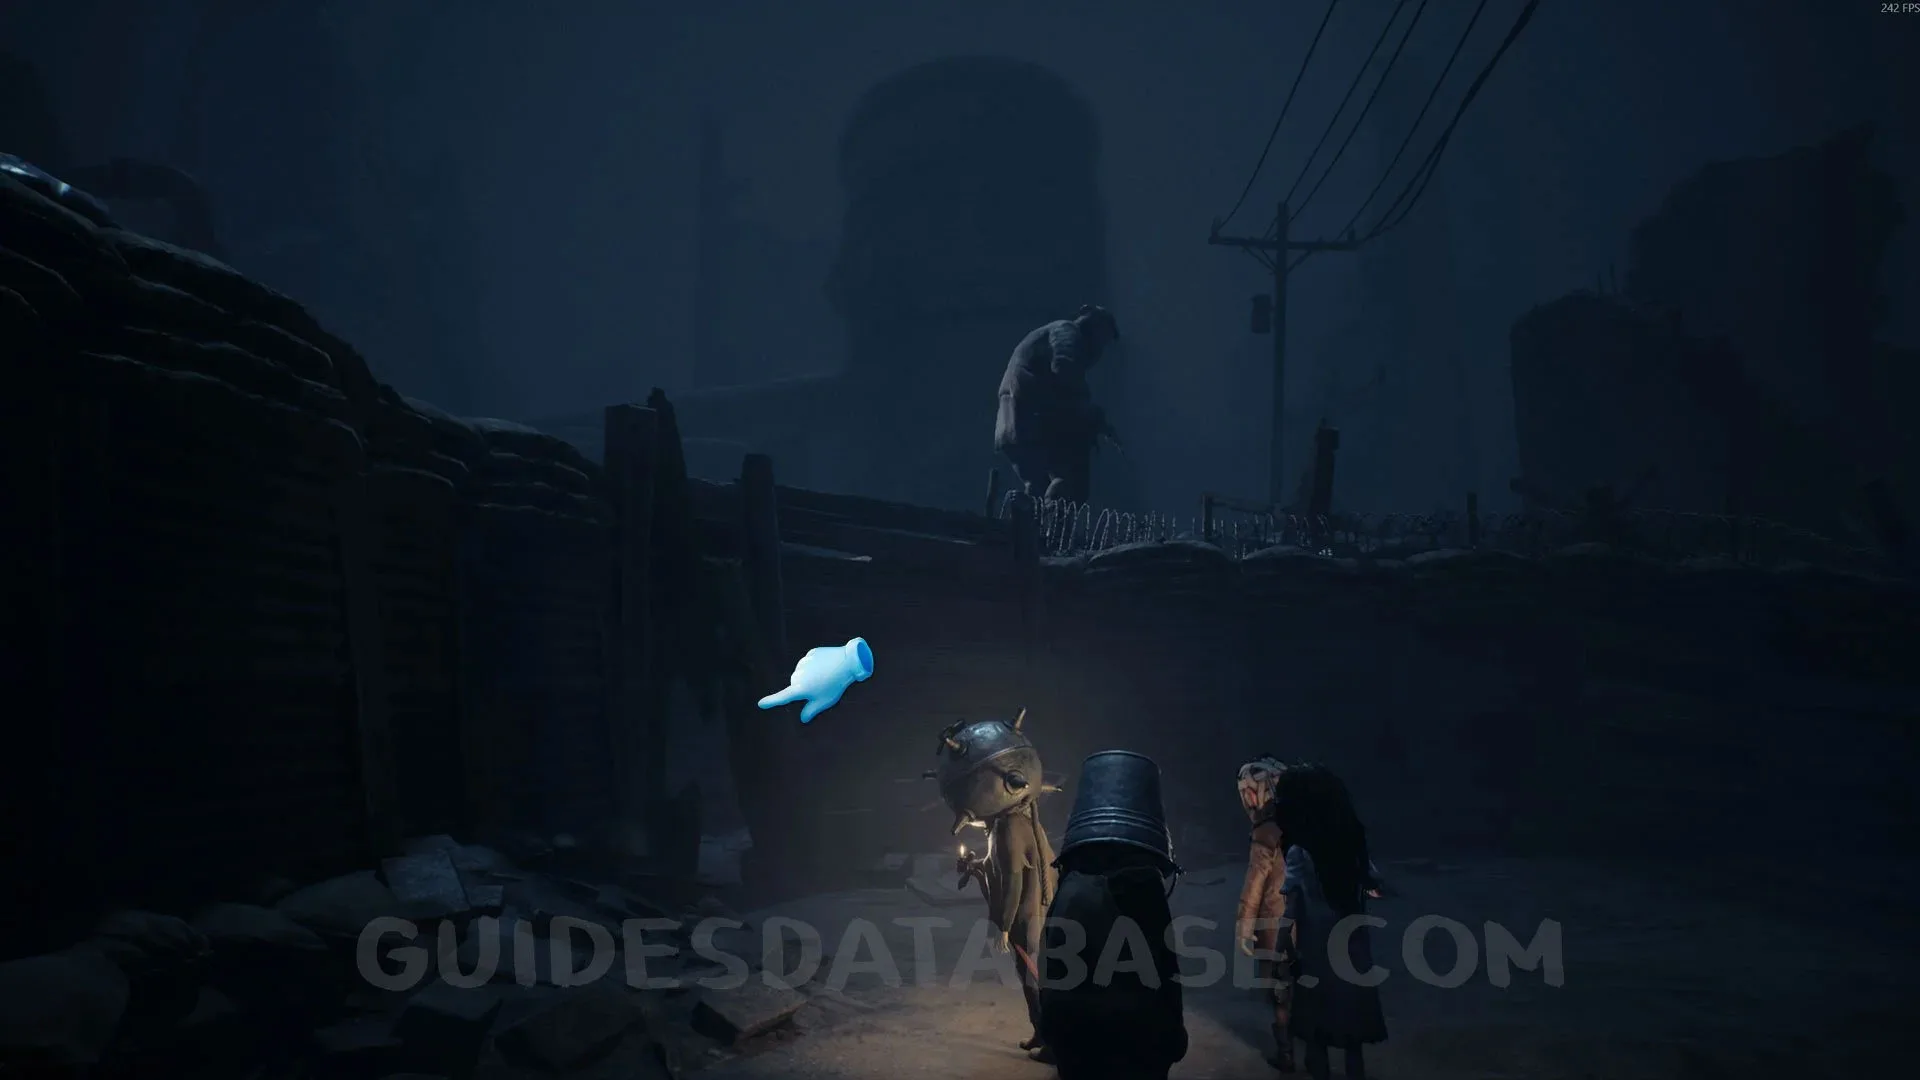
Poster #17 + Secret #41
After escaping the giant sheep, you will go down a large staircase. This poster is next to the staircase at the end of the area.
 GUIDESDATABASE.COM
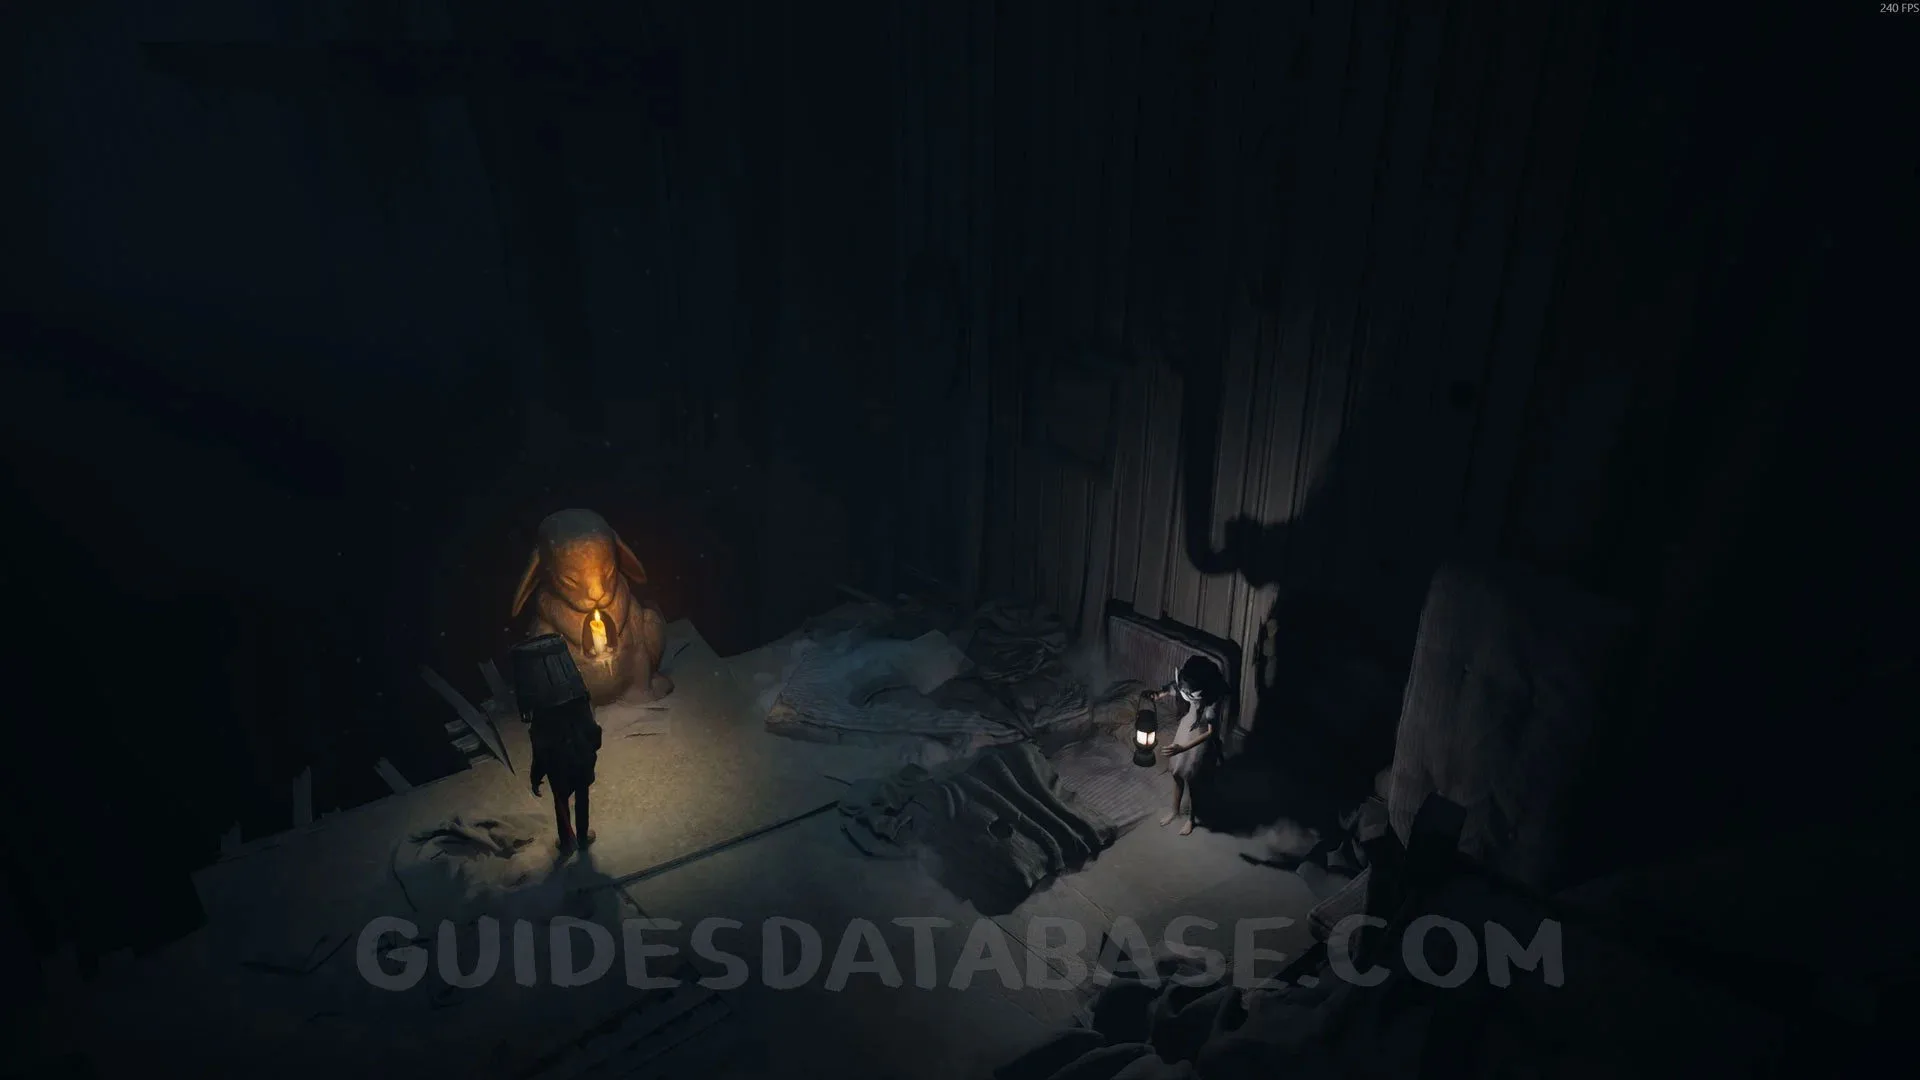
Mask #17 + Secret #42
After the previous collectible, take the elevator up and go through the door on the right. Crawl under the table to find this mask.
 GUIDESDATABASE.COM
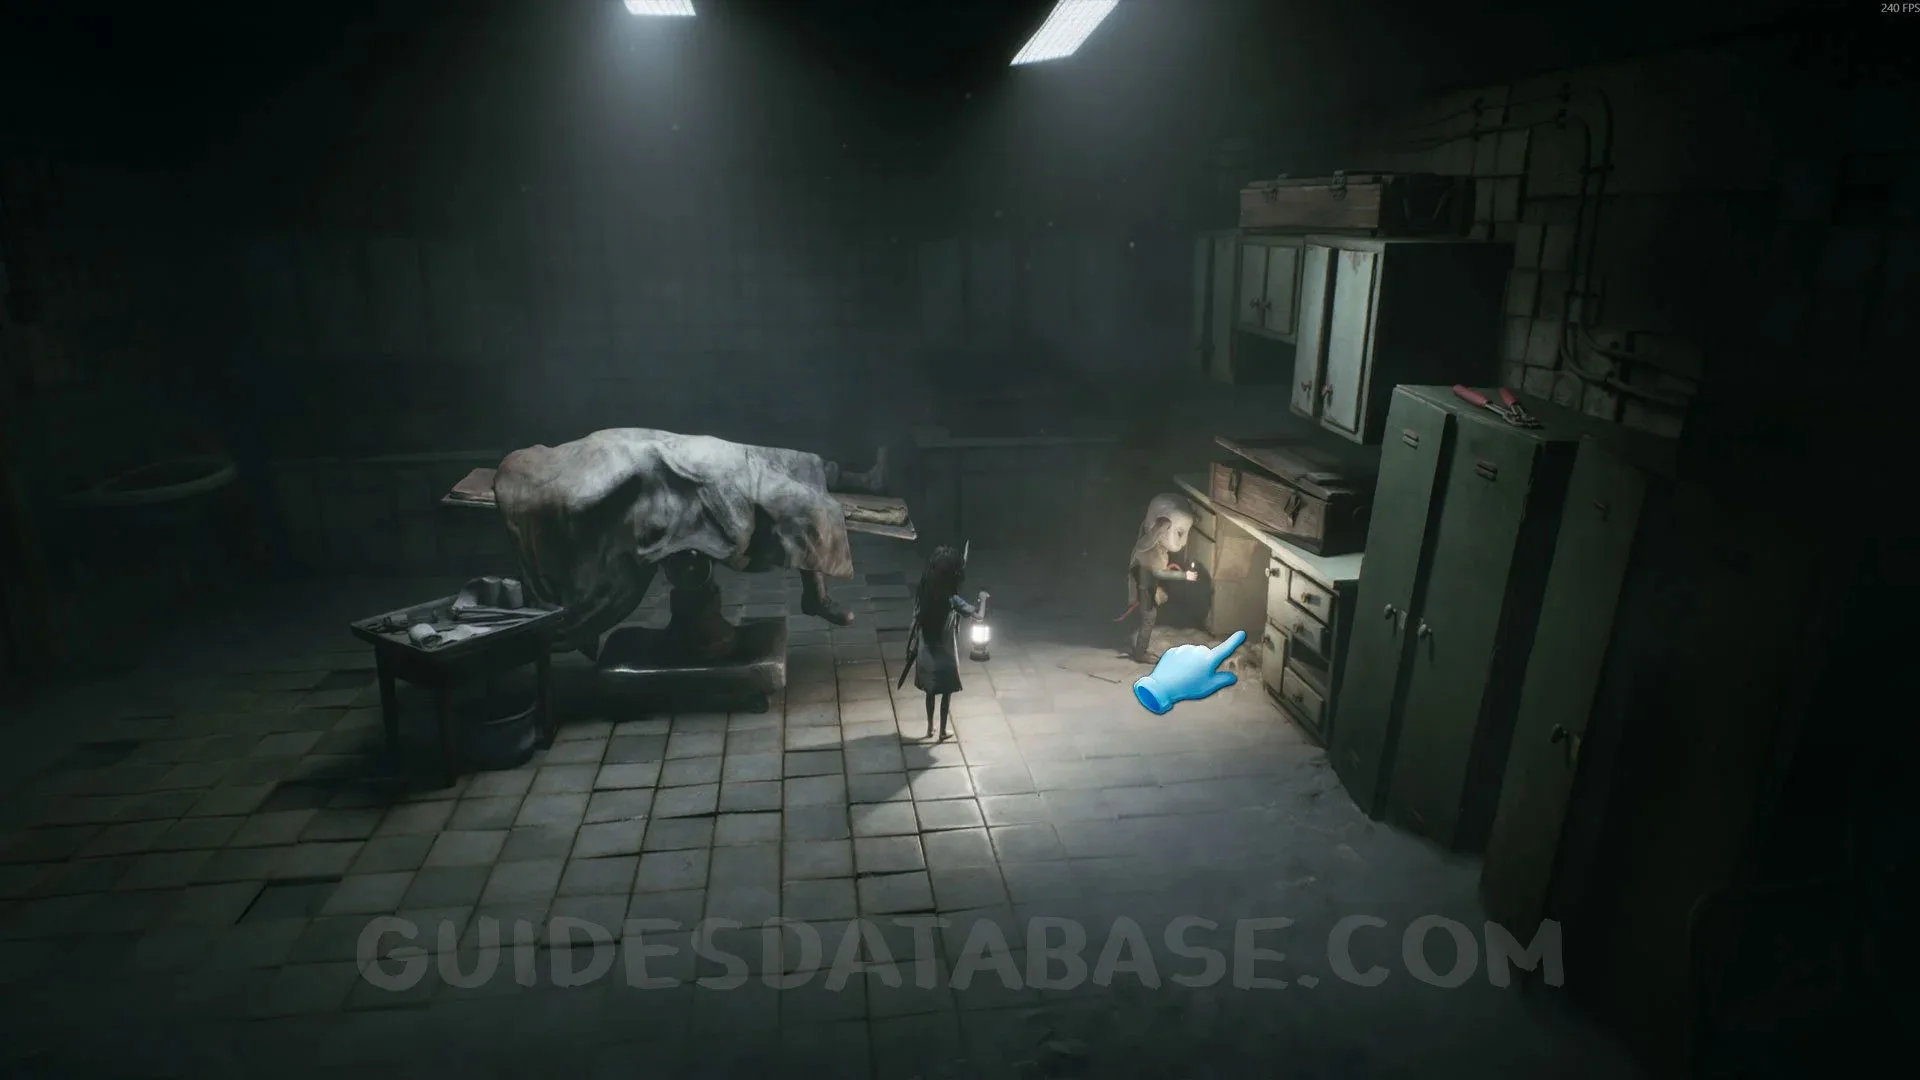 GUIDESDATABASE.COM
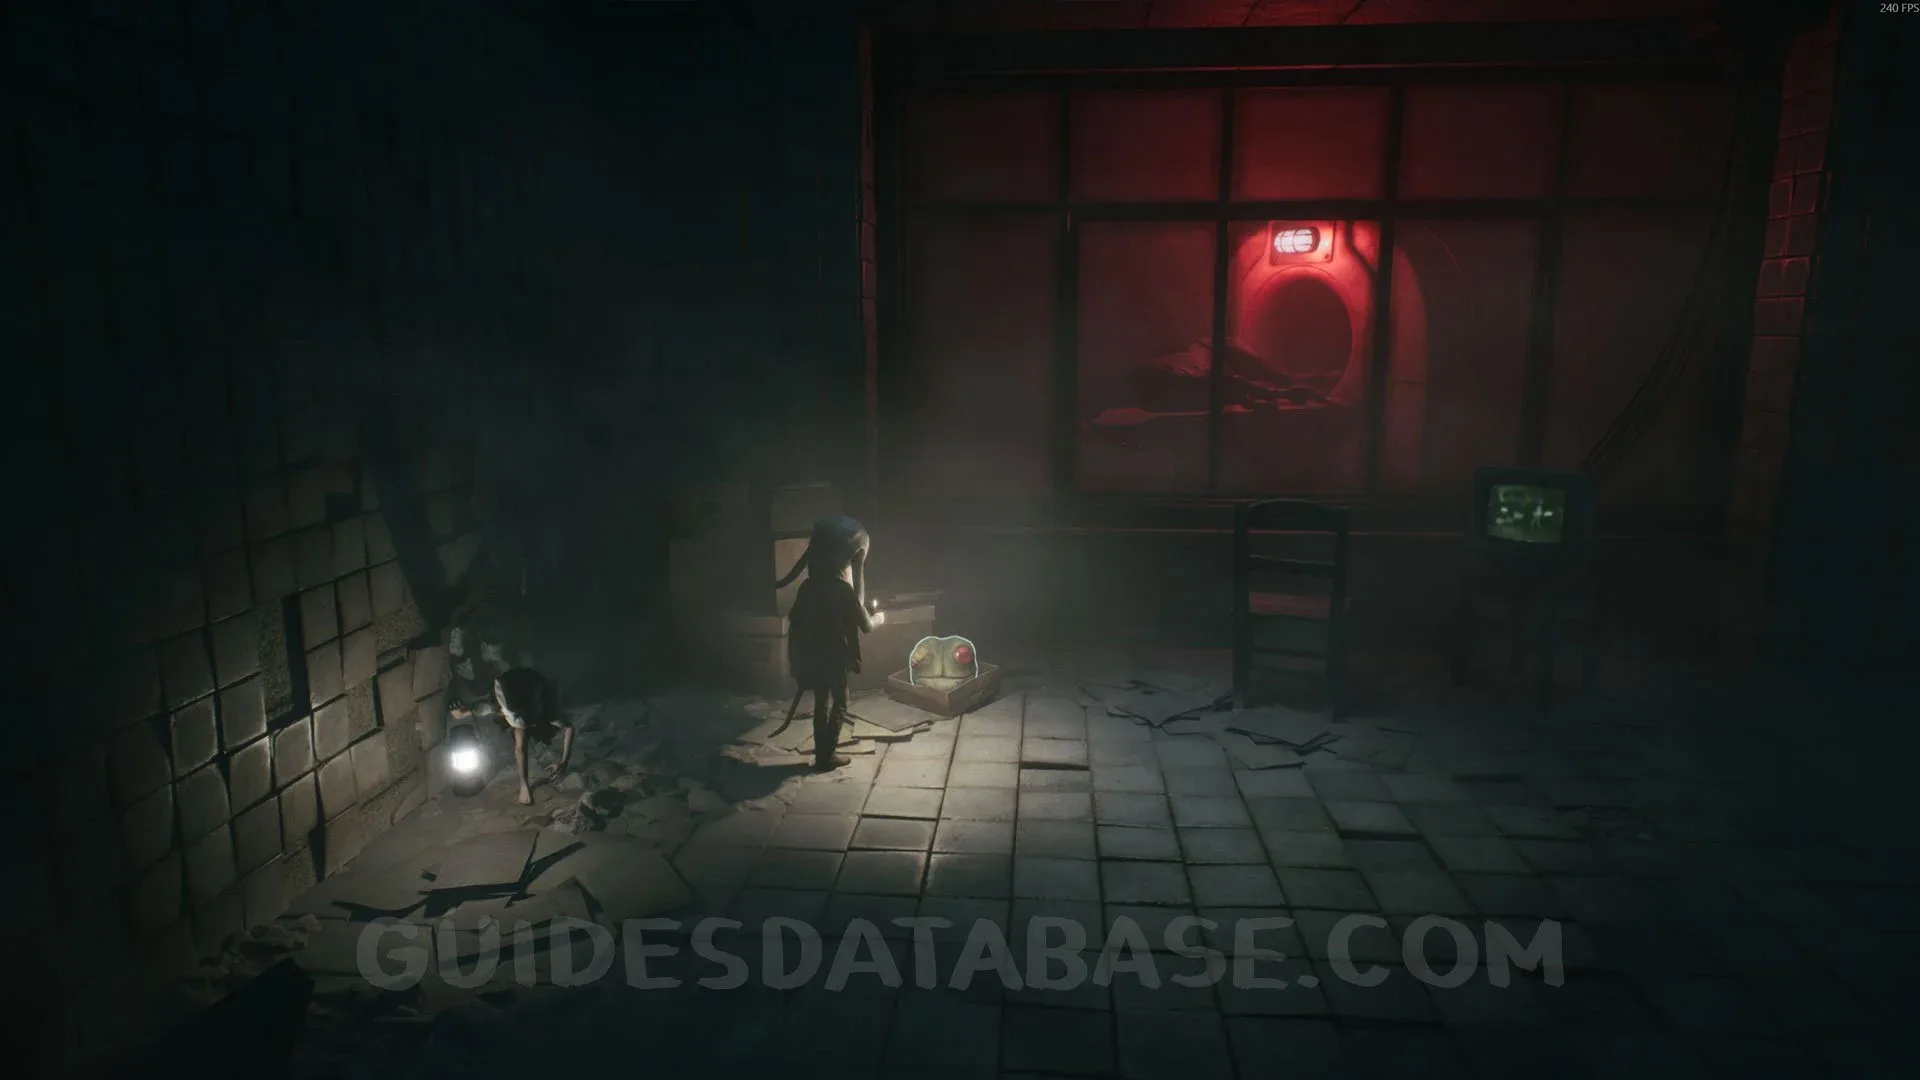 GUIDESDATABASE.COM
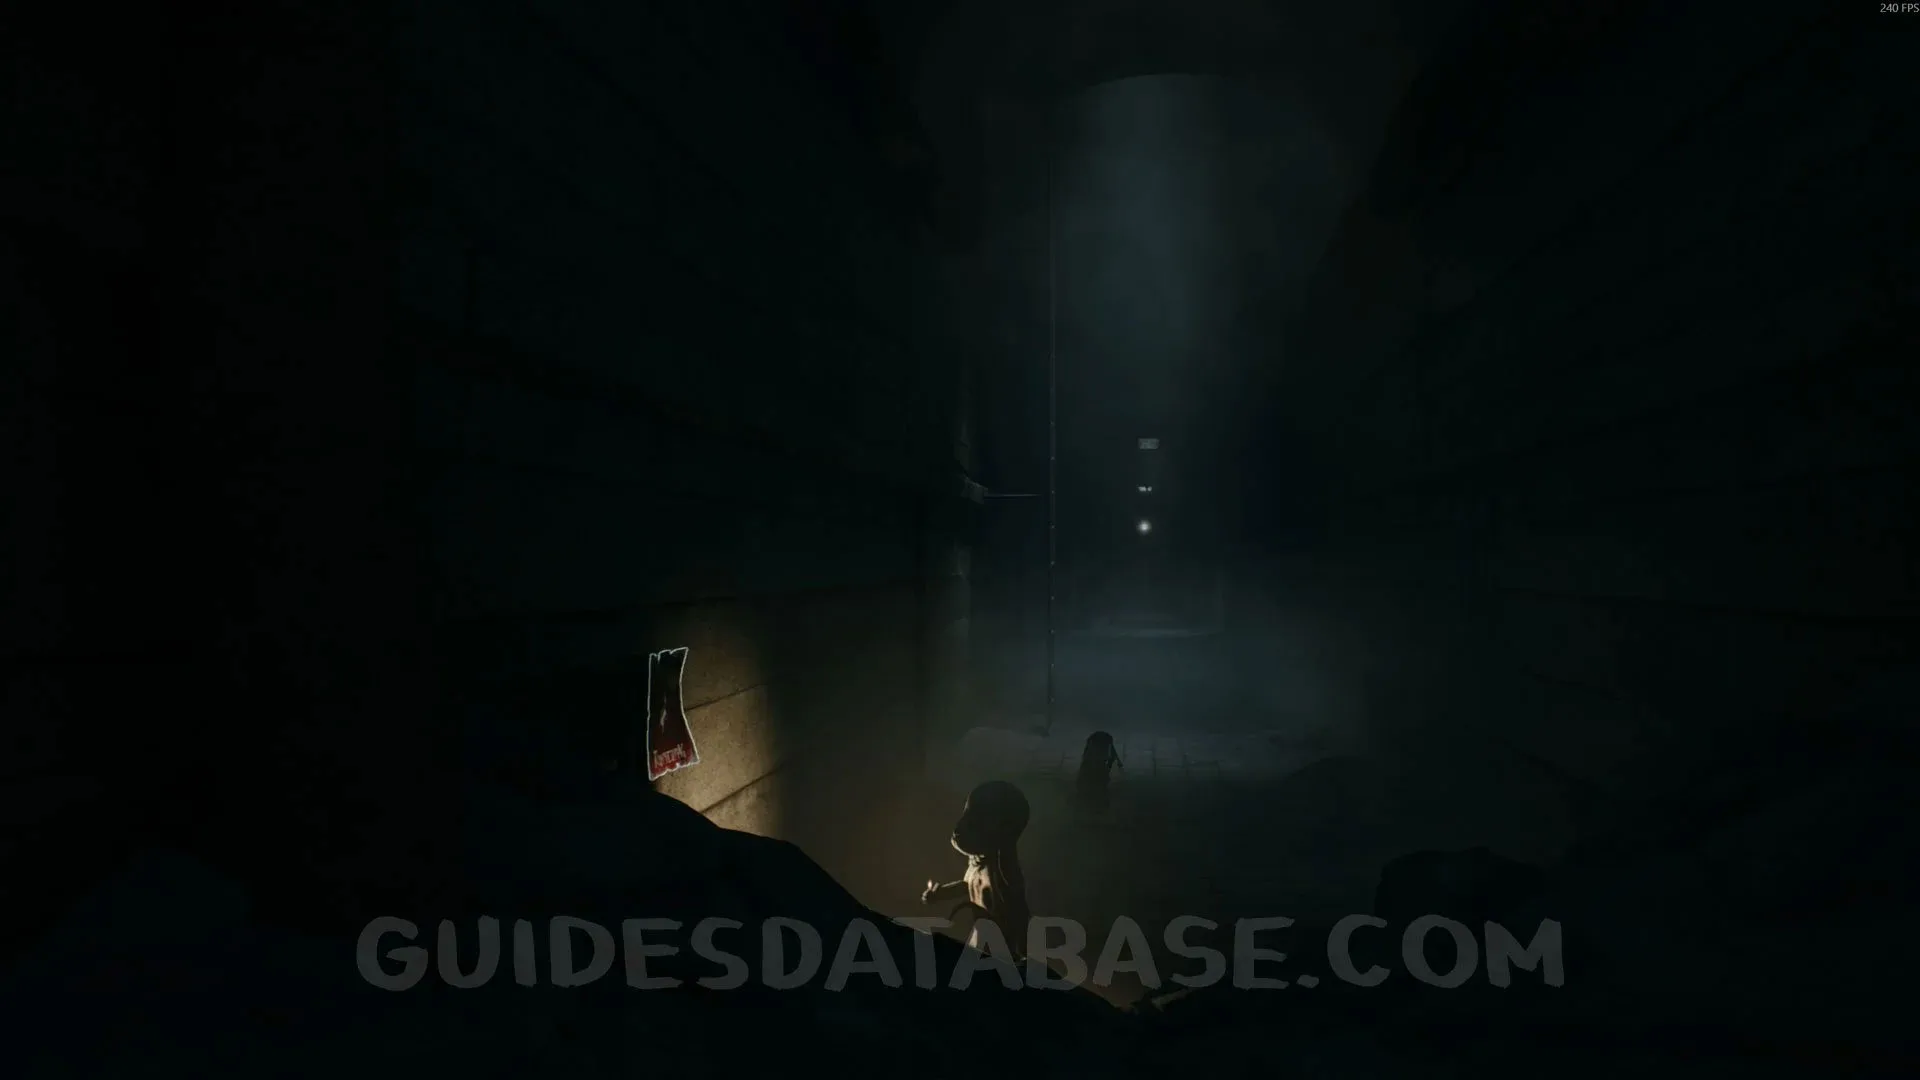
Coffin #5 + Secret #43
After the explosion sequence, go through the hole in the wall on the left, open the bunker, and go downstairs to find this coffin.
 GUIDESDATABASE.COM
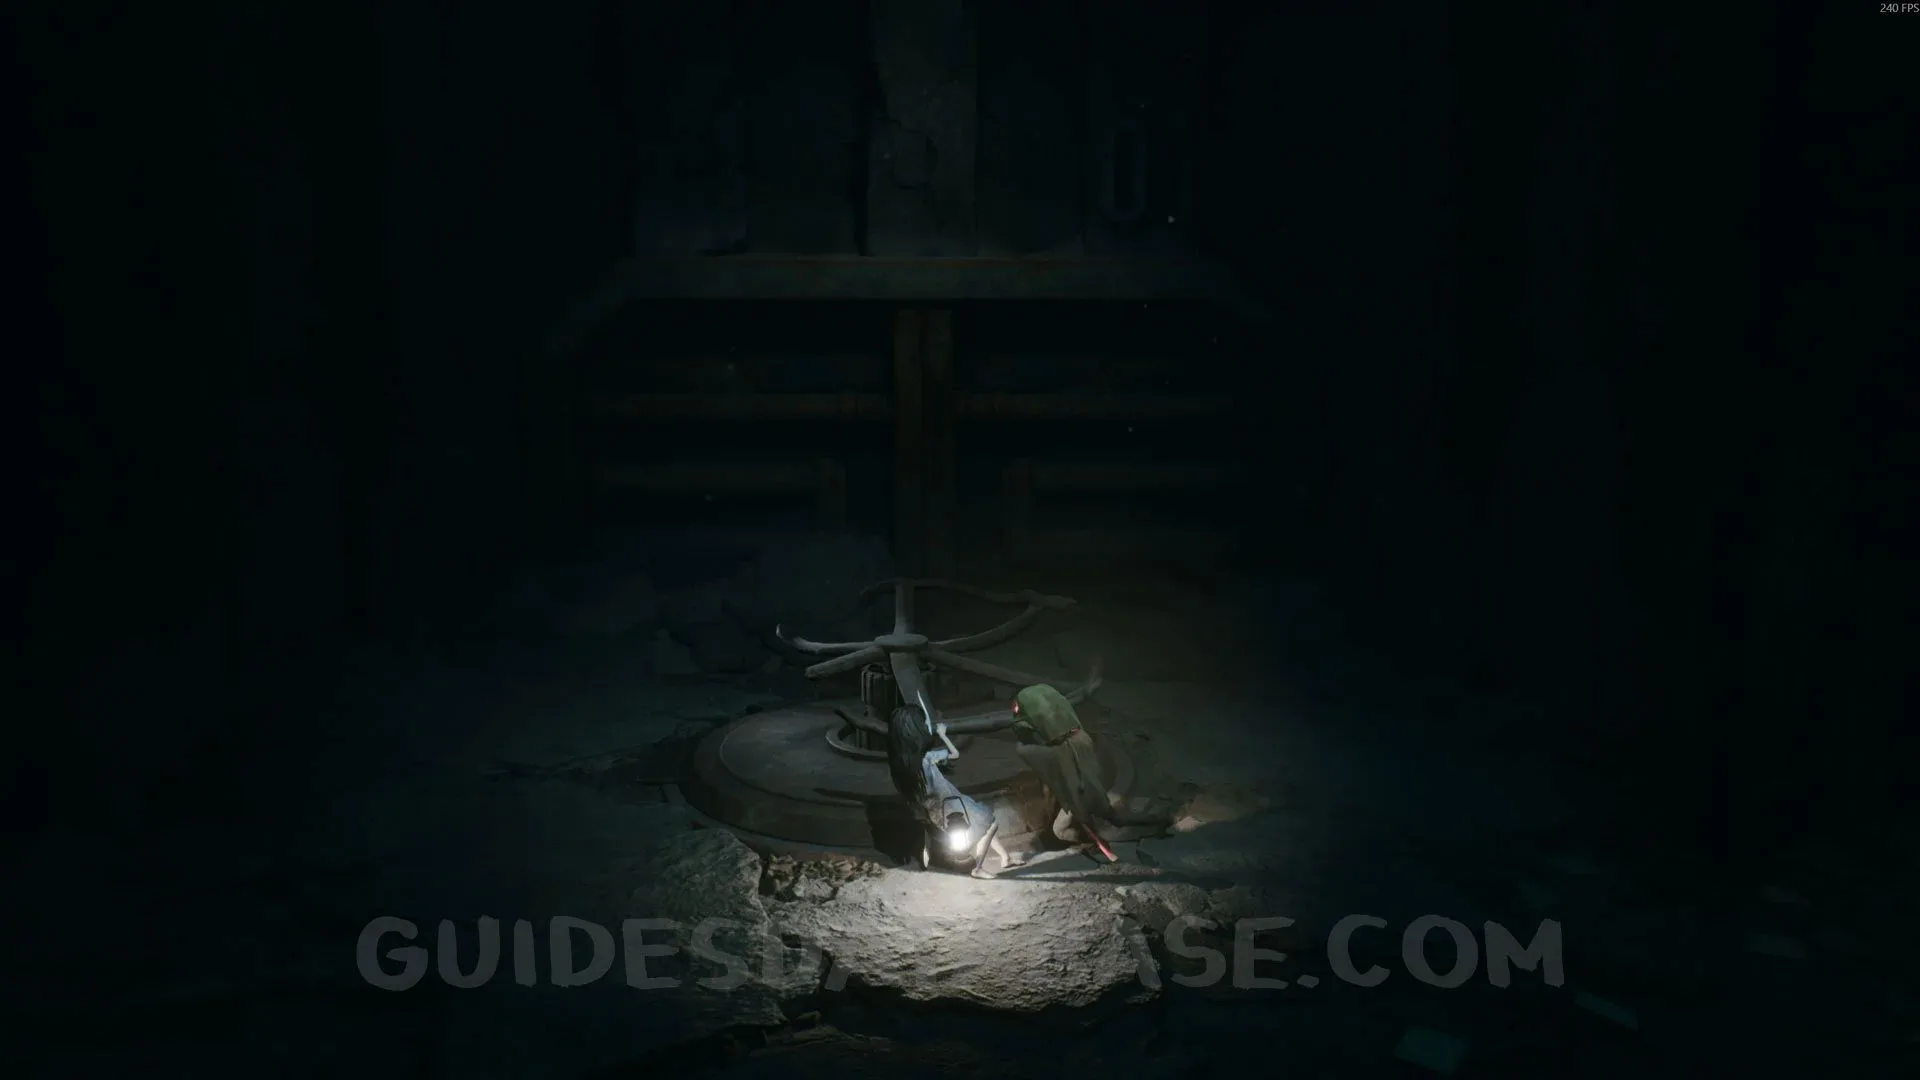 GUIDESDATABASE.COM
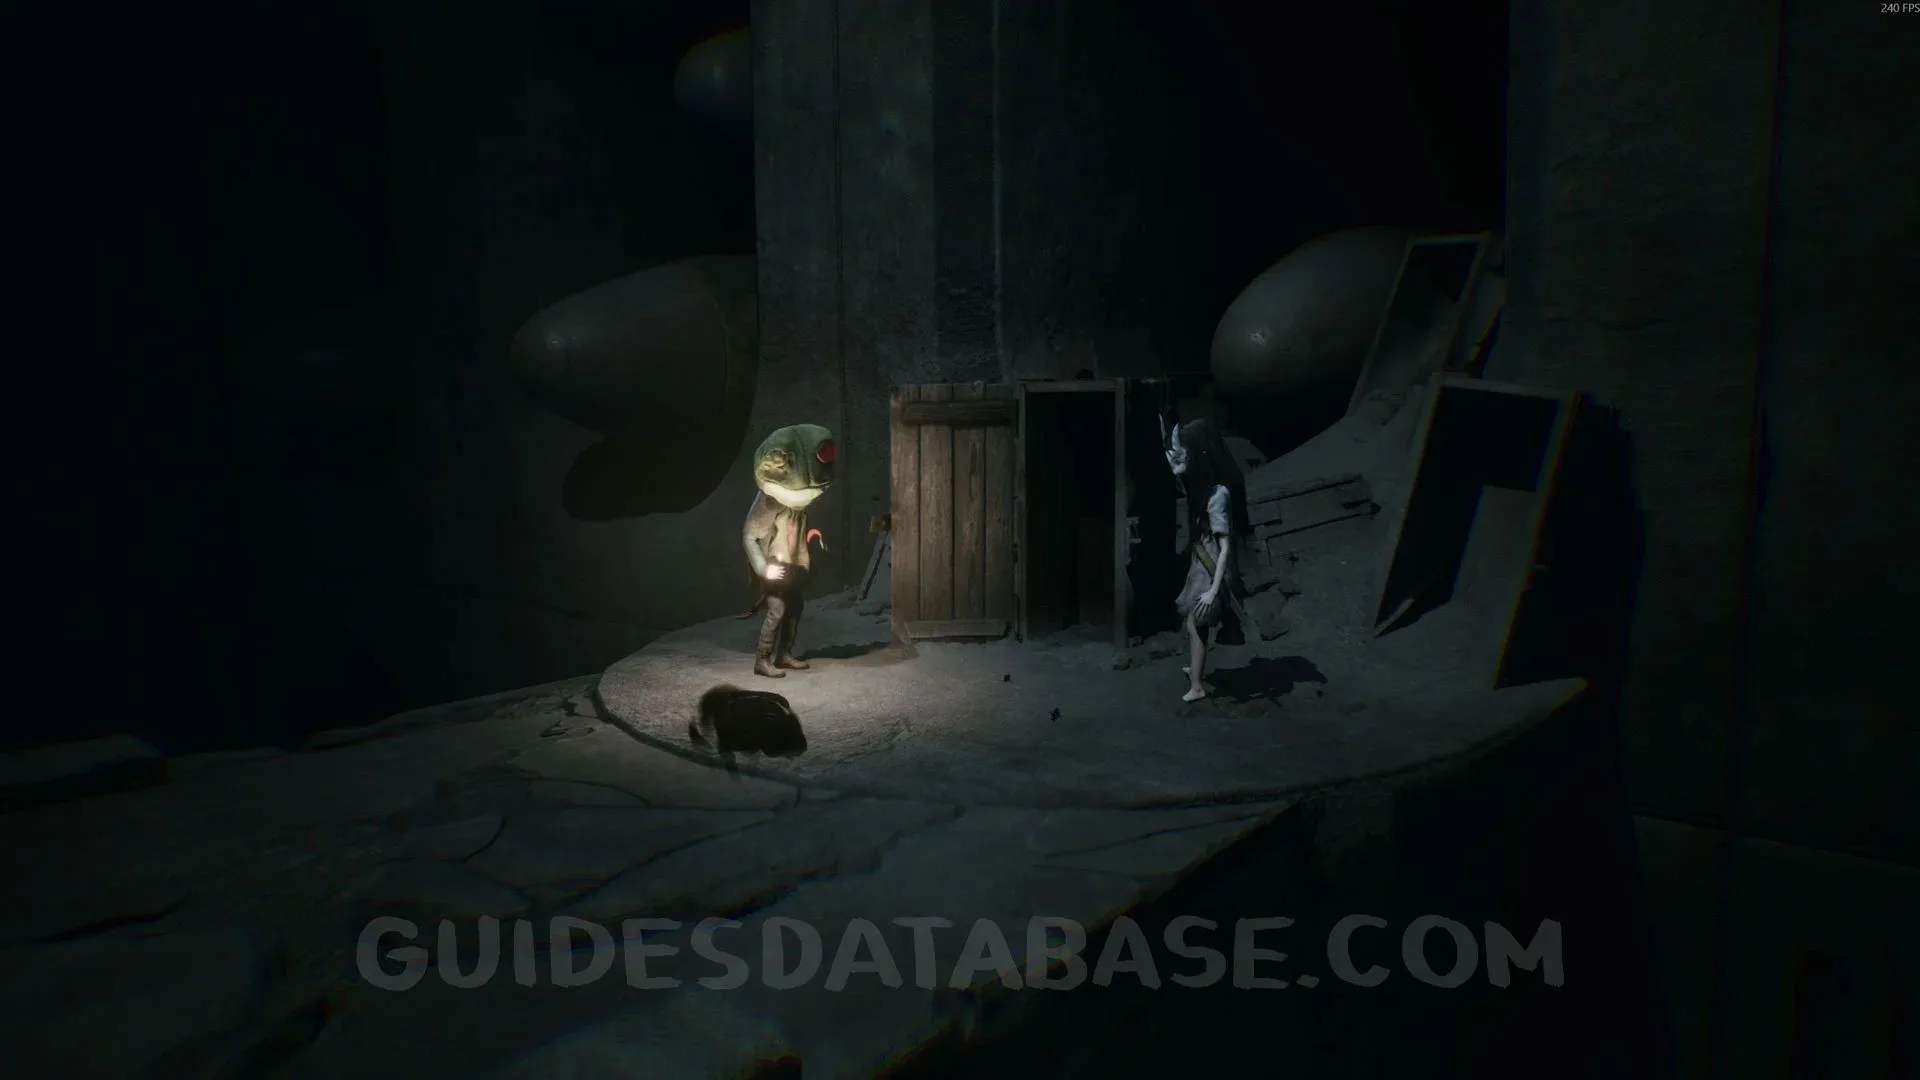 GUIDESDATABASE.COM
Chapter 8: The Watcher
Poster #18 + Secret #44
At the start of the chapter, after going up the two flights of stairs, turn through the door on the left to find this poster.
 GUIDESDATABASE.COM
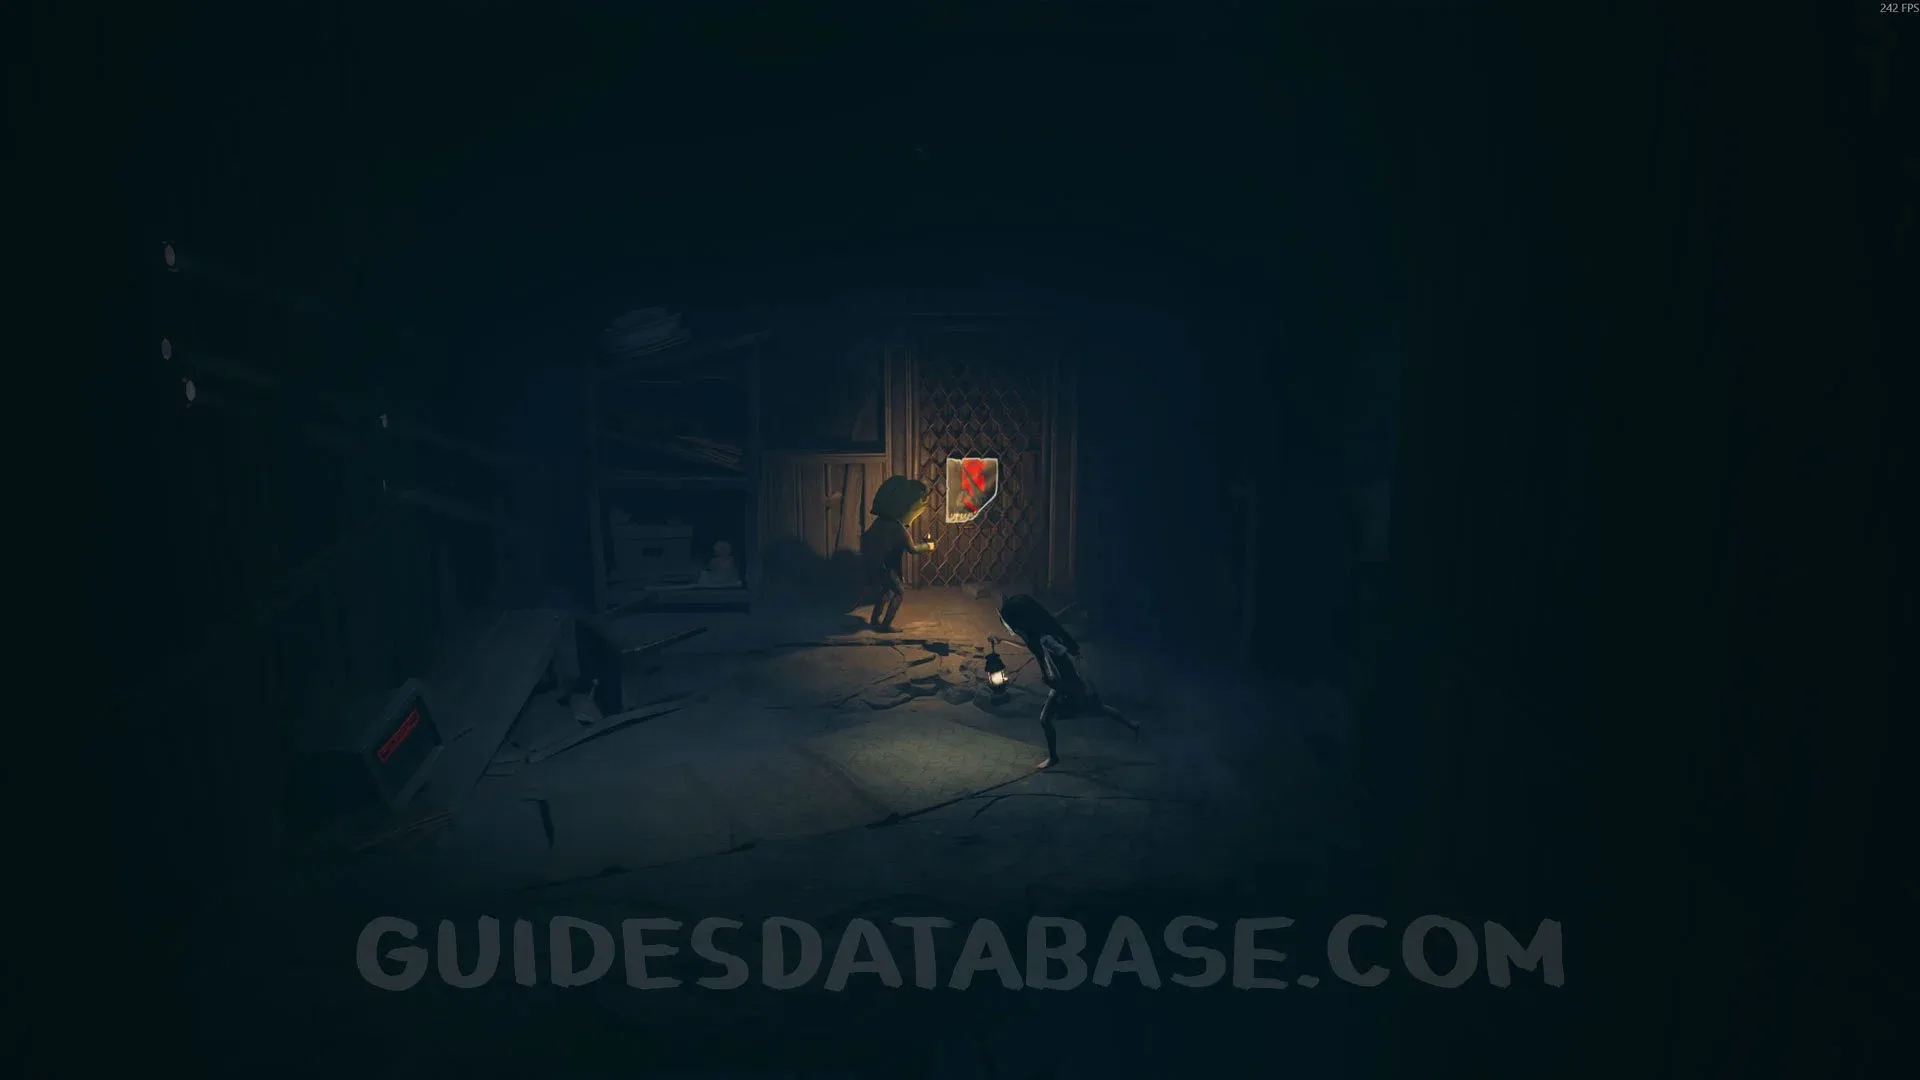 GUIDESDATABASE.COM
Poster #19 + Secret #45
After the previous collectible, go right, and before going up the next staircase, head to the back of the area to find this poster.
 GUIDESDATABASE.COM
Trophy “Friends Like These”
After going through the trench and entering a room, pick up the gun on the floor and accidentally defeat your friend to get this trophy.
 GUIDESDATABASE.COM
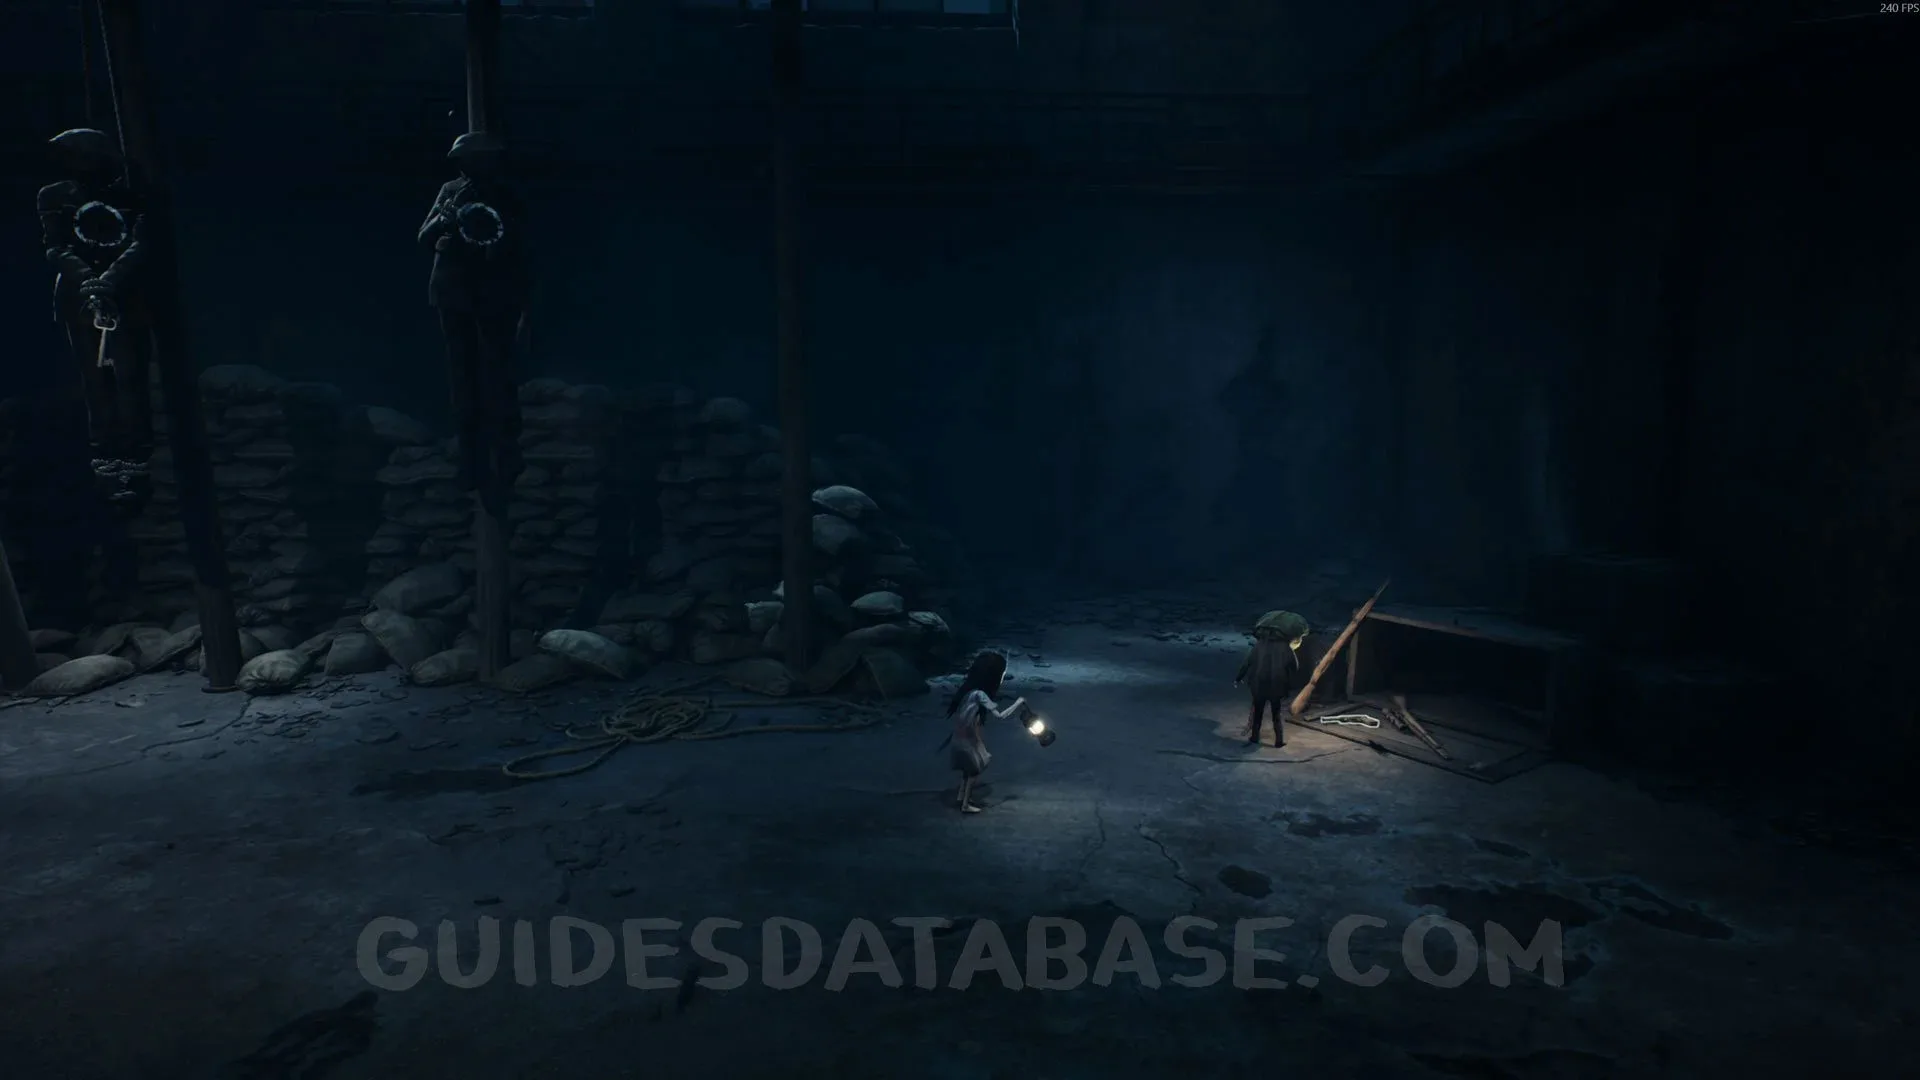 GUIDESDATABASE.COM
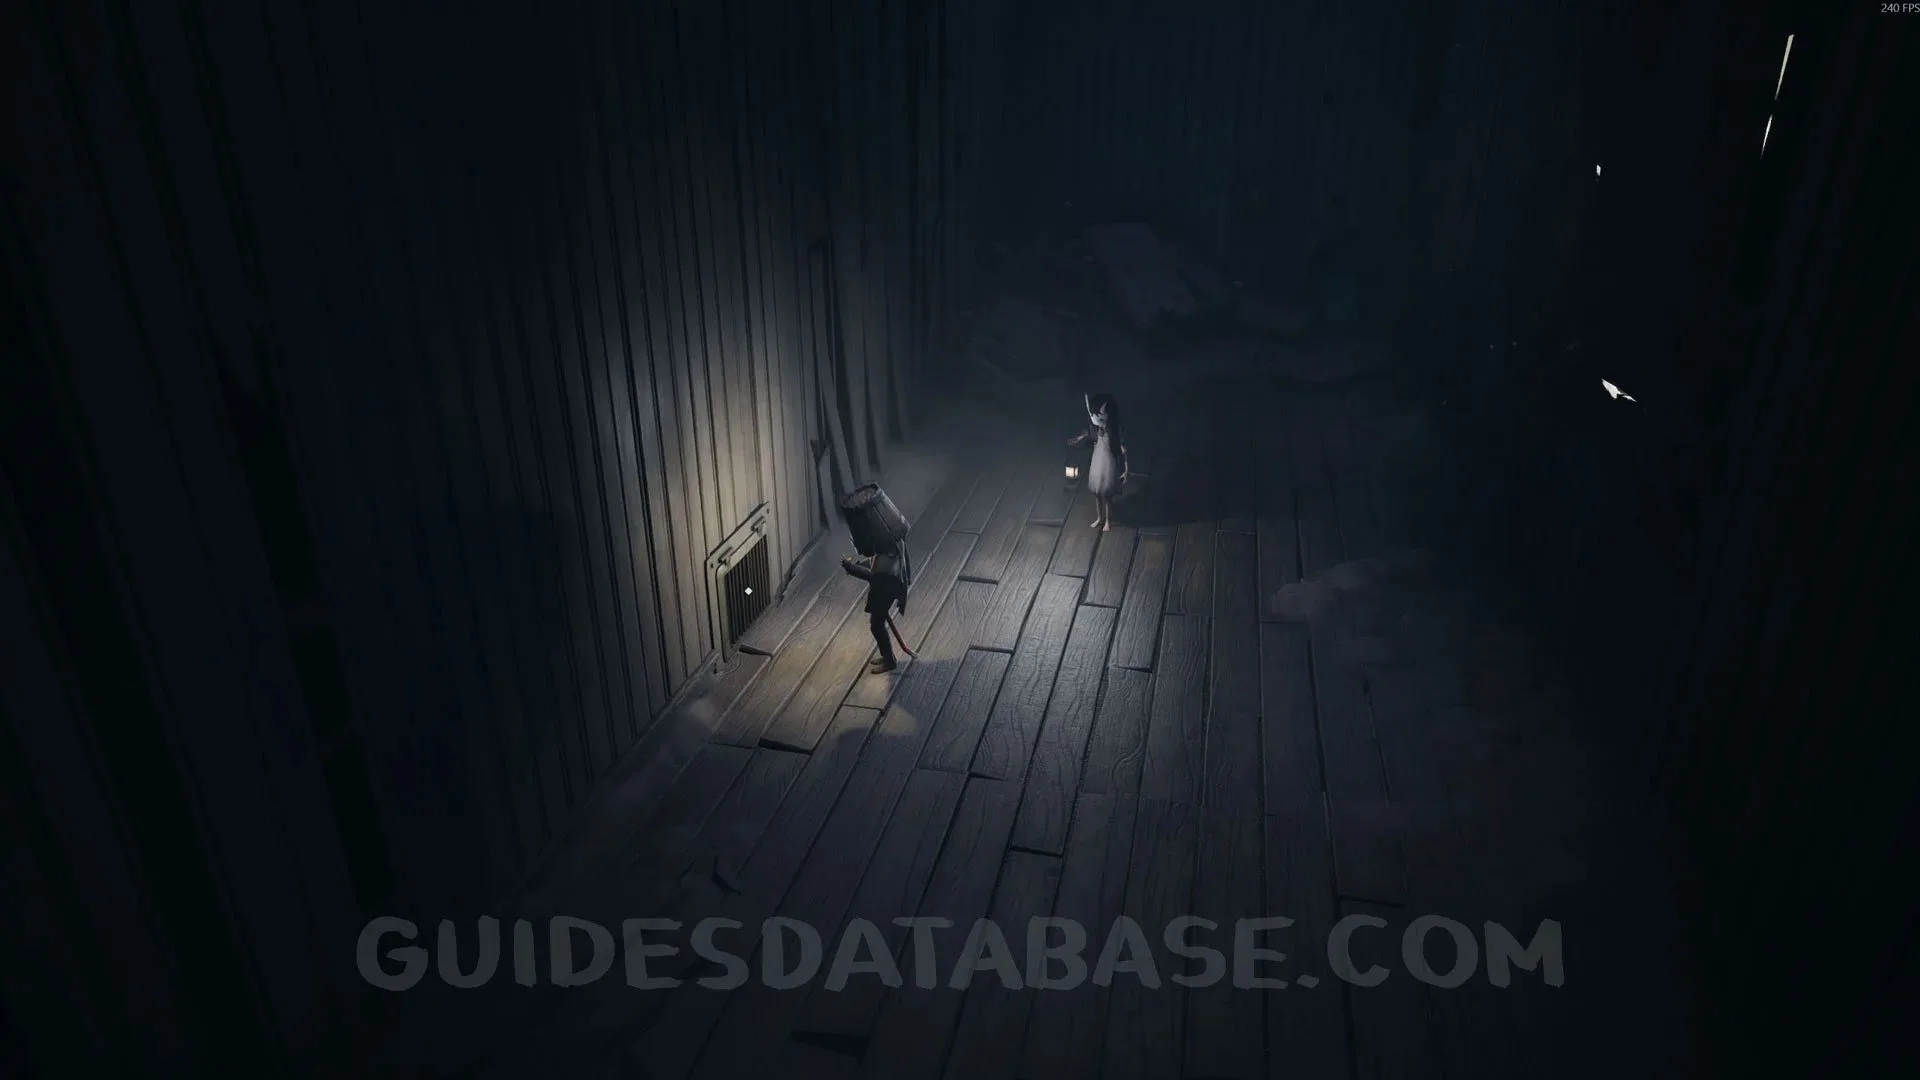
Critter #5 + Mask #18 + Secret #46
Pick up the key and open the door, then use the crowbar to open the oven and a critter will run back into the previous room. Go back to the previous room, defeat the critter, and pick up the mask.
 GUIDESDATABASE.COM
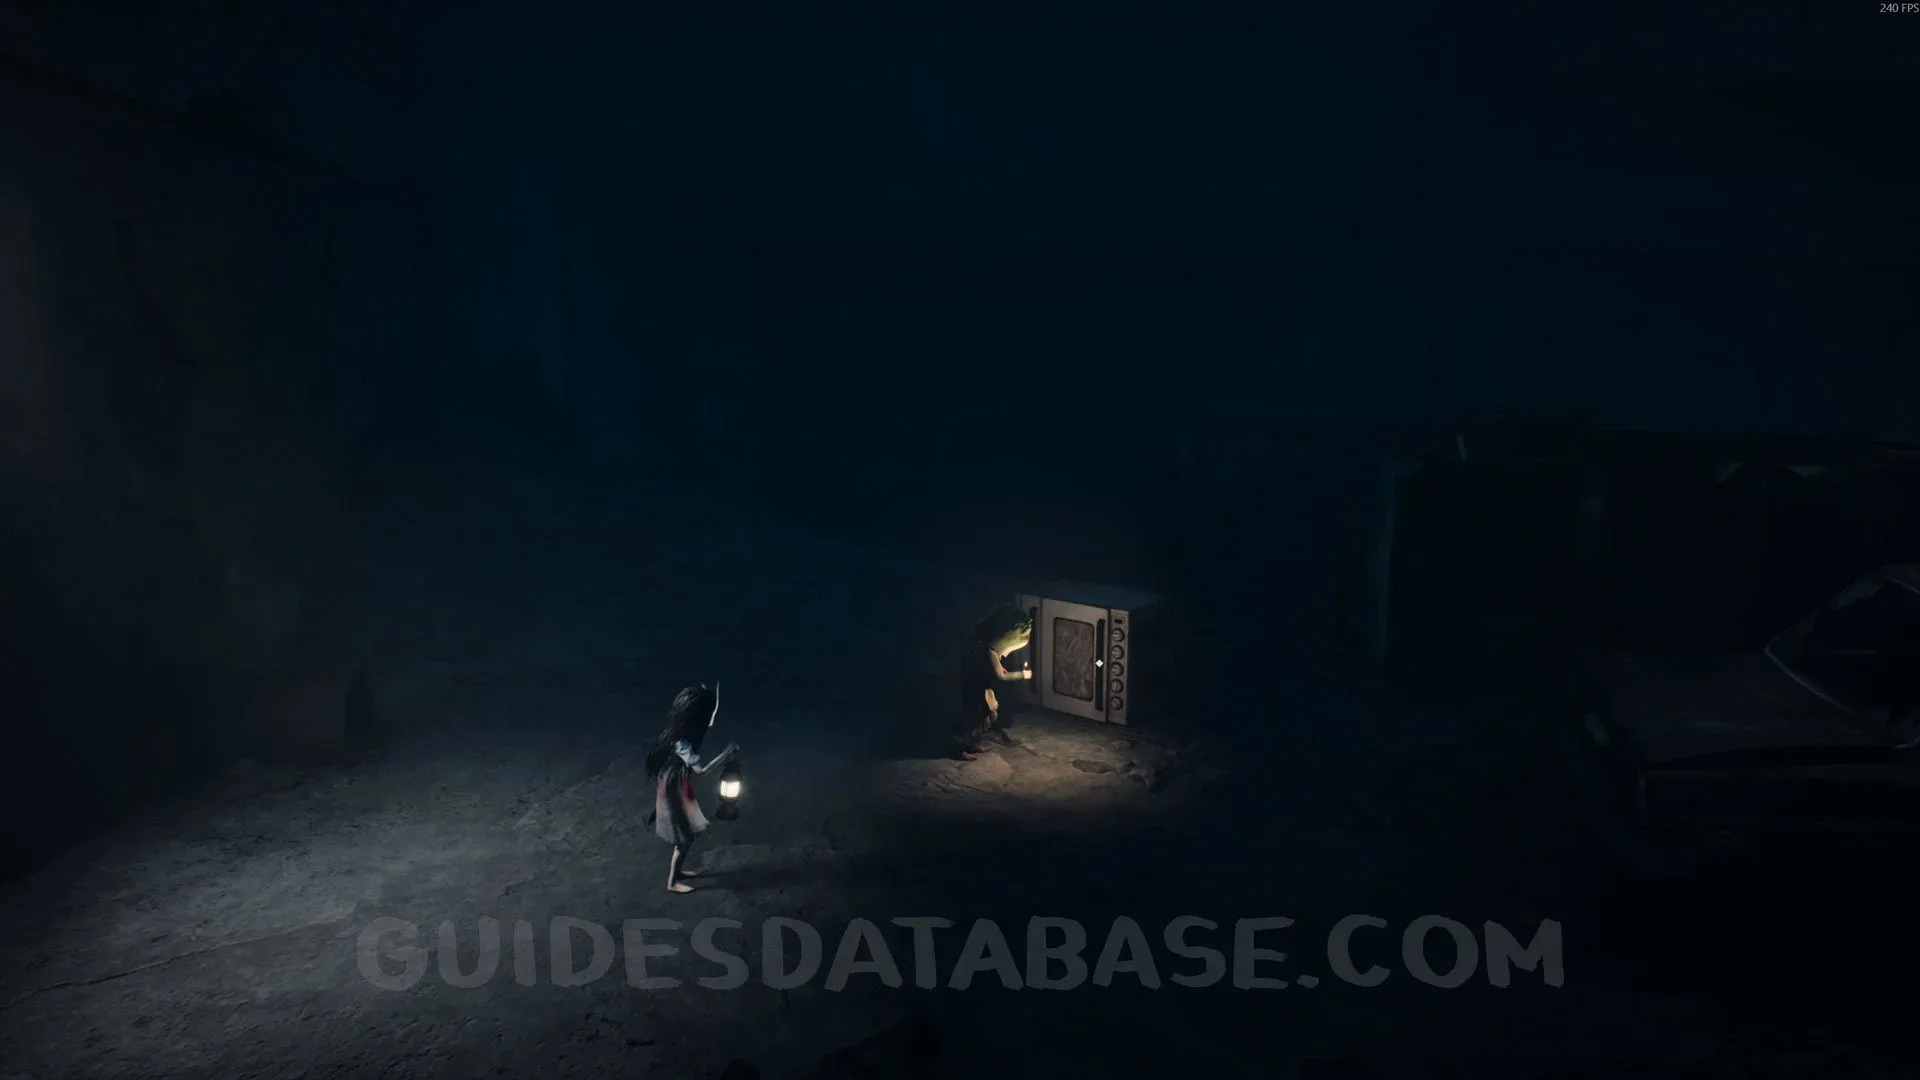 GUIDESDATABASE.COM
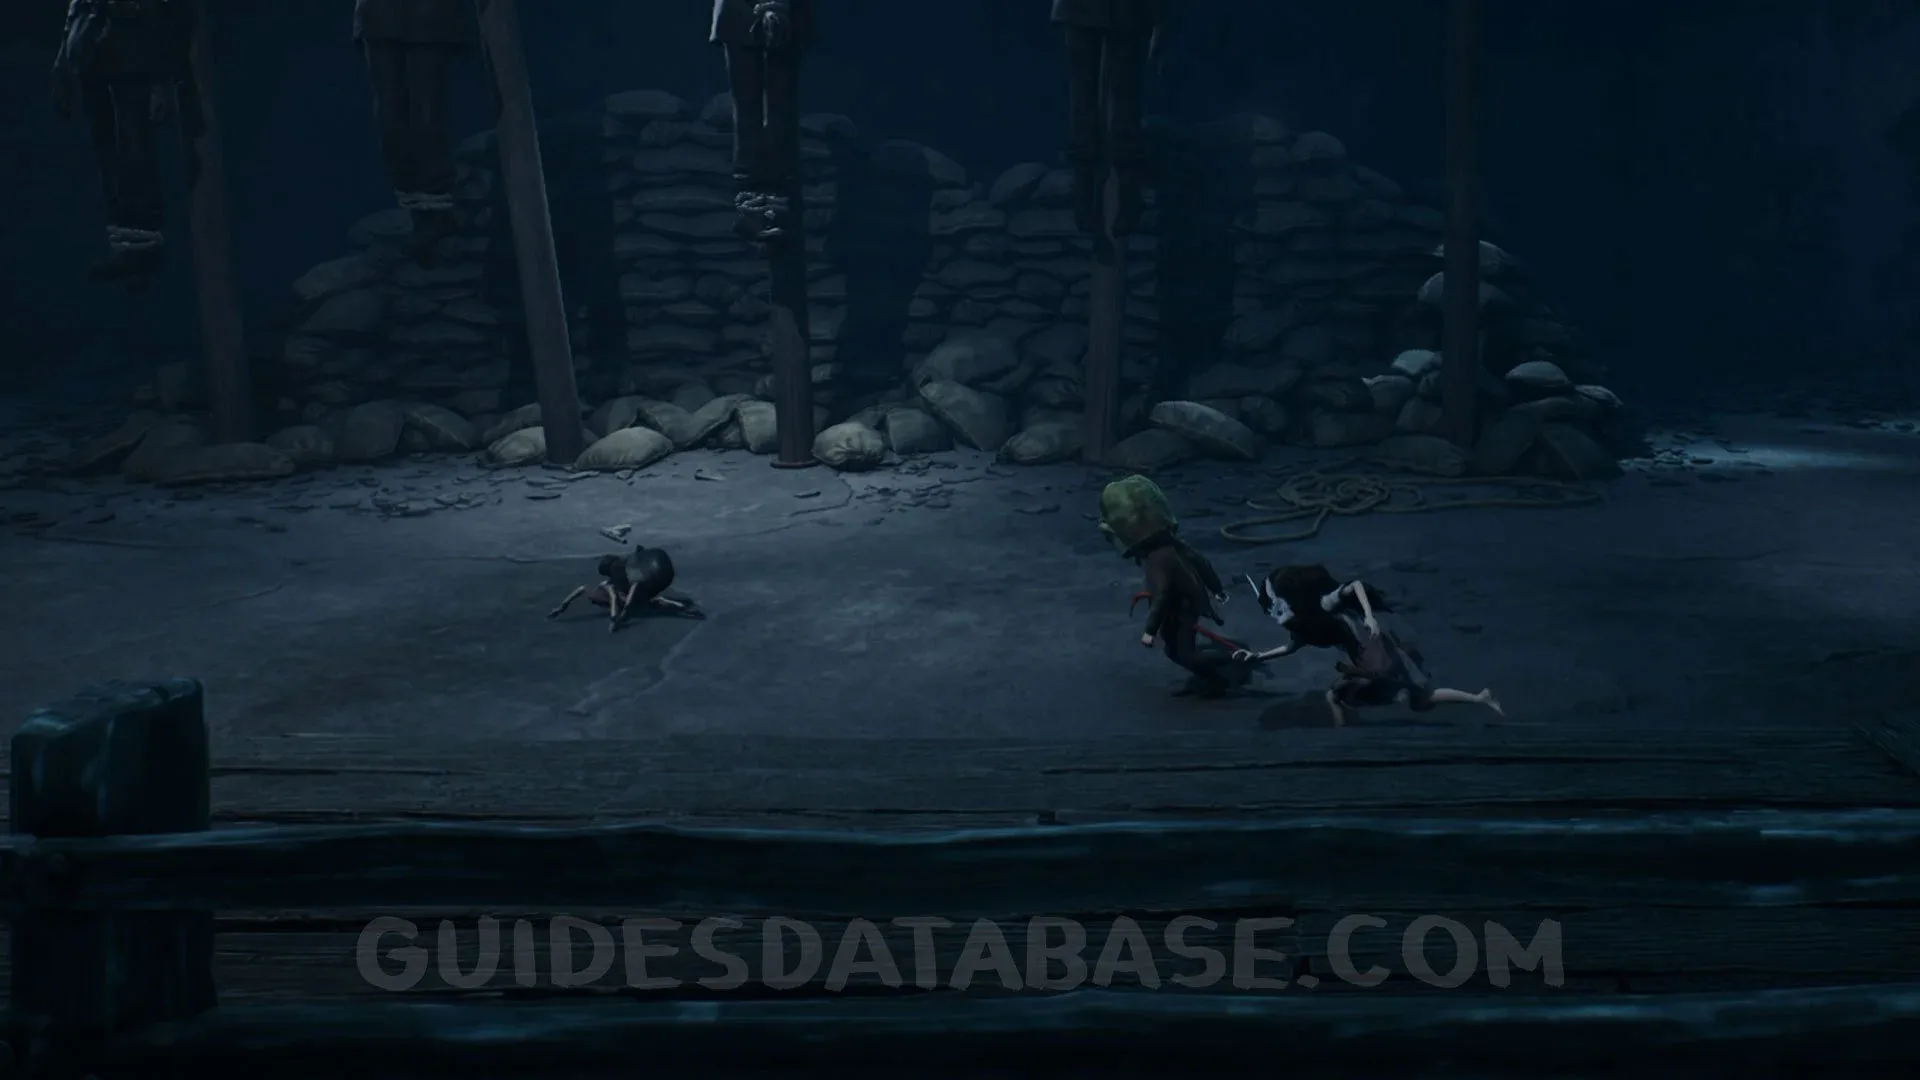 GUIDESDATABASE.COM
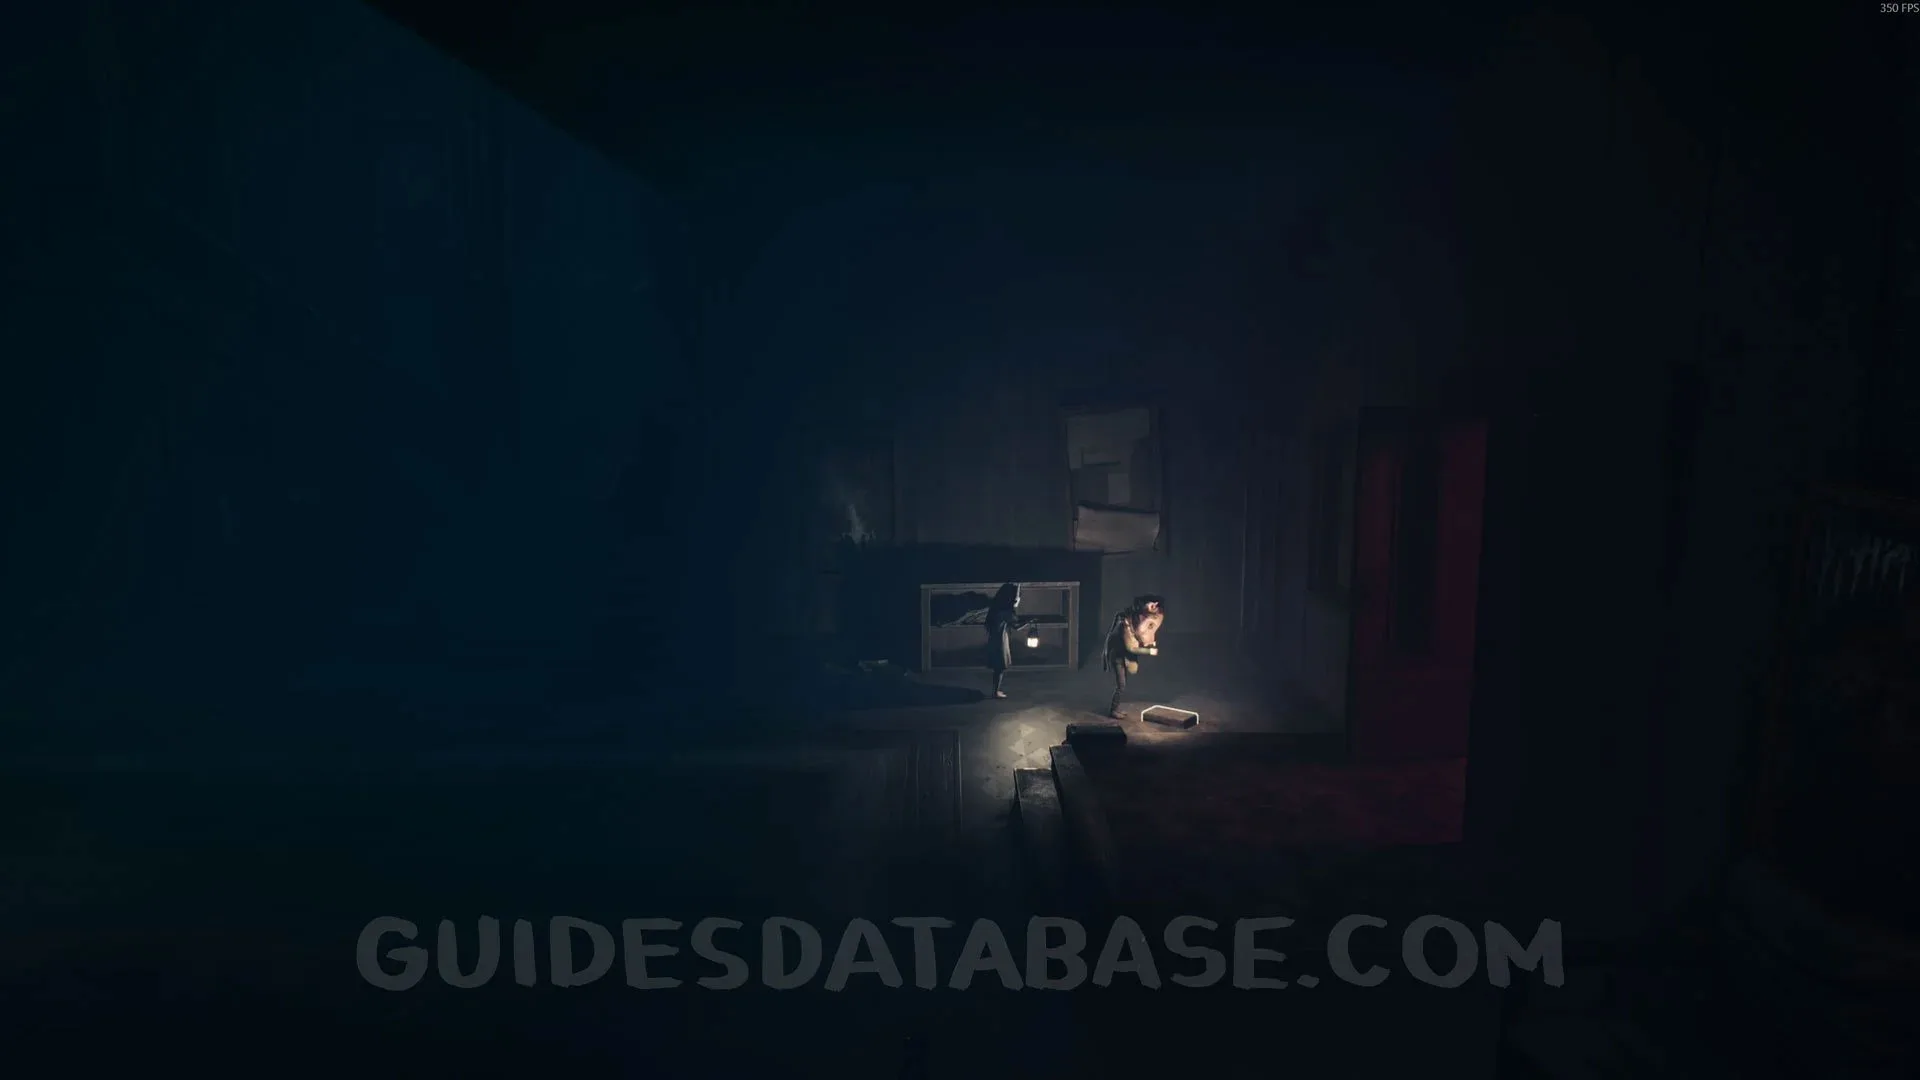
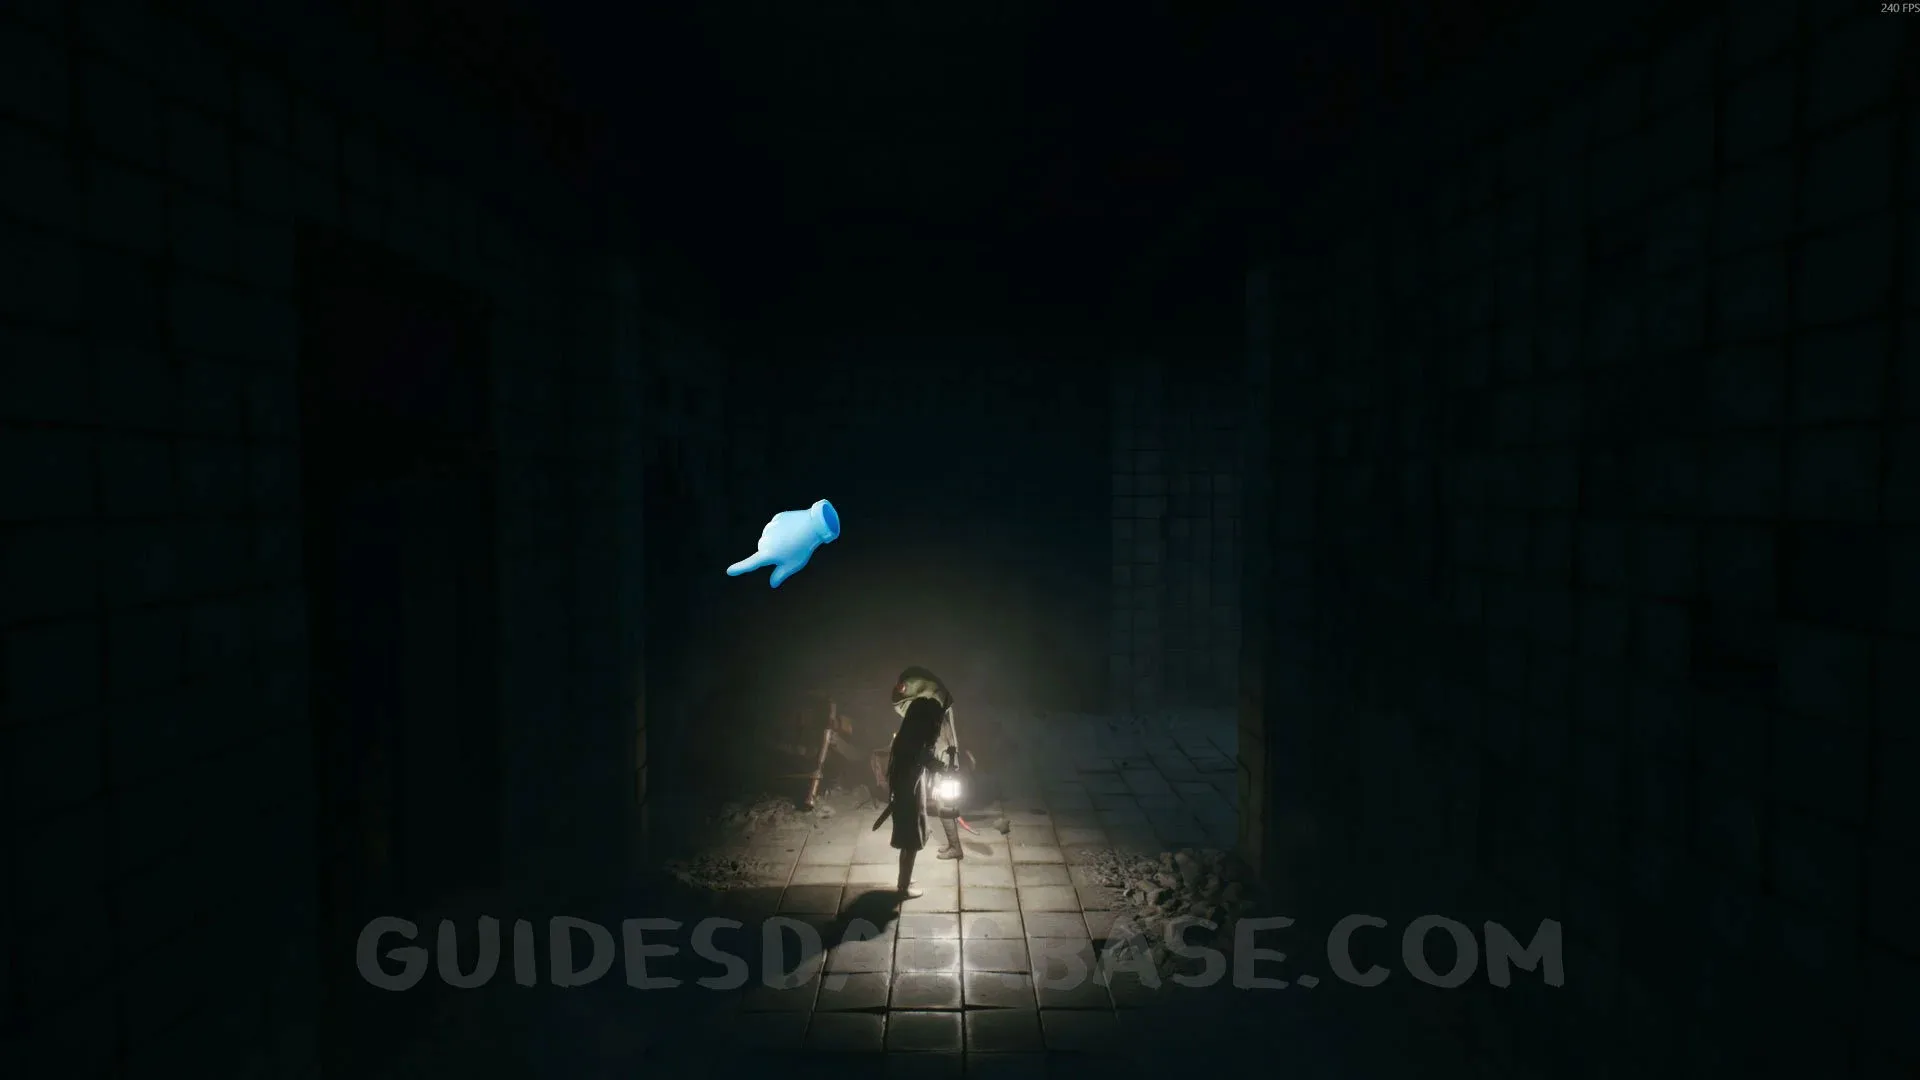
Poster #20 + Secret #47
After the part with the sheep, once you jump over a wall, you will go through a door with a flashing red light. Inside that room, open the elevator door to find the last poster.
 GUIDESDATABASE.COM
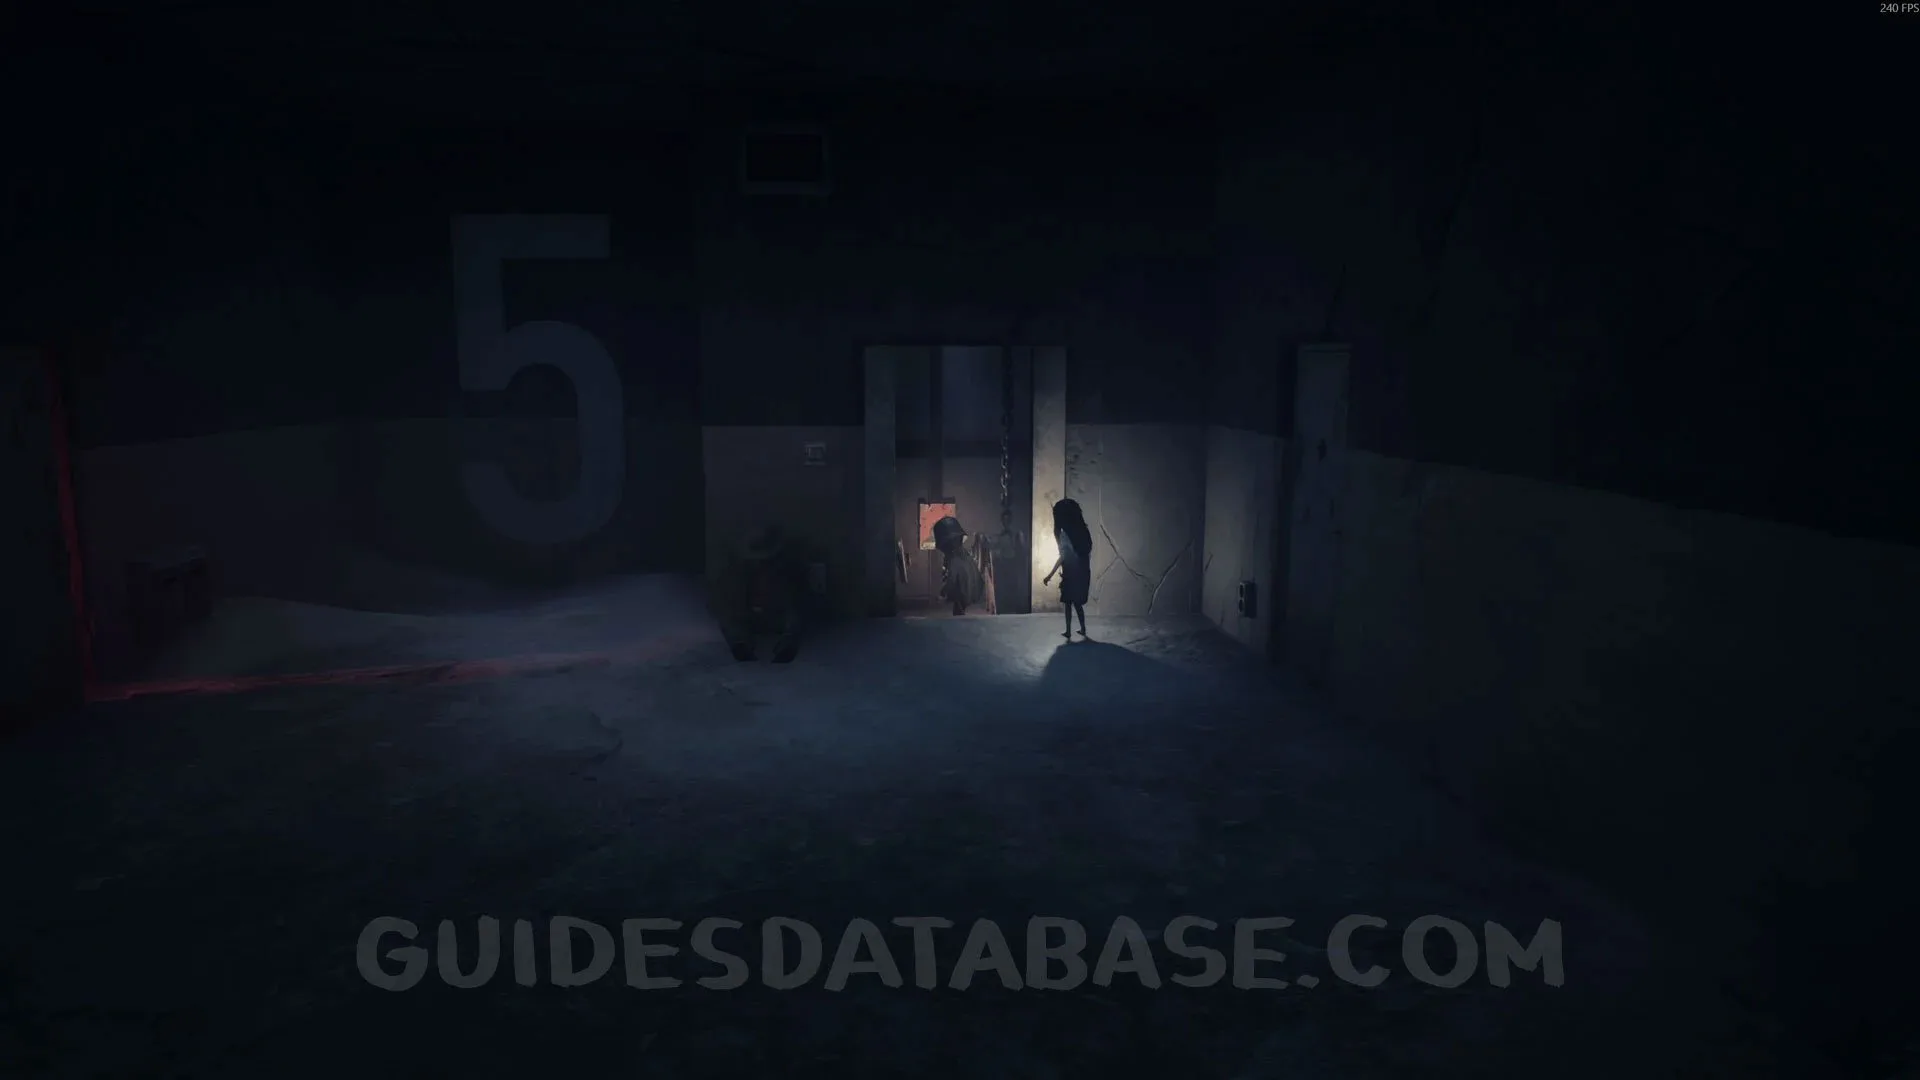 GUIDESDATABASE.COM
Trophy “Just Making Sure”
After using the RPG to defeat the sniper, go over to where he fell and kick him to get this trophy.
 GUIDESDATABASE.COM
 GUIDESDATABASE.COM
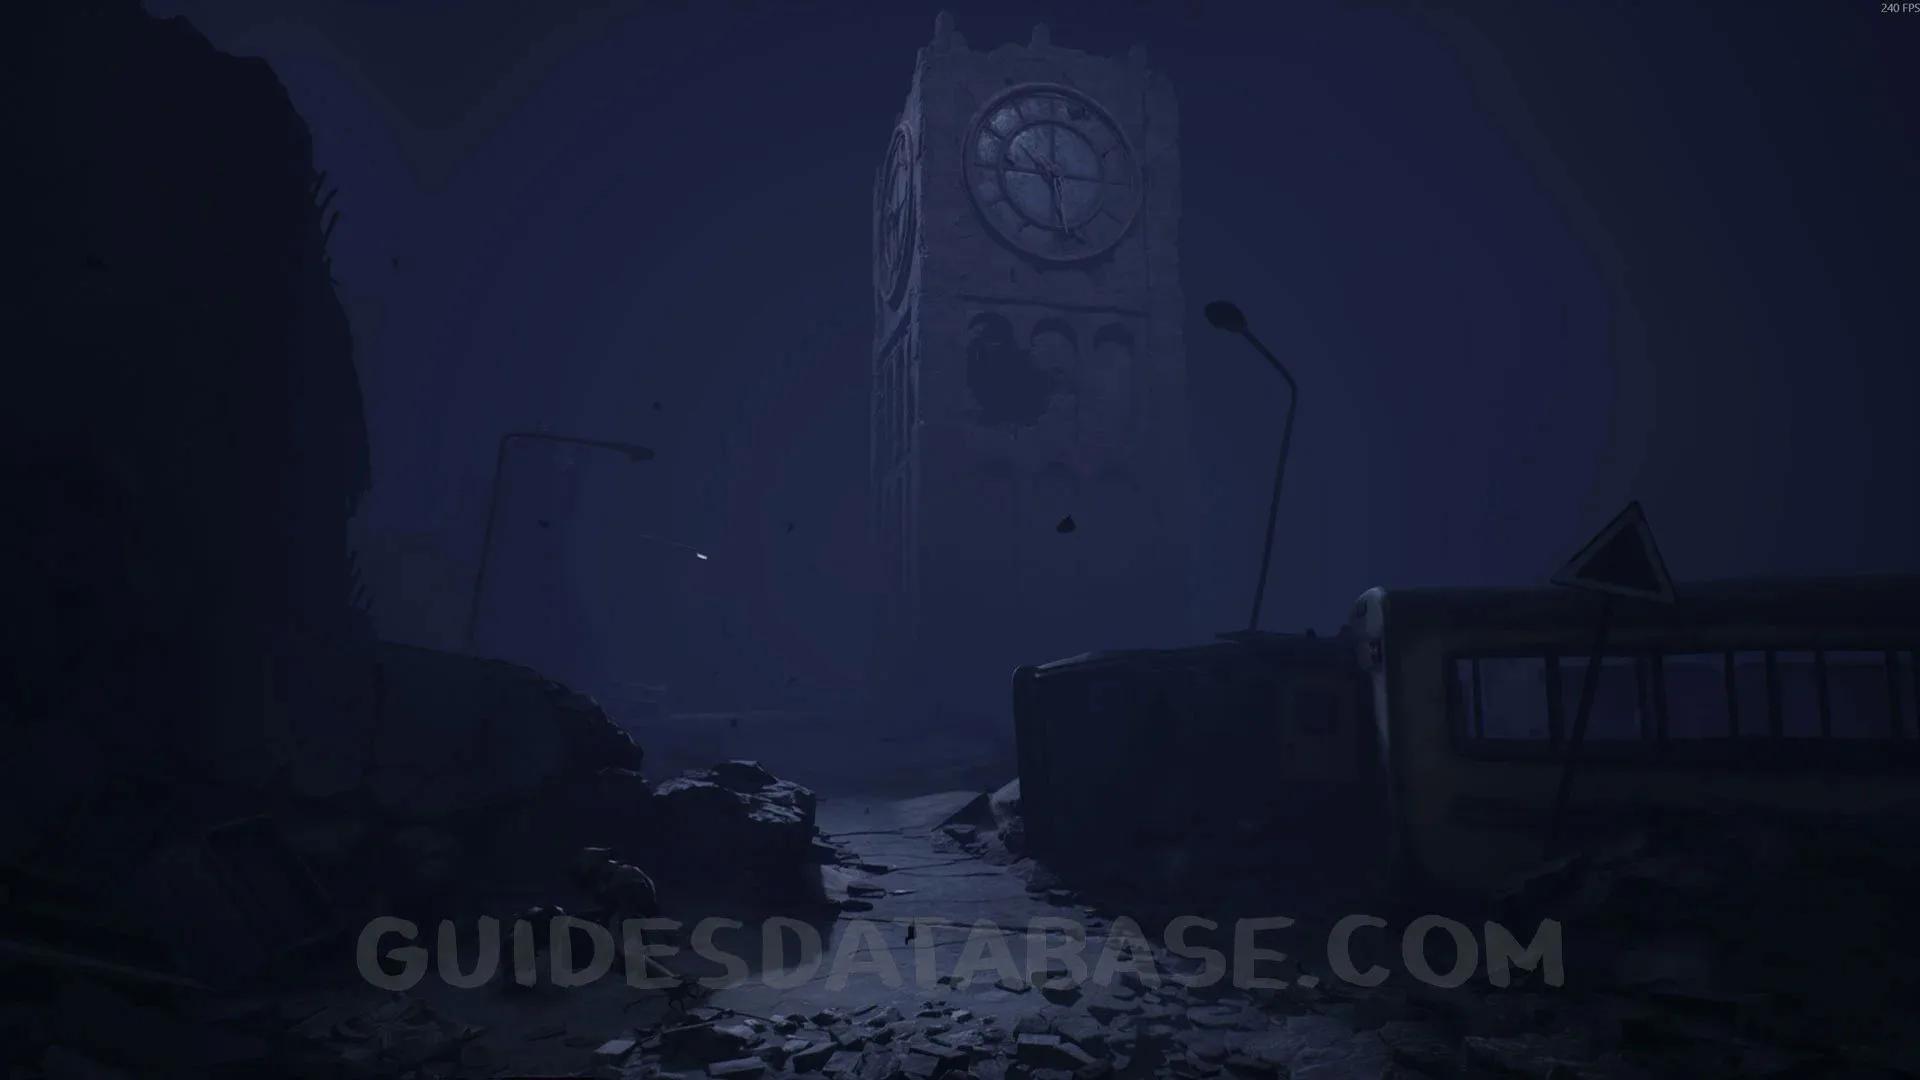
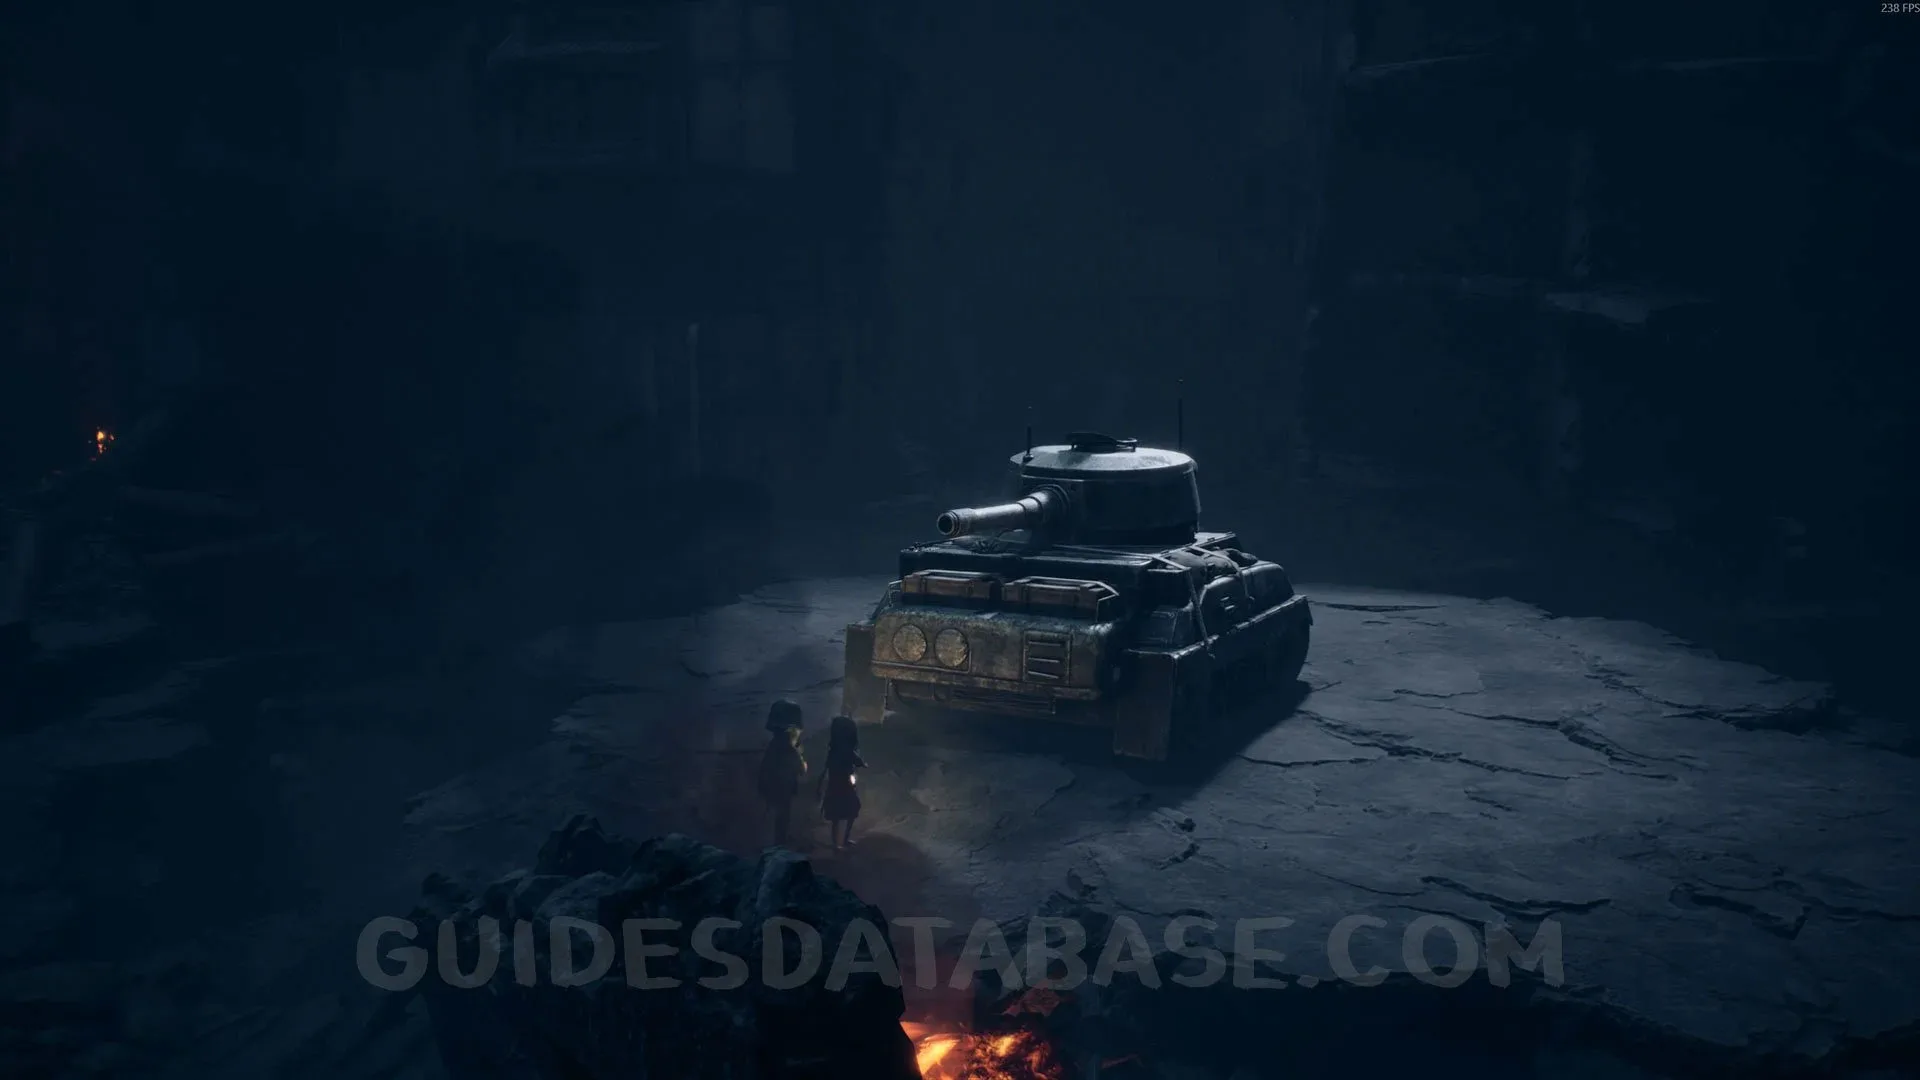
Chapter 9: All-Consuming Past
Trophy “Destruction Derby”
For this trophy, at the start of Chapter 9, you will get a tank. Run over 24 cars with the tank and you will unlock this trophy. There are more than 24 cars along the tank section, so it should not be hard to get. Just make sure you run over the cars.
 GUIDESDATABASE.COM
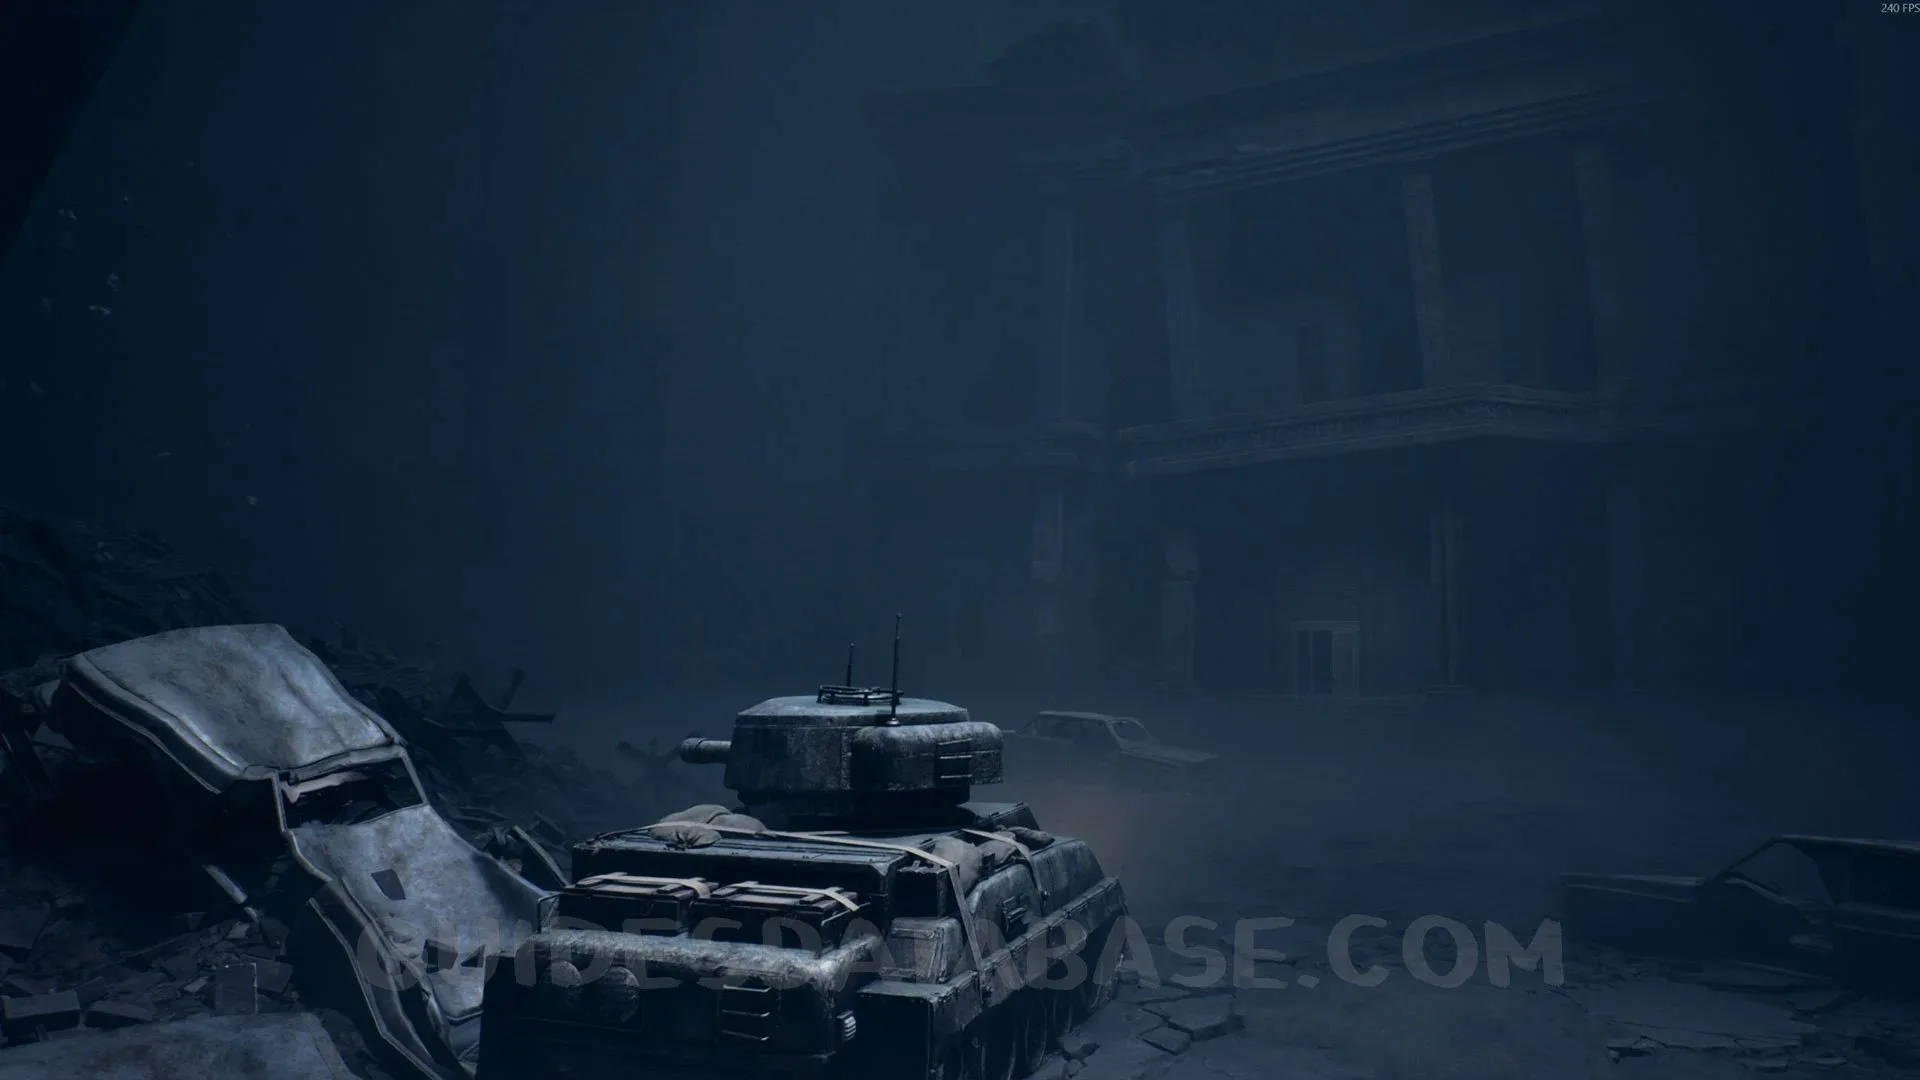 GUIDESDATABASE.COM
Trophy “Friends Reunited” (Secret Ending)
If you collected all 5 Coffins, the secret ending will play at the end of the chapter, and you will unlock both ending trophies, All is Well and Friends Reunited, one after the other. Right after that, you should also get the Platinum trophy, Nothing Lasts Forever. If you missed anything, you can clean up most of it through Chapter Select, but Coffins and Hidden Statues should be collected in the same playthrough.
 GUIDESDATABASE.COM
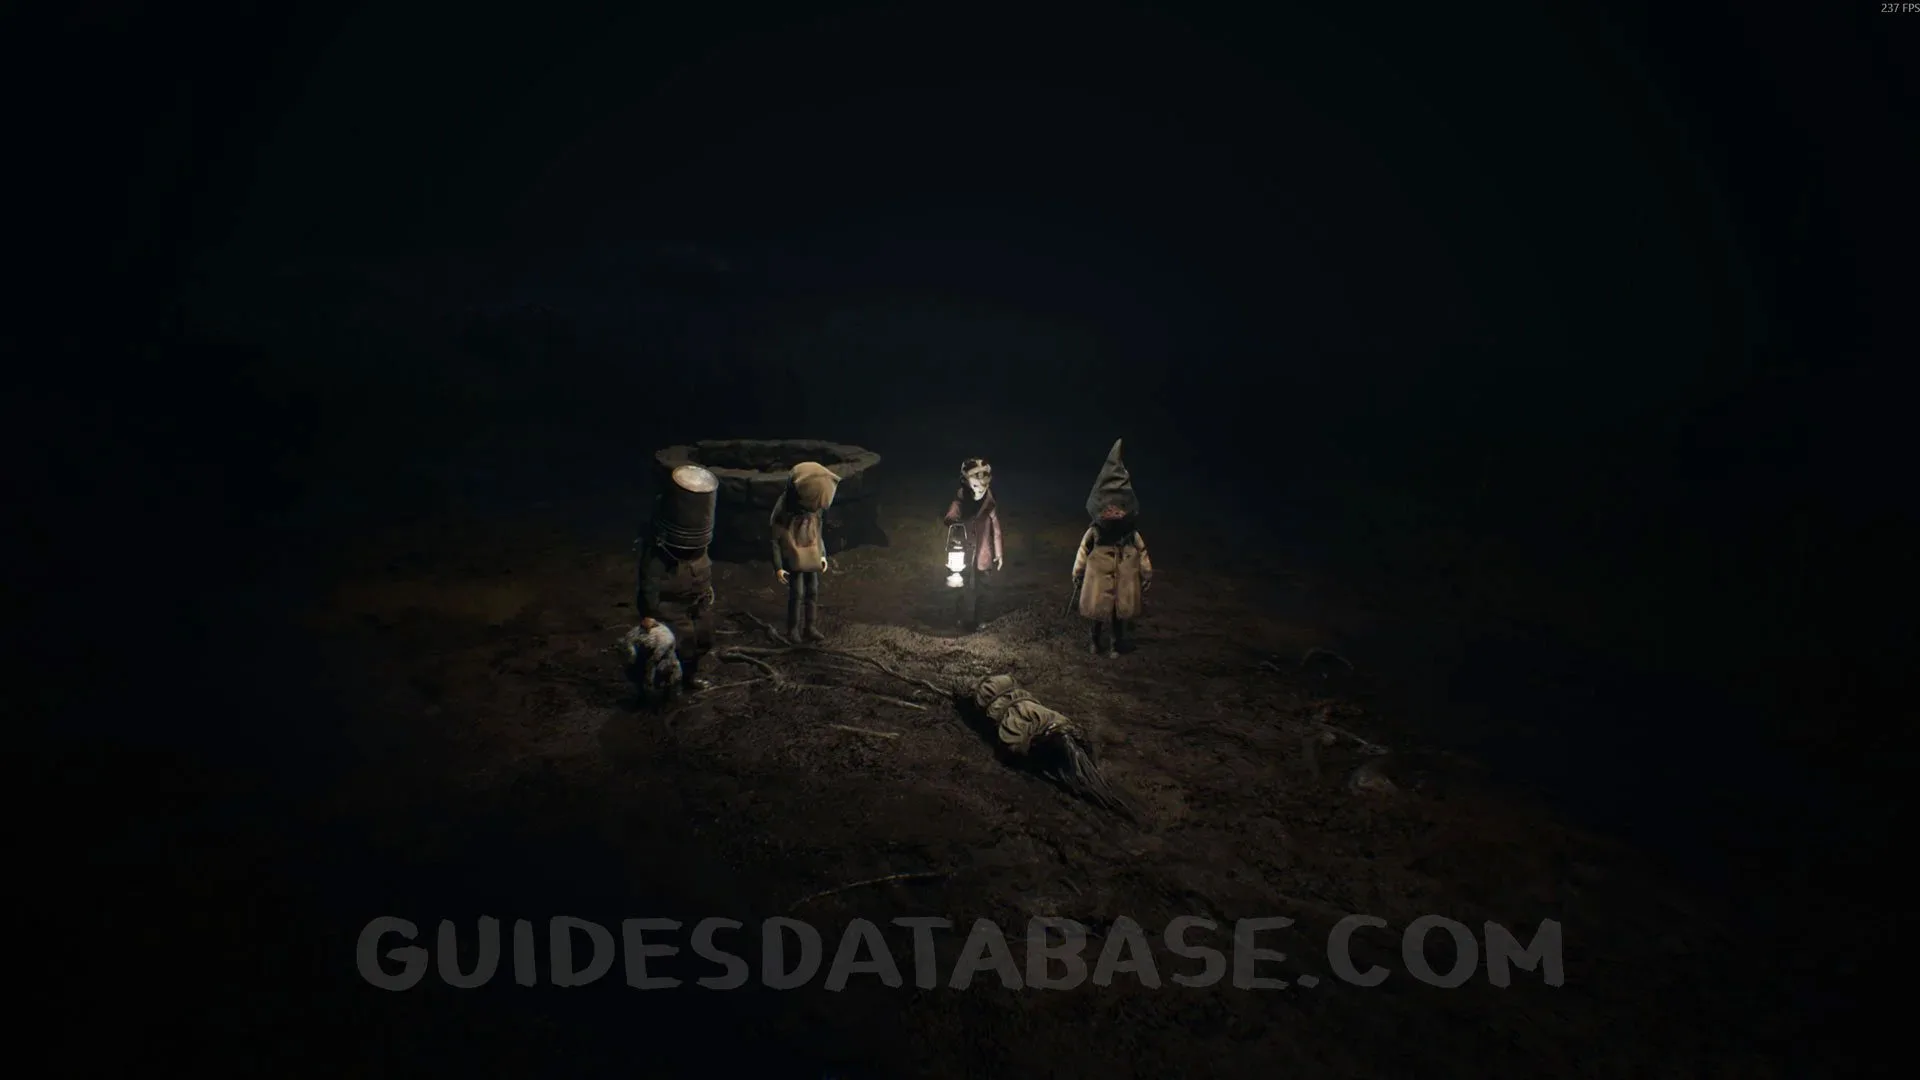 GUIDESDATABASE.COM
 GUIDESDATABASE.COM